What’s actually slowing this PC down?
Pick the symptom - the matching free tool is one click away.
Some links on this page are affiliate links: if you buy through them we may earn a commission, at no extra cost to you.
Resetting a Gigabyte BIOS or UEFI returns motherboard firmware settings to their defaults, which can help recover from failed overclocks, boot loops, unstable memory settings, incorrect boot options, or hardware changes that are not being detected properly. On most Gigabyte boards, this can be done safely from the UEFI setup menu, while deeper recovery may require clearing CMOS with a jumper, rear I/O button, onboard button, or the CMOS battery.
The exact steps vary by motherboard model, especially between older BIOS designs and newer Gigabyte UEFI interfaces, but the goal is the same: remove custom firmware settings without damaging components or losing data on your drives. Before resetting, it is worth noting your current boot order, SATA mode, fan curves, XMP or EXPO profile, Secure Boot settings, and any virtualization or RAID options you rely on.
As an Amazon Associate I earn from qualifying purchases.
Recommended Free Tools
After the reset, the system may boot differently until those settings are restored, so the process is not finished the moment the BIOS defaults load. A careful reset includes shutting down safely, using the correct method for your board, then rechecking memory profiles, boot priority, date and time, storage mode, and any settings required for Windows, Linux, or specific hardware to start normally.
When You Should Reset a Gigabyte BIOS
Resetting a Gigabyte BIOS or UEFI is most useful when a firmware setting is preventing the system from starting, behaving normally, or recognizing hardware correctly. A reset returns the motherboard to its default configuration, which can undo unstable overclocking, incorrect boot settings, memory training problems, and other configuration changes. It is not the first fix for every PC issue, but it is a practical step when the problem clearly started after changing BIOS settings or installing new hardware.
Popular on Amazon

- SUPERIOR COMFORT — Unlike traditional circular ear buds, the design of EarPods is defined by the geometry of the ear. Which makes them more comfortable for more people than any other ear bud–style headphones.
- HIGH-QUALITY AUDIO — The speakers inside EarPods have been engineered to maximize sound output and minimize sound loss, which means you get high-quality audio.
- BUILT-IN REMOTE — EarPods with USB-C plug also include a built-in remote that lets you adjust the volume, control the playback of music and video, and answer or end calls with a pinch of the cord.
- COMPATIBILITY — Works with all devices that have a USB-C port.
- INTEGRATED MICROPHONE — A built-in microphone precisely captures your voice while you’re on the phone, taking a FaceTime call, or summoning Siri — so you’re always heard loud and clear.
One of the most common situations is a failed memory or CPU overclock. If you enabled XMP, EXPO, manual RAM timings, Precision Boost Overdrive, voltage changes, or CPU ratio adjustments and the system now boot-loops, freezes, or shows no display, resetting the BIOS can restore safe defaults. Many Gigabyte boards will attempt automatic recovery after several failed boots, but if the system remains stuck, a manual reset may be needed.
You may also need to reset the BIOS after changing boot-related options. For example, switching between UEFI and CSM mode, disabling the wrong storage controller option, changing Secure Boot settings, or rearranging boot priority can stop Windows or Linux from loading. If the system powers on but lands in the BIOS repeatedly, displays “no bootable device,” or skips a known-good SSD, resetting defaults can help you get back to a known baseline before setting the correct boot drive again.
Common signs a BIOS reset may help
- No display after a BIOS setting change: The PC powers on, fans spin, but the monitor stays blank.
- Repeated boot loops: The system turns on and off several times without reaching the operating system.
- Unstable performance: Crashes, blue screens, or random restarts began after changing RAM, CPU, or voltage settings.
- Hardware not detected correctly: A new SSD, RAM kit, GPU, or CPU is not recognized as expected after installation.
- Forgotten BIOS password or locked settings: Some configuration access issues may require clearing CMOS, depending on the model and password type.
- Incorrect fan or power settings: Aggressive fan curves, ErP, wake-on-LAN, or power recovery settings are causing unwanted behavior.
A BIOS reset can also be helpful after a BIOS update if the board behaves strangely afterward. While many Gigabyte updates preserve existing settings, old configuration data can sometimes conflict with newer firmware behavior. Loading optimized defaults after an update is a common way to stabilize the system before re-enabling preferred settings such as XMP/EXPO, Resizable BAR, virtualization, or custom fan curves.
There are also cases where a BIOS reset is unlikely to solve the problem. If the PC shows no signs of power, the issue may involve the power supply, motherboard power connectors, case power switch, or a short. If the system overheats under load, the cooler installation, thermal paste, pump, or airflow should be checked. If a drive is failing or Windows system files are corrupted, resetting the BIOS may not repair the operating system. Use a BIOS reset when firmware configuration is a likely cause, then follow up by restoring only the settings you actually need.
Before You Reset: Safety Checks and Settings to Note
Before resetting the BIOS on a Gigabyte motherboard, take a few minutes to record your current configuration and make the system safe to work on. A BIOS reset can restore defaults for boot order, memory tuning, fan behavior, storage mode, secure boot, and CPU-related options. On most systems this is easy to fix afterward, but on a PC with mulle drives, RAID, BitLocker, or custom overclocking, missing one setting can stop Windows from booting or make the system behave differently than before.
If the PC still boots into the Gigabyte UEFI, open it by pressing Delete during startup, then check the main areas you have customized. Many Gigabyte boards also allow saving a BIOS profile from the Save & Exit or profile section, depending on the model. If you cannot save a profile, take clear photos with your phone. Capture pages for boot priority, SATA/NVMe settings, memory settings, fan curves, CPU voltage or boost options, and secure boot. This is especially useful on AORUS, UD, Gaming X, and Aero boards where menu names and layouts can differ between BIOS versions.
Settings worth recording first
- Boot order: Note which SSD, NVMe drive, or Windows Boot Manager entry is first.
- SATA mode: Check whether the system uses AHCI, RAID, or Intel RST. Changing this after a reset can prevent an existing Windows installation from starting.
- XMP or EXPO: Record whether memory profiles are enabled, plus the RAM speed, voltage, and timings if manually tuned.
- Secure Boot and TPM/fTPM: These may matter for Windows 11, BitLocker, anti-cheat software, and corporate-managed systems.
- Fan curves: Defaults may make the PC louder or warmer than your previous setup.
- CPU or GPU-related options: Note undervolts, overclocks, Precision Boost Overdrive, Resizable BAR, Above 4G Decoding, and integrated graphics settings.
- Virtualization: Record SVM or Intel VT-x/VT-d settings if you use virtual machines, WSL, Docker, or emulators.
Also check whether drive encryption is enabled before making changes. If BitLocker is active, suspend it in Windows or make sure you have the recovery key saved to your Microsoft account or another safe location. A BIOS reset can change TPM, Secure Boot, or boot-related values enough to trigger a BitLocker recovery prompt. This does not mean the data is lost, but you may be locked out until the recovery key is entered.
For any physical reset method, shut the computer down fully and switch the power supply off before opening the case. Unplug the power cable, then press the case power button for a few seconds to discharge residual power. Work on a stable surface, avoid carpet if possible, and touch the metal case frame before handling internal parts. If the system is a prebuilt PC or still under warranty, check the manufacturer’s documentation before moving jumpers or removing the CMOS battery.
Finally, confirm your exact motherboard model and revision. Gigabyte often prints the model name and revision number on the board itself, and the manual for a B550 AORUS Elite, Z790 AORUS Elite AX, or B650 Gaming X AX may show different jumper positions, button labels, and BIOS menu paths. Downloading the correct manual from Gigabyte’s support page can prevent mistakes, especially when locating the CLR_CMOS pins or identifying whether your board has a rear I/O clear CMOS button.
Also popular on Amazon

- Precise Magnetic Alignment, Rock-Solid Hold: Designed for MagSafe-compatible iPhones, this magnetic portable charger delivers a strong 15N magnetic hold for precise alignment and stable wireless charging. Whether you're taking calls, snapping selfies, or using your phone on the go, this magnetic power bank stays firmly attached. Compatible with iPhone 18 Pro/18 Pro Max, for iPhone 17/17 Air/17 Pro/17 Pro Max, for iPhone 16/16 Plus/16 Pro/16 Pro Max, for iPhone 15/15 Plus/15 Pro/15 Pro Max, for iPhone 14/14 Plus/14 Pro/14 Pro Max, for iPhone 13/13 Mini/13 Pro/13 Pro Max, for iPhone 12/12 Mini/12 Pro/12 Pro Max, and MagSafe-compatible cases. Not compatible with non-magnetic cases.
- Slim & Portable — Power Without the Bulk: Bulky power banks just don't fit your active lifestyle. That's why we designed the W5 for MagSafe portable charger to keep you moving. Weighing just 120g and only 11.8mm thick, W5 iPhone battery power bank doesn’t block your camera or get in the way. Snap photos, game, or take calls while charging — all without the hassle of awkward bulk. Plus, crafted with a tough yet lightweight shell, it’s impact-resistant, TSA-approved, and sleek enough for daily use.
- 5000mAh Capacity, Ready When You Need It: The W5 iphone portable charger is designed to balance portability and reliable backup power. Its 5000mAh battery can provide up to one full charge for an iPhone 16, making it ideal for commuting, travel, and everyday emergencies. Stay connected for calls, navigation, photos, and more without worrying about running low on battery.
- Flexible Charging – Wired or Wireless, Your Choice: Use it as a wireless charger for convenient cable-free power, or switch to USB-C wired charging whenever you prefer. This portable charger gives you the freedom to choose how you power up, while the USB-C output also works with AirPods, for iPad, for Apple Watch, and other compatible devices. Need to charge two devices? This magnetic power bank supports wired and wireless charging at the same time, making it a versatile for iPhone charger for travel, work, and everyday use.
- Multi-Layer Protection, Lasting Battery Health: Built with an intelligent cooling chip, the W5 portable charger power bank safeguards your devices with comprehensive protection: overcharge, overheat, over-voltage, over-current, and short-circuit prevention. This advanced power management keeps your battery in top condition, even with prolonged charging. Charge day and night without worry — your device’s safety is our priority.
Resetting BIOS Defaults from the Gigabyte UEFI Menu
The safest way to reset a Gigabyte BIOS is from inside the UEFI setup screen, because it restores the firmware defaults without opening the case or touching the motherboard. Use this method if the system still powers on, displays video, and lets you enter setup. It is ideal after unstable overclocking, memory training issues, boot order mistakes, or configuration changes that did not completely prevent POST.
Start by restarting the PC. As soon as the Gigabyte splash screen appears, repeatedly press Delete to enter BIOS setup. On some systems, especially laptops or compact keyboards, you may need to press Fn + Delete. If Windows loads too quickly, open Windows Settings, go to System > Recovery > Advanced startup, choose Restart now, then navigate through Troubleshoot > Advanced options > UEFI Firmware Settings.
Once inside the Gigabyte UEFI, you may land in Easy Mode or Advanced Mode. Most modern Gigabyte boards let you switch modes with F2. To restore defaults, look for an option named Load Optimized Defaults, Load Setup Defaults, or similar. On many Gigabyte motherboards, the shortcut is F7. Confirm the prompt when asked. This loads Gigabyte’s stable default configuration for CPU, memory, chipset, storage, fan, and boot-related settings.
- Enter BIOS setup by pressing Delete during startup.
- Press F2 if you need to switch between Easy Mode and Advanced Mode.
- Select Load Optimized Defaults, or press F7 if supported.
- Confirm the reset when the UEFI asks for approval.
- Choose Save & Exit, usually with F10.
- Confirm the save operation and allow the PC to restart.
Before saving, remember that defaults may disable settings you previously relied on. XMP or EXPO memory profiles are commonly turned off, so DDR4 or DDR5 memory may return to its base JEDEC speed. Custom fan curves, SATA mode, Resize BAR, integrated graphics preferences, Secure Boot settings, virtualization options such as SVM or Intel VT-x, and manual CPU tuning may also revert. If your Windows installation depends on a specific boot mode or storage setting, check those items before leaving the BIOS.
Gigabyte menu names vary by motherboard generation and BIOS version. Older boards may use a classic blue-and-gray interface, while newer AORUS models use a graphical UEFI with tabs such as Tweaker, Settings, System Info, and Boot. The reset option is often available from the main screen, the Save & Exit page, or the function-key legend at the bottom of the screen. If you do not see Load Optimized Defaults, check the right-side help panel or the motherboard manual for the exact key.
After saving and rebooting, the first startup may take longer than usual while the board retrains memory and rebuilds hardware configuration data. This is normal on many AM4, AM5, and recent Intel platforms. If the machine reboots more than once, give it a few minutes before interrupting power. When the system successfully starts, return to the BIOS if needed to restore your boot drive as the first boot device, re-enable XMP or EXPO, and apply any essential settings you recorded before the reset.
Clearing CMOS with the Motherboard Jumper or Button
If the Gigabyte UEFI menu is inaccessible, the system will not POST, or a bad overclock prevents display output, clearing CMOS from the motherboard is the most direct reset method. This erases saved firmware settings and returns the BIOS/UEFI configuration to defaults. On many Gigabyte boards, this is done with a two-pin CLR_CMOS, CLR_CMOS1, or JBAT header; higher-end models may instead provide a dedicated Clear CMOS button on the rear I/O panel or on the board itself.
Shut the PC down completely before touching anything inside the case. Turn off the power supply switch, unplug the power cable, and press the case power button for a few seconds to discharge residual power. If you are working inside the system, ground yourself by touching the metal chassis, and avoid placing tools on the motherboard. Do not clear CMOS while the system is powered on or in sleep mode.
Using the CLR_CMOS jumper pins
- Open the side panel and locate the CMOS clear header. Check the motherboard manual for the exact location, as it varies by model and chipset.
- If the header has only two exposed pins, briefly short them with a metal screwdriver tip for about 5 to 10 seconds.
- If the header uses a removable jumper cap, move the cap from its normal position to the clear position for 5 to 10 seconds, then move it back.
- Reconnect the power cable, switch the power supply back on, and start the PC.
Some Gigabyte motherboards do not ship with a jumper cap installed on the clear-CMOS pins, so using a screwdriver to bridge the two pins is common. Make sure you are shorting only the clear-CMOS header and not a nearby front-panel, RGB, fan, or USB header. The labels printed on the PCB can be small, so use a flashlight and confirm against the manual if there is any doubt.
The Tool Desk
Outbyte Driver Updater FREEFix the driver behind crashes, sound loss and screen glitchesFind Drivers →Outbyte PC Repair FREEClear out junk files and repair common Windows errorsFree Scan →Also popular on Amazon
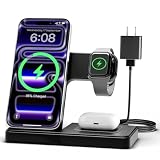
- 3 in 1 Wireless Charger Station: This 3-in-1 wireless charger is designed to work seamlessly with a variety of devices, including iPhone 16 15 14 13 12 11 8 Pro Max Mini Plus X XR XS Max SE Plus Series, Apple Watch Series 10 9 8 7 6 5 4 3 2 SE and Ultra, AirPods 2 3 4 Pro 2 (Note: for Airpods 2 3 4, needs work with a MagSafe charging case). A perfect Christmas present for couple (to husband or wife), son, daughter, or any loved ones.
- Fast Charging Power: Ensure your devices are efficiently charged with up to 7.5W for phones, 3W for earbuds, and 2.5W for watches. The charger is versatile, making it ideal for company work desk, window sills, living room or bedside, providing quick and reliable power delivery.
- Portable and Foldable Design: Featuring a foldable, lightweight design, this charging station is ideal for home, office, travel or trip. Manufacturer designed it to fit easily into bags, it makes a thoughtful present for loved ones who need reliable charging on the go. It's convenient for working remotely or on traveling.
- Safe Charging Base: Built with multiple safety features, including overcurrent, overvoltage, and overheating protection. This charger has worked reliably for customer. The LED indicators offer clear charging status, making it a reliable accessory for any desk or nightstand.
- Customer Friendly Features: It is equipped with a non-slip surface and case-friendly compatibility, which supports cases with a thickness of ≤ 0.16 inches (4mm). Please avoid cases with metal rings, pockets, or magnets. It helps to keep devices organized and charged while enhancing any room or office with its sleek appearance.
Using a Clear CMOS button
On select Gigabyte AORUS and enthusiast boards, a Clear CMOS button may be located on the rear I/O shield near the USB ports, or directly on the motherboard. With the system shut down and AC power disconnected unless your manual states otherwise, press and hold the button for several seconds. Some models allow the rear I/O button to work while standby power is present, but behavior differs, so follow the instructions for your exact board revision.
After clearing CMOS, the first boot may take longer than usual while the board retrains memory and rebuilds hardware settings. You may see a message such as “BIOS has been reset” or be prompted to enter setup. Press Delete during startup to open the Gigabyte UEFI, then check the date and time, confirm the correct boot drive, and re-enable settings you previously used, such as XMP or EXPO memory profiles, fan curves, SATA mode, Resizable BAR, Secure Boot, virtualization, or TPM-related options.
Removing the CMOS Battery to Reset BIOS
If your Gigabyte board does not have a clear-CMOS button, the jumper is hard to reach, or the system will not respond well enough to enter UEFI, removing the CMOS battery is another practical way to reset stored BIOS settings. The battery is usually a round CR2032 coin cell seated in a small holder on the motherboard. Taking it out cuts standby power to the CMOS memory, allowing settings such as boot order, overclocking values, fan curves, and memory profiles to return to defaults.
Shut the PC down completely before touching the battery. Turn off the power supply using its rear switch, unplug the power cable, and press the case power button for a few seconds to discharge remaining power. If you are working inside a desktop case, place it on a stable surface with good lighting and touch a bare metal part of the case before handling components. Avoid using excessive force, and do not pry against nearby traces, capacitors, or PCIe slots. On some Gigabyte mini-ITX boards or compact prebuilt systems, the battery may be mounted vertically or attached with a short cable, so check the manual for the exact location and removal method.
Battery removal steps
- Power off the computer, switch off the PSU, and unplug the power cable.
- Remove the side panel and locate the CR2032 CMOS battery on the motherboard.
- Gently press the metal retaining clip away from the battery until the coin cell pops up.
- Lift the battery out, noting which side faces upward. In most holders, the positive side marked with a “+” faces up.
- Wait about 5 to 10 minutes. For a stubborn board, wait longer or press the case power button again while the system is unplugged.
- Reinstall the battery in the same orientation, reconnect power, and start the PC.
After the first boot, your Gigabyte motherboard may show a message such as “BIOS has been reset,” “CMOS checksum error,” or “Press DEL to enter setup.” This is expected. Enter the UEFI setup with the Delete key and load optimized defaults if prompted. If the date and time are wrong after every shutdown, replace the CR2032 battery with a new one, because a weak battery can cause repeated BIOS resets and boot errors.
Battery removal is generally safe, but it is less convenient than using the UEFI menu or clear-CMOS pins because it requires opening the case and working near motherboard components. It also may not reset every security-related setting on every model; for example, some firmware passwords or TPM-related states can behave differently depending on the board and BIOS version. If your Gigabyte motherboard uses dual BIOS, the reset normally affects the active BIOS settings rather than rewriting the backup firmware chip. Once the reset is complete, continue by restoring practical settings such as your boot drive order, XMP or EXPO memory profile, fan behavior, SATA mode, Resizable BAR, virtualization, and any custom settings you recorded before clearing CMOS.
Independent reader supportYour contribution helps us test, update, and keep practical guides available for everyone.What to Configure After the BIOS Reset
After a Gigabyte BIOS reset, the motherboard returns most firmware options to factory defaults. The system may boot normally right away, but it can also lose settings that were required for your operating system, storage layout, memory profile, cooling behavior, or security features. Enter the UEFI setup again by pressing Delete during startup, then review the core settings before assuming the reset is complete.
Restore the correct boot device
Start with the boot order, especially if you have more than one drive installed. In Gigabyte UEFI, open the BIOS or Boot section and make sure Windows Boot Manager or your intended system drive is listed first. If the PC drops into BIOS on every restart or shows “no bootable device,” the reset may have changed the boot mode or selected the wrong disk. For modern Windows installations, UEFI mode is usually the correct choice; older installations may require Legacy/CSM, depending on how the drive was originally configured.
Do these 3 things before closing this tab:
1Scan for outdated or missing drivers - takes under a minute2Repair Windows errors before they cause bigger problems3Fix the driver behind crashes, sound loss and screen glitchesRe-enable memory, CPU, and storage settings
Memory often runs at a safe default speed after a CMOS clear, so high-speed RAM may report as 2133, 2400, 2666, or another baseline value. If your system was stable before, re-enable XMP for Intel platforms or EXPO for supported AMD DDR5 memory from the Tweaker or Easy Mode screen. Save and reboot, then confirm stability before changing anything else. If the reset was performed to fix crashes, leave XMP or EXPO disabled at first and test the system at default memory speeds.
Also popular on Amazon

- Secure Hold: Our PopSockets adhesive phone grip gives your cell phone a secure, comfortable hold in hand to help prevent drops while texting, taking photos, or scrolling on the go. Designed to stick firmly to most phone cases and devices.
- Hands-Free Made Easy: Easily turn your PopSocket into a phone stand to prop up your phone anywhere, perfect for watching videos, video calls, or following recipes. A must-have phone holder that keeps your device secure and ready for anything.
- Compatibility: Works with all phones, tablets, and Kindles. Sticks best to smooth, hard plastic cases and may not adhere to silicone or textured cases. Easily swap your PopTop to change up your style.
- Black PopSockets: Simple, refined, and endlessly versatile. A timeless essential for any phone.
- Travel Must-Have for People On the Go: A must-have travel accessory for flights, flying, airports, air travel, airplanes, planes, international trips, cruises, and long travel days. Key gadget for your airport haul, travel accessories and must-haves.
- SATA mode: Check whether the system needs AHCI, RAID, or Intel RST/VMD. Changing this from the previous setting can prevent Windows from booting.
- Resizable BAR / Above 4G Decoding: Re-enable these if you use a compatible gaming GPU and had them active before.
- TPM / fTPM / PTT: Windows 11 systems normally require firmware TPM enabled. Gigabyte boards may label this as AMD fTPM or Intel Platform Trust Technology.
- Secure Boot: Re-enable it if your OS, game anti-cheat software, BitLocker policy, or workplace configuration requires it.
Check fan control and hardware monitoring
A reset can also restore default fan curves, which may make the PC louder or warmer than expected. Open Smart Fan 5 or Smart Fan 6, depending on your Gigabyte board, and verify that CPU and case fans are detected correctly. Select the proper control mode for each header, such as PWM for 4-pin fans or DC for 3-pin fans. If you use a liquid cooler, confirm the pump header is running at the intended speed and is not being controlled like a normal case fan.
Finally, review system date and time, onboard device settings, and any custom options you used before the reset, such as integrated graphics, Wake-on-LAN, virtualization, USB behavior, or PCIe slot configuration. If BitLocker is enabled, keep your recovery key available because firmware changes can trigger a recovery prompt. Once everything looks correct, press F10 to save and exit. After Windows or Linux loads, verify that the boot drive, memory speed, network adapter, audio devices, and temperatures all look normal before closing the case or reconnecting unnecessary peripherals.
Frequently Asked Questions
Will resetting my Gigabyte BIOS delete Windows or my files?
No. Resetting the BIOS or clearing CMOS only restores motherboard firmware settings to default values; it does not erase your SSD, hard drive, Windows installation, or personal files. After the reset, you may need to reselect the correct boot drive in BIOS if the system no longer boots straight into Windows.
Quick wins for a faster PC:
Repair Windows errors before they cause bigger problemsFix Now →Scan for outdated or missing drivers - takes under a minuteDriver Scan →Clear out junk files and repair common Windows errorsFree Scan →What is the safest way to reset a Gigabyte BIOS?
The safest first option is to enter the Gigabyte UEFI setup, usually by pressing Delete during startup, then choose Load Optimized Defaults and save changes. This avoids opening the PC and is enough for most problems caused by incorrect BIOS settings. Use the CMOS jumper, clear-CMOS button, or battery removal method only if you cannot access the BIOS menu or the system will not POST.
How long should I remove the CMOS battery on a Gigabyte motherboard?
With the PC fully powered off, unplugged, and the power button pressed once to discharge remaining power, remove the coin-cell battery for about 5 to 10 minutes. Some boards clear faster, but waiting a few minutes helps ensure the CMOS settings are reset. Reinstall the battery in the same orientation, reconnect power, and enter BIOS to check the date, time, and boot settings.
Do all Gigabyte motherboards have a clear-CMOS button?
No. Higher-end Gigabyte and AORUS boards may include a rear I/O or onboard clear-CMOS button, while many budget or older models use two pins labeled CLR_CMOS, CLRTC, or similar. Check your motherboard manual for the exact location and procedure because the label and placement vary by model.
What settings should I check after resetting the BIOS?
Check the boot order first so the system starts from the correct Windows drive. Then re-enable settings you previously used, such as XMP or EXPO for memory speed, fan curves, Secure Boot, TPM or fTPM, virtualization, RAID mode, Resizable BAR, and any custom CPU or voltage settings. If Windows was installed in a specific storage mode, such as RAID instead of AHCI, restoring that setting may be necessary for it to boot correctly.
Free tools Windows power users keep installed
One-click scans. No signup required.
Bottom Line
Resetting a Gigabyte BIOS/UEFI is usually straightforward: start with the built-in “Load Optimized Defaults” option if you can enter BIOS, and use the Clear CMOS button, jumper, or battery method only when the system will not boot or settings are inaccessible. Always power down fully, unplug the PSU, and check your motherboard manual because Gigabyte layouts and labels vary by model.
After the reset, go back into BIOS to confirm the boot drive, enable XMP/EXPO if needed, restore fan curves, virtualization, RAID, Secure Boot, or any other custom settings, then save and reboot. If the PC still will not POST after a proper CMOS clear, test basic hardware connections and consider updating the BIOS or contacting Gigabyte support.

