What’s actually slowing this PC down?
Pick the symptom - the matching free tool is one click away.
Some links on this page are affiliate links: if you buy through them we may earn a commission, at no extra cost to you.
The most reliable way to build a foldable PS2 handheld is to start with an Android phone that already runs your legally dumped games, then design a removable clamshell around it. This staged approach preserves the phone’s display, processor, operating system, battery management and charging hardware while you solve the genuinely difficult parts—hinge geometry, USB-C alignment, controls, heat and service access. An Android-handheld transplant or custom single-board computer (SBC) can offer more control, but it adds display, power, cooling and electronics work before you know whether your target games emulate well. Validate emulation first, prototype controls second, and only then commit to a printed enclosure.
What architecture should you choose?
For a first build, choose a phone-based clamshell. An intact Android phone is a complete, serviceable computer; your printed shell only has to hold it safely and provide controls. Use a donor handheld transplant when you specifically want integrated controls and accept teardown risk. Choose an x86 handheld conversion when broad PCSX2 compatibility matters more than Android, folding convenience or low power draw.
As an Amazon Associate I earn from qualifying purchases.
| Architecture | Strengths | Hard parts | Best use |
|---|---|---|---|
| Phone-based Android clamshell | Reuses display, compute board, Android, battery management, Wi‑Fi, Bluetooth and charging | Phone port and camera-bump clearance, heat, aspect ratio, connector alignment and hinge stress | First project and reversible prototype |
| Android-handheld transplant | Known buttons, sticks and display; potentially cleaner final ergonomics | Teardown, proprietary display cables, thermal transfer, battery wiring and custom routing | Experienced maker with a suitable donor |
| x86 handheld conversion | Desktop PCSX2 path and generally broader software flexibility | Greater thickness, heat, power draw and mechanical load; it is not an Android build | Users prioritizing compatibility over portability |
What must the Android device already do?
Install an Android-compatible PS2 emulator on the unmodified phone or handheld before designing anything. ARMSX2’s documentation describes it as a native ARM PlayStation 2 emulator built from the PCSX2 setup model and adapted for Android and other ARM platforms. Emulator maturity and sustained performance vary by chip, cooling, game and settings; no Android processor should be presented as running every PS2 title perfectly.
Import a BIOS dumped from your own PlayStation 2 and game images dumped from software you own. Do not download commercial BIOS files or ISOs. Test a representative group rather than one easy title:
Popular on Amazon

- 【Strong Adsorption】The inspiration of the silicone phone suction case comes from the adhesive force of the octopus. Each suction cup phone mount is 3.15 inches long and 2.17 inches wide, with 24 independent suction cups providing a stronger and more stable suction force, so you don't have to worry about your phone falling during use.
- 【Back of Phone Suction Grip】Remove the adhesive film on the phone suction cup and stick it on the phone case. You can then fix the phone on any smooth surface, which is very convenient. (The phone suction cup cannot be removed and reused after being attached to the phone case. It is recommended to attach it to a regular phone case, not a valuable one.)
- 【Widely Used】Our non-slip silicone phone sticky grip mount attaches to almost any flat phone case and make it compatible with common mobile phones such as iPhone and Android.You can shoot, watch videos or video calls in the kitchen, gym, dance studio, bathroom and other places.
- 【Capture the Wonderful Picture】Whether you are a TikTok creator or just like to share videos and photos, this phone suction cup can help you hands-free capture wonderful videos and photos for sharing with friends.
- 【Note】You can fix the phone suction cup on a smooth surface such as a mirror or glass. If necessary, wipe the suction cup with a damp cloth to obtain stronger suction. Before releasing your hand, make sure the phone is firmly fixed. (Not applicable to rough walls, wooden surfaces, and other uneven surfaces)
- A lightweight 3D game to establish a baseline.
- A demanding 3D game that exposes sustained-performance or thermal limits.
- A title with timing-sensitive audio or video.
- A game that uses both analog sticks, pressure-sensitive buttons or unusual control mappings.
Record the failure type for each game: speed, graphics, audio, input or game-specific compatibility. A case cannot fix an emulator baseline that is already unstable.
Storage is a library-management decision, not a performance guarantee. One current Android setup guide identifies 256 GB as a practical tier for libraries extending through GameCube, Wii and PS2; your actual requirement depends on how many legally dumped games, artwork files and other systems you keep.
What parts and subsystems do you need?
Build the first revision from removable, low-risk components. A useful bill-of-materials framework is:
- An Android phone or Android handheld with adequate sustained PS2 performance.
- An Android PS2 emulator, your own dumped BIOS and legally dumped game images.
- A two-part 3D-printed shell with a replaceable cradle, service panels and reinforced hinge mounts.
- A metal or engineered hinge insert, or a proven hinge design; do not rely on a thin printed pivot for high loads without testing it.
- A USB-C or Bluetooth controller for the first prototype. A custom microcontroller button board belongs in a later revision.
- A USB-C cable, strain relief and, for modular phone layouts, an optional compact USB-C hub.
- Speakers or a retained phone audio path.
- Vent openings, thermal interface material and a fan only if the selected hardware genuinely needs active cooling.
- A battery bank, or a correctly engineered battery-management and boost/charging system if you are adding power instead of using the phone’s battery.
- Fasteners, threaded inserts, magnets or a latch, wiring and replacement hinge and control parts.
A 2022 DIY-handheld conference paper groups the core subsystems as an SBC, operating system, human-interface device, power system, 3D-printed case, display and speakers. That list is a useful completeness check: leaving out power, audio or input usually creates a late redesign.
How do you prove the emulator baseline?
Use the stock device in its normal case, with no custom shell or battery modification, and work through these steps.
- Install and configure the emulator. Keep the first pass conservative. Confirm that the emulator sees the BIOS, game image and controller.
- Run one known-good title. Check boot, menus, gameplay, audio and save-state behavior.
- Run the representative set. Keep a simple log with game name, graphics settings, frame pacing, audio behavior, input problems and device temperature observations.
- Repeat after a sustained session. A game that looks fine for five minutes may throttle after the phone heat-soaks.
- Separate game-specific issues from device limits. If one title fails while others are stable, do not redesign the shell around that single result.
Do not use a speed percentage, universal frame-rate promise or compatibility percentage unless a named source measured it for the exact hardware and software combination. The available evidence supports trade-offs, not a guaranteed number.
Also popular on Amazon

- SUPERIOR COMFORT — Unlike traditional circular ear buds, the design of EarPods is defined by the geometry of the ear. Which makes them more comfortable for more people than any other ear bud–style headphones.
- HIGH-QUALITY AUDIO — The speakers inside EarPods have been engineered to maximize sound output and minimize sound loss, which means you get high-quality audio.
- BUILT-IN REMOTE — EarPods with USB-C plug also include a built-in remote that lets you adjust the volume, control the playback of music and video, and answer or end calls with a pinch of the cord.
- COMPATIBILITY — Works with all devices that have a USB-C port.
- INTEGRATED MICROPHONE — A built-in microphone precisely captures your voice while you’re on the phone, taking a FaceTime call, or summoning Siri — so you’re always heard loud and clear.
How do you measure the donor device?
Measure the complete device, including any protective case that will remain installed. Capture length, width, thickness, button travel, camera bump height, speaker openings, vent locations, power and volume buttons, USB-C position and the area swept by the hinge. Photograph the port and hinge zones before modeling.
Design a removable cradle or adjustable insert rather than printing the phone permanently into the upper half. A first revision should be replaceable without reprinting the entire enclosure. Leave clearance for a cable plug that can be inserted without bending the phone’s port, and keep the hinge from transferring force into the display glass.
An accurate scan is helpful but not mandatory. Calipers, a flat reference surface and a paper or cardboard mock-up can reveal gross alignment errors before filament is consumed. Make the screen bezel support the frame, not the active display area.
How should you prototype the controls?
Start with a USB-C or Bluetooth controller while the phone is still accessible. This answers the important questions—hand spacing, stick location, shoulder-button reach, viewing angle and Android input recognition—without committing to a custom PCB.
Crashes, No Sound, or Screen Glitches?
Random freezes, missing sound and display glitches usually trace back to one bad driver. Find and replace yours safely.Free scan · under a minuteWindows Errors? Fix Them Before They Spread
Repair common Windows errors and clear accumulated junk for a smoother, more stable PC - no reinstall needed.Free scan · no reinstallCommercial flip-style phone controllers illustrate the practical constraints: connector alignment, protective-case thickness and Android settings can determine whether a seemingly correct design works reliably. Treat such a controller as a reference for clearances, not as proof that your final shell geometry is correct.
- Map every required PS2 input, including both sticks, triggers, shoulder buttons, face buttons, Start, Select and any pressure-sensitive functions your games use.
- Test the controller with the phone folded and open. A cable should not become a structural member of the hinge.
- Check wake, sleep, charging and reconnect behavior after Android rotates or suspends the app.
- Only after the layout is comfortable, consider custom controls.
A custom board can use a microcontroller that presents itself as a USB HID device, with button membranes and joystick modules mounted in the lower shell. It also introduces firmware, debouncing, connector, grounding and repair problems. Keep the first custom board replaceable and provide a conventional external USB-C port for recovery.
Also popular on Amazon

- Secure Hold: Our PopSockets adhesive phone grip gives your cell phone a secure, comfortable hold in hand to help prevent drops while texting, taking photos, or scrolling on the go. Designed to stick firmly to most phone cases and devices.
- Hands-Free Made Easy: Easily turn your PopSocket into a phone stand to prop up your phone anywhere, perfect for watching videos, video calls, or following recipes. A must-have phone holder that keeps your device secure and ready for anything.
- Compatibility: Works with all phones, tablets, and Kindles. Sticks best to smooth, hard plastic cases and may not adhere to silicone or textured cases. Easily swap your PopTop to change up your style.
- Black PopSockets: Simple, refined, and endlessly versatile. A timeless essential for any phone.
- Travel Must-Have for People On the Go: A must-have travel accessory for flights, flying, airports, air travel, airplanes, planes, international trips, cruises, and long travel days. Key gadget for your airport haul, travel accessories and must-haves.
How do you design a safe, durable hinge and shell?
The hinge controls cable bend radius, screen safety, enclosure stiffness and long-term reliability. Mount it to reinforced frame sections rather than thin cosmetic walls, and add a positive open stop so the hinge cannot over-rotate into the display.
Include these features in the CAD model:
- A protected display bezel and a separate phone cradle.
- A controlled cable channel with a generous bend radius and strain relief.
- Ventilation on the heat-producing side, with an unobstructed path through the shell.
- A latch or magnets that hold the closed halves without squeezing the screen.
- A service panel for controller wiring, battery access and hinge replacement.
- Threaded inserts or captured nuts where repeated assembly would strip printed plastic.
- Hard stops that carry hinge loads through the frame, not through a USB-C plug.
Keep the phone removable for ordinary Android use. Avoid gluing a battery, display or port into a part that cannot be opened without destroying the shell.
The Tool Desk
Outbyte Driver Updater FREEFix the driver behind crashes, sound loss and screen glitchesFind Drivers →Outbyte PC Repair FREERepair Windows errors before they cause bigger problemsFix Now →How should power and cooling be engineered?
Reusing the phone’s original battery and charging circuit is the lowest-risk architecture. A battery bank can power a phone through USB-C, but it adds cable routing, conversion losses and another component that must be secured. If you install a separate lithium cell, use a charger, protection circuit, boost converter, insulation, current-rated connectors and strain relief designed for the exact load. Never connect a bare cell directly to a phone or SBC.
A Raspberry Pi 5 clamshell project documents a 5 V, 5 A operating requirement for its selected configuration and a 5,000 mAh LiPo with dedicated battery-management and boost hardware. Those figures describe that project, not a universal Android handheld specification; copy the engineering principle, not the numbers.
Run a demanding PS2 game for a sustained session with the case open before closing the enclosure. Observe throttling, audio stability, charging behavior, surface temperature, cable warmth and whether the hinge traps heat. If active cooling is needed, model the fan, intake and exhaust as one airflow path. Random vents added after printing may only weaken the shell or recirculate hot air.
Test charging separately from gameplay. A device that runs well on battery may throttle or disconnect when a charger, hub and controller share one USB-C path. Make charging access possible while the shell is open and closed, and ensure no plug is trapped by the hinge.
Also popular on Amazon

- [360 ° Flexible Rotation Design] Comes with a rotatable lanyard ring that supports 360 ° free rotation, effectively solving the problem of twisted and tangled lanyards
- [Wide compatibility] The ultra-thin 0.02-inch design does not block the charging port at all, and both wired and wireless charging can be used directly without removing the pad. Compatible with most smartphones such as iPhone, compatible with various wristbands, lanyards, crossbody straps, and keychains
- [Durable and Portable Material] Premium rust-resistant stainless steel material with good flexibility, which not only avoids scratching the phone case, but also has excellent anti rust and anti fading performance
- [Multi scenario Practical] Paired with a lanyard or wristband, hands-free use can be achieved. The phone is within reach and not easily dropped, ideal for daily commuting and outdoor activities. Suitable for full coverage phone cases, does not support half coverage phone cases
- [Quality Service] If you find any damage or other issues with the product upon receipt, please contact us immediately. We will handle it quickly
What is a sensible 3D-printing workflow?
PETG is a reasonable starting filament for a functional enclosure because it is commonly used for durable printed parts, but material alone does not guarantee a strong hinge or heat-resistant shell. Print orientation, wall thickness, infill, insert design, printer calibration and local temperatures determine the result.
- Mock up the envelope. Use cardboard, foam board or a low-cost draft print to verify hand position, viewing angle and folded thickness.
- Print only the cradle and hinge test pieces. Check port alignment, button reach, camera clearance and hinge travel before making full panels.
- Add inserts and fasteners. Repeatedly opened shells should not depend on self-tapping threads in thin plastic.
- Route wires and cables. Close and open the hinge repeatedly while checking for pinching, scraping or excessive bend.
- Print the final halves. Keep access panels and replaceable mounts; do not seal the battery or controller board permanently.
- Perform a non-powered fit check. Confirm that the display, phone, buttons, speaker openings and charging plug all clear the shell.
Make one change per revision where possible. If the screen, controls and hinge all move at once, you will not know which change solved—or caused—a problem.
How do you validate the completed handheld?
Validation is a sequence, not one launch test. Work through the following checklist:
- Open and close the clamshell repeatedly while watching the cable and hinge.
- Confirm every button and analog axis in Android and inside the emulator.
- Run a light title, then a demanding title, for a sustained session.
- Check audio, sleep/wake, save states and charging.
- Inspect for hot spots near the battery, converter, phone port and hinge.
- Remove and reinstall the phone or controller board to prove service access.
- Verify that the closed shell does not press the display, sticks or triggers.
Stop immediately if a lithium cell swells, smells unusual, becomes damaged, heats rapidly or shows exposed wiring. Disconnect power only when it is safe, move the device to a nonflammable test area and replace the damaged component rather than enclosing it.
How do you troubleshoot common failures?
| Symptom | Likely cause | Next action |
|---|---|---|
| Performance degrades after several minutes | Thermal throttling or blocked airflow | Reproduce with the shell open, improve the airflow path and reduce sustained load before changing the hinge. |
| Only one game fails | Game-specific emulator compatibility | Compare with the baseline log and try documented per-game settings; do not treat it as a universal hardware failure. |
| Controller works in Android but not in-game | Emulator mapping, focus or HID mode | Remap inside the emulator, confirm app focus and test the controller outside the shell. |
| USB-C disconnects when opening | Port misalignment, insufficient bend radius or hinge load | Move the connector support into the frame, add strain relief and redesign the cable channel. |
| Charging stops when a hub is attached | Shared-port power or negotiation conflict | Test the phone, charger and hub separately; keep the hub optional and provide direct charging access. |
| Shell flexes or hinge loosens | Thin walls, weak print orientation or load carried by cosmetic plastic | Add ribs, inserts and a mechanical stop; replace the hinge mount rather than tightening it indefinitely. |
When is an Android handheld or x86 build better?
An Android-handheld transplant makes sense when you value integrated controls and are comfortable identifying proprietary display, battery and speaker connections. It is not automatically easier: the donor’s motherboard, heat spreader and connectors may leave less room than a phone-based cradle.
An x86 handheld is the alternative when your priority is the desktop PCSX2 ecosystem or a wider range of demanding titles. Expect a thicker enclosure, larger power system and more heat. Presenting it as an Android solution would confuse two different software and hardware paths.
Also popular on Amazon
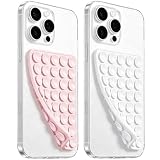
- 【PKYAA Double Sided Silicone Suction Phone Case Mount】PKYAA With Double Sided 40 Strong and Reliable individual suction cups, PKYAA provides a thicken and upgraded universal silicon suction mount for your phone.
- 【Friendly to Content Creators】If you are a content creator or an online influencer, you can create videos anywhere with this suction mount completely hands free with this silicone cell phone mount for cases.
- 【HANDS-FREE & Adhere to Mirrors】This Double Sided silicone suction phone case mount allows you to stick your phone to the mirror easily. No longer holding your phone in one hand to watch video tutorials while making up.
- 【Strong Grip on the Smooth Surface】You can easily hang your phone anywhere with a smooth surface. All you do is you clean off your phone and smooth surface. It is STURDY and it not only sticks to mirrors, it also sticks to windows, it sticks to refrigerators, tiles and other clean, flat surfaces.
- 【Press Down Firmly Every 30 Minutes】Use your palm or fingers to press the phone down firmly and check it's secure before letting go. Apply even pressure for a few seconds to allow the suction cup to adhere properly. To maintain the grip and prevent accidental falls, it's a good practice to periodically reapply pressure to the suction cup.
The phone route remains the best first project because every major decision is reversible. You can abandon the printed shell and still have a normal phone; a transplanted board or custom battery system is much harder to recover.
What will the build cost?
There is no defensible universal total for this project. The donor phone or handheld, controller choice, printer access, hinge hardware, battery architecture and failed prototypes dominate the budget, and the available evidence does not provide a complete current bill of materials or tested total. Plan by subsystem rather than trusting a single headline estimate: validate the donor first, prototype with an existing controller, then buy fabrication and custom-electronics parts after dimensions are stable.
Recommended Free Tools
How this build path was selected
The recommended sequence prioritizes emulator validation, reversibility, safe power design, hinge reliability, serviceability and the ability to reuse the donor device. Those criteria address the failure modes that repeatedly make clamshell projects harder than they appear: connector alignment, battery integration, heat, cable bending and inaccessible repairs.
What are the legal and safety boundaries?
Use a BIOS dumped from your own PlayStation 2 and game images dumped from software you own. Do not link to copyrighted BIOS files or commercial game downloads, and do not advise bypassing console security.
Lithium batteries and boost converters can cause fire or injury. Use protected cells, an appropriate battery-management system, insulation, current-rated wiring, strain relief and a nonflammable test area. A battery capacity that fits the printed enclosure is not automatically safe, and a project’s stated capacity or runtime cannot be generalized to another phone, converter or game load.
Frequently Asked Questions
Can I use a mid-range Android phone for PS2 emulation?
Possibly, but the important variable is sustained performance rather than a single processor name. Run your own representative games on the unmodified phone, repeat the test after heat soak and keep the phone only if its results meet your target before fabrication.
Do these 3 things before closing this tab:
1Clear out junk files and repair common Windows errors2Fix the driver behind crashes, sound loss and screen glitches3Repair Windows errors before they cause bigger problemsDo I need a 3D printer to make a foldable PS2 handheld?
No. Cardboard, foam board, laser-cut panels or a fabricated enclosure can validate dimensions and controls first. A 3D printer becomes useful when you need curved cradles, hinge mounts and replaceable service panels.
How can I dump a PS2 BIOS legally?
Use a method that reads the BIOS from a PlayStation 2 you own and keep the resulting file for your personal use. Avoid downloaded BIOS archives and commercial game images; the enclosure project does not require distributing either.
Can the phone remain usable as a normal phone after the build?
Yes, if the upper cradle is removable and the shell leaves access to the phone’s buttons, cameras, speakers and USB-C port. A glued-in phone or permanently soldered charging path removes that advantage and makes repairs substantially harder.
Quick Recap
Product prices and availability are accurate as of the date/time indicated and are subject to change. Any price and availability information displayed on Amazon at the time of purchase will apply.
Quick wins for a faster PC:
Clear out junk files and repair common Windows errorsFree Scan →Scan for outdated or missing drivers - takes under a minuteDriver Scan →
