Some links on this page are affiliate links: if you buy through them we may earn a commission, at no extra cost to you.
OBS Studio is the best starting point for most YouTube creators who want a free, configurable recorder with scene composition, multiple sources, audio controls, and live streaming. For a tutorial workflow that includes editing, consider Camtasia; Mac creators may prefer ScreenFlow. Loom is designed around short recordings and quick sharing, while NVIDIA App is a focused option for gameplay capture on compatible NVIDIA PCs.
The right choice depends on what you need to capture and what happens after recording: a polished tutorial, a quick explanation to share, a gameplay clip, or a scene-based production. The comparison below focuses on the five tools whose official product documentation supports a clear fit for YouTube creators.
As an Amazon Associate I earn from qualifying purchases.
At a glance
| Name | Best for | Key spec | Free plan / price | Checked |
|---|---|---|---|---|
| OBS Studio | Configurable recording and streaming | Scenes, multiple sources, audio filters | Free and open source | Nov 2026 |
| Camtasia | Tutorial recording and editing in one app | Independent screen, camera, and audio layers | Price not listed here | Nov 2026 |
| ScreenFlow | Mac tutorials and app demos | Screen, camera, microphone, and iOS capture | Starts at $199 | Nov 2026 |
| Loom | Short recordings and quick sharing | Starter: five-minute recordings, up to 720p | Starter free; Business listed at $18 per user/month | Nov 2026 |
| NVIDIA App | Gameplay capture on compatible NVIDIA PCs | Recording tools in the in-game overlay | Price not listed here | Nov 2026 |
Prices and plan limits can change; the figures above reflect vendor listings checked in November 2026. Loom’s listed Business price is per user per month.
1. OBS Studio: Best free recorder for configurable YouTube production
OBS Studio is a free, open-source application for video recording and live streaming. It is the strongest fit here if you want to build a recording setup from distinct sources rather than simply press record: a screen or window, camera, microphone, and other audio can be arranged into scenes and managed together.
Popular on Amazon

- Studio-Quality Sound for Clear Podcast Recording – The K66 USB podcast microphone delivers studio-quality, broadcast-level audio using a high-performance condenser capsule and cardioid pickup pattern that focuses on your voice while reducing unwanted background noise. Designed as a reliable microphone for PC, it features a wide 40Hz–18kHz frequency response and a 46kHz sampling rate to reproduce rich lows, smooth mids, and clear highs for natural, detailed vocals. With –45dB ±3dB sensitivity, it captures balanced sound without distortion during expressive speaking. Ideal for podcasting, voice-over, online classes, meetings, and professional content creation.
- Intelligent Noise Reduction Mode for Cleaner Podcast Audio – This podcast microphone features an advanced Noise Reduction Mode designed for clearer, more focused voice recording in real-world environments. Press and hold the mute button to enable noise reduction (blue indicator). In this mode, the microphone helps reduce keyboard clicks, PC fan noise, air conditioner hum, and background chatter. Default Mode maintains a warm, natural vocal tone for quiet spaces. Designed as a reliable microphone for PC, it allows creators to identify the active mode instantly and adapt as needed, ensuring clear audio for podcasting, gaming, streaming, online classes, meetings, and recording.
- True Plug-and-Play USB Microphone with Wide Device Compatibility – Engineered for effortless plug-and-play use, the K66 USB microphone requires no drivers, apps, or software installation. Simply connect and start recording on Windows PC, Mac, laptops, PS4, PS5, and tablets. Included USB-C and Lightning adapters ensure seamless compatibility with iPhone, iPad, and modern USB-C phones and devices, making it easy to switch between desktop and mobile recording. Ideal for creators working across multiple platforms, this microphone delivers consistent, high-quality audio for YouTube, TikTok, Twitch, Zoom, Discord, OBS Studio, Streamlabs, podcasting, livestreaming, and professional voice recording.
- Real-Time Zero-Latency Monitoring with Adjustable Volume Control – This podcast microphone features real-time, zero-latency monitoring through a built-in 3.5mm headphone jack, allowing you to hear exactly what’s being recorded without delay. Designed as a reliable microphone for PC, it includes a dedicated monitoring volume control that lets you adjust headphone listening levels independently for accurate and comfortable audio monitoring. Real-time feedback helps identify distortion, background noise, or uneven volume before it affects your final recording, making this podcast microphone ideal for podcasting, streaming, online teaching, voice-over work, and professional content creation.
- Precision Audio Adjustment Knobs for Full Sound Control – This podcast microphone gives creators hands-on control with dedicated knobs for microphone volume, monitoring volume, and echo adjustment. Fine-tune mic gain to maintain clear, balanced vocal output, adjust headphone monitoring levels independently for comfortable listening, and add or reduce echo to enhance depth and presence. Designed as a reliable PC microphone, these intuitive physical controls allow fast, on-the-fly adjustments without software, helping identify distortion, background noise, or level inconsistencies instantly. Ideal for podcasting, streaming, ASMR, voice-overs, singing, and professional multi-platform recording.
Its documented features include scene transitions, hotkeys, source mixing, and audio filters. That combination is useful for tutorials that switch between a desktop demonstration and a camera view, or for creators who want to manage narration and system audio as separate parts of a production. The audio filters also give creators controls within the recording setup rather than requiring every adjustment to happen in a later editor.
Platforms: Windows, Mac, and Linux. Cost: Free and open source. Limits to weigh: OBS is a configurable production tool, not a promise of effortless setup or smooth capture on every computer. The OBS Project cautions that a compatible system does not necessarily have the capacity to record or stream effectively. It also notes that performance depends on the encoder, resolution, frame rate, and scene complexity. A detailed scene with several sources can demand more from a computer than a simple screen capture.
The Tool Desk
Outbyte Driver Updater FREEFix the driver behind crashes, sound loss and screen glitchesFind Drivers →Outbyte PC Repair FREERepair Windows errors before they cause bigger problemsFix Now →OBS is a good match when control matters more than a built-in tutorial editor or a one-click sharing link. It can also serve creators who livestream as well as make recorded videos. If you only need occasional short explanations, its setup options may be more than you need; if you plan to edit extensively, pair the recording workflow with a separate editor.
2. Camtasia: Best for tutorials that need recording and editing together
Camtasia is aimed at creators making how-to videos and technology training. Its product page describes independent screen, camera, and audio layers, along with cursor editing. That makes it a practical choice when the recording is only the first stage: you want to capture a demonstration, then refine the presentation and pacing in the same application.
Independent layers can help keep the screen demonstration, face-camera footage, and narration distinct during editing. Cursor editing is especially relevant to software tutorials, where viewers need to follow what the presenter selects or clicks. Camtasia is therefore a more natural fit than a quick-share recorder for structured lessons, walkthroughs, or training videos that need post-capture polish.
Also popular on Amazon

- [Convenient Setup] Plug and play recording USB microphone for PC, with 5.9-Foot USB cable included for computer PC laptop, is connected directly to USB-A port for recording music, computer singing or podcast. The office condenser microphone for computer is easy to use and install. (NOT compatible with Xbox and Phones)
- [Durable Metal Design] Solid sturdy metal construction design, the computer microphone for Zoom meetings with stable tripod stand is convenient when you are doing voice overs or livestreams on YouTube. Durable material extends the service life of the voice-over microphone.
- [Mic Volume Knob] Gaming condenser USB mic compatible for PS4 with additional volume knob itself has a louder or quieter adjustment and is more sensitive. Your voice would be heard well enough through the zoom microphone USB when gaming, skyping or voice recording. Also, you can adjust your volume to zero and protect your privacy.
- [Widely Use] USB-powered design, the condenser microphone for recording no need the 48v Phantom power supply, works well with Cortana, Discord, voice chat and voice recognition. The podcast microphone for Mac, with USB-B to USB-A/C cable, is compatible with desktop, laptop or PS4/PS5, which meets most of your daily recording needs.
- [Clear Output Voice] Cardioid condenser microphone for PC captures your voice properly, producing clear smooth and crisp sound. Great computer recording mic for gamers/streamers/youtubers focus on the main source and reduces background noise. The streaming microphone does the job well for broadcast ,OBS and teamspeak.
Platforms: Check TechSmith’s current product information for supported systems before purchasing. Plan and price: Review the current TechSmith listing for editions and pricing. Limits to weigh: The central trade-off is that a combined capture-and-edit workflow may be unnecessary if you already have an editor or only need an unedited clip. As with any desktop recording workflow, plan a short capture to confirm the screen, camera, and narration are coming through as intended before making a full lesson.
What’s actually slowing this PC down?
Pick the symptom - the matching free tool is one click away.
Choose Camtasia when built-in editing is a core requirement, not merely a bonus. If your priority is free access and control of scenes and sources, OBS is the clearer fit; if you work on a Mac and want a tutorial-oriented editing workflow, compare its role with ScreenFlow.
3. ScreenFlow: Best for Mac tutorials and app demonstrations
ScreenFlow is the Mac-focused option in this comparison. Telestream describes screen, camera, and microphone recording, iOS capture, multi-track editing, captions, and tutorial templates. Those features suit software walkthroughs and app demonstrations that combine a desktop or mobile screen with narration and a camera view.
Multi-track editing gives a creator room to work with separate recorded elements, while captions and tutorial templates address common tutorial-production needs. The ability to capture iOS devices is useful when the subject is an app or mobile workflow rather than a desktop program. Those features make ScreenFlow more than a bare recorder: it is a capture-and-edit option for creators who work in the Apple ecosystem.
Platforms: Mac. Price: Telestream lists a starting price of $199. Limits to weigh: Its Mac focus makes it a poor fit if your recording computer runs Windows or Linux. The listed starting price is also a paid-software commitment rather than a free starting point. Check Telestream’s current page for the applicable edition and purchasing terms.
Quick wins for a faster PC:
Fix the driver behind crashes, sound loss and screen glitchesFind Drivers →Repair Windows errors before they cause bigger problemsFix Now →Scan for outdated or missing drivers - takes under a minuteDriver Scan →Also popular on Amazon

- [Natural Audio Clarity] Operated with frequency response of 50Hz-16KHz, the podcasting XLR mic delivers balanced audio range, likely to resonate with your audience. Directional cardioid dynamic microphone corded will not exaggerate your voice, while rejects unwanted off-axis noise for vocal originality and intelligibility during your PS5 gaming streaming video recording. (Tips: Keep the top of end-addressing XLR dynamic microphone AM8 facing audio source, and suggested recording range is 2 to 6 in.)
- [XLR Connection Upgrade-Ability] To use XLR connection, connect the podcast microphone to an audio interface (or mixer) using a separate XLR cable (NOT Included) . Well-connected and smooth operation improves audio flexibility to make you explore various types of music recording singing. The streaming mic isolates the pristine and accurate sound from ambient noise with greater no interference and fidelity. (RGB and function key on mic are INACTIVE when using XLR connection.)
- [USB Connection with Handy Mute] Skip the hassle of setting something up and plug the cable to play the dynamic USB microphone directly, which suits for beginner creators or daily podcast. You can quickly control the gamer mic with tap-to-mute that is independent of computer/Macbook programs to keep privacy when live streaming. LED mute reminder helps you get rid of forgetting to cancel the mute. (RGB and function key are only available for USB connection, but NOT for XLR connection)
- [Soothing Controllable RGB] RGB ring on the desktop gaming microphone for PC, with 3 modes and more than 10 light colors collection, matches your PC gears accessories for gaming synergy even in dim room. You can control the RGB key button of the dynamic microphone USB directly for game color scheme gaming or live streaming. Configured memory function, the streaming microphone RGB no need to repeated selections after turnning off and brings itself alive when power on. (Only available for USB connection)
- [More Function Keys] Computer microphone with headphones jack upgrades your rhythm game experience and gets feedback whether the real-time voice your audience hear as expected. Get the desired level via monitoring volume control when gaming recording. Smooth mic gain knob on the PC microphone gaming has some resistance to the point, easily for audio attenuation or boost presence to less post-production audio. (Only available for USB connection)
For a Mac creator choosing between ScreenFlow and Camtasia, the decision is less about a universal winner than workflow: ScreenFlow has documented iOS capture, captions, and tutorial templates, while Camtasia’s described strengths include independent screen, camera, and audio layers and cursor editing. Compare the current product pages against the particular lesson format you make.
4. Loom: Best for short recordings and fast sharing
Loom is most useful when a recording needs to be shared quickly as an explanation, update, or short tutorial. Its free Starter plan is limited to 25 videos and five minutes per recording, with resolution up to 720p. Those caps make it less suitable as the main recorder for a regular schedule of long-form YouTube lessons.
The paid Business plan is listed at $18 per user per month and supports unlimited recording duration and up to 4K. That may make Loom viable for longer or higher-resolution recordings, but its quick-sharing orientation is still different from a scene-based production setup. A creator who needs deliberate source composition and audio filtering should compare it with OBS; someone who needs editing controls for a full tutorial should compare it with Camtasia or ScreenFlow.
Platforms: Check Loom’s current product information for the recording environments supported by your account and device. Plan limits: Starter is capped at 25 videos, five minutes per recording, and up to 720p; Business is listed with unlimited duration and up to 4K. Price: Starter is free; Business is listed at $18 per user/month. Check the current pricing page before subscribing, since plan terms can change.
Recommended Free Tools
Loom is a sensible pick for concise explainers and recordings where a shareable result matters more than detailed production controls. For YouTube, keep the Starter limits in mind before planning a longer walkthrough, and consider whether your workflow needs an editor after capture.
Also popular on Amazon
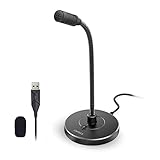
- 【Crystal Clear Audio Quality】Our Omnidirectional pattern condenser microphone accurately captures your voice, making it perfect for dictation, online classrooms, and more.
- 【Active Noise-Cancelling】Come in CMTECK CCS2.0 SMART CHIP with Omnidirectional Polar Pattern, which can effectively block the background noise. The pop filter prevents plosives from overloading the microphone, ensuring only your voice is heard.7
- 【Convenient Mute Button with LED Indicator】You can quickly mute/un-mute the microphone with the Mute Button and the built-in LED light lets you know the working status(Greenlight: Connected; Red light: Mute mode).
- 【Easy to use】 No drivers needed, just plug and record without external power supply, directly connect the microphone to a USB compatible device, well compatible with Windows(7, 8 and 10), Mac OS and PS4 (NOT compatible with Raspberry Pi/Linux/Android)
- 【Mini size with Adjustable Gooseneck】Adopted flexible and adjustable gooseneck metal pipe, easily adjust position 360 degrees to suit user comfort. The compact and stable base maximizes your desktop space.
5. NVIDIA App: Best for gameplay capture on compatible NVIDIA PCs
NVIDIA App is the focused choice for gameplay capture if you have compatible NVIDIA hardware. NVIDIA says its in-game overlay includes recording tools, so it is relevant to creators who want to capture gameplay without building a more general scene-based recording setup.
Platforms: Compatible NVIDIA PCs. Plan and price: Consult NVIDIA’s current App page for availability and requirements. Limits to weigh: The fit is specific to gameplay and supported hardware. The product information cited here does not establish a performance impact or detailed output-format controls, so creators should not assume it offers the same scene, source, or export configuration as OBS. Make a short sample capture on the intended game and system before planning a full session.
NVIDIA App is not a general replacement for every YouTube recording workflow. It can be a straightforward candidate for game footage on an eligible PC, while OBS is the broader choice when a creator wants scenes, multiple sources, audio filters, or live-streaming controls.
Free tools Windows power users keep installed
One-click scans. No signup required.
How should you choose a screen recorder for YouTube?
Start with the kind of video you make and the work you need the recorder to do. The key decision is whether you need production controls, editing, quick sharing, or specialized gameplay capture.
- Define the recording. A narrated software tutorial may need a readable screen, microphone, cursor visibility, and a camera view. A gameplay video may prioritize in-game capture; a quick explanatory clip may need only a fast recording and share workflow.
- Decide how much control you need during capture. OBS documents scenes, source mixing, transitions, hotkeys, and audio filters. That makes it a good match when you want to manage multiple visual and audio elements. A simpler sharing workflow may be preferable for short clips.
- Decide whether editing belongs in the same app. Camtasia and ScreenFlow both describe editing features alongside recording. Camtasia emphasizes independent screen, camera, and audio layers and cursor editing; ScreenFlow highlights multi-track editing, captions, and tutorial templates.
- Match the tool to your computer. OBS runs on Windows, Mac, and Linux; ScreenFlow is Mac-focused; NVIDIA App is for compatible NVIDIA PCs. Check vendor system requirements and current plan terms for other options before committing.
- Check practical limits and cost. Loom Starter’s five-minute limit and 25-video cap can rule it out for frequent long tutorials. ScreenFlow’s vendor-listed starting price is $199, while OBS is free and open source. For Camtasia, Loom Business, and NVIDIA App, check the vendor’s current page for the plan and price that applies to you.
- Make a short sample before a full recording. Record on the computer and with the scene you intend to use. Play the file back and check that text is readable, microphone narration is clear, system audio is present when needed, the cursor is visible, and the file plays correctly. A successful sample is more useful than assuming hardware compatibility guarantees smooth capture.
What YouTube settings should you use for a screen recording?
YouTube’s upload guidance recommends MP4 with H.264 video, AAC-LC or Opus or Eclipsa Audio, and 48 kHz audio. It also recommends using the same frame rate for the upload as for the recording; these are YouTube recommendations, not a universal setting that every recorder must use.
Also popular on Amazon
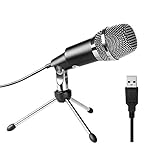
- Plug and Play and Portable - Simply plug it into any available USB port, select it as your input in your software settings and you're ready to create your own audio. Compatible with Windows and Mac, and no software to install. (Incompatible with Xbox and Phones)
- Distinctive Omni Pick-up pattern - Noise cancellation and isolates the main sound source. Good for home studio, chatting, Skype, Discord, Yahoo Recording, YouTube Recording, Google Voice Search and Steam.
- Smooth, Flat Frequency Response of 50Hz-16KHz - Extended frequency response is excellent for singing, speech and Voice over. Performed perfectly in reproduces sound, high quality Mic & perfect voice recorder ensure that your exquisite sound reproduces on the internet.
- Record Directly to Your Computer - This desktop microphone is ideal for everything from studio vocals, to speech, gaming, podcast and desktop recording. Great gift for streamer twitch, computer gamers and youtubers.
- Wide Frequency Response for brilliant and transparent sound. Extremely high signal output lets your voice cut through. Durable 5.9-foot USB cable is included, flexible and long enough for multiple applications.
For SDR 1080p uploads, YouTube lists reference bitrates of 8 Mbps at standard frame rates (24, 25, or 30 fps) and 12 Mbps at high frame rates (48, 50, or 60 fps). See YouTube’s recommended upload encoding settings for the full guidance. These values are upload references, not a guarantee that a particular recorder, computer, or source will produce the best result at that setting.
Keep the capture and export decisions connected. If you record at a given frame rate, follow YouTube’s recommendation to upload at that rate. Before publishing, inspect the exported file for legible interface text and synced narration, then confirm it plays correctly. If a recording looks choppy or incomplete, simplify the capture setup or adjust the recording settings and make another short sample; OBS specifically warns that system compatibility alone does not ensure effective recording.
How we picked
The selections reflect documented use cases and features on each product’s own pages: cross-platform scene and audio controls, tutorial capture plus editing, Mac tutorial production, short recordings with a share workflow, and gameplay capture on compatible NVIDIA PCs. The recommendations are workflow-specific rather than a universal ranking of image quality or performance; no product is presented as benchmarked against another.
Frequently Asked Questions
Can I record YouTube tutorials on Linux?
OBS Studio is the option in this comparison explicitly listed for Linux, as well as Windows and Mac. If you plan to use another recorder, check its current vendor requirements for Linux support rather than assuming desktop availability.
Is 4K necessary for a YouTube screen recording?
Not for every tutorial: viewers may need clear interface text more than a larger output resolution. Loom Business is listed as supporting up to 4K, but YouTube’s 1080p bitrate recommendations are separate upload guidance and do not establish that every recording should be made in 4K.
Should I record my microphone and computer audio separately?
Keeping narration and system sound distinguishable can make it easier to balance a tutorial where both matter. OBS documents source mixing and audio filters; whichever setup you choose, play back a short sample to confirm both sources are present and understandable.
What should I check if a screen recording looks choppy?
First make a brief sample with the intended resolution, frame rate, and scene, then simplify the scene or lower capture demands if playback is still poor. OBS identifies encoder, resolution, frame rate, and scene complexity as factors in performance, and warns that compatible hardware is not automatically capable of effective recording.

