The Tool Desk
Outbyte Driver Updater FREEFix the driver behind crashes, sound loss and screen glitchesFind Drivers →Outbyte PC Repair FREEClear out junk files and repair common Windows errorsFree Scan →To move an existing Core Keeper world, back it up, copy the numbered .world.gzip file from your client’s worlds folder into the stopped server’s DedicatedServer/worlds folder, then set the server’s World Index to the number in that filename. A file named 3.world.gzip, for example, must be started with world index 3.
Prefer not to run the server on your own PC? Godlike.Host offers hosted Core Keeper servers with free DDoS protection and up to three free backups a day.
The exact file path depends on whether the destination is a managed host, a self-hosted Windows server, or Docker. The safe sequence is always the same: back up, stop the server, transfer the file, match the index, restart, and verify the terrain before deleting anything.
As an Amazon Associate I earn from qualifying purchases.
Quick wins for a faster PC:
Clear out junk files and repair common Windows errorsFree Scan →Scan for outdated or missing drivers - takes under a minuteDriver Scan →Repair Windows errors before they cause bigger problemsFix Now →What an uploaded Core Keeper world contains
A Core Keeper world file stores the shared world state: terrain, explored areas, buildings, containers, bosses defeated, automation, and other progress that belongs to the world itself. It is separate from each player’s character save. Copying a world to a server therefore does not automatically copy every player’s character, inventory, equipment, or personal progression. Players may need to connect with the characters already present on the client that created them, or otherwise restore their character data through the game’s supported save process.
The transfer target is a file with the pattern number.world.gzip. The number is the world index. The extension must remain .world.gzip; do not unzip it, rename it to a different format, or upload the enclosing backup archive as though it were the world file.
#1 Best Overall

- DISCOVER 50+ GAMES — Explore a curated library of more than 50 games playable across XBOX consoles, PC, and supported devices, with new favorites ready to discover.
- PLAY ACROSS YOUR FAVORITE DEVICES — Enjoy included games across supported XBOX consoles, PC, and other compatible devices for more ways to play wherever you are.
- PLAY TOGETHER ONLINE — Connect with friends and communities with online console multiplayer included with XBOX Game Pass Essential.
- STREAM WITH XBOX CLOUD GAMING — Enjoy up to 5 hours of cloud playtime per month and stream supported games to compatible devices with XBOX Cloud Gaming.
- EARN REWARDS WHILE YOU PLAY — Earn Rewards points by playing games, completing eligible activities, and shopping in the Store with your XBOX Game Pass membership.
Back up the world before replacing anything
Make two backups before you alter a server. First, use Core Keeper’s main-menu backup command, Ctrl+Alt+B. The game creates CoreKeeperSaves.zip on the desktop. Keep that archive in a separate location, such as another drive or a USB device, rather than leaving the only copy on the same computer.
Second, preserve the original server world before uploading the replacement. Download it with SFTP or the host’s file manager, or copy it out of the Docker persistent volume. Give the copies clear names that identify their origin and date, for example server-before-import-2026-10-14.world.gzip. Do not delete either backup until you have connected successfully and checked the expected terrain and progress.
- Close the game or at least return to its main menu before making the client backup.
- Check that the desktop archive was actually created and has a non-zero size.
- Keep the original numbered world file unchanged. Work from a copy when possible.
- Record the source filename and its number; you will use that number for World Index.
Find the world file on the client
Windows Steam installation
On a Windows Steam client, open File Explorer and paste this path into the address bar:
%USERPROFILE%AppDataLocalLowPugstormCore KeeperSteam<SteamID>worlds
Replace <SteamID> with the user-specific folder shown on your computer. A first-slot world is commonly named 0.world.gzip. Other worlds use other numbers, such as 1.world.gzip or 3.world.gzip. Sort by name or date if you have several files, and use the modified date and file size to identify the world you recently played.
If File Explorer does not show the folder, enable hidden items from the View menu. The AppData directory is hidden by default. Also verify that you are looking under the same Windows account and Steam profile that actually played the world; another account can have a different SteamID folder.
Do these 3 things before closing this tab:
1Repair Windows errors before they cause bigger problems2Fix the driver behind crashes, sound loss and screen glitches3Clear out junk files and repair common Windows errorsLinux Steam installation
On Linux, the client worlds are under:
$HOME/.config/unity3d/Pugstorm/Core Keeper/Steam/<user-id>/worlds
Rank #2

- System: Intel Core i5-13400F 2.5GHz 10 Cores | Intel B760 Chipset | 16GB DDR5 | 1TB PCIe 4.0 NVMe SSD | Windows 11 Home
- Graphics: NVIDIA GeForce RTX 5060 8GB Graphics | 1x HDMI | 2x DisplayPort
- Connectivity: 1 x USB-C 3.2 | 2 x USB-A 3.2 | 6 x USB-A 2.0 | 1 x LAN | WiFi 6 | Bluetooth 5.3 | 7.1 Channel Audio
- Tempered Side Case Panel | Custom RGB Lighting | Keyboard and Mouse
- 1 Year Parts & Labor Warranty, Free Lifetime Tech Support
Use your file manager’s location field or a terminal to open the path, replacing <user-id> with the account directory present on your system. The same numbered naming rule applies. Copy the complete .world.gzip file, including its number and both extensions.
Confirm you found the right world
Do not rely on the number alone if you have many worlds. Compare the modified timestamp with the last session, and retain every candidate until you have identified the correct one. If you upload the wrong numbered file, the server can start normally while loading an older or different world, which may look like a failed import even though the transfer itself succeeded.
Stop the destination server first
Stop the dedicated server before replacing a world file. A running process can keep the old save open, write over your upload during its next save, or leave a partially written file if the transfer and a save happen at the same time. Wait until the hosting panel reports the server as stopped, or until the dedicated-server process and Docker container have fully exited.
Do not upload over a live server merely because the panel offers an online file manager. The operational order matters:
- Tell players to disconnect and stop the server.
- Wait for the process or container to finish shutting down.
- Download or copy the existing server world as a rollback backup.
- Only then replace the file.
Upload to a managed hosting panel
Managed hosts expose different directory layouts, so there is no universal panel path. Use the provider’s file manager or SFTP account and locate the directory named DedicatedServer/worlds (or the equivalent worlds directory inside the server data directory). Confirm the path by checking where the existing numbered .world.gzip files are stored; do not assume that a similarly named configuration folder is the save location.
- Stop the server in the hosting control panel.
- Open SFTP or the panel file manager and navigate to the server’s
DedicatedServer/worldsdirectory. - Download the current server world before changing it.
- Upload the client’s numbered
.world.gzipfile. - Keep the original server file under a different backup name, or move it to a separate backup directory if the panel supports that operation. Avoid leaving two files with the same name.
- Open the server startup settings and set World Index to the source file’s number.
- Save the setting, start the server, and wait for it to finish loading before connecting.
For example, uploading 3.world.gzip requires World Index 3. Uploading the file while leaving the panel set to index 0 can make the server load 0.world.gzip instead, creating the impression that the imported world disappeared.
Upload on a self-hosted Windows server
A Windows dedicated server normally stores its data below:
Free tools Windows power users keep installed
One-click scans. No signup required.
Rank #3

- Intel Core i7 14700F, NVIDIA GeForce RTX 5070 12GB, 32GB DDR5 RGB 4800MHz 16x2 1TB NVMe SSD, WIFI Ready, Windows 11 Home
- Connectivity: 6 x USB 3.1 | 1x RJ-45 Network Ethernet 10/100/1000 | Audio: On board audio
- Special Add-Ons: Tempered Glass RGB Gaming Case | 802.11AC Wi-Fi Included | 16 Color RGB Lighting Case | Free iBUYPOWER Gaming Keyboard & RGB Gaming Mouse | No Bloatware | AI Workstation PC ready
%USERPROFILE%AppDataLocalLowPugstormCore KeeperDedicatedServer
The world files are in that directory’s worlds subfolder:
%USERPROFILE%AppDataLocalLowPugstormCore KeeperDedicatedServerworlds
Stop the server, copy the client file into this worlds folder, and preserve the existing server file before replacing it. If you run the server under a service account, scheduled task, or different Windows user, %USERPROFILE% refers to that account, not necessarily the account you use to play. Check the account that launches the dedicated server when the expected folder is missing.
Set the startup option or configuration field named World Index to the number before .world.gzip. If you start the server with command-line options, the equivalent world selector is the -world setting. Use one method consistently: a panel’s World Index field, a configuration file, or the command-line argument, depending on how your installation is managed.
Upload to a Docker server
Docker changes where the file is stored, not the world-index rule. The replacement must go into the persistent volume or bind-mounted host directory that contains DedicatedServer/worlds. Copying a file into the container’s writable but non-persistent filesystem can appear to work, then vanish when the container is recreated.
- Stop the container cleanly.
- Identify the host path or named volume mounted for the server’s persistent data.
- Within that persistent location, open
DedicatedServer/worlds. - Copy the existing numbered world file to a safe backup outside the volume or under a distinct backup name.
- Place the client’s
.world.gzipfile in the same worlds directory. - Set the container’s World Index or
-worldenvironment/command option to the filename number. - Start the container and inspect its logs for a normal startup before joining.
If you are unsure which Docker path is persistent, inspect the container’s volume or bind-mount configuration rather than browsing only inside the running container. The host-side mount is the location that survives image updates, container replacement, and recreation.
Rank #4
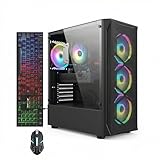
- This Gaming PC Desktop is well-suited for a variety of tasks including gaming, study, business, photo and video editing, streaming, day trading, crypto trading, and so on,ideal for Home, Office, School work
- This high-performance Gaming Computer Desktop is capable of running a wide range of popular PC games for pc gamer, including Fortnite, Call of Duty Warzone, Escape from Tarkov, GTA V, World of Warcraft, LOL, Valorant, Apex Legends, Roblox, Overwatch, CSGO, Battlefield V, Minecraft, Elden Ring, Rocket League, The Division 2, and Hogwarts Legacy with 60+ FPS
- PC Gaming System: This gaming computer desktop is loaded with Intel Core i7 up to 3.9GHz | 16GB Memory | 512GB Solid State Drive | Genuine Windows 11 Home 64-bit
- Gaming Desktop Connectivity: This gaming pc comes with RGB Fan x 4 | 1x RJ-45 | Wi-Fi 6 | Bluetooth 5.0 | Radeon RX 580 8G | HDMI | DisplayPort
- Gaming Computer Special Feature: This gaming pc equips with RGB Gaming Mouse & Keyboard |1 Year parts & labor | Free lifetime tech support,ARGB lighting that brings your gaming setup to life, with easy plug-and-play setup that gets you started in minutes. Built for long-lasting performance, it holds up well over time, while secure packaging ensures it arrives in perfect condition. Backed by reliable customer support for quick issue resolution
Set World Index correctly
The world index is not an arbitrary label. It is the integer represented by the filename. These examples show the required pairing:
| World file | World Index or -world |
Result |
|---|---|---|
0.world.gzip |
0 |
Loads the file numbered zero |
1.world.gzip |
1 |
Loads the file numbered one |
3.world.gzip |
3 |
Loads the file numbered three |
Keep the filename and setting synchronized. If you intentionally change a filename, change the index to match and ensure the server is configured to use that directory. In most migrations, the safest choice is to leave the source filename untouched and set the server’s index accordingly.
Use a custom data location when needed
Some installations put server data outside the default location by supplying the -datapath argument. When that argument is present, look for DedicatedServer/worlds beneath the path it specifies. When it is omitted, the documented default is a DedicatedServer subfolder in the server user’s normal data location.
A common mistake is to upload into the default folder while the server is actually launched with -datapath pointing elsewhere. Check the complete startup command or service definition, then follow the active data path rather than the folder that happens to be easiest to find.
Restart and verify the imported world
Start the server only after the file and index are in place. Allow the process to finish loading, then connect with a client and verify specific landmarks rather than checking only that the login succeeds.
- Confirm the spawn area has the expected terrain and buildings.
- Check a chest or automation setup whose contents you know.
- Visit a previously explored area and confirm that map progress is present.
- Verify that the expected world name, seed-related layout, and progression state appear.
- Ask another player to join if multiplayer access is part of the migration.
Keep the client backup and pre-import server copy until these checks pass. If the server loads the wrong world, stop it again before making another change; repeated live replacements make it harder to determine which file was actually loaded.
Independent reader supportYour contribution helps us test, update, and keep practical guides available for everyone.What happens to characters and player progress
The client folder and the world folder serve different purposes. The cited save-path documentation places characters on the client side while worlds are stored separately. Uploading the world therefore transfers shared map progress but does not automatically move each player’s character save to the server.
Best Value

- This Gaming PC Desktop is well-suited for a variety of tasks including gaming, study, business, photo and video editing, streaming, day trading, crypto trading, and so on,ideal for Home, Office, School work
- This high-performance Gaming Computer Desktop is capable of running a wide range of popular PC games for pc gamer, including Fortnite, Call of Duty Warzone, Escape from Tarkov, GTA V, World of Warcraft, LOL, Valorant, Apex Legends, Roblox, Overwatch, CSGO, Battlefield V, Minecraft, Elden Ring, Rocket League, The Division 2, and Hogwarts Legacy with 60+ FPS
- PC Gaming System: This gaming computer desktop is loaded with Intel Core i7 up to 3.9GHz | 16GB Memory | 512GB Solid State Drive | Genuine Windows 11 Home 64-bit
- Gaming Desktop Connectivity: This gaming pc comes with RGB Fan x 6 | 1x RJ-45 | Wi-Fi 6 | Bluetooth 5.0 | GeForce RTX 3050 6G | HDMI | DisplayPort
- Gaming Computer Special Feature: This gaming pc equips with RGB Gaming Mouse & Keyboard |1 Year parts & labor | Free lifetime tech support,ARGB lighting that brings your gaming setup to life, with easy plug-and-play setup that gets you started in minutes. Built for long-lasting performance, it holds up well over time, while secure packaging ensures it arrives in perfect condition. Backed by reliable customer support for quick issue resolution
Tell players to retain their original local saves. A player who connects from a different machine or Steam account may not see the same character, even though the server world is correct. Treat character migration as a separate task and do not overwrite client save folders while troubleshooting a world import.
PC Slower Than It Used to Be?
A free scan shows the junk files, broken settings and background clutter dragging Windows down - then fixes them in one click.Free scan · Windows 10 & 11Outdated Drivers Are Slowing You Down
One free scan finds every outdated or missing driver and matches the right update for your exact hardware.Free scan · exact hardware matchTroubleshooting by symptom
The server starts in a new or empty world
- Check that the uploaded file is in the active
DedicatedServer/worldsdirectory, not a parent folder or a similarly named backup directory. - Compare the filename number with World Index or
-world. - Check for an active
-datapathargument that redirects the server elsewhere. - Stop the server before correcting the path or replacing the file.
The host rejects the upload
Verify SFTP credentials, available storage, and the panel’s permitted directory. Upload the original .world.gzip file without changing its extension. If the panel has separate “game files” and “save files” areas, use the location where existing numbered world files appear.
The old server world comes back after restart
This usually indicates that the process was still running during replacement, the panel restored a backup automatically, or the upload went to a non-persistent Docker location. Stop the server, inspect the file’s modified time and size, and confirm the persistent mount or active data path before trying again.
The file is present but the wrong world loads
List every numbered file in the active worlds directory. The server may be loading another file whose number matches the configured index. Either remove unrelated duplicates after backing them up or set the index to the number of the intended file.
The world loads but players cannot find their characters
This is expected when only the world file was transferred. Character data is client-side and must remain available to the players’ game installations. Have each player connect using the account and machine that contain the relevant character save, and keep the original client backup while resolving account or installation differences.
What’s actually slowing this PC down?
Pick the symptom - the matching free tool is one click away.
The Docker import disappears after recreation
The file was likely copied into the container’s ephemeral layer instead of its persistent volume or bind mount. Stop the container, copy the file into the host-side persistent directory that maps to DedicatedServer/worlds, set the matching index, and recreate or restart the container only after the persistent copy is in place.
Choosing a transfer method
The same numbered world file works across deployments, but the operational trade-offs differ:
| Deployment | Control | Convenience | Portability | Recovery considerations |
|---|---|---|---|---|
| Managed host | Panel settings and SFTP permissions limit direct control | File manager and hosted startup controls simplify the upload | Depends on the provider’s directory layout and export options | Download the existing world before replacement; verify the host’s backup behavior |
| Self-hosted Windows | Direct access to files, startup arguments, and services | Requires local administration and manual copying | Custom locations are possible with -datapath |
You control backups and can restore the saved original directly |
| Docker | Command, environment, and volume configuration are explicit | Repeatable once the volume mapping is understood | Persistent volumes make migration between hosts practical | Copy into the persistent volume, not the ephemeral container filesystem |
Choose the method based on who controls the files and how easily you can recover. A managed panel is convenient when SFTP and a file manager are available. A self-hosted installation exposes the most direct file and command-line control. Docker is portable when its persistent volume is documented and backed up correctly.
Complete migration checklist
- Use Ctrl+Alt+B in Core Keeper and confirm that
CoreKeeperSaves.zipexists on the desktop. - Locate the intended client file under the Windows or Linux Steam worlds path.
- Write down the number in the filename, such as
3from3.world.gzip. - Stop the destination server or Docker container completely.
- Back up the current server world before changing it.
- Find the active
DedicatedServer/worldsdirectory, following the host’s layout or-datapath. - Upload or copy the unchanged
.world.gzipfile. - Set World Index or
-worldto the filename number. - Start the server and wait for normal loading.
- Join and verify landmarks, progression, and multiplayer access.
- Keep both backups until verification is complete.
The crucial safeguards are simple: never replace a save while the server is running, never guess the active data directory, and never mismatch the filename number and World Index. Following those rules lets you move a Steam world to a hosted, self-hosted, or Docker server without sacrificing the original save.
Recommended Free Tools
Quick Recap
Product prices and availability are accurate as of the date/time indicated and are subject to change. Any price and availability information displayed on Amazon at the time of purchase will apply.




