First identify what is missing: implant-position data, soft-tissue geometry, or the registration that joins separate scans. Photogrammetry records implant positions; it does not capture the surrounding tissue contours, which must come from an intraoral scan (IOS) in the workflow described by the ITI. If the surface or coded feature was never captured, rescan it. If the corresponding data are present but do not line up, use the scanner’s documented alignment procedure. Mesh repair is for eligible defects—not a substitute for capturing clinical anatomy.
Identify which data stream has the defect
In a full-arch implant workflow, extra-oral photogrammetry (EPG) records implant positions, while IOS supplies soft-tissue morphology and mucosal contours. The datasets may also need to be registered to standard scan-body library geometry. A missing gingival surface may therefore be an IOS capture gap rather than a photogrammetry failure. The ITI workflow guide describes these separate datasets and their alignment.
- Implant position or coded geometry is missing: Check scan-body compatibility, seating, condition, visibility, and acquisition before attempting alignment.
- Soft tissue is missing: Inspect the IOS dataset and rescan the uncovered region if necessary.
- Both datasets exist but do not match: Check the registration workflow and use the scanner’s supported manual alignment, if available.
- The defect appears after scan-body conversion: Do not assume a universal cause. SHINING 3D’s support index lists a FAQ titled “Why there is a Missing Part of Scan Bodies after Convertion?” but the index does not provide its answer. Check the exact scanner and software version, library, and workflow instructions. See SHINING 3D support.
Check scanner, scan bodies, and setup
Before repairing a mesh, confirm the hardware and workflow are appropriate for the scanner and implant system. Calibration, scan-body compatibility, and seating instructions vary by equipment; follow the current manufacturer protocol rather than transferring settings from another system.
For the ITI-described extra-oral workflow
The ITI guide describes placing compatible photogrammetry scan bodies on all implants, hand-tightening them, and calibrating the device with its calibration device according to the manufacturer’s protocol. It describes capturing images from multiple angles and gives a working distance of 25 to 30 cm for the iCAM4D or PIC workflows covered in that guide. That distance is specific to those systems, not a general setting for dental photogrammetry. Read the ITI workflow guide and the device’s current instructions.
#1 Best Overall

- Mini Body:246g, small and ergonomic design 14mm ultra low inlet height 1 7mm great depth of Ĭeld
- High accuracy for data:Get the impression data directly and the data can be uploaded directly to cloud, which makes it easy to restore and traceable.
- Intuitive image:Realistic scan colors,Offers full HD color or monochromatic scanning
- CAD/CAM Systems for Dentists,Produces open STL and PLY files for easy sharing with the lab of your choice
- Supports full clinical workflows in orthodontics, restorative, implant and sleep dentistry
For SHINING 3D’s intraoral workflow
SHINING 3D distinguishes coded scan bodies, used to locate implant positions and directions, from cap scan bodies used for soft-tissue capture in immediate cases. Its documented workflow requires Aoralscan Elite series devices. The manufacturer recommends replacing coded or cap scan bodies within 300 uses; the publication date for that IntraoralScan 3.5.6 guidance is not stated. These details apply to that manufacturer’s workflow only. See SHINING 3D support.
For SHINING 3D cap scan bodies, confirm the part type and matching kit, and do not mix types. Inspect surfaces and screw structures for contamination or damage. The vendor notes that blood or saliva covering coded features can prevent recognition. Clean or replace parts according to the manufacturer’s instructions before recapturing. The SHINING 3D cap-scan-body instructions describe this workflow.
Rank #2
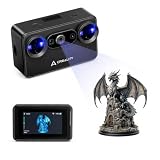
- Pocket-Sized & Wireless Freedom: At only 260g and 1006035mm, Pika fits in your palm. Features Wi-Fi 6 wireless PC mode, 3-inch HD touchscreen (500 nit), dual swappable 3350mAh batteries for extended sessions, and supports outdoor scanning up to 110,000 lux - scan anywhere, anytime without cables
- Dual-Mode Scanning with Blue Laser & NIR Structured Light: Switch between 7-line blue laser mode for fine detail capture and NIR structured light mode for full-body scanning with 24-bit true color. Scan objects from 101010mm to 200020002000mm - from tiny miniatures to life-size body scans - all with one device
- Ultra-High Precision 0.03mm Accuracy: Equipped with 7 parallel blue laser lines, Creality Pika delivers up to 0.03mm scanning accuracy and 0.1mm 3D resolution, capturing intricate details on small parts, figurines, mechanical components, and collectibles with professional-grade precision for 3D printing and reverse engineering
- AI-Powered Smart Features: Built-in AI Body Completion generates full-body 3D models from just a face scan and photos in as little as 10 seconds (10 faster). AI Retexturing maps real photo textures onto scanned models for lifelike results. AI Hole Filling automatically repairs incomplete scans for cleaner, print-ready output
- Scan Black & Metal Without Spray and Multi-Platform Export: Directly scans dark and metallic surfaces without scanning spray. Exports STL/OBJ/PLY/ASC formats compatible with all major 3D printing and CAD software. Works with Windows, macOS, iOS, and Android via CrealityScan app. Includes tripod, turntable, calibration board, and full accessories
Recapture geometry that was missed or obscured
If the software view shows missing coded features or the needed surface is absent from the dataset, return to acquisition. Alignment cannot reconstruct a feature that was never captured, and a filled mesh does not establish that the underlying anatomy was recorded.
Capture coded scan bodies deliberately
For its coded-scan-body workflow, SHINING 3D instructs users to choose the appropriate body length for the corresponding implant, orient coded-body ends toward the palatal or lingual side, and follow the on-screen path to scan the whole structure and then each rod in detail. Where adjacent implants make it difficult to scan every body at once, its instructions describe capturing them in groups. The vendor suggests approximately 10 N·cm tightening torque for this specific product workflow; do not apply that figure to other scan bodies. Follow the current instructions for the exact device and kit. See SHINING 3D coded-scan-body instructions.
Rank #3
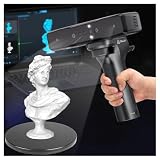
- Ultra-Precision & Versatility: Achieves 0.05mm accuracy with advanced infrared structured light technology, ideal for scanning objects from tiny screws (20mm³) to large automotive parts (2000mm³). Perfect for engineers, designers, and hobbyists seeking professional-grade 3D models.
- Wireless Freedom & Mobile Control: Built-in Wi-Fi and Lite Bridge battery handle eliminate cable restrictions. Use your smartphone as a real-time display via the Creality Scan app, enabling flexible scanning in any environment.
- Outdoor-Ready & Adaptive Lighting: Features DOE structured light and dual LED fill lights for crisp scans in low-light or bright outdoor conditions (up to 30,000 lux). Capture full-color textures with stunning realism, even in challenging settings.
- 30fps Real-Time Scanning & Anti-Shake: Smooth performance powered by a dedicated depth-computing chip and single-frame 3D imaging technology. Enjoy stable tracking at 30fps with minimal motion blur, ensuring fast and reliable results.
- User-Friendly Software & Cross-Platform Support: Compatible with Windows and macOS (recommended specs included). Seamlessly export models in OBJ/STL/PLY formats and utilize multi-angle stitching for complete 360° scans. Includes calibration tools and a portable case for on-the-go use.
Review the capture before proceeding
- Check whether the full coded geometry is visible in the software, not just the portion that will later be aligned.
- Confirm coded surfaces are clean, undamaged, and seated as directed.
- Check that the IOS includes the tissue contours needed for the case.
- Look for gaps, double images, or overlapping layers that could indicate incomplete or inconsistent acquisition.
The appropriate scan path and capture threshold depend on the scanner and case. 3Shape’s post-processing guidance recommends checking that teeth and restoration areas are fully captured, examining gaps and stitching issues, and rescanning missing data. For the workflow in that guide, 3Shape recommends no more than 2,000–2,500 3D images per single full-jaw scan to reduce post-processing failures; this is vendor-specific guidance, not a universal image limit. See 3Shape’s post-processing guidance.
Use manual alignment when the scans exist but registration fails
Manual alignment is appropriate only when the corresponding data are present and recognizable. Use the documented procedure for the scanner in use; do not move a final combined mesh by eye as a substitute for registration checks.
Rank #4

- Otter Lite: Built in wireless Wi Fi module, paired with a battery handle Lite Bridge to free scanning from cable constraints. When scanning wirelessly, a mobile phone can replace the scanner screen to make the scanning process easier and more convenient.
- 0.05mm Ultra-High Precision: Advanced structured-light stereo vision captures details as small as 20mm and objects up to 2000mm.
- Scan Black & Metal Objects: No spraying required—ideal for automotive parts, tires, and industrial applications.
- Full-Color 24-bit RGB: Million-pixel camera with color mapping for lifelike textures and contours, even in sunlight (<30,000 lux).
- Anti-Shake & 30 FPS Speed: Smooth scanning with One-End 3D Imaging tech and fast backtracking.Compatibility: Works seamlessly with Windows, macOS, Android, and iOS.
SHINING 3D cap-scan-body alignment
For its cap-scan-body workflow, SHINING 3D describes manually selecting three corresponding data groups when automatic alignment fails. Its instructions include a specific “only two cap scanbodies exist” option. The vendor recommends at least three cap scan bodies for alignment while allowing a minimum of two in that workflow. These are system-specific instructions, not general clinical rules. Follow the exact on-screen steps and inspect the resulting overlay or available reslices. See SHINING 3D cap-scan-body instructions.
SHINING 3D coded-body alignment and conversion
For coded scan bodies, SHINING 3D directs users to scan the connection between the coded scan body and gingiva, and offers manual alignment when automatic alignment is wrong. Its documentation says the coded body should be scanned before conversion and marking. Afterward, confirm that the selected manufacturer, implant type, and subtype match the intended components. See SHINING 3D coded-scan-body instructions.
The Tool Desk
Outbyte Driver Updater FREEScan for outdated or missing drivers - takes under a minuteDriver Scan →Outbyte PC Repair FREERepair Windows errors before they cause bigger problemsFix Now →Best Value

- Easier Scans: Quickly and easily 3D scan small to medium-sized objects without moving the scanner
- Lightweight and Portable: Weighing only 315 g with a diameter of 125 mm, the Portable Turntable is easy to transport and supports a maximum load of 2.5 kg
- Turntable Topper: Comes with a Turntable Topper with pre-placed marker points for easier scanning of featureless objects
- Compatibility: Works with all Revopoint 3D scanners for small and medium objects
Check each registration layer in a combined dataset
The ITI-described full-arch workflow links multiple datasets: intraoral scan bodies are aligned to standard library scan bodies, and those are then matched to extra-oral photogrammetry scan bodies. If the final prosthesis dataset is misregistered, inspect each correspondence layer in sequence. A plausible-looking overall overlay does not establish that every implant correspondence is correct. The ITI workflow guide describes this chain.
Independent reader supportYour contribution helps us test, update, and keep practical guides available for everyone.Repair mesh defects only when the required anatomy is captured
Mesh cleanup can address some holes, borders, and isolated scan artifacts. It cannot prove that a clinically important surface was actually acquired. For an implant prosthesis, follow the clinical team’s verification protocol and obtain a new capture when key anatomy or implant geometry is uncertain. The sources cited here do not establish one universal acceptance test.
What 3Shape cleanup tools can address
3Shape Dental System refinement documentation lists options for closing holes, removing scan artifacts smaller than 5 mm, and improving scan borders. These controls are available only for specified order types and imports, so check the software version and order settings. The under-5-mm figure is the threshold for that artifact-removal tool, not a clinical threshold for discarding anatomy. See 3Shape’s refinement guide.
3Shape’s Unite post-processing guidance also recommends trimming excess tissue and artifacts, checking for large gaps, holes, double images, and stitching problems, and trimming overlapping areas. If an area is missing, the guidance is to rescan it rather than rely on cleanup. These are recommendations for the workflow described by 3Shape, not universal settings. See 3Shape’s post-processing guidance.
Recommended Free Tools
Choose the correction that matches the failure
| Problem | Appropriate next step | Important limit |
|---|---|---|
| Important surface or coded feature was not captured, is obscured, or is damaged | Correct setup or part condition, then recapture the affected region. | Mesh filling cannot establish that clinical anatomy or implant geometry was captured. |
| Corresponding data are present, but automatic registration failed | Use the scanner’s documented manual-alignment procedure and inspect its available quality checks. | Alignment steps and minimum scan-body counts are system-specific. |
| Eligible mesh hole, border, or isolated artifact | Use supported cleanup tools, then review the result against the acquired scan. | Tool availability depends on software version, order type, and import; cleanup is not a substitute for missing data. |
| Implant positions and soft-tissue contours are both needed | Use the appropriate EPG and IOS datasets and verify their registration. | EPG alone does not record soft-tissue morphology in the ITI-described workflow. |
No general failure rate for missing surfaces or alignment errors is established by the cited vendor and workflow documentation. Compatibility, calibration, capture settings, and clinical acceptance criteria should be checked for the exact scanner, software version, scan-body kit, and implant system.
Quick Recap
Product prices and availability are accurate as of the date/time indicated and are subject to change. Any price and availability information displayed on Amazon at the time of purchase will apply.




