Quick wins for a faster PC:
Fix the driver behind crashes, sound loss and screen glitchesFind Drivers →Repair Windows errors before they cause bigger problemsFix Now →Action-RPG buildcrafting is an optimization loop: attributes set your resources, defenses, requirements, and scaling; skills turn those attributes and weapons into repeatable actions; gear supplies damage, mitigation, and modifiers; and respec systems let you change the allocation when your plan no longer works. A strong build is not the one with the biggest isolated number. It is the combination whose stats, skills, equipment, and resource economy all reinforce one combat goal.
What a build actually is
A build is the set of permanent and changeable choices that determines how a character fights. It includes attributes, weapon or spell choices, active skills, passive effects, armor, accessories, consumables, and sometimes a specialization tree. Buildcrafting begins when you stop treating those choices as independent upgrades and instead ask whether they produce a reliable combat pattern.
As an Amazon Associate I earn from qualifying purchases.
For example, a fast melee build may value stamina, mobility, Dexterity scaling, and a low-cost skill that can be used between enemy attacks. A heavy stagger build may accept slower movement in exchange for Strength scaling, poise or defense, and enough stamina to keep attacking after a charged hit. A damage-over-time caster may care less about a single large strike than about resource recovery, status duration, and surviving long enough for the effect to finish.
Free tools Windows power users keep installed
One-click scans. No signup required.
The same item or stat can therefore be excellent in one plan and poor in another. Buildcrafting is the process of making those trade-offs deliberately.
#1 Best Overall
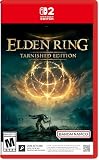
- ELDEN RING Tarnished Edition contains the Elden Ring Base Game + Shadow of the Erdtree Expansion + Additional Content (including Torrent Skins, New Armors, and More...)
- MASSIVE OPEN WORLD
- DEEP, CUSTOMIZABLE COMBAT
- NEW STARTING CLASSES
- NEW PLAYER-FRIENDLY ENHANCEMENTS
How the four systems fit together
Stats establish the operating limits
Attributes determine what your character can equip, how large its health or resource pools are, and how strongly weapons or spells scale. They are the infrastructure beneath every combat action. Raising a damage attribute without enough health to survive, or taking an expensive spell without enough resource capacity, can make the displayed damage misleading.
Skills define the combat loop
Skills are the actions you repeat: attacks, spells, movement abilities, defensive reactions, buffs, debuffs, and crowd-control effects. Their value depends on cost, timing, range, damage type, cooldown or recovery, and how well they use your attributes and equipment. A skill that looks powerful on a tooltip may be inefficient if it empties your resource bar before the next opening.
Gear supplies power and interactions
Weapons and armor add base damage or defense, attribute scaling, equipment burden, and special effects. Upgrades often change the value of every related stat point, while passive effects can alter how a skill behaves. Gear is therefore both a numerical increase and a set of rules that can change your rotation.
Outdated Drivers Are Slowing You Down
One free scan finds every outdated or missing driver and matches the right update for your exact hardware.Free scan · exact hardware matchWindows Errors? Fix Them Before They Spread
Repair common Windows errors and clear accumulated junk for a smoother, more stable PC - no reinstall needed.Free scan · no reinstallRespecs provide a controlled change of direction
A respec reallocates some or all of your character choices. It is the safety valve that lets you test a different plan without discarding the character, but its cost is meant to preserve the significance of earlier decisions. In Diablo IV, Blizzard described respecs as available for skills and passives, unlimited but not free, easier early in a character’s life, and increasingly costly as the character grows.
Stats: choose points by function, not by habit
Different games use different names and formulas, but every attribute point should answer at least one of four questions: What resource does it provide? What equipment or skill requirement does it meet? What damage or defense does it scale? What breakpoint or softcap changes its efficiency?
Elden Ring’s eight primary attributes
Bandai Namco’s Elden Ring guide lists Vigor, Mind, Endurance, Strength, Dexterity, Intelligence, Faith, and Arcane. Their roles make a useful general model:
| Attribute | Primary function | Build decisions it affects |
|---|---|---|
| Vigor | Health | How many mistakes you can survive and how much healing restores relative to your total health. |
| Mind | FP, the resource used by spells and skills | How often expensive abilities can be used before drinking a flask or waiting for recovery. |
| Endurance | Stamina and total equipment load | Attack, block, sprint, and dodge frequency, plus whether armor and weapons force a slower movement tier. |
| Strength | Weapon requirements and scaling | Access to heavy weapons and the damage gained from Strength-oriented upgrades. |
| Dexterity | Weapon requirements and scaling | Access to agile weapons and the damage gained from Dexterity-oriented upgrades. |
| Intelligence | Support for particular spell families and scaling | Which sorceries or weapons you can use and how strongly they benefit from Intelligence. |
| Faith | Support for another family of spells and scaling | Incantation access and the performance of Faith-oriented weapons or effects. |
| Arcane | Status buildup, item discovery, and some requirements | Access to equipment and the speed or strength of compatible status effects. |
These roles are specific to Elden Ring’s systems, not a universal template. Other action RPGs may combine attributes, rename them, or make one stat affect several mechanics.
Use minimums before optimization
First meet the requirements for the weapon, spell, shield, or skill that defines your plan. Only then compare marginal damage gains. A point that unlocks your main tool can be worth more than a point that adds a small percentage to an already available attack.
Recognize softcaps and diminishing returns
A softcap is a point after which additional investment produces smaller gains. Bandai Namco Entertainment America’s 2023 advanced-stats guide gives a concrete Elden Ring example: Vigor 10 corresponds to 414 HP, while Vigor 40 corresponds to 1,450 HP. The guide reports that increasing Vigor from 39 to 40 adds 48 HP, whereas 40 to 41 adds 26 HP. Those values are game-specific, but the decision principle applies broadly: once a stat’s next point is less efficient, a resource, defense, or secondary scaling stat may improve the complete build more.
Rank #2

- Collaborating with George R.R. Martin to create the ELDEN RING mythos has been a genuinely delightful experience and a source of wonderful inspiration. The team is working hard to ensure that the world of ELDEN RING will be a fascinating place for players to explore, filled with peril and wonder from its furthest reaches to its lowest depths. This is a FromSoftware title through and through, rich in fantasy and RPG action. We sincerely hope you look forward to it.
- Building the world of ELDEN RING with Miyazaki-san and his team was a treat! The graphics, mythos, and action-RPG gameplay will deliver an unforgettable experience. I can’t wait for people to see what ELDEN RING has in store for them.” Said George R.R. Martin.
Do not treat a softcap as a command to stop forever. Extra points can still be worthwhile when they meet a survivability target, unlock a requirement, or support a particular scaling formula. The useful question is what the next point changes in actual play.
Skills turn numbers into a repeatable plan
Start with one primary action
Choose the attack, spell, or weapon pattern that delivers your intended outcome. Everything else should help that action land more often, hit harder, create an opening, or keep you alive while using it. A build with six unrelated damage skills may have a high theoretical ceiling but no efficient rotation.
Budget the resource pool
Count the cost of your main skill, movement or defense, and any maintenance buff. If a sequence empties the resource bar before an enemy’s vulnerable window, add capacity or recovery, reduce the cost, or choose a cheaper filler. In Elden Ring, skills consume FP, so Mind and flask allocation are part of the damage plan rather than separate quality-of-life choices.
Match timing and range to the weapon
A close-range skill needs a way to enter and leave danger; a long cast needs distance, interruption protection, or crowd control. Damage type and status effects should also agree with your attributes and gear. A status-focused weapon paired with bonuses that never trigger the status is a mismatch even if both pieces are individually rare.
Understand skill-changing systems
Elden Ring’s official combat guidance says that skills can be changed by changing Ashes, and that weapon type determines which Ashes a weapon can carry. That means the weapon is not just a damage stick: its compatible Ashes define which resource costs, damage types, and scaling changes are available. Check compatibility before investing in an upgrade path.
Gear: evaluate the whole package
Read the four layers of an item
- Base power: the weapon damage, armor, resistance, or other direct value before modifiers.
- Scaling: how strongly the item benefits from your attributes and upgrades.
- Burden: weight, stamina cost, movement penalty, or another limit that can reduce defensive comfort.
- Effects: passives, triggers, status bonuses, cooldown changes, and conditional multipliers.
Upgrading a weapon can raise its base power and alter its scaling. Elden Ring’s combat guide also explains that Ashes of War can change damage type and the attributes receiving scaling bonuses. A lower-level item with the correct scaling and effect can therefore outperform a higher-level item that fights your attribute spread.
Rarity is a filter, not a verdict
Rarity usually signals the number or strength of possible modifiers, but it does not measure compatibility with your build. Blizzard’s Diablo IV design discussion calls itemization “a huge core part of any Action RPG,” reflecting why items are designed as more than a simple color ladder. Nightreign’s official guide describes higher-rarity equipment, passive effects, and effects triggered by specific actions; those triggers can create synergies that raw attack numbers do not reveal.
| Question | Why it matters |
|---|---|
| Does the item scale from your primary attributes? | It determines whether future stat points and upgrades improve the item. |
| Does its damage or defense type fit the enemies you face? | A large sheet value can be reduced by resistances or fail to cover a common threat. |
| Does the passive trigger during your actual rotation? | A conditional bonus has no practical value if its condition is rarely met. |
| Can you carry it without losing mobility? | Burden can change dodge, sprint, stamina, or recovery behavior. |
| Is it upgradeable on your progression path? | A modest item with a reliable upgrade route can be better than a powerful item that cannot keep pace. |
Mobility and survivability are damage stats
Survival determines how much of your theoretical damage reaches the target. Health, mitigation, resistances, healing, stamina, and escape tools all increase the number of attacks you can complete. Mobility also has an offensive value because a faster dodge or shorter recovery creates more safe openings.
Elden Ring’s official guidance gives explicit equipment-load thresholds: below 30% load is a fast roll; 30% to 69.9% is a normal roll; 70% to 99.9% is a heavy roll; and 100% or more prevents dodging and jumping. These thresholds illustrate a general rule: a small damage increase is often a poor trade if it moves the character into a movement tier that causes missed attacks or unavoidable hits. Other games use different breakpoints, so read the current game’s descriptions rather than importing Elden Ring’s numbers.
Rank #3

- High Quality Materials : This Dark Moon Greatsword model is crafted from high-quality zinc alloy, ensuring excellent durability and resistance to wear. The intricate craftsmanship and realistic detailing make it a perfect, authentic reproduction of the legendary sword from Elden Ring DLC Shadow of the Erdtree, making it an ideal collector's item for fans of the game
- Ideal Size & Safety: Designed based on Game Elden Ring DLC Shadow of the Erdtree Dark Moon Greatsword, this 11.8-inch replica is eye-catching in any setting. Its smooth surface and absence of sharp edges ensure it's safe to handle and easy to carry, so you can enjoy it without worry
- Realistic Details Reproduction: The detailed carving and texture design of the Elden Ring DLC Shadow of the Erdtree Dark Moon Greatsword is exquisite, with the blade shimmering under the moonlight. This stunningly crafted sword brings you a visually immersive experience, which makes it a collector's item
- Multipurpose Decoration: This beautiful Elden Ring DLC Shadow of the Erdtree Dark Moon Greatsword is not only suitable for collection, but also can be used to decorate your desktop, bookshelf, or game-themed party, adding a unique style to your space
- Best Gift Choice: Whether it's for game fans, collectors, or as a birthday or holiday gift, this Elden Ring DLC Shadow of the Erdtree Dark Moon Greatsword model is a personalized choice that will be warmly welcomed
A step-by-step buildcrafting workflow
- Define the combat outcome. Write a short target such as fast melee, heavy stagger, ranged spell damage, damage-over-time, or support. If the goal cannot be described in one sentence, the build is not ready to optimize.
- Select the primary skill or weapon pattern. Confirm its damage type, range, resource cost, requirements, and scaling.
- Meet minimum requirements. Allocate attributes needed to equip and use the core tools. Do not chase secondary damage while the main action is locked out.
- Set a survivability target. Choose enough health, mitigation, stamina, load capacity, or recovery to survive representative encounters and complete the rotation.
- Add supporting skills. Include a reliable filler, movement or defense, and one answer to groups, shields, interruptions, or other common threats. Every slot should have a job.
- Choose matching gear. Prioritize scaling, damage type, passives, triggers, burden, and upgrade availability. Compare the complete rotation, not one tooltip.
- Test under realistic conditions. Fight both a representative group and a boss-like target. Watch resource consumption, recovery windows, missed attacks, movement tier, and how often you survive a mistake.
- Change one variable at a time. Swap a weapon, attribute allocation, or skill and record what improved. Isolating changes prevents a lucky result from being mistaken for a better build.
- Respec only for a defined advantage. Change direction when the new plan solves a specific weakness or enables a clearly stronger combat loop, not merely because one item displays a larger number.
How to compare two builds
Use the same encounter, equipment level, and consumable assumptions for both versions. Then score the dimensions that determine real performance:
Do these 3 things before closing this tab:
1Clear out junk files and repair common Windows errors2Fix the driver behind crashes, sound loss and screen glitches3Repair Windows errors before they cause bigger problems| Axis | What to measure | Typical trade-off |
|---|---|---|
| Survivability | Hits survived, mitigation, healing demand, and recovery after mistakes | More defense can reduce damage, burden, or resource capacity. |
| Damage profile | Damage per hit, sustained damage, burst window, and damage-over-time uptime | High burst may have long recovery or poor performance against groups. |
| Resource economy | Uses before depletion and time needed to recover | Expensive skills can be stronger but less consistent. |
| Mobility and load | Dodge tier, sprint stamina, repositioning speed, and attack recovery | Heavier gear may improve defense while making openings harder to exploit. |
| Execution difficulty | Number of conditions, timing precision, and punishment for mistakes | A complex rotation can outperform a simple one in expert hands but fail under pressure. |
| Gear dependence | Need for rare drops, maximum upgrades, or specific passives | A peak build may be weaker during ordinary progression. |
| Encounter coverage | Bosses, groups, ranged enemies, resistant targets, and interruptions | Specialization improves one matchup while creating blind spots. |
| Respec friction | Currency, materials, level restrictions, and time needed to rebuild | A flexible build can be more valuable when experimentation is expensive. |
When a respec is worth the cost
Good reasons to respec
- Your chosen weapon or skill has a scaling pattern that does not match your current attributes.
- You have reached a softcap and can move points to health, resource capacity, stamina, or a useful requirement.
- A new item or skill enables a complete rotation rather than a single larger hit.
- Your current plan fails a recurring encounter because it lacks range, crowd control, mobility, or a damage type.
- Your play style has changed and the old timing or execution demands are no longer enjoyable or reliable.
Reasons to wait
- You are reacting to one disappointing drop instead of a complete equipment and skill plan.
- The proposed change fixes a tooltip number but lowers survivability, mobility, or resource uptime.
- You cannot yet meet the new build’s requirements or obtain its essential gear.
- The game’s respec currency is scarce and you have not tested the replacement in a low-risk area.
Blizzard’s Diablo IV design update described the intended balance clearly: respecs should be easy enough early in a character’s life to encourage experimentation, but increasingly costly as the character grows so established choices retain meaning. Treat that cost as part of the build decision. Keep a written target for the new allocation, the gear it requires, and the encounter it is meant to improve.
Common buildcrafting mistakes and fixes
Chasing one damage number
Symptom: The character shows high attack power but dies before finishing a rotation or runs out of resources. Fix: Test sustained output, resource use, and survival in the same encounter; then add the smallest defensive or recovery investment that removes the failure.
Spreading attributes across every option
Symptom: Many weapons are technically usable, but none receives meaningful scaling. Fix: Choose one primary scaling family and one secondary only when a specific requirement or effect justifies it.
Ignoring burden and recovery
Symptom: A heavier item adds defense but causes missed dodges, slower attacks, or exhausted stamina. Fix: Check the game’s load and recovery breakpoints before accepting the upgrade.
The Tool Desk
Outbyte PC Repair FREERepair Windows errors before they cause bigger problemsFix Now →Outbyte Driver Updater FREEFix the driver behind crashes, sound loss and screen glitchesFind Drivers →Assuming rarity guarantees superiority
Symptom: A rare item performs worse because its passive never activates or its scaling conflicts with your stats. Fix: Compare triggered effects, scaling, damage type, and upgrade path against your actual rotation.
Respeccing without a test plan
Symptom: Several changes happen at once and it is impossible to tell what helped. Fix: Define the intended combat outcome, change the allocation to support it, and test the same representative targets before and after.
The principles that transfer between games
- A point matters because of the resource, requirement, breakpoint, or scaling it unlocks; attributes are not equally valuable at every level.
- Skills are valuable only when your resource pool, timing, and equipment let you use them repeatedly.
- Gear should be judged by synergy and upgrade potential, not rarity color alone.
- Softcaps make later points less efficient, so redirecting investment can improve the complete character.
- Respecs support experimentation, but their cost makes a deliberate plan better than constant reaction.
The formulas and thresholds are always game-specific. Elden Ring’s attribute values, FP system, Ashes compatibility, and equipment-load percentages are examples from that game; Diablo IV’s respec economy is an example of a different design. Check the current version’s descriptions and patch notes before treating any number as universal.
Quick Recap
Product prices and availability are accurate as of the date/time indicated and are subject to change. Any price and availability information displayed on Amazon at the time of purchase will apply.
What’s actually slowing this PC down?
Pick the symptom - the matching free tool is one click away.

