Free tools Windows power users keep installed
One-click scans. No signup required.
For most first-week survivors, the best base location in 7 Days to Die is a compact, repairable point of interest (POI) in or just outside a Pine Forest town. Choose a building with a roof, few entrances, nearby flat ground, road access, and a short trip to the biome’s trader. You get manageable early-game pressure without giving up quests, loot, water runs, or routes into harder biomes.
When you are ready to run a 7 Days to Die server, Godlike.Host provides a game panel, free DDoS protection, and up to three free backups a day with restore.
| # | Preview | Product | Price | |
|---|---|---|---|---|
| 1 |

|
7 Days to Die – Console Edition Survival Bundle - PlayStation 5 | $47.00 | Buy on Amazon |
| 2 |

|
7 Days to Die – Console Edition - Xbox Series X | $44.99 | Buy on Amazon |
| 3 |

|
7 Days to Die (PS4) | $23.01 | Buy on Amazon |
| 4 |
|
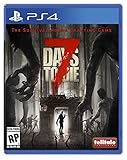
7 Days to Die - PlayStation 4 | $36.21 | Buy on Amazon |
| 5 |

|
7 Days to Die - Xbox One (Renewed) | $39.07 | Buy on Amazon |
As an Amazon Associate I earn from qualifying purchases.
Do not move into the trader compound itself. The official Traders page states that it cannot be modified and that players are removed at closing time. Treat it as a service hub, not a home or horde base.
What’s actually slowing this PC down?
Pick the symptom - the matching free tool is one click away.
The decision in one minute
Pick a location that solves five problems at the same time: it can be defended and repaired, it is close enough to a trader and town loot to save travel time, its biome does not overwhelm your current gear, roads make exploration practical, and the surrounding land can hold storage, crafting, a farm, vehicles, and a later horde structure.
#1 Best Overall
- Explore – Huge, rich environments, with unique biomes and worlds up to 100 square kilometres in size.
- Craft – Handcraft and repair weapons, clothes, armour, tools, vehicles, with hundreds of recipes and schematics.
- Build – Design your fort with traps, electricity, auto turrets, and gadgets to survive in a fully destructible and mouldable world.
- Cooperate or Compete – Work together to build settlements or against each other in a wasteland where zombies and outlaws rule the land.
- A must-have for collectors and fans of Open-World Survival Horror, the 7 Days to Die – Console Edition Survival Bundle includes the following: An exclusive Artbook with over 100 pages showcasing never-before-seen illustrations of the zombie apocalypse, a CD featuring the haunting Original Soundtrack (OST) of the game, a double-sided poster, Fine art prints x3, Sticker sheets x 3, the physical game, and a collectible tuck-in box housing all the contents.
For days 1–7, rank those needs in that order. A spectacular late-game city is usually a poor first home if every repair attracts danger or every supply run becomes a long expedition. A modest house or service building near a Pine Forest town gives you time to learn the map and improve your equipment before committing to a permanent design.
What makes a location good
Defensibility and repair workload
Inspect the building as a structure, not as a visual landmark. Fewer entrances mean fewer approaches to secure. A roof gives you a controlled upper position and keeps the first defensive work focused. Thick, intact sections are preferable to long walls with many windows or thin exterior panels. Every damaged block becomes a repair task, so a smaller footprint often outperforms a larger building during the opening week.
Trader and loot access
Short trips matter because early survivors spend time carrying loot, completing quests, buying supplies, and returning before night or a horde event. A base near a town keeps several POIs within one run; a base near a trader reduces the time needed for selling, buying, and quest turn-ins. The ideal site is close to both without sitting directly inside the trader compound.
Recommended Free Tools
Biome pressure
Biome choice changes how much survival attention you can devote to construction. Pine Forest is the forgiving default for a new character. Desert, Snow, and Wasteland locations can be worthwhile, but they should be deliberate progression choices rather than accidental moves made because a building looked convenient.
Roads and travel routes
Road access is more valuable than a few extra storage squares. Roads connect towns, traders, resource areas, and biome borders, making the same base useful as your range expands. In a random world, examine the actual roads and intersections you rolled instead of assuming a guide’s coordinate will reproduce.
Expansion room
Leave space outside the POI for containers, workstations, a farm plot, vehicle parking, and a separate horde-defense project. A building can be excellent for sleeping and crafting yet unsuitable for the long term if every adjacent tile is occupied, steep, or exposed.
Best base patterns by location
Pine Forest town edge: the strongest first-week default
Search the edge of a Pine Forest town for a small house, gas station, or similarly compact POI. The best candidates have a roof, limited entrances, and flat land nearby. Being just outside the densest streets can reduce the number of directions you must watch while keeping town loot and the trader close.
Rank #2
- Explore – Huge, rich environments, with unique biomes and worlds up to 100 square kilometres in size.
- Craft – Handcraft and repair weapons, clothes, armour, tools, vehicles, with hundreds of recipes and schematics.
- Build – Design your fort with traps, electricity, auto turrets, and gadgets to survive in a fully destructible and mouldable world.
- Cooperate or Compete – Work together to build settlements or against each other in a wasteland where zombies and outlaws rule the land.
- Farm or Hunt – Plant gardens for sustainable resources or head out to the wilderness and hunt over a dozen unique animals.
A gas station is a practical temporary conversion for roughly the first 5–10 days. It offers a recognizable, compact shell and useful road visibility, but its walls may be thin, traffic can see the building from the road, and the site may not leave much room for later expansion. Before committing, identify every entrance, roof route, blind corner, and vulnerable wall rather than assuming the building is safe because it is already standing.
Desert roadside or town edge: roads and utility POIs
The Desert is attractive when your priority is open sightlines, road access, and utility-style buildings. The official Desert page lists gas stations, campsites, water towers, barns, and ghost towns along roads. Those landmarks can make navigation and supply planning straightforward.
Trader Bob specializes in tools and vehicle parts in the Desert, which can support a player prioritizing construction equipment or mobility. The trade-off is greater environmental and combat pressure than the Pine Forest default. Use a Desert site when the route, terrain, and your equipment justify that pressure—not merely because the building has more floor space.
Snow town or city edge: a progression base
A Snow location suits a player who can handle harsher conditions and wants access to higher-pressure loot areas. Trader Hugh specializes in weapons and ammunition there. Exact risk values are version-dependent unless the current build documents them, so judge the actual map, weather, enemy pressure, and your supplies rather than applying an old numeric rule.
Snow bases work well as a second-stage move or a specialized outpost. If you use one early, keep the first structure compact and maintain a clearly marked return route to safer supplies.
Wasteland urban edge: high reward, high commitment
A Wasteland urban edge concentrates valuable points of interest but imposes severe survival pressure. Trader Joel specializes in armor in the Wasteland. This is a late-game or high-risk choice, not a sensible default shelter for a fresh character.
Never assume an unmodified urban POI will survive a horde. If you settle there, build a separate, deliberately engineered horde defense and use the POI primarily for living, storage, or loot staging.
Rank #3
- Unlimited hours of gameplay
- Explore - Huge, unique and rich environments, offering the freedom to play the game however you want
- Craft - craft and repair weapons, clothes, armour, tools, vehicles, and more
- Build - Take over a ruin, or build from the ground-up. Design your fortress to include traps and defensive positions to survive the undead
- Cooperate or Compete - Includes two player split screen mode, with support for up to 4 players online, in Player versus Player, co-op survival, or co-op creative modes
Biome border or crossroads: the long-term compromise
In a random world, a town near a biome border or crossroads can become the best long-term headquarters. Favor a trader and roads leading toward at least two biomes, then inspect the generated terrain for flat building space and a practical return path. World generation changes the exact layout, so the map you actually rolled is more important than a universal coordinate.
Starter-location comparison
| Location pattern | Best use | Advantages | Main liabilities | Recommended timing |
|---|---|---|---|---|
| Pine Forest town edge | First home and early crafting base | Manageable pressure, nearby quests and loot, straightforward roads | Starter POIs may have thin walls, road visibility, and limited expansion | Days 1–7 |
| Desert roadside or town edge | Utility-focused base or mobility staging point | Open sightlines, roads, gas stations, campsites, water towers, barns, and ghost towns | More environmental pressure; utility buildings still need inspection and reinforcement | Early alternative or first move |
| Snow town or city edge | Progression base near higher-pressure loot | Access to Snow loot areas and a weapons-and-ammunition trader | Harsher conditions; exact risk depends on the current build and map | After early gear improves |
| Wasteland urban edge | Late-game loot headquarters | Dense, valuable points of interest and an armor-focused trader | Severe survival pressure; an unmodified POI is not a dependable horde defense | Late game or specialist play |
| Biome border or crossroads | Long-term headquarters | Routes toward multiple biomes and better logistics | Generation-dependent; some crossroads have poor terrain or awkward trader distance | When the generated map supports it |
Should you live near the trader?
Yes, but “near” means a convenient trip, not inside the compound. The trader saves time on buying, selling, and quests, while the surrounding town supplies repeatable loot targets. Build far enough away to have room for your own blocks and defensive layout.
The official trader specialties are:
| Trader | Biome | Specialty |
|---|---|---|
| Rekt | Pine Forest | Food and seeds |
| Jen | Burnt Forest | Medical supplies |
| Bob | Desert | Tools and vehicle parts |
| Hugh | Snow | Weapons and ammunition |
| Joel | Wasteland | Armor |
These specialties can influence a relocation decision. For example, a player building around vehicles may value Bob’s Desert location, while a player filling armor gaps may eventually prefer Joel’s Wasteland region. The specialty should refine your choice after defensibility and travel time—not override them.
Why the trader compound is not a base
The official 7 Days to Die Wiki’s Traders page puts the limitation plainly: “The compound cannot be used as the base as the player cannot place or destroy any blocks and is kicked out at closing time.” You cannot remodel it, add your own defenses, or remain there after closing. Store the trader on your route, but place your bedroll, storage, crafting stations, and defensive construction elsewhere.
How to inspect a candidate in the first week
Do this before moving all your supplies. The inspection takes less time than rebuilding after discovering a basement entrance or an exposed rear wall.
- Circle the entire exterior. Find thin walls, damaged sections, basement openings, roof access, windows, side doors, and blind corners. Mark every route an enemy could use to reach the interior.
- Enter from each available approach. Check whether doors, stairs, ladders, and internal corridors funnel movement toward a room you can actually defend. Note any route that bypasses your planned sleeping or crafting area.
- Check the roof and upper levels. Confirm that you can reach the roof safely and that the roof has enough sound surface for an observation or retreat position. Do not treat roof access as a complete horde strategy.
- Place a provisional bedroll or land claim and test the layout. Make sure your storage and workstations fit without blocking repair paths, doors, stairs, or the route you will use to leave during an emergency.
- Measure practical travel time. Walk the real route to the trader, town center, water, and a mine or resource area. Straight-line distance can be misleading when roads, elevation, or blocked streets force a detour.
- Reserve expansion ground. Identify space for a farm plot, vehicle parking, outdoor storage, and a future horde structure. If none exists, classify the POI as temporary housing or an outpost.
- Choose its role explicitly. Label it a temporary living base, permanent crafting base, or outpost. A clear role prevents you from spending permanent-building effort on a shelter you will abandon.
Turning a POI into a useful starter base
Secure the perimeter before decorating
Repair the most exposed approach first, then control entrances and remove surprises such as open basement access or an unobserved rear door. Keep a clear repair route so you can reach damaged blocks without crossing your own storage or workstation area.
Separate living, crafting, and emergency movement
Put sleeping and essential storage where you can reach them quickly, but do not create a single cramped room that becomes impossible to repair. Leave a deliberate path from the interior to the outside and a second route to a roof or fallback position when the POI permits one.
Rank #4
- Explore & Craft - Huge, unique and rich environments, offering the freedom to play the game any way you want while you craft and repair weapons, clothes, armor, tools, vehicles, and more.
- Build - Take over a ruin, or build from the ground-up. Design your fortress to include traps and defensive positions to survive the undead - the world is fully destructible and moldable.
- Cooperate or Compete - Includes two player split screen mode, with additional online multiplayer modes and features to be revealed in the near future.
- Create - Unleash your creativity and build the ultimate world by yourself friends. Enjoy unlimited access to nearly 400 in-game items and 1,200 unique building blocks in creative mode.
- Improve - Increase your skills in a multitude of active and passive disciplines. 7 to Die is the only true survival RPG with nearly 50 multi-tiered skill and perk groups.
Use nearby flat land deliberately
Flat space is a logistics asset. Assign separate areas for farming, parking, material staging, and a future horde build. Avoid filling every open tile with decorative blocks during the first week; expansion space is harder to replace than furniture.
Keep a temporary base temporary
A gas station or small house can carry you through the opening days without becoming your final headquarters. Store only what you need for the move in a clearly labeled cache, and avoid an expensive redesign if the site fails the expansion or horde-defense test.
Quick wins for a faster PC:
Scan for outdated or missing drivers - takes under a minuteDriver Scan →Repair Windows errors before they cause bigger problemsFix Now →Where is the safest place for a horde base?
Do not equate “best starter base” with “best horde base.” A living POI optimized for storage and convenience may have thin walls, blind approaches, or a roof that cannot sustain repeated attacks. The safer plan is to select housing for daily logistics and build a separate horde structure nearby after you understand the terrain.
- Choose a location with room to approach, repair, and retreat without crossing your storage area.
- Keep the horde structure close enough for a short trip but far enough that a failure does not destroy your home and supplies together.
- Use the POI inspection to identify threats, not to assume the existing building is engineered for sustained attacks.
- Reassess the design whenever you move into a harsher biome or begin attracting stronger pressure.
Navezgane or random generation?
Navezgane
Navezgane offers a known geography, so you can plan around established towns, roads, biomes, and trader placements shown in the official table. That predictability helps a new player practice route planning and compare a few candidate regions.
Random generation
Random worlds reward the evaluation method more than memorized coordinates. Roads, town edges, biome borders, and trader distance vary with the generated map. Use the five comparison axes and the inspection checklist on the world in front of you; do not assume that a location recommended for another seed exists in yours.
Which should a first-week player choose?
Choose Navezgane if you value a known route and want to learn a stable layout. Choose random generation if you prefer exploration and are willing to inspect several candidates before settling. In either mode, the building’s condition and logistics matter more than its name on the map.
Do these 3 things before closing this tab:
1Repair Windows errors before they cause bigger problems2Scan for outdated or missing drivers - takes under a minute3Clear out junk files and repair common Windows errorsA practical seven-day base plan
Day 1: establish mobility
Find a compact shelter near a Pine Forest town or a road-connected alternative. Secure a sleeping position, basic storage, and a route to the trader. Do not spend the day on cosmetic rebuilding.
Best Value
- Explore & Craft - Huge, unique and rich environments, offering the freedom to play the game any way you want while you craft and repair weapons, clothes, armor, tools, vehicles, and more.
- Build - Take over a ruin, or build from the ground-up. Design your fortress to include traps and defensive positions to survive the undead - the world is fully destructible and moldable.
- Cooperate or Compete - Includes two player split screen mode, with additional online multiplayer modes and features to be revealed in the near future.
- Create - Unleash your creativity and build the ultimate world by yourself friends. Enjoy unlimited access to nearly 400 in-game items and 1,200 unique building blocks in creative mode.
- Improve - Increase your skills in a multitude of active and passive disciplines. 7 to Die is the only true survival RPG with nearly 50 multi-tiered skill and perk groups.
Days 2–3: inspect and stabilize
Complete the exterior walk, identify every entrance and blind corner, and repair the most vulnerable sections. Confirm that the site has room for a farm, vehicle, and a separate defensive project before investing heavily.
Days 4–5: connect the logistics
Run the actual routes to the trader, town loot, water, and a resource area. Organize storage around the return path so each trip can be unloaded quickly. If the travel time is impractical, move while your inventory is still small.
Days 6–7: decide the base’s lifespan
Classify the site as temporary, permanent, or outpost. A permanent choice should have expansion ground and a workable route to more than one resource or biome area. A temporary choice should receive only repairs that improve immediate survival.
The Tool Desk
Outbyte Driver Updater FREEFix the driver behind crashes, sound loss and screen glitchesFind Drivers →Outbyte PC Repair FREERepair Windows errors before they cause bigger problemsFix Now →Common mistakes and fixes
Building inside the trader compound
Symptom: You cannot place or destroy blocks and are removed at closing. Fix: Move your living and crafting setup to a nearby POI; use the compound only for trader services.
Choosing floor space over repairability
Symptom: A large building consumes time and materials because it has many entrances or thin walls. Fix: Prefer a smaller shell with fewer approaches, even if you must keep some supplies outside temporarily.
Ignoring the generated road network
Symptom: Every trader or loot run takes longer than expected. Fix: Measure the real route and relocate toward a road, crossroads, or biome border with better connections.
Using a living POI as the only horde defense
Symptom: Your home’s storage and sleeping area are exposed to the same attack path. Fix: Plan a separate horde structure and keep it close enough to reach without making your home part of the failure chain.
PC Slower Than It Used to Be?
A free scan shows the junk files, broken settings and background clutter dragging Windows down - then fixes them in one click.Free scan · Windows 10 & 11Outdated Drivers Are Slowing You Down
One free scan finds every outdated or missing driver and matches the right update for your exact hardware.Free scan · exact hardware matchMoving to a harder biome for the wrong reason
Symptom: The new location offers attractive loot but consumes your supplies and repair time. Fix: Treat Snow and Wasteland sites as progression choices; return to a safer logistics base until your equipment and route planning support the move.
Final selection checklist
- Is the POI compact, roofed, and repairable?
- Have you walked the entire exterior and identified every entrance, basement opening, roof route, thin wall, and blind corner?
- Can you reach the trader and town loot by a practical road route?
- Does the biome match your current supplies and combat readiness?
- Is there room for farming, vehicle parking, storage, and a separate horde structure?
- Have you decided whether this is temporary housing, a permanent crafting base, or an outpost?
- If the world is randomly generated, did you judge the actual map rather than rely on a memorized coordinate?
The strongest first-week choice is therefore not a famous coordinate or a single “best” building. It is a compact POI whose defenses, trader route, biome pressure, and expansion ground all fit the character you have now. Start in the Pine Forest when you want the most forgiving margin, then use roads and biome borders to decide when a larger or harder-region headquarters is worth the risk.
Quick Recap
Product prices and availability are accurate as of the date/time indicated and are subject to change. Any price and availability information displayed on Amazon at the time of purchase will apply.

