Free tools Windows power users keep installed
One-click scans. No signup required.
A black screen right after a BIOS update is unnerving, but it’s also a pattern with clear causes: the system may be stuck on a bad display output path, a CMOS setting may be out of sync, or the BIOS flash may not have completed cleanly. In many cases, the fix is mechanical (cable/CMOS/RAM seating) and only a subset requires reflashing.
This guide walks you through five fixes in a safe order: start with the simplest hardware/display checks, then reset CMOS, then remove variables, and only then reflash or restore defaults. You’ll also get troubleshooting steps for the “still black” cases and a short list of mistakes to avoid.
As an Amazon Associate I earn from qualifying purchases.
What a Black Screen After a BIOS Update Usually Means
BIOS updates can change boot behavior, video initialization, memory training, and storage compatibility. When the screen stays black, the issue is often one of these:
- Display output mismatch: the BIOS now prefers a different GPU/port, or you’re plugged into the wrong video connector.
- CMOS settings drift: custom boot mode (CSM/UEFI), secure boot, XMP/EXPO, or boot order no longer matches your hardware.
- Bad or incomplete BIOS flash: the update didn’t verify, and recovery/rollback is needed.
- Memory training or stability issue: a setting like XMP can cause no-post or a hang before video output.
- Hardware initialization problem: loose RAM/GPU, a failing PCIe device, or incompatible add-in card.
Before You Change Anything: Quick Checks That Prevent Wasted Time
Before you reset CMOS or open the case, do these fast checks. They resolve a surprising number of “black screen” cases after BIOS changes.
#1 Best Overall

- 【32G FAT32 format with sufficient capacity】32G USB2.0 flash driver with 29.2-30GB of storage space,The Thumb Drives can be extensively used for Digital Data Storing, Transferring and Sharing. Save Data in Form of Music, Photos, Movies, Designs, Manuals, Programs, Handouts; MP3, MP4, RMVB, EXCEL, WORD, PDF and all other possible formats. a perfect memory choice
- 【Easy to Use, Plug and Play】 No need to install any software, just plug the USB flash drive into your computer USB port or other device with USB port to get it work
- 【Full Compatiblility】Strong compatibility, compatible with your video capture card, cassette player,computer, etc. support windows 7 / 8 / 10 / Vista / XP / 2000 / ME / NT Linux and Mac OS, compatible with USB2.0 and below
- 【Simple and Portable Design】New Sleek and easy-to-carry design with a string attachment slot available.The top cap design can protect the usb interface and greatly reduce the oxidation,Made of plastic ABC with clean and neat appearance, portable and lightweight, sleek and slim make them a great choice for your friends. Ends with hang rope design for key chains or lanyards, You can take your digital world anywhere without worrying about losing the pen drive
- 【Led Indicator】The red light flash when have data transfer. You can easily know whether the drive is working. When you connect your capture card or cassette player to record, the indicator light will be on to better remind the work status
- Wait time: some boards take longer after BIOS updates (especially with memory training). If you were just flashing yesterday, give it 2–5 minutes once.
- Monitor input: confirm the monitor input matches the cable (HDMI/DisplayPort). If you have multiple inputs, switch explicitly.
- Status LEDs / beeps: watch the motherboard’s Q-LED / debug LED (CPU/DRAM/VGA/BOOT). The label tells you where the boot process stalls.
- HDMI/DP cable integrity: try a different port on the monitor, or a different cable if you have one.
Fix 1: Confirm the Display Path (Cable, Input Source, GPU vs iGPU)
After a BIOS update, the system may not select the same graphics path as before. If you’re using a desktop with a dedicated GPU, make sure the physical connection matches what the motherboard is now using.
Check the cable and monitor input
Power the PC off, reseat the cable firmly, and then power on. On the monitor, use the physical buttons to select the exact input (HDMI 1 vs HDMI 2, DisplayPort 1, etc.).
Try the other video output
If your motherboard has video ports and you’re currently plugged into the GPU, temporarily connect the monitor to the motherboard’s video output (HDMI/DisplayPort) only if your CPU has integrated graphics. If you previously used motherboard output, try the GPU instead.
Quick wins for a faster PC:
Clear out junk files and repair common Windows errorsFree Scan →Scan for outdated or missing drivers - takes under a minuteDriver Scan →Repair Windows errors before they cause bigger problemsFix Now →- Using iGPU: plug into the motherboard port and remove/disable the discrete GPU temporarily if the board allows it.
- Using dGPU: plug into the GPU (not the motherboard), and ensure the GPU power cables are fully seated.
Remove extra display adapters briefly
If you use a capture card, docking station, or unusual adapter, disconnect it. Test with a direct HDMI or DisplayPort cable from the primary GPU/port.
Fix 2: Power-Cycle Correctly and Reset CMOS
CMOS reset clears settings that can block boot after a BIOS update—especially boot mode, secure boot flags, and memory profiles. Do this carefully so you don’t leave standby power in the system.
Rank #2

- STRICT QUALITY CONTROL: Our FAT32 USB 3.0 flash drives 32GB are made of original and stable A+chip, and have been double-tested by our H5 quality-checking device before shipping, with a lifetime of up to 100,000 cycles
- USB 3.0 ULTRA TRANSFER SPEED: The read transfer speeds up to 90-105MB/s, and write speeds up to 30-40MB/s. 10X faster over a USB 2.0 flash drive. The extra USB C adapter also has a USB 3.0 port
- METAL DESIGN & ADDITIONAL ACCESSORIES: Highly textured metal material is utilized for faster heat dissipation, featuring a twill design with an anti-slip feature. The USB C adapter is tiny and easy to carry. Best choice for commercial, school, wedding, exhibition, photography
- WIDE COMPATIBILITY: Backward-compatible with USB 3.0/2.0/1.1 (Default format: fat32). Support Windows, Mac OS, and Linux systems, suitable for any device with a USB port, including PCs, Macs, laptops, TVs, cars, and cassette players. To avoid errors, please format the USB drive on your device before using it
- WHAT WILL YOU GET: 1PCS 32GB FAT32 USB 3.0 drive, 1PCS USB C 3.0 adapter,1PCS key chain.
Standard CMOS clear (most desktops)
- Shut down the PC fully.
- Unplug the power cord from the wall and switch off the PSU (flip the PSU I/O switch to 0 if present).
- Press and hold the PC power button for 10–20 seconds to discharge capacitors.
- Locate the CMOS clear header or button on the motherboard (often labeled CLR_CMOS, JBAT, or similar).
- Use the jumper as instructed by the board’s silkscreen: move the jumper to the clear position for ~5–10 seconds, then return it.
- Plug power back in, connect the monitor, and power on.
CMOS battery pull (if there’s no jumper)
- With the PC unplugged and the PSU switch off, remove the CMOS battery (coin-cell) carefully.
- Wait 5–10 minutes to let the board discharge fully.
- Reinstall the battery with correct polarity (+ up, per the marking).
- Power on and test.
Laptop note
Laptops rarely support a user CMOS clear. If a laptop has a black screen after BIOS update, use the manufacturer’s recovery method (often an embedded controller procedure or service firmware recovery). In that case, Fix 4 (reflash/recovery) is usually the correct path.
Fix 3: Reseat or Remove Hardware to Restore a Known-Good Boot
BIOS updates can change memory training behavior. If the system gets stuck early, reseating and reducing configuration to the minimum often restores video output.
Reseat RAM and confirm slot usage
- Power off and unplug the PC.
- Remove and reinstall each RAM stick firmly (you should hear/feel the click).
- If you have 2 sticks, try them in the motherboard’s recommended first slots (often labeled A2/B2; check the manual).
- If you have 4 sticks, test with only 1 stick first.
Reseat or temporarily remove the GPU
- Unplug power and remove the GPU.
- Reseat it and reconnect PCIe power cables.
- If the board supports it and you have an iGPU, try without the GPU to test whether the hang is GPU-related.
Remove non-essential peripherals
Disconnect USB devices, capture cards, extra NVMe drives, and internal USB headers for audio cards. Leave only: CPU (already), RAM (minimal), GPU (or iGPU), one boot drive, and power.
Watch the debug LEDs
If your motherboard shows a stage like DRAM or VGA for a long time, you’ve narrowed the fault domain. DRAM stalls point toward RAM seating/XMP; VGA stalls point toward GPU/output settings.
Fix 4: Boot Recovery / Flash BIOS Again Using the Manufacturer’s Tool
If the BIOS update failed or won’t POST, recovery flashing is often the real fix. Many boards include a “BIOS Flashback” USB port, “CrashFree BIOS,” or an automated recovery mode.
Rank #3

- 【16GB Flash Drive】USB flash drives with 16GB capacity, meet your needs of daily use on work, school, home and travelling for photos, music, videos, files storage and transfer. IMEASON thumb drives can be used to store different files, easy to data backup.
- 【Metal Swivel Cap Design】USB thumb drive is metal swivel cover provides extra protection for the usb thumbdrive connector, no usb drive cap to lose; keychain design makes it easier to carry without worrying lose it.
- 【Wide Compatibility】USB drive supports Windows 7/8/10/11 / Vista / XP / Unix / 2000 / ME / NT Linux and Mac OS, also Supports USB 2.0 and 1.1 ports. USB Stick support TV, desktop, notebook computer, car, audio and other device. The USB Memory Stick is your great data storage and transfer companion with traveling and working.
- 【Easy to use】usb memory stick is plug and play without any software installation. Just simply plug the Flashdrive into the port of your USB-compatible devices such as computer, laptop to start data storage or transmission.
- 【What You Get】16 GB USB Flash Drive Thumb Drive, The default format of the usb storage flash drive is FAT32.
Identify your board’s recovery method
Look for these common features (names vary by brand):
What’s actually slowing this PC down?
Pick the symptom - the matching free tool is one click away.
- USB BIOS Flashback / BIOS Flashback (often a dedicated rear USB port and a button).
- Q-Flash Plus (ASUS-style phrasing varies by model).
- CrashFree BIOS (ASUS).
- BIOS recovery from USB with a specific filename and folder structure.
General safe reflash workflow (adapt to your brand)
- Use a known-good USB flash drive (commonly 8GB or less, formatted to FAT32).
- Download the exact BIOS version matching your motherboard model from the manufacturer site.
- Copy the BIOS file onto the USB and follow the exact filename rules from the board’s recovery guide (some require a specific name like
CREATIVE.rom—yours will differ). - Insert the USB into the specified port (often the BIOS Flashback port).
- Power on (or keep power off, depending on the method), then press and hold the recovery button as directed.
- Wait for the status light to change or stop flashing; do not interrupt power.
- After completion, remove USB, connect monitor, and boot.
Rollback the BIOS version if the new one is the trigger
If you updated to version X and the black screen started immediately, reflash to version X-1 (previous stable) if your manufacturer provides it. BIOS regressions do happen, and a rollback avoids repeated recovery cycles.
Important: don’t rely on Windows-based flashing if you’re already stuck
If your PC can’t reliably POST, a Windows flasher (like a vendor app inside Windows) won’t help much. Use the hardware recovery tool because it works without booting the OS.
Fix 5: Restore BIOS Defaults and Undo Risky Settings
If the system does reach a BIOS screen (even briefly), you can often fix the black screen by resetting the configuration that changed or didn’t carry over from the old BIOS.
Set BIOS defaults
- Power on and immediately start pressing the BIOS key (commonly Del or F2 depending on the board).
- Choose an option like Load Optimized Defaults, Load Default Settings, or Clear BIOS.
- Save and reboot.
Common settings to review after an update
These toggles frequently cause “no video” or boot hangs when they change behavior across BIOS versions:
Do these 3 things before closing this tab:
1Repair Windows errors before they cause bigger problems2Scan for outdated or missing drivers - takes under a minute3Clear out junk files and repair common Windows errorsRank #4
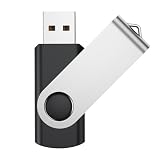
- Universal Drives: USB storage memory can be used in computers, TV, speaker, computer, notebook, car audio, and other USB devices. Support Windows 7/8/10, Windows Vista, Windows 2000, Mac OS X, Linux, etc
- Great for All Ages and Purposes: This USB flash drive is suitable for storing digital data for school, business, or daily usage. Apply to data storage of music, photos, movies, and other files. Apply to data storage of music, photos, movies, and other files
- Fashion and Convenience: Thumb drive with 360° swivel protect USB connector. Portable and lightweight. Easily to attach in your key chain, backpack, lanyard. Safety and easy carrying
- LED Indicator Design: The bottom of the usb drive has one red LED light; Let you know the flash drive is working
- All of jump drives have been rigorously tested and formatted before leaving the factory; The default format of the usb stick is exFAT
- Boot mode: UEFI vs CSM/Legacy. If your drive was installed in one mode, switching can break boot.
- Secure Boot: enable/disable based on your OS install and keys.
- XMP/EXPO: try disabling XMP/EXPO temporarily, then test stability after you’re back to booting.
- Resizable BAR and PCIe settings: defaults can affect certain GPUs.
- Fast Boot: disabling it can restore a normal boot sequence and video init.
Update settings in a controlled order
Once you can boot to the OS, re-enable XMP/EXPO one change at a time. If you re-enable multiple settings at once and you break boot again, troubleshooting becomes guesswork.
Independent reader supportYour contribution helps us test, update, and keep practical guides available for everyone.When None of the Fixes Work: Escalation Steps
If you still get a black screen after trying display checks, CMOS reset, minimal hardware, and at least one recovery reflash, the problem may be deeper: a corrupted BIOS write, a failing component, or a mismatch between BIOS and hardware revision.
- Test one CPU and one RAM stick if possible (or try a known-good compatible RAM kit).
- Try another GPU if you can borrow one, especially if your debug LED shows VGA.
- Inspect the motherboard: look for swollen capacitors, obvious damage, or loose power connectors (24-pin and 8-pin CPU).
- Check BIOS update prerequisites: some boards require a specific BIOS to be installed before later versions.
- Contact the manufacturer: provide the exact BIOS version, board model, and what the debug LEDs indicate.
If your board has a removable/dual-BIOS feature, prefer the backup BIOS chip. If it’s a prebuilt PC, prioritize the vendor’s exact recovery instructions over generic methods.
Common Mistakes That Make It Worse
- Interrupting a BIOS recovery flash due to power loss or impatience. Keep the system on a reliable outlet or UPS.
- Flashing the wrong BIOS file (wrong model revision). Always verify the exact motherboard model and revision.
- Leaving XMP/EXPO enabled after a BIOS update when the board can’t train memory.
- Plugging the monitor into the wrong port (common when a system switches between iGPU and dGPU).
- Trying multiple “big changes” at once (resetting CMOS, changing drives, reseating parts, then reflashing). Change one variable, test, then proceed.
FAQs
Is a black screen after BIOS update always a failed flash?
No. Many cases are caused by output selection (wrong port), boot mode changes, or memory training issues. A recovery reflash is helpful only when you can’t POST or debug LEDs indicate a BIOS/boot stage stall.
How long should I wait for the first boot after updating BIOS?
Give it 2–5 minutes the first time, especially if the board is training memory. If the debug LED stays stuck on DRAM/VGA for many minutes with no activity, proceed with CMOS reset and hardware reduction.
Best Value

- [Package Offer]: 2 Pack USB 2.0 Flash Drive 32GB Available in 2 different colors - Black and Blue. The different colors can help you to store different content.
- [Plug and Play]: No need to install any software, Just plug in and use it. The metal clip rotates 360° round the ABS plastic body which. The capless design can avoid lossing of cap, and providing efficient protection to the USB port.
- [Compatibilty and Interface]: Supports Windows 7 / 8 / 10 / Vista / XP / 2000 / ME / NT Linux and Mac OS. Compatible with USB 2.0 and below. High speed USB 2.0, LED Indicator - Transfer status at a glance.
- [Suitable for All Uses and Data]: Suitable for storing digital data for school, business or daily usage. Apply to data storage of music, photos, movies, software, and other files.
- [Warranty Policy]: 12-month warranty, our products are of good quality and we promise that any problem about the product within one year since you buy, it will be guaranteed for free.
Can I use a different BIOS version to recover?
Often yes, but only within the correct model family and revision. Download from the manufacturer’s site for your exact motherboard model; some boards require specific stepping paths.
What if the motherboard has a BIOS Flashback button but it never finishes?
Try a different USB stick (format FAT32), ensure the BIOS filename matches the board’s requirements exactly, and use the exact specified USB port. If it still fails, the board may have a hardware fault or you may be using the wrong BIOS file.
Does this happen on laptops too?
It can, but fixes differ because you usually can’t do a user CMOS jumper reset. Laptop recovery typically uses the OEM’s firmware recovery procedure or service tools.
The Tool Desk
Outbyte PC Repair FREERepair Windows errors before they cause bigger problemsFix Now →Outbyte Driver Updater FREEScan for outdated or missing drivers - takes under a minuteDriver Scan →Bottom Line
A black screen after a BIOS update is usually fixable if you follow the right order: confirm the display path, reset CMOS properly, reduce hardware to a minimum, and only then use BIOS recovery/reflash or restore safe defaults. The motherboard’s debug LEDs are your best “map” for what to try next.
If you share your motherboard model, the BIOS version you updated from/to, and which debug LED (CPU/DRAM/VGA/BOOT) stays lit, you can narrow this down fast—and avoid repeated reflashes.
Quick Recap
Product prices and availability are accurate as of the date/time indicated and are subject to change. Any price and availability information displayed on Amazon at the time of purchase will apply.




