What’s actually slowing this PC down?
Pick the symptom - the matching free tool is one click away.
You can run a continuous YouTube playlist by having FFmpeg play and send your media, YouTube accept the feed at its ingest URL using your stream key, and—optionally—NGINX RTMP receive or relay the stream. NGINX is not required: FFmpeg can send directly to YouTube. If you do use NGINX, first choose a compatible RTMP module; the NGINX Plus module and the separate third-party arut module are not interchangeable.
This guide explains the architecture and setup checks without presenting a universal FFmpeg playlist-loop command: the right playback and looping method depends on your FFmpeg build and the media. Validate it with your actual files before relying on it unattended.
As an Amazon Associate I earn from qualifying purchases.
Choose the stream path
Decide whether NGINX has a job in your setup before installing it. FFmpeg is the playback and encoding process; YouTube Live provides the destination URL and stream key. NGINX RTMP can act as a local or remote RTMP ingest point or relay between FFmpeg and YouTube, but it does not create the playlist or replace the encoder.
| Path | How it works | Use it when |
|---|---|---|
| FFmpeg → YouTube | FFmpeg plays the media and sends the encoded stream straight to YouTube’s ingest URL with the stream key. | You do not need an intermediate RTMP endpoint or relay. |
| FFmpeg → NGINX RTMP → YouTube | FFmpeg publishes to an RTMP application on your NGINX server; NGINX relays that feed onward to YouTube. | Your design specifically needs an RTMP ingest or relay stage. This adds another service and configuration to operate. |
For either path, YouTube’s encoder workflow needs the server URL and key from Live Control Room. Prefer YouTube’s RTMPS endpoint when your sender supports it; YouTube recommends RTMPS as the encrypted extension of RTMP. See YouTube’s RTMPS guidance.
#1 Best Overall

- 【AMD Ryzen 5 3501U Mini PC For Enhanced Daily Performance】Powered by AMD Ryzen 5 3501U processor with 4 cores and 8 threads, this mini pc provides responsive performance for office applications, home entertainment, online learning, media playback, and everyday computing.
- 【16GB Memory & 512GB Storage With Expansion Options】Built with 16GB DDR4 RAM and 512GB PCIe 3.0 NVMe SSD, this mini computer provides more space for applications, files, videos, and daily content. Upgrade memory up to 32GB, expand SSD storage up to 2TB, or add a 2.5-inch HDD.
- 【Flexible Small Desktop Computer For Home Applications】This small desktop computer is designed for home office, streaming, personal server setups, digital entertainment, and light gaming. The upgraded memory helps support smoother operation when using more applications.
- 【Triple Display Setup & Flexible Connectivity】Dual HDMI ports and a full-function USB-C port support up to three displays. This micro pc offers convenient connectivity with WiFi 6, Bluetooth 5.3, Gigabit Ethernet, and multiple USB ports.
- 【Compact Mini Desktop With Space-Saving Design】Measuring only 5.0 × 4.4 × 1.6 inches, this small pc saves valuable desk space. VESA mount support allows installation behind compatible monitors, making it suitable for home offices and compact workspaces.
Select and install an NGINX RTMP module
Option A: NGINX Plus dynamic module
The official NGINX dynamic-module instructions describe the NGINX Plus package path. They are not generic installation instructions for every NGINX distribution or build. Confirm that your NGINX Plus version, operating system and package repository match the guide before installing. The documented flow installs the RTMP module package, loads ngx_rtmp_module.so in the NGINX configuration, checks the configuration with nginx -t, and reloads NGINX. Follow the current NGINX Plus RTMP dynamic-module guide for package and configuration details.
Option B: third-party arut module
arut/nginx-rtmp-module is a separate third-party project, not the NGINX Plus packaged module. Its compatibility and installation depend on the NGINX build and operating system you choose. Follow that project’s README for the build or installation method appropriate to your environment; do not apply the Plus package steps to it by assumption.
Before proceeding, record which NGINX binary and module you installed, how that module is loaded, and how you will update both. A module that cannot load into the installed NGINX build will prevent NGINX from starting or reloading successfully.
Rank #2

- 【AMD Ryzen 4300U True 4-Core CPU: Outperforms N95 & i3-10110U】KAMRUI P2 Mini PC is equipped with true 4-core AMD Ryzen 4300U processor built on advanced 7nm Zen2 architecture,This means you get consistent, unthrottled performance for hours on end, whether you’re running multiple browser tabs, streaming 4K content, or managing virtual machines. Compare that to Intel N95 (4 efficiency cores that throttle under load) or Intel i3-10110U (only 2 cores total), and the difference is night and day: The KAMRUI P2 AMD Ryzen 4300U (28W) is 40% faster than the Intel i3-10110U and 25% faster than the Intel N95 in multi-core tasks, ensuring smooth, lag-free performance even during heavy workloads.
- 【Integrated AMD Radeon Graphics: 2.5X Stronger for Tri 4K】The KAMRUI P2 AMD 4300U Mini PC have unlocked the full potential of the built-in AMD Radeon Vega 5 graphics with 28W power delivery, making it 2.5 times stronger than the Intel UHD graphics found in the N95 and i3-10110U. This means you can enjoy Tri 4K@60Hz displays without a single stutter, perfect for productivity setups, home theaters, or even light photo/video editing and casual gaming. While the Intel N95/i3-10110U struggle to run a single 4K display without lag, The KAMRUI AMD 4300U Mini PC handles Tri 4K effortlessly, turning your workspace into a high-efficiency hub or your living room into a premium entertainment center.
- 【Large Storage Capacity, Easy Expansion】KAMRUI Pinova P2 mini computers is equipped with 16GB LPDDR4 for faster multitasking and smooth application switching. 512GB M.2 SSD ensures fast startup, fast file transfers and plenty of storage space,eliminating slow loading times and ensuring fast responsiveness. the two storage slots (1x M.2 2280 SATA/NVMe PCIe3.0 slot, 1x M.2 2280 SATA slot) can be combined to provide up to 4TB of total storage(Not included). This gives you enough space for all your projects, media and data.
- 【4K Triple Display】KAMRUI Pinova P2 4300U mini desktop computers is equipped with HDMI2.0 ×1 +DP1.4 ×1+USB3.2 Gen2 Type-C ×1 interfaces for faster transmission, Triple 4K@60Hz Display, KAMRUI P2 mini computer is ideal for visual home entertainment, home office, conference rooms, etc. USB3.2 Gen2 Type-A port ×2 with a transfer speed of up to 10 Gbps (21 times faster than USB 2.0) for efficient data transfer. Ideal for seamless multitasking between spreadsheets, browsers and presentations, or for an immersive entertainment experience.
- 【USB3.2 Gen2 Type-C 10Gbps, Versatile connectivity】KAMRUI P2 mini desktop pc fast and versatile connectivity! The USB3.2 Gen2 Type-C port offers a data transfer rate of 10Gbps and simultaneously supports DisplayPort 1.4 video output. The P2 AMD Ryzen 4300U Mini PC is complemented by Gigabit LAN, WiFi and Bluetooth, so nothing stands in the way of a productive working environment.
Configure an RTMP application only if you use NGINX
With the arut module, an RTMP application is the named endpoint to which the publisher connects. The module’s directives include RTMP live-streaming configuration; consult its RTMP directives reference and the project README for syntax supported by your build. Configure the application and publishing permissions for your own deployment, then validate and reload NGINX before pointing FFmpeg at it.
Do not confuse RTMP ingest with NGINX’s separate HTTP HLS module. The latter serves HLS from MP4 or MOV files; it is not the RTMP module and is listed by nginx.org as part of its commercial subscription. See the NGINX HTTP HLS module documentation and NGINX technical specifications.
At this stage, your intended chain should be explicit: FFmpeg publishes to the configured NGINX RTMP application, and a relay configuration forwards the feed to YouTube. If you are not setting up that intermediate hop, skip NGINX and configure FFmpeg’s output for YouTube instead.
Rank #3
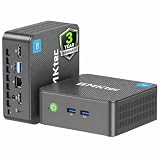
- 12th INTEL ALDER LAKE N95 PROCESSOR - The G3S mini pc uses the 12th Intel N95 CPU 4 Core 4 Threads 6MB cache, burst speed up to 3.4GHz. Compared with (N100/N5105/N5100/N5095), the N95 offers an overall performance improvement of 36%. Ideal for routine tasks, office work and home entertainment,which is more convenient than traditional desktop pc
- 8GB RAM MEMORY & 256GB SSD STORAGE - GMKtec Nucbox G3S mini pc is prebuilt with 8GB DDR4 RAM, you will enjoy a speedier experience with Built-in 256GB M.2 2242 SSD Hard Drive. Our mini desktop pc boots up in seconds, work on multiple browser tabs, software applications and quickly transfers files
- RICH INTERFACE - Nucbox G3 Plus mini computer is equipped with USB 3.2, up to 10Gbps/S, HDMI(4K@60Hz)×2, 3.5mm Audio Jack. Supports WiFi 5, and Gigabit Ethernet RJ45 1000MbE network connectivity, Bluetooth 5.0. This Mini PC supports multiple device connection and can be used with servers, monitoring equipment, office equipment, displays, projectors, televisions, etc
- 4K DUAL SCREEN DISPLAY - Mini desktop computer is equipped with upgraded Intel Graphics(max 1000MHz), supports 4K video playback and AV1 decoding, connect the pc with a projector as a home theatre, enjoy a variety of entertainments. Two HDMI 2.0 ports allows you to multi-task efficiently on two 4K@60Hz displays
- WiFi5 & BT5.0 - Built-in Bluetooth 5.0 enables you to connect multiple wireless devices such as mice, keyboard, monitoring equipment, printer and monitor. High-speed wireless connection technology, reliable and efficient transmission speed, providing a faster internet experience for browsing and streaming. Small pc supports Wake On LAN, PXE Boot, RTC Wake and Auto Power On, ideal to use as a server
Prepare the playlist and validate FFmpeg playback
There is no single loop command that is established as correct for every playlist, file format and FFmpeg build. Test your chosen playback method against the exact media and installed FFmpeg version rather than assuming a loop or concat recipe will preserve continuity.
Recommended Free Tools
- Confirm the intended file order and that every file can be read by the deployed FFmpeg build.
- Check whether the files’ video and audio codecs, dimensions, frame rates, sample rates and channel layouts are compatible with one another and with your intended YouTube output.
- Test transitions for timestamp resets, gaps, frozen frames, audio silence, jumps or drift. A playlist that plays locally once is not necessarily a clean continuous live output.
- Decide whether FFmpeg will transcode or pass compatible streams through. Transcoding changes the CPU and bitrate demands; stream copy avoids re-encoding only when the input streams already meet the output requirements. Validate the choice with your actual inputs.
- Test reconnect behavior and how the sender behaves when a file ends, fails to decode, or the network connection drops. The exact flags and supervision behavior are version- and deployment-specific.
Keep a private copy of the final tested configuration and document how to stop and restart the sender. For a long-running service, choose an operating-system service manager or other supervisor, configure it to detect an exited process and restart it, and monitor its logs. The suitable implementation depends on the host and deployment; validate that it restarts FFmpeg and NGINX failures rather than assuming a process will recover itself.
Get the YouTube destination and protect the key
- Open YouTube Studio and go to the Live Control Room. Create or select the live stream you intend to use.
- Copy the server URL and stream key shown for that stream. YouTube describes the key as the password/address used to accept the encoder feed; treat it as a secret.
- Put the URL and key in the output configuration of the final sender. For a direct path, that is FFmpeg’s YouTube output. For a relay path, configure FFmpeg to publish to your NGINX application and configure the relay to send that feed to YouTube.
- Use the RTMPS server URL when supported by the sender. Check YouTube’s encoder setup instructions for the current Live Control Room workflow.
Do not paste the key into a public script, screenshot, ticket or shared log. Restrict access to configuration files and redact the key from diagnostic output. If it is exposed, reset it in YouTube Studio and update the sender or relay configuration before reconnecting.
Rank #4

- 【Fanless Design for Uninterrupted Stability】Perfect for noise-sensitive environments and 24/7 operation. This mini PC delivers completely silent performance with an efficient cooling system that prevents overheating. It reliably runs office software and HD video without slowdowns, making it ideal for focused offices, home theaters, and demanding industrial IoT applications
- 【Ultra-Portable & Ready for Any Screen】Extremely compact and lightweight, this is a full Windows 10/Ubuntu computer that fits in your pocket. It's the ultimate plug-and-play solution for business presentations on a projector, digital signage in classrooms, or entertainment on your home TV. Achieve true "work from anywhere" flexibility with one device for all scenarios
- 【Stunning UHD 600 Graphics】Experience vibrant, fluid visuals with 4K @ 60Hz output. Powered by Intel UHD 600 Graphics, this mini PC is your perfect home entertainment center for streaming movies, attending online classes, or hosting video conferences. It turns any display into a sharp, high-definition visual experience
- 【Versatile Ports for Easy Expansion】Tackle multiple tasks with ease using our comprehensive selection of ports. Connect storage, keyboards, monitors, and more simultaneously with 2x USB 3.0 ports, a Gigabit LAN port, and a TF card reader. With convenient USB-C charging, it becomes the effortless control center for your office or home setup
- 【Pre-Installed & Ready to Go】Get started immediately with the genuine Windows 10 Pro operating system pre-installed. Paired with 4GB LPDDR4 RAM and 64GB eMMC storage, it's fully equipped for everyday office tasks and HD content right out of the box. This hassle-free setup is perfect for businesses, schools, and users who want a simple, ready-to-run computer
Set output settings YouTube can ingest
YouTube’s current encoder guidance lists H.264, H.265/HEVC and AV1, recommends constant bitrate (CBR), and recommends a two-second keyframe interval that does not exceed four seconds. Its bitrate table varies by codec, resolution and frame rate; use the current YouTube encoder settings and bitrate table for the combination you actually send.
| Example output | YouTube’s recommended bitrate | Keyframe guidance |
|---|---|---|
| H.264, 1080p at 30 fps | 5 Mbps | 2 seconds recommended; no more than 4 seconds |
| H.264, 720p at 60 fps | 8 Mbps | 2 seconds recommended; no more than 4 seconds |
These are YouTube recommendations, not a guarantee that a particular connection or encoder will sustain the stream. Set the output for the chosen resolution and frame rate, use CBR where applicable, and make sure the sending uplink has enough sustained capacity for the video and audio together. A peak speed test alone does not establish that a connection will remain stable all day.
The Tool Desk
Outbyte PC Repair FREEClear out junk files and repair common Windows errorsFree Scan →Outbyte Driver Updater FREEScan for outdated or missing drivers - takes under a minuteDriver Scan →If you transcode, verify the selected codec, frame rate, dimensions, bitrate mode and keyframe interval in the FFmpeg output actually running. If you stream-copy, verify that the input’s codec and timing characteristics match what YouTube expects. Do not copy a bitrate recommendation for one resolution or frame rate onto a different output without checking YouTube’s table.
Best Value
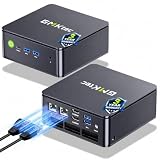
- MINI PC COMPUTER OFFICE BUSINESS PERSONAL - GMKtec Nucbox G11 PLUS Series is equipped with the Ryzen 5 3500U, a 64-bit quad-core mid-range performance x86 mobile microprocessor. This processor is based on AMD's Zen+ microarchitecture and is fabricated on a 12 nm process. The 3500U operates at a base frequency of 2.1 GHz with a TDP of 15 W and a Boost frequency of 3.7 GHz. This APU supports up to 32 GB of dual-channel DDR4-2400 memory and incorporates Radeon Vega 8 Graphics operating at up to 1.2 GHz. 20% Multi-core Performance increase over previous Ryzen 3 models such as 4300U. 35% performance increase over the Intel N-series N95/N97/N150.
- AMD RADEON GRAPHICS 1.2GHz - this powerful mini computer with 480% Faster Integrated Graphics: The built-in AMD Radeon Graphics GPU delivers a staggering 480% higher 3DMark Time Spy performance than the Intel N150's UHD graphics. Powered by dedicated shader cores clocked at 1.2GHz, it dramatically outperforms the N150 for intensive visual tasks and surpasses the 4300U's iGPU by 21% in raw computational throughput. With support for triple independent 4K displays, H.265/HEVC encoding, and modern APIs like DirectX 12 and Vulkan, this GPU turns the R2514 into a true multimedia powerhouse for professional edge computing, industrial HMI, or high-end digital signage station.
- DUAL CHANNEL 16GB RAM MEMORY - The R2514 platform supports dual-channel DDR4 memory (2×8GB; Total 16GB), effectively doubling the data pathway between RAM and the processor compared to a single 16GB stick used in N150 or 4300U systems. With dual-channel, the GPU experiences zero memory bottlenecks, resulting in significantly higher frame rates (up to 30% improvement in gaming scenarios), smoother 4K video playback, and faster application responsiveness—especially in professional workloads like CAD viewing, real-time data visualization, and multitasking across multiple displays.
- DUAL NIC 2.5GBE ETHERNET - The G11 mini PC with dual 2.5GbE ports, you can transform it into a high-speed, all-in-one networking hub. This setup enables it to function as a professional-grade firewall and router (using software like pfSense/OPNsense) for unbeatable network security and ad-blocking, a blazing-fast Network Attached Storage (NAS) server, and a compact server for a home lab running virtual machines and containers (with Proxmox). It can also be used to create a dedicated, isolated network for IoT devices and security cameras or as a compact VPN server for secure remote access.
- UNLEASH RAW PERFORMANCE MODE 35W - Dominate demanding tasks with the AMD Ryzen Embedded R2514 processor. When switched to Performance Mode in the BIOS (press "Esc" key repeatedly during boot, save then exit), this mini PC delivers superior multi-core processing power, significantly outperforming Intel N-series chips in CPU-intensive applications, multitasking, and creative workloads.
Test before making the stream public
- Start NGINX first if it is part of the path, then start the FFmpeg sender using the tested playlist and output configuration.
- Open the stream preview in YouTube Live Control Room and verify that both moving video and representative audio arrive.
- Read YouTube’s stream-health messages and address warnings before publishing. Monitor for dropped or unstable input, audio problems, black frames and interruptions.
- Let the test run long enough to cover playlist transitions and at least one full loop of the material you intend to repeat. Confirm that the playlist advances and returns to its beginning as intended.
- Check FFmpeg and NGINX logs, process status, host resources and the local recording destination if you are recording independently. Confirm that your restart procedure works before leaving the service unattended.
- Publish only after the preview and health indicators are satisfactory. Continue monitoring the stream rather than treating a successful initial connection as proof of continuous operation.
YouTube’s live streaming tips also recommend testing, monitoring stream health and checking audio and video quality.
Plan for archives and rights before running 24/7
A continuous broadcast is not a dependable single YouTube archive. YouTube says streams under 12 hours can be automatically archived; a stream exceeding 12 hours may not be captured at all. For a 24/7 stream, arrange independent local recording if retaining the complete programming matters, or divide the schedule into shorter sessions and verify that each resulting archive is available. See YouTube’s archive guidance.
Before streaming a playlist, make sure you have the rights and permissions needed for every video, song, recording and other element in it. A live broadcast can still raise copyright issues; looping material does not make it yours or exempt it from YouTube’s policies. Review YouTube’s current rules and any rights-holder restrictions, and do not assume that permission to use a track in one context covers continuous live rebroadcast.
Troubleshoot common failures
| Symptom | Likely area to check | Practical next step |
|---|---|---|
| NGINX fails to start or reload | Module mismatch, load path, or invalid configuration. | Confirm the installed NGINX build and module are compatible, check the configured module path, then run nginx -t before reloading. Use the installation instructions for your selected module rather than mixing Plus and third-party steps. |
| FFmpeg cannot publish to NGINX | RTMP application name, server address, publishing permissions, or listener availability. | Check the configured endpoint against the RTMP application and inspect NGINX and FFmpeg logs. Verify the service is listening and reachable from the sender host. |
| YouTube does not receive the feed | Incorrect server URL or key, output path, relay configuration, or unsupported transport. | Copy the current URL and key from Live Control Room, verify which hop is responsible for YouTube output, and test RTMPS support in the sender. Reset an exposed key. |
| Stream-health warnings or dropped frames | Uplink instability, bitrate beyond sustainable capacity, or encoder/host load. | Check the health messages and logs, reduce output demands using YouTube’s guidance, and test sustained network and host capacity. Do not infer stability from a brief connection test. |
| Black video, silence or glitches at playlist boundaries | Incompatible media, discontinuous timestamps, audio changes, or loop handling. | Test every file and transition with the actual FFmpeg build; validate ordering, timestamps, codecs and audio continuity. Adjust the playback/transcoding approach and repeat the full-loop test. |
| The stream stops after running unattended | FFmpeg or NGINX exited, host/network interruption, or no restart supervision. | Inspect process and service logs to identify which component stopped, then test a supervisor or service-manager restart policy and alerting. Verify that recovery does not silently resume with a broken playlist or invalid key. |
| The full program is missing from YouTube’s archive | The continuous session exceeded YouTube’s archive duration behavior. | Use an independent recording plan or shorter sessions, then verify the saved files rather than relying on a single long YouTube archive. |
Or let it run in the cloud
If you would rather not maintain an always-running FFmpeg and NGINX host, StreamNeo is a cloud service for keeping a YouTube channel live from uploaded videos. Upload your recording or build a playlist, add your YouTube stream key, and go live. It loops the uploaded media from the cloud, so no computer or home connection has to stay on. It is YouTube-only and plays uploaded videos rather than broadcasting a camera feed.
Quick Recap
- Nothing has to stay running at home.
- Uploaded quality streams as made, up to 4K 60fps, at one flat price per slot.
- Automatic recovery if YouTube drops the stream.
- The first day is free with no card, one free day per account.
- Monthly: $9.99 per month.
Product prices and availability are accurate as of the date/time indicated and are subject to change. Any price and availability information displayed on Amazon at the time of purchase will apply.




