Hardware problems on Windows 10 can show up as random crashes, freezes, blue screens, slow performance, disk errors, or devices that suddenly stop working. Before replacing parts or reinstalling Windows, it’s worth running a few diagnostics to narrow down whether the issue is related to memory, storage, drivers, or another component.
Windows 10 includes several built-in tools for checking RAM, drives, device status, and overall system health. Many PC manufacturers also provide their own diagnostics that can test components more deeply, especially on laptops and prebuilt desktops.
As an Amazon Associate I earn from qualifying purchases.
This guide covers five practical ways to run hardware diagnostics on Windows 10, including Windows Memory Diagnostic, CHKDSK, Device Manager, Performance Monitor, and OEM tools from brands like Dell, HP, Lenovo, and others.
The Tool Desk
Outbyte Driver Updater FREEFix the driver behind crashes, sound loss and screen glitchesFind Drivers →Outbyte PC Repair FREERepair Windows errors before they cause bigger problemsFix Now →Use Windows Memory Diagnostic to Check RAM
Windows Memory Diagnostic is the built-in Windows 10 tool for checking your computer’s RAM for errors. Faulty memory can cause blue screen crashes, random restarts, app freezes, corrupted files, or failed installations, so this is one of the first hardware checks to run when the system becomes unstable. The tool works by restarting the PC and testing memory outside the normal Windows desktop environment.
#1 Best Overall

- 56pc Comprehensive Electronics Repair Kit: Tackle any electronics repair or DIY project with this 56-piece tool set, ideal for laptops, computers, drones, gadgets, and more; all the essential accessories for detailed work
- Versatile Driver Handle & Precision Bits: Features a full-length driver handle with a flexible extension for reaching recessed positions; comes with 20 S2 steel precision bits and 16 CRV bits, perfect for small screws in electronics and larger fasteners
- Essential Wiring & Cable Tools: Manage cables and wires with the compact long nose pliers and adjustable wire stripper; includes zip ties to keep everything neat and organized during and after your repairs
- Pry, Pick, & Lift with Ease: Safely open and disassemble devices using the included pry bar levers, suction cup, and utility knife; great for accessing internal components without causing damage
- Stay Organized & Safe: Keep your tools neatly stored in the portable zipper case made from splash-proof Oxford fabric; includes an ESD wrist strap to prevent static shock, a dust brush for cleaning, and a voltage tester for safety checks
Before running it, save your work and close open apps because the test requires a reboot. To launch it, press Windows + R, type mdsched.exe, and select OK. You can also search for Windows Memory Diagnostic from the Start menu. When prompted, choose Restart now and check for problems if you are ready to test immediately, or choose Check for problems the next time I start my computer if you want Windows to run the scan during the next reboot.
- Press Windows + R.
- Enter mdsched.exe and press Enter.
- Select Restart now and check for problems.
- Wait while Windows scans the installed memory.
- Let the computer restart back into Windows when the test finishes.
During the scan, Windows displays a blue diagnostic screen with the test progress and status. In most cases, you can let the standard test run without changing anything. If you want more control, press F1 while the diagnostic screen is open to access test options such as Basic, Standard, and Extended. The extended test is more thorough but can take much longer, especially on systems with 16 GB, 32 GB, or more RAM. You can also adjust the cache setting and pass count, then press F10 to apply the changes and start the scan.
After Windows restarts, the result may appear as a notification near the system tray. If you miss it, check the result manually in Event Viewer. Right-click the Start button, select Event Viewer, go to Windows Logs > System, and select Find from the right-side Actions pane. Search for MemoryDiagnostics-Results. A clean result usually says that no memory errors were detected. If errors are reported, reseat the RAM modules if you are comfortable working inside the PC, test one module at a time when possible, and replace the failing stick if the errors follow a specific module.
Quick wins for a faster PC:
Clear out junk files and repair common Windows errorsFree Scan →Fix the driver behind crashes, sound loss and screen glitchesFind Drivers →| Result | What it suggests | Next step |
|---|---|---|
| No errors detected | RAM did not fail this Windows test | Continue checking disks, drivers, and temperatures |
| Hardware problems detected | One or more RAM modules may be faulty | Reseat RAM, test modules separately, or replace bad memory |
| Test freezes or reboots repeatedly | Severe memory instability or another hardware fault | Power off, check RAM seating, and run OEM diagnostics |
Run CHKDSK to Scan Your Hard Drive or SSD
CHKDSK, short for Check Disk, is a built-in Windows 10 tool that scans a drive for file system errors, bad sectors, and other storage-related problems. It is useful when your PC freezes while opening files, shows disk errors at startup, takes a long time to boot, or repeatedly reports that a drive needs repair. You can use it on internal hard drives, SSDs, external USB drives, and SD cards, as long as Windows can detect the volume.
The safest first scan is a read-only check, which looks for problems without making changes. Open Command Prompt as an administrator by right-clicking the Start button and choosing Windows PowerShell (Admin) or Command Prompt (Admin). Then run the following command, replacing C: with the drive letter you want to scan:
chkdsk C:
If Windows reports file system errors, run CHKDSK with repair options. The most common command is:
chkdsk C: /f
The /f switch tells Windows to fix file system errors. If you scan the system drive, Windows will usually say the volume is in use and ask whether to schedule the scan for the next restart. Type Y, press Enter, then restart your PC. CHKDSK will run before Windows fully loads, which allows it to repair files that are normally locked while the operating system is running.
What’s actually slowing this PC down?
Pick the symptom - the matching free tool is one click away.
Rank #2

- ATTN : Please DO study the listing page the "Product Guides and Documents" section, the "Instructions for Use (IFU) (PDF)" guide for all manual links at the end of the PDF, to use this kit correctly and easily. 【The item PACKING】 includes the paper printout with the same Complete Instruction Folder with PDFs and APP. 【Only use the tested APP in the folder】 【BOTH 64bit for Newer Androids and 32bit Manufacturer APP】 are available, passed the Android security scan checks and Google Play pending. MUST use the Android APP to display results on the screen, NO Traditional DIGITAL Display to show the POST codes, Great Ease to save hassles of diagnostic codes lookup one by one manually.
- Easy To Use Unique USB Diagnosis with Videos and PDF Guides. 【MUST study the Guides Before Use】 New latest smartphone technology in using the USB ports ( Standard USB / micro USB / Type C ) to diagnose the computers. 【NOT just getting the electric power but RUNNING the Diagnosis Data through USB ports】. A very powerful Essential Nice Handy computer repair tool kit for quick help on diagnosing Desktop PC, Server, Laptop, All-in-one PC, Android Smartphone / Tablet, customized built miniPC and Mac machines ... etc. A great motherboard tester diagnostic kit that provides the most accuracy and effectiveness in making the computer troubleshooting and repairs much easier.
- USB Diagnosis Unique Feature - Save hassles of taking the dusty PCs or laptops apart. Follow the English PDF user guides to power on and let the Android APP to work with this new test kit to auto scan the motherboard for faulty components quickly. When testing different PCs together, make sure follow the listing User Guide(PDF) to see 【Latest Updates with PRECAUTIONs and Extra Tech Tip】 to UNPLUG the USB cable between each test and restart to clear the last cached working motherboard diagnosis data. The ONBOARD USB cable is needed to plug to the Android charger, the other dedicate USB cable connects to motherboard USB port. Connect this 2 USB cable wrongly causes the unstable connectivity.
- All-in-one Multiports support - Different complete bus connector adapter parts included. Made of quality PCB, transistors and capacitor components. Direct pinpointing the faulty motherboard components to greatly reduce the costs yet increase the effectiveness in the computer diagnostic repairs. Videos and the PDFs instructions please see the listing "Videos" section and the "Product guides and documents" section for more details.
- Tested and brought to you by 29 years IT Professionals This kit works with all machines with USB ports including New Old Desktop PC and Laptop Computers, IBM compatible, Mac machines (using USB), Android devices Smartphones and Tablet PCs. Comes with Step by Step Easy Guides, videos instructions, PDF pictorial manuals with Easy Flowcharts and Latest Updates with Precautions. Great for PC Technicians, Computer Owners, Computer Class Student Learners and PC DIY Lovers, Hardware Traders, professionals and novices . Nice Essential must have to add to our computer tool boxes.
Common CHKDSK commands for Windows 10
| Command | What it does | When to use it |
|---|---|---|
| chkdsk C: | Scans the drive without repairing anything | For a quick check when you suspect disk issues |
| chkdsk C: /f | Fixes file system errors | When Windows reports corrupted files or directory errors |
| chkdsk C: /r | Locates bad sectors and attempts to recover readable data | For hard drives with clicking, freezing, or repeated read errors |
| chkdsk C: /scan | Runs an online scan while Windows is running | For a faster check on NTFS drives without rebooting immediately |
Use /r carefully because it includes the repair behavior of /f and performs a much deeper surface scan. On large hard drives, it can take hours. On SSDs, CHKDSK can still repair file system problems, but it is not a full SSD health test. For SSD wear level, spare blocks, temperature, and SMART status, use the drive manufacturer’s tool or a trusted SMART monitoring utility.
You can also run a basic disk check from File Explorer. Open This PC, right-click the drive, select Properties, go to the Tools tab, and click Check under Error checking. Windows may say it has not found any errors, but you can still choose to scan the drive manually. After CHKDSK finishes, review the result on screen or check logs in Event Viewer under Windows Logs > Application, looking for entries from Wininit or Chkdsk. If CHKDSK repeatedly finds new errors, back up your files and test the drive with the manufacturer’s diagnostic software.
Check Device Manager for Hardware Problems
Device Manager is one of the quickest built-in places to look when Windows 10 detects a hardware or driver problem. It lists installed components such as graphics cards, network adapters, storage controllers, Bluetooth radios, USB controllers, sound devices, cameras, and system devices. If a device is malfunctioning, disabled, missing a driver, or reporting a conflict, Device Manager often shows a warning icon next to it.
To open it, right-click the Start button and select Device Manager. You can also press Windows + R, type devmgmt.msc, and press Enter. Once it opens, expand each hardware category and look for devices marked with a yellow triangle, down arrow, or unknown device entry. A yellow triangle usually indicates a driver or device error, while a down arrow means the device is disabled.
Do these 3 things before closing this tab:
1Fix the driver behind crashes, sound loss and screen glitches2Clear out junk files and repair common Windows errors3Scan for outdated or missing drivers - takes under a minute- Open Device Manager.
- Expand categories such as Display adapters, Disk drives, Network adapters, Sound, video and game controllers, and Universal Serial Bus controllers.
- Look for warning icons or entries named Unknown device.
- Right-click the affected device and choose Properties.
- Check the Device status box on the General tab for the error message or code.
The Device status field can give useful details, such as “Windows has stopped this device because it has reported problems. (Code 43)” or “The drivers for this device are not installed. (Code 28).” These messages can help you decide whether to update a driver, roll back a recent driver change, enable the device, reconnect external hardware, or check whether the component is failing. For example, if a USB device repeatedly shows errors across different ports, the device itself may be faulty. If mulle USB devices fail on the same port, the USB controller or port may be the issue.
Common Device Manager actions
| Action | When to use it |
|---|---|
| Update driver | Use when Windows reports a missing, outdated, or incompatible driver. |
| Roll Back Driver | Use after a recent driver update causes crashes, missing features, or device errors. |
| Disable device / Enable device | Use to reset a device state or re-enable hardware that was turned off. |
| Uninstall device | Use when a driver installation is corrupted; restart Windows to let it reinstall the device. |
| Scan for hardware changes | Use after reconnecting hardware or installing a new internal component. |
For driver updates, right-click the device, select Update driver, then choose Search automatically for drivers. Windows may find a suitable driver through Windows Update, but for graphics cards, chipsets, Wi-Fi adapters, and storage controllers, it is often better to download the latest Windows 10 driver directly from the PC maker or hardware manufacturer. If the problem started after an update, open the device’s Properties, go to the Driver tab, and select Roll Back Driver if the option is available.
You can also use Device Manager to reveal disconnected or hidden hardware. In the menu bar, select View > Show hidden devices. This can help identify old drivers, duplicate entries, or devices that Windows previously detected but no longer sees. If a critical device disappears entirely, such as a disk, network adapter, or webcam, check physical connections, BIOS or UEFI settings, and manufacturer diagnostics to confirm whether the hardware is still being detected outside Windows.
Rank #3

- All-in-One Motor & Circuit Testing Tool: Quickly diagnose 12V automotive electrical systems with this universal car motor diagnostic tool. Functions as a tester and circuit tester to directly power and test window motors, wiper motors, seat motors, and more—no complex setup required
- One-Touch Control for Instant Results: Featuring an intuitive one-touch control switch, this tool allows you to safely apply power and instantly test motor direction and functionality. Easily identify faulty components within seconds, saving time on troubleshooting and repairs
- Heavy-Duty Copper Clips for Secure Connection: Equipped with upgraded heavy-duty alligator clips with copper teeth, ensuring strong grip and stable conductivity. Provides reliable battery connection without slipping, making every test more accurate and efficient
- Wide Compatibility for Multiple Vehicle Systems: Designed for universal use across cars, trucks, SUVs, and motorcycles. Perfect for testing window regulators, windshield wipers, power seats, sunroof motors, and other 12V DC components
- Thick Insulated Wiring for Safe Operation: Built with thick insulated wires and heat-resistant materials (up to 105°C), this automotive electrical tester prevents overheating and enhances safety during use. Ideal for both professional mechanics and DIY users
Use Performance Monitor and System Diagnostics
Performance Monitor is a built-in Windows 10 tool that can collect hardware and system data, then generate a diagnostics report. It is useful when the PC feels slow, freezes randomly, overheats, or shows symptoms that are not clearly tied to one device in Device Manager. Instead of checking one component at a time, System Diagnostics reviews several areas at once, including CPU activity, disk performance, memory usage, network behavior, drivers, services, and basic hardware status.
Recommended Free Tools
To run it, press Windows + R, type perfmon, and select OK. In the left pane, expand Data Collector Sets, then expand System. Right-click System Diagnostics and choose Start. Windows will begin collecting diagnostic data in the background, usually for about 60 seconds. During this time, keep using the computer normally if you are trying to capture a performance issue, or leave it idle if you want a baseline report.
After the collection finishes, open Reports in the left pane, then go to System > System Diagnostics. Select the newest report by date and time. The report may take a moment to load. At the top, look for warnings, failed checks, and resource issues. Sections such as Diagnostic Results, CPU, Disk, Memory, and Network can help you spot patterns, such as heavy disk queue lengths, high processor usage, low available memory, or services that failed during the scan.
What to look for in the diagnostics report
- Warnings under Diagnostic Results: These may point to driver problems, service failures, or configuration issues that affect hardware behavior.
- High disk activity or long disk queues: This can indicate a busy, failing, or overloaded hard drive or SSD, especially if it matches slow startup or app launch times.
- Low available memory: If Windows is constantly low on RAM, the system may slow down or rely heavily on the page file.
- CPU bottlenecks: Sustained high CPU usage can make the PC seem unstable even when the hardware is not physically failing.
- Driver or device-related entries: These can help confirm whether a hardware issue is connected to a specific component or driver.
You can also create a quick System Diagnostics report from an elevated command prompt. Right-click Start, choose Windows PowerShell (Admin) or Command Prompt (Admin), then run perfmon /report. Windows will collect data and display a report automatically. This shortcut is often faster than browsing through Performance Monitor manually, and it provides a clear overview of system health in one place.
Performance Monitor does not replace deeper tests such as Windows Memory Diagnostic, CHKDSK, or manufacturer drive and hardware scans. However, it is a strong middle step when the symptoms are broad or inconsistent. If the report repeatedly shows disk delays, memory pressure, driver failures, or resource bottlenecks, use those clues to decide which component to test next.
Free tools Windows power users keep installed
One-click scans. No signup required.
Run Manufacturer Hardware Diagnostic Tools
Windows 10 includes several useful diagnostic tools, but PC manufacturers often provide deeper hardware tests that are designed for their own systems. These utilities can check components such as the motherboard, CPU, memory, storage drive, battery, fans, graphics hardware, keyboard, touchpad, display, webcam, and network adapters. They are especially helpful when you suspect a physical fault or when Windows tools do not show a clear cause.
Many OEM diagnostics run outside Windows, which means they can test hardware without interference from drivers, background apps, or operating system errors. This makes them useful for troubleshooting startup problems, random shutdowns, overheating, charging issues, and intermittent hardware failures. In some cases, the utility will also generate an error code that support technicians can use when arranging a repair or warranty claim.
Rank #4
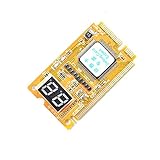
- 3 in 1 tester.
- For PCI, PCI-E, and LPC.
- Diagnostic post-test card.
- Diagnostic post-test card.
- Easy to use.
Common manufacturer diagnostic tools
| Manufacturer | Diagnostic tool | How to access it |
|---|---|---|
| Dell | SupportAssist Diagnostics or ePSA Pre-boot System Assessment | Press F12 at startup, then choose Diagnostics, or open Dell SupportAssist in Windows. |
| HP | HP PC Hardware Diagnostics | Press Esc repeatedly at startup, then press F2, or run the HP diagnostics app in Windows. |
| Lenovo | Lenovo Diagnostics or Lenovo Vantage | Open Lenovo Vantage in Windows, or use the boot menu on supported models. |
| ASUS | MyASUS System Diagnosis | Open MyASUS in Windows and select the system diagnosis options. |
| Acer | Acer Care Center | Open Acer Care Center and use the checkup or hardware scan options. |
| Microsoft Surface | Surface Diagnostic Toolkit | Download and run the Surface Diagnostic Toolkit from Microsoft. |
To use one of these tools, first identify your PC model. Press Windows + R, type msinfo32, and press Enter. In the System Information window, check System Manufacturer and System Model. Then visit the manufacturer’s official support website and download the correct diagnostic utility for your device. Avoid third-party download sites, since diagnostic tools may require low-level access to your hardware.
- Connect the charger if you are using a laptop, since some full tests can take a long time.
- Close open files and apps before starting diagnostics from within Windows.
- Choose a quick test first if available, then run an extended test if the quick scan finds nothing.
- Write down any failure ID, validation code, or component name shown in the results.
- Update firmware, BIOS, or drivers only from the manufacturer’s official support page if the tool recommends it.
If a manufacturer diagnostic reports a failed component, treat that result as stronger evidence than a generic Windows warning. For example, a storage failure code from Dell, HP, or Lenovo usually means the drive should be backed up and replaced soon. If all manufacturer tests pass but the issue continues, the problem may still be related to software, drivers, heat under load, loose internal connections, or a fault that appears only intermittently.
Outdated Drivers Are Slowing You Down
One free scan finds every outdated or missing driver and matches the right update for your exact hardware.Free scan · exact hardware matchWindows Errors? Fix Them Before They Spread
Repair common Windows errors and clear accumulated junk for a smoother, more stable PC - no reinstall needed.Free scan · no reinstallFrequently Asked Questions
Does Windows 10 have a built-in hardware diagnostic tool?
Yes. Windows 10 includes several built-in tools for basic hardware checks, including Windows Memory Diagnostic for RAM, CHKDSK for drives, Device Manager for device errors, and Performance Monitor for system health reports. These tools can help identify common problems, but manufacturer diagnostics are often better for testing the full hardware set on a specific PC.
How do I check if my RAM is failing in Windows 10?
Use Windows Memory Diagnostic by typing “Windows Memory Diagnostic” in the Start menu and choosing to restart and check for problems. After the test runs, Windows will reboot and the results may appear in a notification or in Event Viewer under Windows Logs > System. If errors are reported, reseating the RAM or replacing the faulty module is usually the next step.
Should I run CHKDSK on an SSD?
Yes, CHKDSK can be used on an SSD to check file system errors and scan for al problems. Run it from Command Prompt as an administrator using a command such as chkdsk C: /f. Avoid repeatedly running intensive surface scans unless needed, and use the SSD maker’s utility to check drive health, firmware, and SMART status.
What does a yellow warning icon in Device Manager mean?
A yellow warning icon usually means Windows has detected a driver, configuration, or device communication problem. Open Device Manager, right-click the affected device, choose Properties, and check the device status message and error code. Updating, rolling back, reinstalling the driver, or reconnecting the hardware often resolves the issue.
Are Dell, HP, Lenovo, or other manufacturer diagnostics better than Windows tools?
Manufacturer diagnostics are often more complete because they are designed for the exact hardware in your laptop or desktop. Tools such as Dell SupportAssist, HP PC Hardware Diagnostics, Lenovo Diagnostics, and similar utilities can test components like the battery, motherboard, fans, keyboard, storage, and display. Use them when Windows tools do not find a problem but the PC still crashes, overheats, freezes, or shows hardware-related symptoms.
Bottom Line
Windows 10 gives you several practical ways to check your hardware, from Windows Memory Diagnostic and CHKDSK to Device Manager, Performance Monitor, and built-in troubleshooters. For deeper testing, manufacturer tools from Dell, HP, Lenovo, and other PC makers can help confirm problems with components like storage, RAM, battery, and motherboard hardware.
If your PC is crashing, slowing down, overheating, or showing device errors, start with the built-in checks, then use your OEM diagnostic utility for a more complete scan. Back up files before running disk repairs or advanced tests, and consider replacing failing hardware if diagnostics report repeated errors.
Quick Recap
Product prices and availability are accurate as of the date/time indicated and are subject to change. Any price and availability information displayed on Amazon at the time of purchase will apply.




