Grouping pictures in Microsoft Word lets you treat several images as one object, making it much easier to move, resize, align, and format them without accidentally shifting individual pieces out of place.
This is especially helpful when you are creating reports, flyers, worksheets, newsletters, or any document that uses mulle visuals. Before you can group pictures successfully, you may need to adjust how the images are positioned on the page so Word allows them to be selected together.

As an Amazon Associate I earn from qualifying purchases.
This beginner-friendly guide walks through preparing your pictures, selecting mulle images, grouping them, working with the grouped object, ungrouping when needed, and fixing common issues that can prevent grouping from working.
Why Group Pictures in Word?
Grouping pictures in Microsoft Word lets you treat several separate images as one single object. Instead of dragging each picture into place, adjusting one image, then trying to line up the others again, you can group them and move the whole arrangement together. This is especially helpful when you are building a worksheet, flyer, report, invitation, manual, newsletter, or any document that uses more than one image in the same area.
#1 Best Overall

- Millions of creative combinations are possible with advanced color manipulation and unparalleled special effects and painting tools. Plus you can add backgrounds, frames, props, balloons and more.
- Make any portrait picture perfect with new retouching tools and hundreds of digital photo effects. Remove red-eye, wrinkles and fix other photo flaws with 1 click.
- Powerful drawing tools.
- 10,000+ Photo Projects and Graphics
- Easy to use Video Editing and Photo Morphing Tools
For beginners, the biggest benefit is control. Word documents can shift as you add text, change margins, insert headings, or edit spacing. If your pictures are separate, one image may move while another stays behind, causing your layout to look uneven. Once the pictures are grouped, their positions stay locked in relation to each other. A logo, icon, caption image, and decorative shape can remain aligned as a set, even when you reposition them on the page.
Common times grouping is useful
- Creating a photo collage: Arrange several photos into a neat layout, then move or resize the collage as one piece.
- Combining icons and labels: Keep an icon next to its matching text box or shape so the design stays together.
- Designing forms or handouts: Place arrows, screenshots, circles, and callouts together for clearer instructions.
- Building a header or cover page: Group decorative images, shapes, and logos so the page design is easier to manage.
- Keeping annotations attached: If you add arrows or highlights over a screenshot, grouping keeps those markings in the correct spot.
Grouping also makes formatting faster. After images are grouped, you can resize the entire group by dragging a corner handle, apply certain layout options, copy and paste the group, or move it to another part of the document. This saves time compared with repeating the same adjustment on every individual picture. For example, if you have three product images arranged side by side, grouping them allows you to shrink the whole row to fit a page width without manually resizing each product image.
Another advantage is consistency. When pictures are grouped, their spacing and alignment are easier to preserve. This matters in polished documents where small layout shifts can make a page look messy. Grouping helps keep visual elements organized while you continue editing the surrounding text. You can still ungroup the pictures later if you need to replace one image, change the spacing, or edit an individual item. In other words, grouping gives you a temporary container for your images, making your Word document easier to edit without permanently merging the pictures into a single file.
Prepare Your Pictures Before Grouping
Before you try to group pictures in Microsoft Word, take a few minutes to set them up correctly. Grouping works best when Word treats each picture as a movable object on the page rather than as regular text. If your images are still set to sit “In Line with Text,” Word may not let you select them together or the Group command may appear grayed out.
Start by inserting all the pictures you want to group. Go to Insert > Pictures, then choose whether the images are coming from your device, stock images, or online sources. Once they are on the page, click each picture and choose a wrapping option that allows free movement. The most common beginner-friendly choices are Square, Tight, Through, or In Front of Text. You can find these options by selecting a picture, clicking the Layout Options button next to it, or by going to Picture Format > Wrap Text.
Recommended setup before grouping
- Change text wrapping: Select each picture and set it to something other than In Line with Text. For most layouts, Square or In Front of Text works well.
- Place the pictures near each other: Drag the images into the rough layout you want before grouping them. You can fine-tune the position later, but starting close saves time.
- Resize large images first: If one picture is much larger than the others, resize it before grouping so the combined object is easier to manage.
- Crop if needed: Use Picture Format > Crop to remove extra space around an image before grouping.
- Apply basic corrections early: Brightness, contrast, borders, and simple picture styles are often easier to adjust before the images become one grouped object.
It also helps to turn on alignment guides or gridlines if you want the pictures to line up neatly. Go to the View tab and check Gridlines if you want a visible guide on the page. You can also use the alignment tools under Picture Format > Align to line up selected pictures by their left edges, centers, tops, or bottoms. This is especially useful when creating a photo collage, a row of product images, or a set of screenshots for instructions.
If your pictures overlap with text, headers, shapes, or other objects, decide what should stay separate before grouping. For example, if you want a caption to move with the pictures, you may need to place the caption inside a text box and group that text box with the images. Plain typed text in the document body cannot usually be grouped directly with pictures, but a text box or shape can. Once each picture has the right wrapping style, size, and position, you will be ready to select mulle pictures and group them into one easy-to-control object.
Recommended Free Tools
How to Select Multiple Pictures in Word
Before you can group pictures in Microsoft Word, you need to select more than one image at the same time. This is the step that often confuses beginners, especially because pictures inserted “In Line with Text” behave like large text characters and may not select the way you expect. For the easiest selection process, make sure each picture uses a text wrapping option such as Square, Tight, Through, Top and Bottom, or In Front of Text.
To check this, click one picture, then select the Layout Options button that appears beside it. Choose a wrapping style other than In Line with Text. Repeat this for the other pictures you want to group. Once the pictures are no longer treated as inline objects, Word makes it much easier to select them together.
Select multiple pictures with Ctrl-click
The most common method is to use the Ctrl key on your keyboard. Click the first picture once to select it. Then hold down Ctrl and click each additional picture you want to include. Keep holding Ctrl until all the pictures are selected. You should see selection handles around each chosen image, which confirms that Word recognizes them as part of the current selection.
- Click the first picture you want to select.
- Hold down the Ctrl key.
- While still holding Ctrl, click the second picture.
- Continue clicking any other pictures you want to include.
- Release Ctrl after all desired pictures are selected.
Select pictures with the Selection Pane
If your pictures overlap, sit behind text, or are hard to click, use the Selection Pane. Go to the Layout tab or Picture Format tab, then choose Selection Pane. A panel opens on the right side of the Word window, showing the objects on the page. Click one picture name in the list, hold Ctrl, and click the other picture names you want to select. This method is especially useful in documents with several images, shapes, icons, or text boxes.
Free tools Windows power users keep installed
One-click scans. No signup required.
| Selection Method | Best For |
|---|---|
| Ctrl-click | Pictures that are easy to see and click on the page |
| Selection Pane | Overlapping pictures or objects hidden behind other items |
| Drag selection | Objects placed close together, usually on a drawing canvas |
You may also be able to drag your mouse around several objects to select them, but this depends on how the pictures are arranged and which version of Word you are using. If dragging does not select the pictures, use Ctrl-click or the Selection Pane instead. Once all the pictures are selected, you are ready to group them from the Picture Format tab.
How to Group Pictures Step by Step
After you have inserted your pictures, set their text wrapping, and selected all the images you want to combine, you can group them into one movable object. This lets Word treat several pictures as a single unit, so you can drag, resize, align, or format the whole arrangement without accidentally shifting one image out of place.
- Select the pictures you want to group. Click the first picture, then hold Ctrl on Windows or Command on Mac while clicking each additional picture. If selecting is difficult, make sure each picture uses a wrapping option such as Square, Tight, Through, or In Front of Text instead of In Line with Text.
- Open the Picture Format tab. Once multiple pictures are selected, Word should show the Picture Format tab on the ribbon. This tab contains tools for arranging and formatting selected images.
- Find the Group command. In the Arrange group on the ribbon, select Group. Depending on your Word version and screen size, you may need to click Arrange first, then choose Group from the drop-down menu.
- Choose Group. Click Group again from the menu. Word will combine the selected pictures into one grouped object.
- Check that grouping worked. Click away from the pictures, then click the group once. You should see one larger selection box around the entire set instead of separate boxes around each individual picture.
You can also group pictures by using the right-click menu. Select all the pictures, right-click one of the selected images, choose Group, then select Group again. This method is often faster once you are comfortable selecting mulle objects, especially when you are arranging diagrams, screenshots, product photos, or a collage inside a document.
What the grouped pictures should look like
When the pictures are grouped correctly, Word places a single border with sizing handles around the full group. Dragging a corner handle resizes the whole group proportionally, while dragging the center of the group moves every picture together. If you click once, you select the group; if you click again on an item inside the group, some Word versions let you select an individual picture for small adjustments without fully ungrouping.
If the Group option is grayed out, the most common cause is that one or more pictures are still set to In Line with Text. Click each picture, select the Layout Options button, and choose a text wrapping style such as Square or Tight. Then try selecting the pictures and using Picture Format > Group again. If your document includes a mix of pictures, shapes, icons, or text boxes, make sure every item you want in the group is selected before choosing the command.
Rank #3

- ✔️ All-in-One Media Manager: Organize your photos, music, videos, and movies in one easy-to-use software
- ✔️ AI-Powered Sorting: Automatically sort your media by categories like artist, genre, album, and more
- ✔️ Create Stunning Slideshows: Combine photos and music to create beautiful slideshows with transitions and effects
- ✔️ Play All Media: Play music, videos, photos, and DVDs – Nero MediaHome supports all major formats
- ✔️ Lifetime License for 1 PC: One-time payment, no subscriptions – compatible with Windows 11 / 10
How to Move, Resize, and Format Grouped Pictures
After you group pictures in Word, the group behaves like one larger object. This makes it much easier to adjust a photo collage, logo arrangement, diagram, or set of screenshots without accidentally shifting one image out of place. Click once on any picture in the group, and Word should show one selection border around the entire group. From there, you can move, resize, rotate, and apply some formatting changes to the group as a whole.
Move the grouped pictures
To move the group, place your pointer over the selected group until you see the four-sided move cursor. Then click and drag the group to a new location on the page. If you want more control, use the arrow keys on your keyboard to nudge the group in small steps. For even finer movement, hold Ctrl while pressing an arrow key. This is useful when you need to line up grouped pictures with text, a page margin, or another object.
If the group does not move where you expect, check its text wrapping setting. Select the group, go to Picture Format or Shape Format, choose Wrap Text, and select an option such as Square, Tight, Top and Bottom, or In Front of Text. Groups are usually easier to position when they are not set to In Line with Text, because inline objects act more like large characters inside a paragraph.
The Tool Desk
Outbyte Driver Updater FREEScan for outdated or missing drivers - takes under a minuteDriver Scan →Outbyte PC Repair FREEClear out junk files and repair common Windows errorsFree Scan →Resize the group
To resize the grouped pictures, select the group and drag one of the corner sizing handles. Using a corner handle keeps the group’s proportions consistent, so the pictures do not look stretched or squeezed. Avoid dragging the side handles unless you intentionally want to make the group wider or taller. You can also enter exact dimensions by selecting the group and using the Height and Width boxes on the Picture Format or Shape Format tab.
- Drag a corner handle to resize the whole group proportionally.
- Drag the rotation handle above the group to rotate all grouped pictures together.
- Use the Size options on the ribbon when you need a precise height or width.
- Press Ctrl + Z if the group changes in a way you did not intend.
Format the grouped pictures
Some formatting can be applied to the entire group at once. For example, you can add a border, apply a shadow, change the overall position, or use alignment tools. Select the group, then open the Picture Format or Shape Format tab. Options such as Align, Position, Wrap Text, and Rotate are especially helpful when placing the group neatly on the page.
If you need to edit one picture inside the group, click the group once to select it, then click the individual picture you want to adjust. Word should select only that item within the group. You can then crop it, change its brightness, apply a picture style, or adjust its border without affecting the other pictures. When you click outside the group and select it again, the images will continue to move and resize together.
How to Ungroup Pictures in Word
Ungrouping pictures in Word separates a grouped set of images back into individual objects. This is useful when you need to adjust one picture, replace an image, change spacing, apply a different border, or move only one item without affecting the rest of the group. After ungrouping, each picture can be selected, resized, rotated, formatted, or deleted on its own.
Crashes, No Sound, or Screen Glitches?
Random freezes, missing sound and display glitches usually trace back to one bad driver. Find and replace yours safely.Free scan · under a minuteWindows Errors? Fix Them Before They Spread
Repair common Windows errors and clear accumulated junk for a smoother, more stable PC - no reinstall needed.Free scan · no reinstallUngroup pictures using the right-click menu
- Click once on the grouped pictures to select the whole group.
- Right-click anywhere on the selected group.
- Point to Group in the menu.
- Click Ungroup.
Word will separate the group into individual pictures. You may still see selection handles around more than one image immediately after ungrouping, especially if Word keeps the objects selected. Click a blank area of the page, then click a single picture to confirm that the images are now separate.
Rank #4
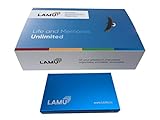
- MORE THAN A HARD DRIVE: Our unique software can automatically organize and find your photos/videos by timeline, place or map, people, camera, relation, social network, and other specifics
- EASILY ACCESSIBLE: All your photos and videos in one place, deduped, organized, portable, easy to find, and easy to share; you can access, view, and share from anywhere connected to the Internet
- PLUG AND PLAY: Works on Windows 7-11, just plug into a USB port; backup or import photos/videos from all local storage media and Cloud into one place; 2TB of storage space available
- FACIAL RECOGNITION: LAMU’s state-of-the-art technology detects faces in your photos; easily find photos of those in your social network based on who has taken photos together or create a family tree
- ORGANIZED AUTOMATICALLY: LAMU transforms your photo collection into a powerful information system; 16 ways to find photos; easily manage pictures and create a family legacy that can be passed on
Ungroup pictures from the Picture Format tab
- Select the grouped pictures.
- Go to the Picture Format tab on the ribbon. In some versions of Word, this may appear as Shape Format or Graphics Format, depending on what is selected.
- Look for the Arrange group.
- Click Group.
- Choose Ungroup.
This method is helpful if the right-click menu does not show the option you expect, or if you prefer using the ribbon. Once the pictures are ungrouped, you can select one image at a time and make individual changes. For example, you can crop one picture, apply a shadow to another, or drag one image slightly to improve alignment.
How to regroup pictures after editing
If you ungroup pictures only to make a quick adjustment, you can group them again afterward. Hold down Ctrl on Windows or Command on Mac, click each picture you want to include, then use Picture Format > Group > Group. Make sure all items have a text wrapping option such as Square, Tight, Through, or In Front of Text, because objects set to In Line with Text often cannot be grouped properly.
What to check if Ungroup is unavailable
- Only one picture is selected: The Ungroup option appears only when you have selected an existing group.
- The object is not actually grouped: The pictures may only be placed close together. Try clicking each image separately to test this.
- You are selecting part of the group: Click the outer edge of the group so the full set is selected before trying to ungroup.
- The file is protected: If editing is restricted, go to Review and check whether document protection needs to be turned off.
- You are working with a pasted image: If several pictures were pasted as one screenshot or flattened image, Word sees them as a single picture, so they cannot be ungrouped into separate parts.
After ungrouping, take a moment to check the layout before continuing. Individual pictures may shift slightly if they use different wrapping settings or are anchored to different paragraphs. If the layout changes unexpectedly, use Undo right away, adjust the wrapping or position settings, and then try ungrouping again.
What’s actually slowing this PC down?
Pick the symptom - the matching free tool is one click away.
Troubleshooting Common Grouping Problems
If Word will not let you group pictures, the issue is usually related to layout options, selection problems, or mixing objects that Word cannot group together in the current format. The Group button may appear gray, one image may refuse to select, or the pictures may move separately even after you think they are grouped. Most of these problems can be fixed by checking how each picture is placed on the page.
The Group button is grayed out
The most common cause is that one or more pictures are set to In Line with Text. Inline pictures behave like large text characters, so Word cannot freely group them with other floating objects. Click each picture, select the Layout Options button, and choose a text wrapping option such as Square, Tight, Through, Top and Bottom, or In Front of Text. After changing the wrapping for all pictures, hold Ctrl and click each image again, then check Picture Format > Group > Group.
You cannot select more than one picture
If Ctrl-clicking does not select mulle pictures, the images may still be inline, hidden behind text, or stacked on top of each other. Change the wrapping option first, then try selecting again. You can also open Home > Select > Selection Pane to see a list of objects on the page. In the Selection Pane, click one picture, then hold Ctrl and click the other picture names. This is especially helpful when one image is behind another or partly outside the visible page area.
- Check wrapping: Make sure every picture uses a floating layout, not In Line with Text.
- Use the Selection Pane: Select hard-to-click images from a list instead of the page.
- Zoom out: A lower zoom level makes it easier to see and select all objects.
- Click the picture edge: Some images are easier to select by clicking near their border.
Pictures move out of place after grouping
If your pictures shift when grouped, they may have different text wrapping settings or anchors. Select each picture before grouping and apply the same wrapping style, such as Square or In Front of Text. You can also right-click a picture, choose Size and Position, and review the position settings. For a beginner-friendly approach, place the pictures where you want them first, use the same wrapping option for all of them, and then group them only after the layout looks correct.
Word will not group pictures with other items
Word can group pictures with many shapes, icons, text boxes, and objects, but some combinations may not work depending on the file type, compatibility mode, or object format. If the document was created in an older Word format, go to File > Info and look for a Convert option to update it to the current format. If you are trying to group a picture with a chart, SmartArt graphic, or embedded object, try placing the item inside a text box or converting it to a picture first, if editing is no longer needed.
Best Value

- ✔️ Find Duplicate Photos, Videos, and Music: Detects exact and similar duplicate photos, videos, and music files across your computer and external storage devices. Keep your media library organized and save valuable storage space.
- ✔️ Supports HEIC/HEIF, RAW, JPG, PNG, and more: Supports all important photo formats including HEIC/HEIF, RAW, JPG, PNG, and more. Ideal for managing photos from your smartphone, DSLR, or other devices.
- ✔️ Easy Scan of Internal & External Storage: Quickly scan your computer, external hard drives, USB drives, and NAS to find duplicate media files in one go.
- ✔️ AI-Powered Image Similarity Detection: Nero Duplicate Manager uses advanced AI algorithms to detect similar images, even if they have been resized, cropped, or edited.
- ✔️ No Subscription, Lifetime License: Get the software once with a lifetime license for 1 PC. No subscriptions, no hidden fees. Save money while organizing your media library effectively.
| Problem | Likely Fix |
|---|---|
| Group button is unavailable | Change all pictures from In Line with Text to a floating wrapping option. |
| Only one image selects | Use Ctrl-click or select objects from the Selection Pane. |
| Grouped images shift position | Apply the same wrapping and position settings before grouping. |
| One object will not group | Check whether it is a chart, SmartArt, or embedded object with limited grouping support. |
If grouping still does not work, save the document, close Word, and reopen it before trying again. For stubborn layouts, copy the pictures into a blank area of the document, set each one to In Front of Text, group them there, and then move the finished group back into position. This often avoids hidden formatting conflicts from nearby paragraphs, tables, headers, or other page elements.
Frequently Asked Questions
Why can’t I select multiple pictures in Word?
This usually happens because one or more pictures are set to “In Line with Text.” Click each picture, open the Layout Options button, and choose a wrapping style such as “Square,” “Tight,” or “Behind Text.” After changing the wrap style, you should be able to hold Ctrl and click each picture to select them together.
Why is the Group option grayed out in Word?
The Group option is often unavailable when the selected items are not compatible for grouping or when a picture is still set to “In Line with Text.” Make sure every image has a text wrapping option other than “In Line with Text,” then select all the images again. If you are working in an older Word document format, saving the file as a modern .docx file can also help.
Do these 3 things before closing this tab:
1Repair Windows errors before they cause bigger problems2Scan for outdated or missing drivers - takes under a minute3Clear out junk files and repair common Windows errorsCan I group pictures with text boxes or shapes in Word?
Yes, Word can group pictures with text boxes, shapes, icons, and other objects. Select all the items you want to combine, then go to Picture Format or Shape Format and choose Group. This is useful when you want a caption, label, arrow, or diagram element to stay attached to an image.
Will grouping pictures make them resize together?
Yes, once pictures are grouped, you can drag a corner handle of the group to resize all selected items at the same time. This keeps their relative positions and proportions together as one unit. For best results, use a corner handle instead of a side handle so the group does not become stretched.
How do I edit one picture inside a group without ungrouping everything?
Click the grouped pictures once to select the group, then click the specific picture inside the group again to select only that item. You can then adjust that individual picture’s formatting, size, or position while it remains part of the group. If Word does not let you make the change you need, ungroup the items temporarily and group them again afterward.
Bottom Line
Grouping pictures in Word is a simple way to keep mulle images together so you can move, resize, and format them as one object. Once you set the pictures to a flexible text wrapping option, selecting and grouping them becomes much easier.
Quick wins for a faster PC:
Fix the driver behind crashes, sound loss and screen glitchesFind Drivers →Clear out junk files and repair common Windows errorsFree Scan →Scan for outdated or missing drivers - takes under a minuteDriver Scan →If grouping is not working, check the layout settings, make sure all images are selected, and try using the Selection Pane for better control. When you need to edit images separately again, just ungroup them and make your changes.
Quick Recap
Product prices and availability are accurate as of the date/time indicated and are subject to change. Any price and availability information displayed on Amazon at the time of purchase will apply.




