Recommended Free Tools
“Css” can mean Counter-Strike: Source (CS:S), while many people now use it informally when they mean Counter-Strike 2 (CS2). They are separate games with different server files. Confirm the edition before downloading anything: the current setup material covered here is primarily for CS2, while Valve’s account and configuration article is a general Source-server reference.
For CS2, hosting involves obtaining the dedicated-server files through SteamCMD, targeting Steam application ID 730, selecting LAN or Internet play, configuring a listening port and administration controls, opening the network path, and testing from a real player connection. A self-hosted machine gives you control but makes you responsible for updates, security and uptime. A managed host removes much of that maintenance but adds a recurring bill and less control over the underlying machine.
As an Amazon Associate I earn from qualifying purchases.
First decide: Counter-Strike: Source or Counter-Strike 2?
The spelling in the title is ambiguous. Do not apply a CS2 procedure to CS:S, or assume an older Source setting is a current CS2 default.
| Question | Counter-Strike: Source (CS:S) | Counter-Strike 2 (CS2) |
|---|---|---|
| Game technology | Older Source-era dedicated-server model. | Current Counter-Strike dedicated-server model. |
| Evidence used for this guide | Valve’s general Source dedicated-server support and command-line references. | A CS2 setup guide updated October 10, 2026, plus Valve’s general Source references. |
| Installation identifier | Not established in the material used here; follow the CS:S-specific package instructions. | Steam application ID 730 is reported for the client and dedicated-server files. |
| Settings you can reuse safely | Use the general Source instructions for the older game. | Use generic Source concepts only after checking that the current CS2 documentation supports them. |
If your group says “CSS” because it plays the 2004 game, use the CS:S section below. If you mean the current Counter-Strike release, use the CS2 procedure.
#1 Best Overall

- POWERHOUSE 8-CORE GAMING PERFORMANCE — Driven by the AMD Ryzen 7 8700F with 8 cores and 16 threads, boosting up to 5.0 GHz for smooth, responsive gameplay and the ability to handle AAA titles, streaming, and background tasks all at once
- NEXT-GEN BLACKWELL ARCHITECTURE — The NVIDIA GeForce RTX 5070 is powered by NVIDIA's cutting-edge Blackwell GPU architecture, delivering a massive generational leap in rasterization and ray tracing performance so you can experience your games the way they were meant to be played.
- Simplistic Design: Enjoy the latest generation of Windows 11 Home for your everyday needs. *MSI recommends Windows 11 Pro for business use.
- Cool While Gaming: In conjunction with an ARGB fan Air Cooler, the Codex R2 features four system cooling fans; three in the front and one in the rear to pull in cool air and push heat out of the PC.
- Turn on the Bright Lights: With the built-in RGB lighting, take your gaming experience to the next level by pressing the MSI LED button to cycle through lighting options. Customize lighting even further with MSI Center software.
Choose where the server will run
Self-hosting on a machine you control
You install the server files on a desktop, spare PC, virtual machine or rented server and operate it yourself. This is the most flexible option for launch settings, configuration files, scheduled restarts and logs. You also have to keep the operating system and server software patched, permit the correct traffic through firewalls, protect remote administration and solve outages yourself.
Using managed game-server capacity
A managed service usually provides a web panel, an already prepared machine and a support channel. It can be practical when nobody in the group wants to leave a computer running or maintain SteamCMD. You trade away some operating-system access and may be limited by the panel’s available settings. Prices, locations, backup policies, player limits and support quality vary, so ask for those details before paying rather than assuming every host offers the same service.
| Decision factor | Self-hosted | Managed |
|---|---|---|
| Initial setup | Install the operating system tools, SteamCMD and server files; configure the network. | Usually a shorter panel-based setup, depending on the provider. |
| Ongoing maintenance | You apply updates, restart after failures and keep backups. | The provider maintains the machine; you still maintain game settings and access credentials. |
| Configuration control | Highest control over files, launch options, scheduled jobs and monitoring. | Limited to the controls exposed by the provider. |
| Reachability | Depends on your upstream connection, firewall and port-forwarding capability. | Depends on the provider’s region, routing and capacity. |
| Cost pattern | Potentially no new hosting fee if you already have suitable hardware, but electricity and connection capacity still matter. | Recurring rental cost; the actual amount depends on the selected plan and location. |
| Support and recovery | You create backups and troubleshoot incidents. | Support and snapshots may exist, but verify what is included and how quickly restores occur. |
Plan the server before installing it
Confirm the edition and intended audience
- Write down “CS:S” or “CS2” before you download files.
- Decide whether the server is LAN-only for people on the same network or Internet-facing for remote players.
- Choose a machine that can remain online for the sessions you intend to run. Current, authoritative minimum hardware and a guaranteed player capacity are not established by the sources used for this guide, so do not promise a fixed number of slots from a generic CPU or RAM estimate.
Check the network you actually have
For an Internet server, identify whether the host is behind a home router, a carrier-grade NAT connection, a corporate firewall or a cloud firewall. If you cannot receive inbound traffic, ordinary port forwarding may not work. A wired connection and a stable upstream link are preferable for a host that must remain reachable, but the game’s actual experience also depends on the distance and routing between the players and the machine.
The Tool Desk
Outbyte PC Repair FREEClear out junk files and repair common Windows errorsFree Scan →Outbyte Driver Updater FREEScan for outdated or missing drivers - takes under a minuteDriver Scan →Separate player access from administration
Players need the game’s connection path. Administrators need a protected control path and credentials. Use a long, unique RCON password where RCON is supported, do not paste it into public chat, and restrict management access to trusted people. Do not reuse a personal Steam password on the server.
How to host a CS2 server in 2026
The steps below reflect the current CS2 setup guidance that identifies application ID 730. The complete installation syntax can change, so copy the exact SteamCMD command from the current setup instructions and confirm it against Valve’s CS2-specific documentation before deploying a public server. The ForgeWorld Gaming procedure is updated October 10, 2026: https://fwg.world/guides/cs2-dedicated-server-setup
Rank #2

- Legend perfected: Modern design with a matte basalt black finish in an optimized chassis with customizable AlienFX lighting zones, including the striking stadium lighting.
- Game changing graphics: Step into the future of gaming and creation with the NVIDIA GeForce RTX 5070 graphics, powered by NVIDIA Blackwell architecture.
- Marathon gaming unlocked: This high-performance technology ensures clean energy is consistently available, unleashing the top-level power of Intel Core Ultra 7 265F processor as you game, livestream, and multi-task for hours on end.
- Total command: Alienware Command Center software allows you to create and edit AlienFX lighting across the ecosystem, choose and monitor your performance mode across distinct power states, and create custom gaming profiles for your whole library.
- Dell Services: 1 Year Onsite Service provides support when and where you need it. Dell will come to your home, office, or location of choice, if an issue covered by Limited Hardware Warranty cannot be resolved remotely.
1. Prepare an installation directory
Create a dedicated directory for the server rather than installing into a personal game-library folder. Give the account that runs the service permission to read and write that directory. Keeping server files separate makes updates, backups and rollback easier.
On a machine that will be shared with other services, run the server under a non-administrator operating-system account. On a disposable test machine, you can use an account with the required permissions, but avoid running unrelated programs with elevated privileges.
What’s actually slowing this PC down?
Pick the symptom - the matching free tool is one click away.
2. Install SteamCMD and obtain the CS2 files
Install SteamCMD using the platform’s current package for your operating system. In SteamCMD, use the application-update workflow for CS2’s reported application ID 730, selecting the server directory you created. The ForgeWorld guide describes the installation flow; treat its exact login and update syntax as version-sensitive rather than copying an old command from a forum post.
Wait for the update to finish and confirm that the expected executable and supporting directories appear in the installation folder. If the update stops partway through, record the final error, check that the account can write to the directory and run the update again before changing unrelated settings.
3. Build a repeatable launch configuration
Do not rely on a command typed manually once. Put the launch options in the service, script or panel that will start the server so a reboot produces the same result. Valve’s broad Source command-line reference documents controls for selecting the game, choosing a port, setting maximum players, selecting a map and forcing LAN-only operation: https://developer.valvesoftware.com/wiki/CHILLMODEA/Pages/Command_line_options_%28Source_Dedicated_Server%29
Rank #3
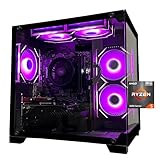
- Processor specifications: Adopting AMD Ryzen 5 5600 processor, with a basic clock speed of 3.5GHz and a turbo frequency of 4.4GHz, it can achieve fast response computing performance
- Graphics Card: Features GeForce RTX 3050 graphics card with 6GB dedicated video memory for gaming and multimedia applications
- Memory configuration: Equipped with 32GB DDR4 RAM (16GB * 2), providing sufficient memory capacity for multitasking and demanding applications
- Gaming Performance: Designed to handle modern gaming titles and graphics-intensive tasks with smooth frame rates and visual quality
- Desktop System: Complete gaming desktop computer system ready for setup and use out of the box
Use that reference as a map of available concepts, not as proof that every legacy switch is valid in CS2. Check the current CS2 documentation for the exact option names and syntax. At minimum, document these choices in your launch configuration:
Do these 3 things before closing this tab:
1Fix the driver behind crashes, sound loss and screen glitches2Repair Windows errors before they cause bigger problems3Scan for outdated or missing drivers - takes under a minute- The game or executable being launched.
- LAN-only versus Internet operation.
- The listening port.
- The initial map or mode.
- The intended maximum-player setting, if the current CS2 build exposes it.
- Any authentication, VAC or remote-administration options supported by the current build.
4. Select LAN or Internet operation
For a private session in one home or office network, select LAN-only mode and test from a second computer on that network. LAN mode avoids exposing the service to the public Internet, but it does not make the server reachable by friends outside your router.
For remote players, configure Internet operation and make the server’s address and port reachable. Valve’s general Source support page describes the LAN/Internet choice and other server fields: https://help.steampowered.com/en/faqs/view/0E82-09BC-324C-CB12 Because that page is a general Source article, verify each field against current CS2 instructions.
5. Choose and expose the port
Every network service needs a port. Valve’s general Source article names UDP port 27015 as its default example, but the material here does not independently establish that 27015 is the current CS2 default. Choose the port documented for your CS2 build, then use the same value in the server launch configuration, the operating-system firewall and the router or cloud-firewall rule.
When the host is behind a router, forward the required UDP traffic from the external port to the host’s fixed local IP address. Reserve that local address in the router or configure a static address so the rule does not point to the wrong computer after a reboot. If your provider uses a cloud firewall, create the equivalent inbound rule there as well as on the operating system.
Rank #4

- POWERED BY RTX 5070 12GB + RYZEN 7 9700X - The GeForce RTX 5070 12GB GDDR7 graphics card pairs with an 8-core AMD Ryzen 7 9700X processor to drive smooth 1440p and 4K gameplay, giving this gaming PC the headroom for modern titles, streaming, and creative work.
- 32GB DDR5 6000MHz MEMORY & 1TB NVMe SSD - 32GB of high-speed DDR5 memory and a 1TB PCIe 4.0 NVMe solid state drive deliver quick load times, smooth multitasking, and generous storage, keeping this prebuilt gaming desktop responsive under heavy workloads.
- BUILT-IN 11.3-INCH Smart DISPLAY - An integrated smart screen shows real-time CPU and GPU temperatures, usage, and weather while you play, adding a distinctive and functional touch to your battlestation.
- 850W 80+ GOLD POWER SUPPLY, 360MM LIQUID COOLING & WiFi 7 - An 850W 80 Plus Gold certified power supply provides stable, efficient power with headroom for future upgrades, while a 360mm AIO liquid cooler, WiFi 7, and an ARGB mid-tower case keep the Ryzen 7 CPU cool and connected in a clean build.
- READY TO PLAY OUT OF THE BOX - Arrives fully assembled and tested with Windows 11 Home pre-installed, so your prebuilt gaming computer is ready to set up in minutes. Assembled in the USA, and backed by a one-year limited warranty and lifetime free technical support.
6. Configure administration, authentication and VAC deliberately
Valve’s general Source setup page lists maximum players, the UDP port, an RCON password and a VAC selection. Set a strong, unique RCON password and store it in a password manager. Do not include it in screenshots, public configuration repositories or a launch command that ordinary users can read.
VAC settings affect the kind of session you are running. Use the current CS2 documentation to confirm the supported choice before enabling or disabling anything. A legacy switch copied from an older Source tutorial can produce a server that starts but does not behave as intended.
7. Start locally, then test from outside
- Start the server and watch its console or log for file, port and authentication errors.
- Join from a second computer on the same LAN. Confirm that the selected map loads, players can move and the server accepts the expected number of connections.
- Ask a player on a different Internet connection to join using the address and port you intend to publish. A successful LAN test does not prove that router forwarding or a cloud firewall is correct.
- Disconnect the host from the game, restart the service and repeat the external test. This catches startup scripts, changing local addresses and rules that were applied only temporarily.
If outside players cannot connect, test in this order: confirm the server is listening on the configured port; confirm the operating-system firewall rule; confirm the router or cloud rule forwards to the correct host; check whether your Internet provider uses carrier-grade NAT; and verify that you gave players the current public address. Do not assume that a server appearing in a browser or console list proves that every network path is healthy.
Independent reader supportYour contribution helps us test, update, and keep practical guides available for everyone.How to host a CS:S server
CS:S uses the older Source dedicated-server model. Start with Valve’s “Setting up a Steam Source Dedicated Server” article for the game-specific account and server workflow: https://help.steampowered.com/en/faqs/view/0E82-09BC-324C-CB12
Account considerations for the older Source setup
Valve’s article says the older Source server procedure uses a separate Steam account and that ownership of the game is not required for that server account. Treat this as a CS:S-era instruction; do not assume the same account rule applies to a current CS2 installation without checking CS2-specific documentation.
Best Value

- CPU: AMD Ryzen7 5700X (up to 4.6GHz) 8-Core 16-Thread to easily handle multi-line tasks
- Main board: MSI B550M-A PRO motherboard provides reliable performance and stability
- GPU: Geforce RTX 5060 8GB GDDR7 Graphics Cards (Brand may vary) Support DLSS 4 multi frame generation, ray tracing, and Reflex 2 delay optimization
- RAM: 32GB DDR4 3200MHz (16GB*2) SSD: 1TB M.2 NVMe PCIe
- Power supply: 650W (80plus bronze) certified for energy efficiency and stable performance
Configure the server and launch options
Follow the CS:S package’s installation instructions, then set the Internet or LAN mode, maximum players, UDP port, RCON password and VAC choice in the server configuration. The Source command-line reference covers general options for selecting a game, map, port, player limit and LAN-only mode: https://developer.valvesoftware.com/wiki/CHILLMODEA/Pages/Command_line_options_%28Source_Dedicated_Server%29
Use the port value consistently in the server, firewall and router. Valve’s generic page uses 27015 as its default example, but confirm the value in the CS:S instructions you are following if you have changed it or are using a hosting panel.
Test CS:S separately
Join from the same LAN first, then from an outside connection. Test a map change, a reconnect after restarting the process and an administrator action. CS:S tutorials often predate modern routers and hosting panels, so a command that worked on an older operating system may still require current firewall and account adjustments.
Free tools Windows power users keep installed
One-click scans. No signup required.
Port forwarding, relays and the limits of generic Source advice
Valve’s Source Multiplayer Networking article discusses Steam Networking and Steam Datagram Relay for games listed on that page: https://developer.valvesoftware.com/wiki/Source_Multiplayer_Networking?language=uk That general article does not establish that a CS2 self-hosted server can avoid port forwarding. Unless current CS2 documentation explicitly confirms relay support for your server type, plan for a reachable UDP port and test it from an external network.
A relay or provider-managed route can change which address players use, but it does not remove the need to understand authentication, firewall rules and server logs. Treat “no port forwarding required” as a product-specific claim that must be confirmed for the exact game version and hosting mode.
Operate the server safely after it works
Updates and rollback
Game updates can change binaries, configuration names and launch behavior. Record the working launch settings, back up configuration files and note the date of every update. Before a scheduled community event, update on a test instance or at least restart and perform one LAN and one external join test.
Backups
Back up configuration, map or plugin data that you are allowed to redistribute, administrator lists and any custom scripts. A backup on the same disk is not a recovery plan; copy it to a separate protected location and periodically verify that it can be read.
Security
- Run the process with only the operating-system permissions it needs.
- Keep SteamCMD, the operating system and server dependencies patched.
- Use a unique RCON password and rotate it when an administrator leaves the group.
- Allow only the required inbound traffic; do not expose unrelated management ports.
- Review logs for repeated authentication failures, crashes and unexpected restarts.
Availability
Schedule restarts during quiet periods if the server or operating system requires them. Use a service manager or hosting-panel restart policy so a process crash does not leave players staring at an offline listing. Tell players the maintenance window and keep a second administrator able to restart the service.
Quick Recap
Troubleshooting by symptom
The server files never finish installing
- Confirm that SteamCMD is the correct build for the host operating system.
- Check write permissions and free disk space in the installation directory.
- Use the current application-update syntax for app ID
730for CS2, or the CS:S-specific package instructions for CS:S. - Read the final SteamCMD error instead of repeatedly changing launch parameters.
The process starts and immediately exits
- Check that the executable and working directory point to the newly installed files.
- Remove one recently added launch option at a time and consult the current game-specific documentation.
- Check logs for a port already in use, missing files or an unsupported legacy switch.
LAN players can join, but Internet players cannot
- Confirm Internet mode rather than LAN-only mode.
- Verify the configured UDP port in the operating-system firewall.
- Verify router or cloud forwarding to the host’s current local IP address.
- Check for carrier-grade NAT or another upstream firewall that prevents inbound connections.
- Have an outside player test again after every network change.
Players connect but experience severe lag
- Check whether the host’s upload link is saturated by backups, streaming or other users.
- Compare results for players near and far from the host; routing distance matters.
- Watch CPU, memory and network utilization while several players are connected.
- Do not infer a guaranteed player limit from a generic hardware specification; current verified capacity depends on the game build, settings and host environment.
Administrators cannot use RCON
- Confirm the password matches the active configuration and contains no copied whitespace.
- Check that the RCON feature and network path are enabled for the current game version.
- Rotate the password immediately if it may have been exposed.
A practical launch checklist
- Label the project CS:S or CS2.
- Choose self-hosting or managed capacity based on who will maintain the machine.
- For CS2, verify the current SteamCMD procedure and target application ID
730. - Install into a dedicated directory and record the working path.
- Set Internet or LAN mode intentionally.
- Choose a documented UDP port and apply it consistently to the server, firewall and router.
- Set a strong RCON password and confirm the current VAC option.
- Start locally and inspect the console or logs.
- Test from another LAN device.
- Test from an unrelated Internet connection.
- Back up the configuration and document the restart procedure.
- Re-test after every game or operating-system update.
Product prices and availability are accurate as of the date/time indicated and are subject to change. Any price and availability information displayed on Amazon at the time of purchase will apply.




