A button that feels sticky or mushy may have residue or debris around it; one that moves normally but fails to respond may have worn contacts or an electronic fault. Start by powering the device off, identifying the button mechanism, and trying only a manufacturer-approved external clean. Open a device only when its maker supports that repair and you have the correct model-specific instructions.
First, distinguish a sticky feel from a missed press
Note whether the button physically resists movement, feels soft, or moves normally but fails to register. Check whether one button or several are affected and whether the problem followed a spill. These clues can help narrow the cause, but they are not a definitive diagnostic test: residue, debris, worn contacts, and faults elsewhere in the electronics can produce overlapping symptoms.
- Sticks or moves poorly: debris or dried liquid may be interfering with the button or the material beneath it.
- Moves normally but misses input: a contact may be contaminated or worn, or the fault may be in the circuit board or another part of the device.
Make the device safe before cleaning
Power down and follow the manufacturer’s instructions before cleaning. Do not spray or pour liquid into a device. For Xbox Series X, Microsoft instructs users to power off and disconnect the console before cleaning and warns against applying liquid directly to it. Its repair guidance also cautions that ignoring instructions, using incompatible parts, or using improper tools can cause serious injury, death, or property damage. These instructions are specific to that console; use the guidance for your own model.
As an Amazon Associate I earn from qualifying purchases.
Do not open a device unless it supports user repair, you have a model-specific procedure and the right tools, and you are comfortable carrying it out. Microsoft advises against proceeding with its repair if the device does not support self-repair, the part will not address the issue, or you lack the necessary skill or tools. Its repair instructions also discuss protective measures and electrostatic-discharge precautions.
Try an external clean without flooding the button
Remove loose surface dust only with a method approved for the device. Compressed air or a small vacuum is used in iFixit’s TV remote repair guide for dust, but that does not make either method suitable for every device. Keep liquids away from openings, and do not assume a solvent is safe for a button’s plastic, rubber, coating, or labels. iFixit warns that some solvents can worsen sticky plastic and recommends testing an inconspicuous area first.
Alcohol concentration is not universal. Microsoft specifies 70% isopropyl alcohol in its Xbox repair context, HP’s higher-concentration advice applies to mechanical keyboards, and iFixit’s remote-button guide refers to rubbing alcohol for selected contacts without establishing one concentration for all devices. Follow your device maker’s instructions rather than transferring a recommendation from a different mechanism.
#1 Best Overall

- QD ELECTRONICS CLEANER: A precise cleaner made from petroleum distillate and alcohol that is fast evaporating and leaves no residue.
- FORMULA: With quick-drying, plastic safe, residue-free features, this cleaner is ideal for even the most sensitive electronics and will help to prevent contact failure.
- APPLICATIONS: QD Electronic Cleaner is ideal for use on computer components, circuit breakers, circuits, coin mechanisms, contacts, flux removal, sockets, lighting, plastics, nylon, plugs, relay switches, PVC, and more!
- PRODUCT SPECIFICATIONS: QD Electronic Cleaner is available in a 11 wt. oz. aerosol can.
- CRC INDUSTRIES: A market leader that offers impeccably designed chemical solutions to maintain, protect and repair different marine, heavy-duty motor vehicles, industrial-grade engines, household tools, and electrical equipment.
Clean a membrane remote only if you can access it safely
In iFixit’s TV remote guide, the rubber-like membrane is removed from the remote before cleaning. The method is specific to that repair; check a guide for your exact remote before opening yours.
Do these 3 things before closing this tab:
1Clear out junk files and repair common Windows errors2Fix the driver behind crashes, sound loss and screen glitches3Repair Windows errors before they cause bigger problems- Use the model-specific disassembly procedure and keep track of the buttons and their positions.
- For sticky residue on the membrane’s top surface, the guide uses water. Do not soak the remote’s circuit board or let liquid enter the device.
- For dust, the guide describes compressed air or a small vacuum.
- If a membrane contact is contaminated, gently clean only the affected contact with a cotton swab moistened with rubbing alcohol. Avoid rubbing away the conductive paint, and do not clean contacts for keys that already work.
- Let parts dry fully, reassemble them in their original positions, and test the affected buttons.
If a button still fails after cleaning, inspect the membrane contact if the guide and design allow it. Conductive paint that is worn or missing may need a repair such as conductive paint or a replacement conductive dot; iFixit’s guide also describes foil as a conditional option. These are not universal fixes, and the right choice depends on the remote and the condition of the contact. If the contact looks intact or the button still fails, the fault may lie on the circuit board or elsewhere.
Rank #2
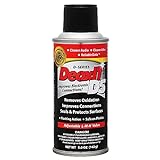
- CAIG DeoxIT Contact Cleaner
- 5% Spray
- 5 oz
Clean a controller with removable rubber pads carefully
For the controller covered by iFixit’s button-cleaning guide, the rubber pads and plastic buttons are separate parts. Other controllers may use a different construction, so do not treat this as a universal teardown procedure.
- Follow a guide for your controller model to access the pads and buttons.
- Clean plastic buttons with a soft material; clean the rubber pads with a damp soft material.
- Dry every part completely before putting it back.
- Align each button with its corresponding circuit area during reassembly, then test the controls.
Use mechanical-keyboard instructions for mechanical keys
A mechanical keyboard’s keycaps and switches are not the same as a remote’s membrane or a controller’s rubber pads. HP’s guide describes removing keycaps, using compressed air, cleaning, allowing parts to dry fully, and testing. Follow the instructions for your particular keyboard, and do not transfer HP’s solvent advice to other devices or mechanisms without manufacturer support.
Rank #3

- CRC INDUSTRIES: A market leader that offers impeccably designed chemical solutions to maintain, protect and repair different marine, heavy-duty motor vehicles, industrial-grade engines, household tools, and electrical equipment
- QD ELECTRONICS CLEANER: A precise cleaner made from petroleum distillate and alcohol that is fast evaporating and leaves no residue.
- FORMULA: With quick-drying, plastic safe, residue-free features, this cleaner is ideal for even the most sensitive electronics and will help to prevent contact failure.
- APPLICATIONS: QD Electronic Cleaner is ideal for use on computer components, circuit breakers, circuits, coin mechanisms, contacts, flux removal, sockets, lighting, plastics, nylon, plugs, relay switches, PVC, and more!
- PRODUCT SPECIFICATIONS: QD Electronic Cleaner is available in a 4.5 wt. oz. aerosol can.
Choose the next step based on what you find
| What you observe | Reasonable next step | Important limit |
|---|---|---|
| Surface dirt or residue; button still moves | Try a gentle external clean that the device maker allows. | There is no single external method established as safe for every device, coating, or seal. |
| Sticky membrane remote; accessible residue or contaminated contact | Use the model-specific procedure and clean only the affected membrane area or contact. | Do not rub off conductive paint or wet the circuit board. |
| Controller with removable rubber pads | Clean pads and buttons as described for that model; dry and align them before reassembly. | The cited iFixit procedure describes its controller, not all controllers. |
| Mechanical keyboard key feels or responds poorly | Use the keyboard maker’s instructions; HP’s guide covers keycap removal, cleaning, drying, and testing. | Keyboard-specific solvent guidance does not automatically apply to other devices. |
| Button still misses input after cleaning | Check for visible contact wear only if the device’s repair procedure permits access; otherwise seek qualified repair. | A clean contact with persistent failure can indicate a circuit-board or other electronics fault. |
Test before calling the repair complete
After reassembly, test every affected button and nearby controls. A button that still fails after appropriate cleaning should not be treated as proof that more solvent or force will help. Stop if a part is damaged, a contact is worn, the procedure does not match your model, or access would require unsupported disassembly; a qualified repair may be safer than continued experimentation.
Quick Recap
Rank #4

- Improves conductivity by blasting away dust and cleaning sensitive electrical equipment
- Non-flammable, quick evaporation, and zero residue
- Prevent contact failure by regularly cleaning
- Safe to use on rubber, metal, and most plastics. Compatibility test on small area is recommended before use
- Extension straw attached for hard to reach areas enabling pinpoint precision
Sources: iFixit: Repair a TV Remote Control Button; Microsoft Learn: Xbox Series X Console Safety & Repair Instructions; iFixit: Cleaning the Controller Buttons; HP: How to Clean and Maintain Your Mechanical Keyboard; iFixit: How Do I Fix Sticky Plastics?.
Product prices and availability are accurate as of the date/time indicated and are subject to change. Any price and availability information displayed on Amazon at the time of purchase will apply.




