Disabling an onboard sound card in BIOS/UEFI can help when you’re using a dedicated audio interface, a different sound card, or you’re troubleshooting crackling, distortion, or device conflicts. It also prevents the motherboard’s audio controller from competing with your new hardware.
This guide walks you through the exact workflow: entering BIOS, locating the right setting (often called HD Audio or Onboard Audio), disabling it, saving changes, and verifying the result in Windows.
As an Amazon Associate I earn from qualifying purchases.
What It Means to Disable an Onboard Sound Card in BIOS
On most PCs, “onboard sound” isn’t a standalone device—it’s the motherboard’s audio controller (commonly Realtek-based) exposed to the system through the PCIe/codec hardware. Disabling it in BIOS turns off the hardware device at boot, so the operating system can’t enumerate it as an audio device.
What’s actually slowing this PC down?
Pick the symptom - the matching free tool is one click away.
You typically control this via settings like:
- Onboard Audio: Enable/Disable toggle
- HD Audio Controller: Enable/Disable
- Azalia (legacy naming)
- Audio Codec: Enable/Disable
Before You Start: Prerequisites and What You’ll Need
Before changing BIOS settings, confirm you have a way to hear audio after disabling onboard audio—especially if you rely on speakers connected to the motherboard.
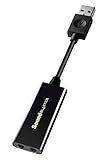
#1 Best Overall

- PLUG IN AND HEAR SOUND IN SECONDS - USB Type-A connector with a 3.5mm stereo headphone output and a separate 3.5mm mono microphone input. No drivers, no software, no external power - the adapter is USB bus-powered and is recognized as a standard USB audio device.
- WORKS ON WINDOWS, MAC AND LINUX - Driverless on Windows 98SE/ME/2000/XP/Server 2003/Vista/7/8, Linux and Mac OSX, and compliant with the USB Audio Device Class 1.0 specification, so any system that supports class-compliant USB audio will see it. Select it as the sound output and input device after plugging it in.
- TWO JACKS, TWO JOBS - The green jack is stereo OUT for headphones or powered speakers; the pink jack is mono microphone IN for a 3.5mm mic. It does NOT support 4-pole headsets on a single combo plug, it does NOT power passive speakers, and it does NOT add surround sound - it is a stereo 2-channel adapter.
- FOR LAPTOPS AND DESKTOPS THAT NEED AN AUDIO PORT BACK - Adds a headphone and mic port to a laptop, desktop, or mini PC whose onboard jack has failed or was never there. Managed and work-issued computers can block new USB audio devices by policy - check with your IT department before ordering for a company machine.
- SABRENT SUPPORT AND WARRANTY - What is in the box: one USB audio sound adapter. Backed by a 1-year limited warranty, extended to 2 years when you register within 90 days on the manufacturer's website.
- A separate audio output path (for example, headphones via USB, a dedicated PCIe sound card, or a USB DAC/amp)
- Keyboard access during BIOS (avoid Bluetooth keyboards)
- BIOS access key (commonly Del, F2, F10, or Esc)
If you disable onboard audio and don’t have another audio device connected, you may end up with silence until you re-enable it or plug in the alternative.
How to Find the Right BIOS Setting
BIOS/UEFI layouts vary by vendor, but audio settings usually live in one of these areas:
- Advanced → Onboard Devices / Integrated Peripherals
- Advanced → Chipset / PCH Configuration
- Boot or Security menus (less common)
Use the most reliable search cues: look for text including Audio, HD Audio, Controller, Realtek, or Azalia.
Step-by-Step: Disable Onboard Audio (UEFI/BIOS Basics)
Follow this sequence on almost any PC:
- Click Restart in Windows.
- During startup, press the BIOS key repeatedly: Del (common on desktops), F2 (common on laptops), or check your motherboard’s/PC’s model documentation.
- Once in BIOS/UEFI, find the menu section labeled Advanced or Chipset.
- Locate Onboard Audio, HD Audio Controller, or Audio / Azalia.
- Change the setting from Enabled to Disabled.
- If there are multiple audio-related toggles (for example “Front Panel Audio” and “HD Audio”), disable the main controller first.
- Press F10 to save and exit (or select Save & Exit), then confirm.
- Boot into Windows and verify audio devices in Device Manager and Sound settings.
On many UEFI firmwares, the setting is immediate after saving—no driver changes are needed, because Windows can’t detect the onboard device.
Vendor-Specific Menu Paths (Most Common UIs)
If you hit a wall, these common paths help you locate the audio setting faster. Menu labels can differ slightly even within the same vendor family.
Rank #2
- Power source type: Corded Electric
- Easy Headphone connectivity -- Compatible with all analog headsets, from standard mobile phone earbuds to gaming and studio-grade headphones; Connect your headsets with single or split stereo/mic connector easily without the use of a Y-splitter cable
- Powerful downloadable software -- control panel software gives powerful Audio Enhancements and unprecedented control; Also includes optimized profiles for multiple earphone brands
- No drivers needed -- works straight out of the box
ASUS (UEFI/ROG)
ASUS frequently groups audio toggles under onboard devices or integrated peripherals.
- Enter BIOS → Advanced.
- Go to Onboard Devices Configuration (or similar).
- Find HD Audio Controller / Onboard Audio.
- Set to Disabled.
- Press F10 → confirm Yes.
MSI
MSI setups often place audio options under integrated peripherals.
Free tools Windows power users keep installed
One-click scans. No signup required.
- Enter BIOS → Settings (or Advanced).
- Open Integrated Peripherals or Onboard Devices Configuration.
- Look for HD Audio Controller / Realtek Audio.
- Set Audio to Disabled.
- Save and exit with F10.
Gigabyte / AORUS
On Gigabyte boards, audio is commonly under Chipset-related or onboard device configuration.
- Enter BIOS → M.I.T. (sometimes) or Settings.
- Go to Peripherals or Integrated Peripherals.
- Find Onboard Audio or Realtek HD Audio.
- Change to Disabled.
- Press F10 → confirm Save & Exit.
ASRock
ASRock boards usually expose onboard audio under onboard device configuration or chipset.
- Enter BIOS → Advanced.
- Open Onboard Devices Configuration.
- Locate HD Audio Controller / Onboard Audio.
- Set it to Disabled.
- Save with F10.
Lenovo (ThinkPad/IdeaPad)
Lenovo laptops sometimes use different naming and may be more restrictive than desktop boards.
Rank #3
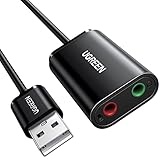
- Upgrade the Sound Quality: UGREEN Aux to USB adapter is the perfect solution for upgrading the sound quality of your laptop or desktop computer. With its high-resolution DAC chip, this adapter offers stunning audio quality that will completely transform your listening experience
- Crystal-Clear Sound: Experience high-fidelity audio like never before! With a built-in DAC chip, this USB audio adapter delivers rich and immersive audio. The USB Aux adapter facilitates high-resolution audio output and noise reduction up to 16bit/48kHz to enhance the original sound quality of your devices
- Plug and Play: Simply connect this sound card to your device and you're ready to go - no drivers or external power sources required. Whether you're using it for gaming, recording music, or watching movies, this adapter is sure to impress
- Wide Compatibility: The USB to audio jack is Compatible with Windows 11/10/98SE/ME/2000/XP/Server 2003/Vista/7/8/Linux/Mac OSX/PS5/PS4/Google Chromebook/Windows Surface Pro 3/Raspberry Pi. So no matter what you're using, this adapter is sure to work seamlessly with your setup. (*Note: NOT compatible with PS3.)
- Compact and Portable: UGREEN Aux to USB adapter is constructed with durable ABS material that makes it easy to take on the go. Don't miss out on this opportunity to elevate your audio experience - get your hands on the UGREEN Aux to USB adapter today
- Restart and open BIOS with F1 or F2 (model dependent).
- Look for Devices, Config, or Audio options.
- If present, set Onboard Audio / Audio Controller to Disabled.
- Save changes and exit.
HP (Most Desktop/Workstation Models)
HP desktop BIOS frequently stores this under Advanced settings for onboard devices.
The Tool Desk
Outbyte PC Repair FREERepair Windows errors before they cause bigger problemsFix Now →Outbyte Driver Updater FREEFix the driver behind crashes, sound loss and screen glitchesFind Drivers →- Enter BIOS (commonly Esc during startup, then select BIOS or F10).
- Open Advanced → Device Options or Integrated Devices.
- Find Onboard Audio / Audio Device.
- Set to Disabled.
- Save and reboot.
Dell (OptiPlex/Latitude)
Dell often labels it clearly, but not every model exposes a toggle.
- Enter BIOS (commonly F2).
- Go to Integrated Devices.
- Look for Audio or Onboard Audio.
- Set to Disabled if available.
- Apply changes and restart.
Confirm the Change in Windows
After reboot, verify that the onboard sound controller is no longer present. This prevents “it changed but nothing happened” confusion.
Check Device Manager:
- Right-click the Start button → Device Manager.
- Expand Sound, video and game controllers.
- Look for your onboard audio device (often named Realtek(R) Audio or similar).
Check Windows Sound settings (Windows 10/11):
- Open Settings → System → Sound.
- Under Output, confirm the onboard device is gone or marked unavailable.
- Play audio through your other device (USB DAC, Bluetooth speaker, sound card).
If you still see and can select onboard audio, the BIOS change didn’t take effect—revisit the setting or verify you saved and exited.
If You Don’t See an Option in BIOS
Some systems don’t offer an onboard audio disable toggle. Here are the most common causes and alternatives.
Rank #4
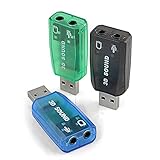
- Packing List: 3X USB Sound Card ( Blue Green Black )
- Support system: Windows /2000/200Windows /2000/2003//XP/Vista/Win7/Win10/Linux/WinCE(5.0 6.0)/Android (2.1, 2.2, 2.3, 4 5, 6,7,8) Linux, Mac OS, etc.
- Supports 3D post tonal sound and virtual 5.1 CH sound track.
- No driver required, Plug and Play.
- Instantly creates microphone in and audio out jack from any PC USB port.
- The setting is hidden under another submenu (try searching for HD Audio or Integrated Peripherals).
- You’re in a “EZ Mode” BIOS that doesn’t show advanced options—switch to Advanced view.
- The audio controller is permanently enabled on that model.
- Secure settings or firmware limitations may hide certain controls.
If the BIOS offers no disable toggle, you can still prevent conflicts by disabling the onboard device in Windows (see the comparison section later).
Troubleshooting When Audio Still Plays
If audio continues after you set onboard audio to Disabled, work through this checklist.
- Confirm you saved BIOS changes: reboot and re-enter BIOS—verify the setting still reads Disabled.
- Try clearing BIOS defaults: if you saved but the setting “reverts,” load defaults, then apply only the audio change.
- Look for multiple audio toggles: some boards have separate options for front panel audio vs HD audio controller. Disable the controller first.
- Check the correct BIOS firmware: on some desktops, a fast boot feature can make it easy to miss the BIOS key—ensure you truly changed the active firmware.
- Verify your output device in Windows: you might still be playing through a different controller connected via USB or HDMI.
If you’re on a system with HDMI/DisplayPort audio, remember that your monitor or TV can present as an audio output even if onboard audio is disabled. Check Settings → System → Sound → Output.
Common Mistakes to Avoid
- Disabling the wrong device: “HD Audio” is usually safe to disable if you’re using a dedicated sound card, but don’t disable unrelated chipset audio features unless you’re sure.
- No alternate audio device connected: if you rely on the motherboard’s 3.5 mm outputs, disabling onboard audio will remove them.
- Skipping the save step: changing a setting but not pressing F10 (or Save & Exit) means nothing persists.
- Confusing onboard sound with HDMI audio: HDMI audio uses separate pathways.
- Assuming drivers can override BIOS: even with drivers installed, a disabled controller won’t enumerate as a device.
Disabling Onboard Audio vs Disabling Drivers in Windows
Disabling in BIOS is the cleanest way to remove the onboard audio device at the hardware level. Disabling drivers in Windows is a workaround when the BIOS toggle isn’t available.
| Method | Where it works | Effect | Best for |
|---|---|---|---|
| Disable in BIOS/UEFI | Firmware at boot | Onboard device won’t enumerate in Windows | Dedicated PCIe/USB audio, reducing conflicts |
| Disable device in Device Manager | Windows only | Device remains in firmware but is disabled by Windows | BIOS lacks the toggle |
| Uninstall audio drivers | Windows only | Removes driver; device may reinstall later | Last-resort cleanup |
If you need the fastest fix and BIOS doesn’t cooperate, disabling the device in Device Manager is usually reversible within seconds.
Best Value

- USB Stereo Sound Card: This biaze USB audio adapter is ideal to replace your faulty sound card or audio port. It extends the 3.5mm mono microphone input and speaker-headphone output via the USB port, allowing you to connect small speakers, headphones, microphones, dual-plug headphones and more
- Dual functions Audio Interface: Support listening + speaking. Support CTIA standards jack. Support Android earphones. Support Windows 10/8.1/8/7/Vista/XP, Mac OS X, Linux, Google Chromebook, Windows Surface 3 pro, Raspberry Pi and PS4 PS5 etc
- Crystal-Clear Sound: Experience high-fidelity audio like never before! With a built-in DAC chip, this USB audio adapter delivers rich and immersive audio. The USB Aux adapter facilitates high-resolution audio output and noise reduction up to 16bit/48kHz to enhance the original sound quality of your devices
- Plug and Play: Simply connect this sound card to your device and you're ready to go - no drivers or external power sources required. Whether you're using it for gaming, recording music, or watching movies, this adapter is sure to impress
- Compact and Portable: Aux to USB adapter is constructed with durable ABS material that makes it easy to take on the go. Don't miss out on this opportunity to elevate your audio experience - get your hands on the Aux to USB adapter today
FAQ
Will disabling onboard audio break my computer?
No—disabling the onboard audio controller typically affects only audio hardware enumeration. If you depend on the motherboard’s 3.5 mm outputs, you’ll lose that audio until you re-enable the controller or use another device.
Why can I still select onboard audio after disabling it in BIOS?
Most commonly, the setting wasn’t saved (you changed it but didn’t apply/save), or you’re seeing HDMI/DisplayPort audio from your monitor/TV. Also check for multiple audio toggles in BIOS.
Is it better to disable in BIOS or in Windows?
If your BIOS offers the option, BIOS is best because it prevents the device from loading at the source. If the option isn’t available, disabling the device in Windows is the most direct substitute.
Do these 3 things before closing this tab:
1Scan for outdated or missing drivers - takes under a minute2Repair Windows errors before they cause bigger problems3Fix the driver behind crashes, sound loss and screen glitchesWhat if I’m using a USB audio interface—should I still disable onboard audio?
Usually, it’s optional. Disabling onboard audio can reduce confusion and device switching in Windows, especially if apps keep picking the wrong output.
Can I re-enable onboard audio later?
Yes. Just go back into BIOS/UEFI and set Onboard Audio / HD Audio Controller back to Enabled, then save and reboot.
Bottom Line
To disable an onboard sound card in BIOS, you’re looking for an Onboard Audio / HD Audio Controller toggle under Advanced or Integrated Peripherals, set it to Disabled, then save with F10. After reboot, confirm in Windows that the onboard device no longer appears under Sound, video and game controllers.
If you can’t find the toggle on your specific model, fall back to Device Manager disablement in Windows—then revisit BIOS once you know where the setting lives for your firmware.
Recommended Free Tools
Quick Recap
Product prices and availability are accurate as of the date/time indicated and are subject to change. Any price and availability information displayed on Amazon at the time of purchase will apply.




