The Tool Desk
Outbyte Driver Updater FREEScan for outdated or missing drivers - takes under a minuteDriver Scan →Outbyte PC Repair FREEClear out junk files and repair common Windows errorsFree Scan →A Core Keeper dedicated server does not install mods from your personal Steam Workshop or mod.io subscriptions. To mod the server, stop it, back up the world, download each mod separately, extract it into the server’s local Mods directory, install its dependencies, and make sure every player uses the same compatible mod set and game build.
Prefer not to run the server on your own PC? Godlike.Host offers hosted Core Keeper servers with free DDoS protection and up to three free backups a day.
The workflow below applies to the Windows and Linux folder layouts commonly used for dedicated servers. Core Keeper’s mod support, Workshop behavior and directory conventions can change with game patches, so check the current official documentation and each mod’s own instructions before applying a version-specific change.
As an Amazon Associate I earn from qualifying purchases.
Recommended Free Tools
What the dedicated server actually needs
The server reads mod files from its own installation. A subscription made on a player’s account is not a server-side installation method, and the server will not automatically download the files that a player has subscribed to. Even when a mod is already installed on your gaming PC, download a separate copy for the dedicated server.
- Server files: The mod’s server-compatible files must be present in the server’s local
Modsfolder. - Client files: Players must install the client portion when a mod is marked for both client and server use.
- Dependencies: Every library or prerequisite named on the mod’s download page must be installed too.
- Version alignment: The server and players need a compatible Core Keeper game build and matching mod versions.
- Manual maintenance: A manually copied mod does not update itself. Recheck every mod after a game patch.
Think of the server as a separate mod installation. Your Workshop or mod.io account can be a convenient way to obtain a package, but it does not replace downloading and copying that package into the server’s data directory.
#1 Best Overall
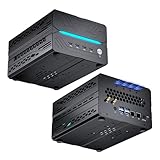
- [Powerful PC] Mini Gaming PC equipped with Core i9-14900F, 24 Cores 32 Threads, 36M Cache, Max Turbo Frequency: 5.8GHz, Windows 11 pro (64 Bit). With GeForce RTX 50 Series GPUs. supporting ray tracing and AI cores. Delivering AI-acceleration in top creative apps. Whether you’re rendering complex 3D scenes, editing 4K video, AI Applications, Multitasking, video server or Gaming livestreaming with the best encoding and image quality, GeForce RTX GPUs give you the performance to create your best.
- [Storage Expansion] Mini computer is equipped with Dual-DDR5 RAM slots which can support up to 96G RAM(2*48G), 1 x M.2 2280 PCIE4.0 high-speed SSD, and support add 1 x 2.5-inch SATA HDD/SSD(not include) is enough to accommodate system files and massive games, Equipped with high-capacity memory, this machine powers through demanding AI applications — from generating stunning images to rendering smooth AI videos. More memory means faster responses, seamless multitasking.
- [8K@60Hz Four-Display] Mini PC equipped with GeForce RTX5060Ti 16GB GDDR7 discrete graphics card, supporting ray tracing and AI cores. easy connect 4 monitors, 1×HDMI 2.1b and 3×DisplayPort 2.1b(All Support 8K@60Hz display), It can provide you with a first-class TV experience and realistic picture quality, for your visual home entertainment, streaming video, web browsing, work design and 3D games create a very smooth experience.
- [Functional Interfaces] Mini computer is equipped with 4 x USB 3.2, 4 x USB2.0, 1 x HDMI2.1 port, 3 x DP2.1 ports, 2xRJ-45 Gigabit Network Ethernet, 1 x Fiber Optic PORT, 1 x Audio in/out. Built-in Bluetooth 5.4 and IEEE 802.11be wifi 7, Higher transfer rates and lower latency. Mini PC supports multiple device connection and can be used with servers, monitoring equipment, office equipment, projectors, televisions, etc, Mini desktop computer support automatic power on and Wake On Lan.
- [Warranty & heat dissipation] Warrant: 2 year/24 months. The compact computer size: 8.6*6.6*4.5in, 5.5lb, Inside the chassis are four all-copper turbo fans and eight vacuum heat pipes for powerful cooling performance. Make it can work smoothly and will not cause too much noise.
Choose the correct mod and download route
mod.io and Steam Workshop are download sources, not server feeds
Both mod.io and Steam Workshop can provide files for players. Neither subscription automatically populates a dedicated server’s local storage. Download the archive or package for each mod, then install it manually on the machine running the server.
| Source | What it provides | What the dedicated server still requires |
|---|---|---|
| mod.io | A player-facing mod download | A separately downloaded copy extracted into the server’s local Mods folder |
| Steam Workshop | A player-facing Workshop download or subscription | Manual server-side download and extraction; the personal subscription is not read by the server |
Workshop availability and its release status have changed across Core Keeper versions. Do not rely on an old guide’s description of a beta or full release; use the current official documentation and the mod author’s current page for the build you are running.
Windows Errors? Fix Them Before They Spread
Repair common Windows errors and clear accumulated junk for a smoother, more stable PC - no reinstall needed.Free scan · no reinstallOutdated Drivers Are Slowing You Down
One free scan finds every outdated or missing driver and matches the right update for your exact hardware.Free scan · exact hardware matchCheck whether the mod is client-only or client-and-server
| Mod target | Server operator installs | Players install |
|---|---|---|
| Client-only | Nothing on the dedicated server unless the author explicitly documents a server component | The client-side package on each player’s game installation |
| Client and server | The server-compatible package and all listed dependencies | The corresponding client package and the same required dependencies |
A mod tagged for both sides is not complete when only the server has it. Conversely, placing a purely client-side mod in the server directory will not make it a server feature. Read the mod’s compatibility label and installation notes rather than inferring behavior from its name.
Find the server’s data directory
The required folder is inside the server’s data directory, not in a player’s ordinary Workshop subscription folder. Use the path that matches the operating system hosting the dedicated server.
| Operating system | Mods directory | Path details |
|---|---|---|
| Windows | CoreKeeperServer_DataStreamingAssetsMods |
Create Mods under StreamingAssets; capitalization matters. |
| Linux | (installdir)/CoreKeeperServer_Data/StreamingAssets/Mods |
Use the equivalent path below the server installation directory; capitalization matters on case-sensitive filesystems. |
If the server was installed in a custom location, search from the directory that contains CoreKeeperServer_Data. Do not create a parallel Mods folder beside the server executable when the data directory is elsewhere. The folder name must be exactly Mods, including the capital M.
Do not guess the configuration-file location
Mod configuration files are not documented consistently across the guides commonly cited for Core Keeper. Some instructions refer to a Save/mods directory, while others refer to DedicatedServer/mods. Those locations should not be treated as interchangeable or universal. Follow the individual mod’s documentation for configuration files, and leave the package in the server’s StreamingAssetsMods or StreamingAssets/Mods folder unless the author gives a different, version-specific instruction.
Do these 3 things before closing this tab:
1Fix the driver behind crashes, sound loss and screen glitches2Repair Windows errors before they cause bigger problems3Scan for outdated or missing drivers - takes under a minuteRank #2

- RYZEN 7 H 255 CPU - The Ryzen 7 H 255 is a chip from the Hawk Point family and is an upgraded version of the older Ryzen 7 8745H and has 8 cores (16 threads thanks to SMT support) that run at up to 4.9 GHz, together with the powerful Radeon 780M iGPU. Unlike Zen 3, Zen 4 offers AVX512 support along with other improvements such as larger caches/registers/buffers across the board.
- GAMING PC - The Radeon 780M (12 CUs / 768 shaders, up to 2,600 MHz) can drive multiple displays simultaneously with a resolution of up to 8K. Hardware encoding and hardware decoding of the most common video codecs (AV1, AVC, HEVC) is also no problem; playing the latest games on FSR settings without issues.
- WHY CHOOSE DDR5 5600MHz DUAL CHANNEL (2×16GB): With a 5600MHz clock—a 17% frequency uplift over 4800MHz—this kit delivers massive bandwidth gains that elevate real-world performance. Gamers enjoy higher minimum FPS and less stutter in open-world and sim titles for a smoother competitive experience. Video editors and 3D creators benefit from faster 4K/8K timeline scrubbing, quicker renders in DaVinci Resolve and Premiere, and swifter asset loading. For AI/LLM workloads, the superior throughput reduces I/O bottlenecks, cuts token generation latency, and accelerates model fine-tuning by keeping processing cores fed with data—so you wait less and create more.
- 32GB DDR5 RAM + 512GB SSD - The K12 mini computer is equipped with Dual 16GB (Total 32GB) SO-DIMM DDR5 5600MHz memory sticks. 512GB PCIE 4.0 SSD Drive with 3x M.2 2280 Expansion slots. Each slot capable of reading up to 8TB. (24TB MAX)
- QUAD SCREEN 4K DISPLAY SUPPORT - K12 Mini PC support 4-screen 4K/8K output via HDMI 2.1 (8K@60Hz), DisplayPort 1.4 (4K@60Hz), and USB Type-C Transfer speed (supporting PD3.0/DP1.4/DATA). Ideal for gaming, video editing, and multitasking, it provides expansive and crisp multi-display support.
Install a mod safely, step by step
1. Stop the dedicated server
Shut down the server before creating folders, replacing files or changing the mod set. Editing a live installation can leave partially written files or a world that was saved while its code was changing. This shutdown step is a cautious operational practice; verify the current server-management procedure for the launcher or host you use.
2. Back up the worlds folder
Make a complete copy of the server’s worlds folder before the first installation and before each later mod change. Keep the backup outside the live server directory and label it with the date and the mod set you were running. A backup gives you a recovery point if a mod fails to load or a world becomes unstable.
- Keep the original backup untouched.
- Make a new backup before adding, removing or upgrading a mod.
- Do not assume that uninstalling a mod reverses changes it already made to a world.
3. Create the exact Mods folder
Open the server data directory and create this folder if it is missing:
CoreKeeperServer_Data/StreamingAssets/ModsOn Windows, the same location is written with backslashes:
CoreKeeperServer_DataStreamingAssetsModsUse the exact capitalization. On Linux, mods, MODS and Mods are different directory names, so a lower-case folder can be ignored even when all files appear present.
4. Download the server copy of the mod
Download the mod package from the source named by its author, whether that is mod.io or Steam Workshop. A file already present in your personal game installation is not a substitute for a server copy. Check the package’s stated Core Keeper version, operating-system support, server/client target and dependency list before extracting it.
Rank #3

- Office Gaming Mini PC - UPGRADED GMKtec Nucbox M5 Ultra Series is equipped with the powerful AMD Ryzen 7 7730U processor, 8 Cores/16 Threads, Base 2.00GHz (Power Saving Quiet Mode) with Turbo Boost up to 4.50GHz (Performance Mode) in BIOS settings, Based on the ZEN 3+ architecture, this small but powerful mini pc delivers satisfying results in productivity, office work, and gaming. 35% Performance increase over AMD Ryzen 5 7430U/ Ryzen 7 5700U, 5600U, 5560U, 5500U.
- 32GB DDR4 RAM & 1TB PCIe SSD - Installed with DDR4 32GB RAM Dual Channel (2x16GB), the Nucbox M5 Ultra mini pc support expansion to 64GB RAM. Featured with 1TB M.2 2280 PCIe 3.0 SSD, support dual slot expansion each can be up to 8TB SSD. (Upgrades not included)
- DUAL NIC LAN 2.5G RJ45 - Fast Network Speeds: Enjoy up to 2500Mbps data transmission speed without worrying about lagging. Ideal for working, gaming, and surfing the internet. Great for Untangle, Pfsense or as a server office PC.
- Mini Desktop Computer with 4K Triple Screen Display - Nucbox M5 Ultra integrates AMD Radeon Graphics 8 Cores 2000 MHz GPU to deliver powerful graphics processing power to easily handle the demands of complex design software, 4K@60Hz UHD video editing, and playback. It can connect to 3 display screens simultaneously.
- Fast Internet WiFi 6E + BT5.2 Connection - GMKtec Mini PC with WiFi-6E Wireless, have 2.5G/5G/6G triple band, more faster and lower latency. Bluetooth 5.2 allowing you more quickly to connect other wireless devices (headset, mouse, keyboard, etc.) Interface features 2*USB3.2 ports, 2*USB2.0 ports, 1*HDMI 2.0 port(4K@60Hz), 1*USB-C port(PD/DP/DATA), 1*DP Port, 1*Audio 3.5mm (HP&MIC), 1*DC Power Port.
5. Extract each mod into its own subfolder
Give every mod a separate, uniquely named directory under Mods. A descriptive name makes updates and rollback easier:
CoreKeeperServer_Data/StreamingAssets/Mods/
├── ExampleModA/
├── ExampleModB/
└── ExampleDependency/
The names above are illustrative folder names, not files that you should download. Preserve the package’s internal structure when extracting. Do not merge two mods into one directory, and do not overwrite one mod’s files with another’s unless the author explicitly instructs you to do so.
6. Install every listed dependency
Open the mod’s download or documentation page and identify required libraries, frameworks or companion mods. Download and extract each dependency as its own package, using the same server-side location when the author describes it as a server dependency. A mod can appear to be installed correctly yet fail because one prerequisite is absent or is the wrong version.
Install dependencies before the mod that requires them when the author specifies an order. If no order is documented, keep the packages separate and use the author’s compatibility notes as the authority.
7. Install the client side where required
Send every player the exact mod list they need. For a client-and-server mod, each player needs a compatible client installation in addition to the server copy. Players should use the same mod release and the same Core Keeper game build as the server. A player who has subscribed to the right Workshop item may still need to verify that the installed version matches the server’s manually downloaded package.
8. Start with a known-good vanilla server
If this is a new server, start it without mods and confirm that the unmodified server runs and the world loads. This separates a base server problem from a mod problem. If the vanilla server is already established, back it up and preserve that working state before proceeding.
Free tools Windows power users keep installed
One-click scans. No signup required.
Rank #4

- 【AMD Ryzen 3 5300U CPU: Outperforms N150 & 3500U】 BOSGAME E5 mini PC is powered by the TSMC 7nm FinFET architecture AMD Ryzen 3 5300U processor (4 Cores, 8 Threads, up to 3.8GHz boost, 6MB total cache). Compared to low-end Intel N150 or 3500U chips which only have 4 single threads and throttle under load, the 5300U delivers over 30% faster multi-core speed. Run 30+ browser tabs, large Excel sheets, and Zoom meetings simultaneously without system lag.
- 【8GB DDR4 RAM & 256GB NVMe SSD Storage】 Installed with high-speed 8GB DDR4 dual-channel memory and a fast 256GB M.2 2280 SSD, eliminating slow boot times and application loading delays. To accommodate growing data requirements, the upgradeable hardware design features dual SODIMM slots that allow you to expand memory up to 64GB RAM, ensuring smooth operation during heavy multitasking.
- 【High-Capacity Dual M.2 SSD Storage Expansion】 Never worry about running out of space for your business files. In addition to the pre-installed 256GB system drive, the motherboard houses an extra empty internal M.2 2280 NVMe PCIe 3.0 slot. This allows you to easily add a second solid-state drive for up to an additional 2TB of storage capacity (upgrades not included) without needing to remove or reinstall the original operating system.
- 【Radeon 6-Core Graphics & Triple 4K Displays】 Integrated with official AMD Radeon Graphics (6 Graphics Cores, 1500 MHz frequency) for casual gaming, photo editing, and crisp 4K media decoding. Featuring 1x HDMI 2.0 port, 1x DisplayPort, and 1x Full-Function Type-C port, the E5 outputs true 4K@60Hz resolution to three monitors at once. This multi-screen setup eliminates constant window-switching for traders, programmers, and office workers.
- 【Dual 2.5GbE LAN Ports for Advanced Networking】 Experience fast wired network transmission speeds up to 2500Mbps without lagging or buffering. The integration of dual 2.5 Gigabit Ethernet ports (powered by Realtek RTL8125 controller) makes this compact computer an exceptional hardware choice for tech enthusiasts. Easily configure it into software routers, hardware firewalls (pfSense, OpnSense), home NAS servers, or local homelabs.
9. Add one mod at a time
After the vanilla check, add one mod and its dependencies, start the server, and test the relevant feature. Repeat for the next mod. Installing a large collection in one operation makes it difficult to identify which package caused a startup failure, incompatibility or unexpected world behavior. Keep a simple record of the order, package versions and date of each change.
10. Test with the intended player group
Have at least one player join with the same client-side set required by the mod. Test the feature in a safe area or a disposable world copy when the mod author recommends it. Do not expose the main world to a new mod until the server starts reliably and the required clients can connect.
Windows and Linux considerations
Windows
Use CoreKeeperServer_DataStreamingAssetsMods. Check that Windows has not left the downloaded package inside an extra archive layer. The folder directly below Mods should be the mod’s extracted directory, not merely another compressed file, unless the mod’s instructions explicitly require a different layout.
Linux
Use (installdir)/CoreKeeperServer_Data/StreamingAssets/Mods and preserve capitalization. A community guide indicates that some Windows-only mods may not load on a Linux server. That is a single-source, low-confidence compatibility warning rather than a universal rule, so verify the specific mod’s operating-system support before planning a Linux deployment.
Linux operators should also check file ownership and permissions after extracting a package. The account that launches the server must be able to read the mod directory and its files; if it cannot, correct the permissions using the host’s normal administration method rather than moving the files to a different, undocumented folder.
Independent reader supportYour contribution helps us test, update, and keep practical guides available for everyone.How to diagnose a failed installation
The server behaves as if no mod is installed
- Confirm the path ends in
CoreKeeperServer_Data/StreamingAssets/Mods(or the Windows backslash equivalent). - Confirm the directory is named exactly
Mods, with a capitalM. - Confirm you copied extracted files, not only a downloaded archive or a personal Workshop subscription.
- Confirm the mod’s target includes the server; a client-only mod will not add server functionality.
- Remove the newest mod, restore the backup if necessary, and repeat the one-at-a-time process.
The server fails after adding a mod
Stop the server, move the most recently added mod out of the live Mods directory, and start again. If the server returns to its previous working state, check that mod’s Core Keeper version, dependencies and operating-system support. Restore the world backup before retrying when the failed run changed the world or when the mod author recommends a clean rollback.
Best Value
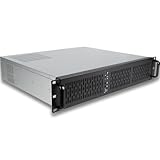
- [CPU] Intel Core Ultra 7 270K Plus Processor (24 Cores, 24 Threads, 3.2 GHz Base Clock Speed up to 5.5 GHz Max Boost Clock Speed) for Elite Gaming and Content Creation | [STORAGE] 1TB PCIe NVMe M.2 SSD - Experience Hyper-Fast Bootup and Data Transfer thats up to 30x Faster Performance than a Traditional Hard Drive.
- [ Graphics ] Integrated Intel UHD Graphics | [RAM] 64GB DDR5 RAM 5600 Gaming Memory for Seamless Multitasking from Multiple Web Pages to Playing Games Online Simultaneously | [OS] Windows 11 Pro x64
- [BUY WITH CONFIDENCE] Empowered PCs are Assembled in the USA, Rigorously Stress-Tested Before Shipping, and Supported with Lifetime Technical and Diagnostic Support and 3-Year Limited Hardware Warranty.
A dependency error appears
Return to the mod’s current download page and compare its required dependencies and versions with the folders you installed. Install missing prerequisites as separate subfolders. Do not assume that a similarly named library already present in another mod satisfies the requirement; use the dependency’s stated version and compatibility information.
One player cannot join
- Compare that player’s Core Keeper build with the server’s build.
- Compare the player’s client mod list and versions with the server’s required list.
- Install the client component for any mod marked client-and-server.
- Remove outdated duplicates and re-download the package when a game update has changed the mod.
A personal Workshop or mod.io subscription is not proof that the player’s installed files match the server. Compare the actual mod release and game build.
Quick wins for a faster PC:
Scan for outdated or missing drivers - takes under a minuteDriver Scan →Clear out junk files and repair common Windows errorsFree Scan →Fix the driver behind crashes, sound loss and screen glitchesFind Drivers →A game patch breaks previously working mods
Manual installations do not update themselves. After every Core Keeper patch, check each mod’s page for a compatible release, back up the worlds folder, and test the server with the updated packages one at a time. If no compatible release exists, remove the affected mod, restore the last known-good backup if required, and wait for the author or official documentation to confirm support.
Updating, removing and rolling back mods
Updating a mod
- Stop the server.
- Back up the worlds folder and preserve a copy of the currently working mod directory.
- Read the mod’s current notes for dependencies, client requirements and Core Keeper version.
- Replace the old server package with the new extracted package, keeping the folder name unique.
- Update the client installations that need the mod.
- Start the server and test before updating another mod.
Keeping the old package outside the live directory gives you a direct rollback option. Do not leave two releases of the same mod active in separate folders unless the author explicitly supports that arrangement.
Removing a mod
Stop the server and back up the world before removing a mod. Remove only the mod and dependencies that are no longer required, then test with the backup or a copy of the world when the mod may have added items, blocks or saved data. Some mods alter world data in ways that are not automatically undone by deleting their files; consult the mod’s removal instructions before opening the main world without it.
Rolling back
For a failed update, stop the server, restore the previous mod package and the corresponding client versions, then restore the pre-change world backup if the failed run affected the save. Keep the backup and failed package until the server has been stable long enough to establish that the rollback worked.
A practical compatibility checklist
- Server is stopped before file changes.
- A dated copy of the worlds folder exists outside the live installation.
- The exact
CoreKeeperServer_Data/StreamingAssets/Modsdirectory exists. - The folder is named
Modswith the correct capitalization. - Each mod has its own uniquely named subfolder.
- Every listed dependency is installed in a compatible version.
- The mod is intended for the server operating system.
- Client-only and client-and-server requirements are understood.
- Every player has the required client packages and the same game build.
- The vanilla server was verified before the first mod.
- Mods were introduced one at a time and recorded.
- Update checks are scheduled after every game patch.
What to verify when documentation conflicts
Core Keeper modding instructions are version-sensitive. When two guides disagree about Workshop status, a configuration directory or a required file, prefer the current official documentation and the mod author’s page for the exact release you are installing. The server’s fundamental rule remains consistent: it loads server files from its local mod directory, while players must supply their own required client files. Paths outside that directory, especially configuration paths, should be treated as mod-specific rather than universal.
Final operating rule
Use the dedicated server’s local Mods folder as the source of truth. Download server packages separately from personal subscriptions, install dependencies, match clients and game builds, back up before every change, and stage additions one at a time. That process minimizes world risk and makes a broken or outdated mod identifiable and reversible.
Quick Recap
Product prices and availability are accurate as of the date/time indicated and are subject to change. Any price and availability information displayed on Amazon at the time of purchase will apply.




