Gateway BIOS updates are one of those “do it carefully or regret it later” tasks. A BIOS flash can fix stability issues, improve compatibility (CPU, memory, storage), or address security fixes—but it can also brick a system if you flash the wrong file or interrupt the process.
This guide walks you through the safest, most dependable workflow: identify your exact model and current BIOS version, obtain the correct BIOS package, choose the right update method, and verify results afterward.
As an Amazon Associate I earn from qualifying purchases.
If you’re nervous about the process, that’s normal. Follow the steps below exactly, keep power stable, and use the recovery-oriented methods when in doubt.
Recommended Free Tools
What a Gateway BIOS update does (and why it matters)
The BIOS (Basic Input/Output System) is low-level firmware that initializes hardware during startup. Updating it can change how the motherboard detects components and how early boot features behave.
#1 Best Overall

- 15.6inch FHD (1920 x 1080) IPS Display, Intel UHD Graphics
- Intel i3 Processor Up to 2.79GHz, 8GB DDR4 Ram, 256GB Storage
- 2x USB Type A, 1x USB Type C, 1x HDMI, 1x Headphone/Microphone Jack
- Super-fast WiFi and Bluetooth, HD Webcam, Fingerprint Reader
- Windows 11 OS, AC Charger Included, Pastel Black Color
Common reasons to run Gateway BIOS updates include:
- Stability fixes for random hangs, boot loops, or resume-from-sleep issues.
- Compatibility updates for memory modules, storage controllers, and newer CPU support.
- Security patches and improvements to firmware-level protections.
- Feature changes such as improved boot options or updated device initialization.
Because BIOS is firmware, changes are applied directly to the hardware. That’s why correctness and power stability matter more than with normal software updates.
Prerequisites before you flash
Before you download or run anything, prepare the basics. Most BIOS flash failures trace back to power loss, wrong BIOS files, or interruptions from security software.
The Tool Desk
Outbyte Driver Updater FREEFix the driver behind crashes, sound loss and screen glitchesFind Drivers →Outbyte PC Repair FREEClear out junk files and repair common Windows errorsFree Scan →Power and environment
- Use a fully charged laptop battery and keep the AC adapter plugged in. Don’t update during storms or on a flaky outlet.
- If it’s a desktop, connect to AC power only. Prefer a UPS if you have one.
- Disable sleep/hibernation for the duration of the update.
Backup and encryption concerns
- If your drive uses BitLocker (Windows), suspend or decrypt according to Microsoft guidance before flashing.
- Back up important files. A BIOS update usually doesn’t touch the drive, but you don’t want to lose data if something goes sideways.
- Write down key BIOS settings you rely on (boot order, SATA mode/AHCI vs RAID, virtualization toggles). After updates, some systems reset settings.
Required hardware
- A stable USB drive for the BIOS file (commonly 4GB or larger, formatted as FAT32).
- A way to connect to the internet to confirm the exact BIOS package for your model.
Find the exact BIOS and model files you need
“Gateway BIOS update” doesn’t mean one universal BIOS file. Firmware is model-specific. The safest workflow is: match your exact Gateway model and device ID, then download only the correct BIOS version from the official support source.
Identify your model precisely
Use at least one of these:
- Gateway model/part number on the label (usually on the bottom of laptops or the front/back of desktops).
- Serial number in Windows System Information or BIOS.
- Manufacturer product name in Device/System settings.
Check BIOS package details
Before downloading, confirm:
- The BIOS package matches your model number.
- The file type is appropriate for your chosen update method (some packages are intended only for BIOS setup flashing).
- The release notes mention fixes you actually need. If the update is unrelated, you can decide whether to proceed.
Check your current BIOS version
Knowing your current version helps you confirm you’re not flashing an older firmware revision or the wrong generation.
Method A: Check in BIOS setup
- Restart your Gateway system.
- During startup, enter BIOS/Setup (commonly F2 on many systems, but check your screen prompt).
- On the main page, locate BIOS Version, BIOS Revision, or similar text.
Method B: Check in Windows
- Press Win + R, type
msinfo32, then press Enter. - Find BIOS Version/Date.
- Record the version and date.
Update methods for Gateway BIOS updates
There are three common ways. The best option depends on the BIOS package format and your tolerance for risk.
Method 1: Flash from the BIOS setup (most reliable)
Many Gateway/Acer-family firmwares support flashing from USB using an option inside BIOS setup. This reduces the chance of Windows interruptions.
Method 2: Update using a Windows-based BIOS updater (if available)
Some BIOS packages include a Windows utility that launches a controlled flash. It can be convenient, but Windows background activity and security tools can interfere.
Method 3: Bootable USB/DOS-style flash (for advanced users)
Some updates ship as a flash utility intended for DOS-like environments. This is effective when supported, but it’s more sensitive to USB formatting and correct command usage.
Rank #2
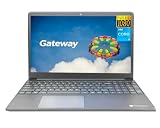
- Powered by 11th Gen Intel Core i3-1115G4 & Intel UHD Graphics: Deliver snappy daily performance for web browsing, document editing and streaming. Paired with 4GB DDR4 RAM and 128GB SSD, it boots
- 15.6” FHD 1920 x 1080 Display for Clear Viewing: Enjoy sharp, detailed visuals for video calls, online courses and movies. The full HD panel brings crisp text and vivid imagery, ideal for long hours of productivity and media consumption.
- Slim, Light & Travel-Friendly Grey Design: Measuring 14.76” x 9.5” x 0.77” and weighing only 4.2 lbs, this compact Gateway laptop fits easily in backpacks. The sleek grey finish offers a clean, professional look for home, office or on-the-go use.
- Versatile Connectivity & Ready-to-Use Windows 11: Comes with USB-C, dual USB-A, HDMI 1.4b, SD card reader, built-in Wi-Fi, Bluetooth and webcam. Windows 11 is pre-installed out of the box; connect external monitors, storage and accessories without extra adapters.
- Professionally upgraded and tested by ROKC Electronics. Includes 1-Year warranty on upgraded RAM/SSD and original manufacturer warranty on all other components.
Step-by-step: update using BIOS setup with USB
This is the workflow most people should choose when it’s available in the BIOS menus.
Step 1: Prepare the USB drive
- Insert a USB drive (4GB+ recommended).
- Format it as FAT32 (not exFAT/NTFS). Use Windows Disk Management or a trusted formatter.
- After formatting, copy the BIOS files to the USB.
- Do not rename files unless the vendor instructions specifically require it.
Step 2: Confirm file placement
Some BIOS flash mechanisms expect the BIOS file at the root of the drive. If the vendor readme says so, place the file directly in the USB root (for example, E:\ root). If it says to use a folder, follow that instruction exactly.
PC Slower Than It Used to Be?
A free scan shows the junk files, broken settings and background clutter dragging Windows down - then fixes them in one click.Free scan · Windows 10 & 11Crashes, No Sound, or Screen Glitches?
Random freezes, missing sound and display glitches usually trace back to one bad driver. Find and replace yours safely.Free scan · under a minuteStep 3: Enter BIOS setup and start the flash
- Shut down the computer completely.
- Insert the USB drive.
- Power on and immediately press the key to enter BIOS/Setup (often F2).
- Navigate to a firmware update area. Look for labels like BIOS Update, Firmware Update, EZ Flash, or Flash BIOS.
- Select Update from USB (wording varies).
- Choose the BIOS file from the list.
- Confirm and start the update when prompted.
Step 4: Do not interrupt the process
Once flashing begins, it can take several minutes. Do not power off, reset, or close the lid on laptops.
Step 5: Reboot into BIOS and verify
- After the flash completes, the system typically reboots automatically.
- Enter BIOS setup again.
- Confirm the BIOS version/date now matches the package you installed.
- Restore any BIOS settings you changed earlier (boot order, storage mode, etc.).
Update using a Windows-based BIOS updater (if available)
If your vendor provides a Windows utility, use it only for the exact model it targets.
Step-by-step
- Download the official BIOS package for your exact Gateway model.
- Extract files if the package is archived.
- Close all apps.
- Temporarily disable third-party antivirus real-time protection if the vendor readme explicitly allows it (otherwise follow vendor guidance strictly).
- Run the updater as Administrator (right-click > Run as administrator).
- Follow the on-screen prompts until it starts the firmware flash.
- Do not use the system during the flash. Let it finish and reboot.
Common gotchas with Windows flashing
- If you disconnect power mid-update, you can corrupt firmware. Keep the adapter plugged in.
- If BitLocker is enabled, Windows flashing may refuse to run or the machine may reboot unexpectedly. Suspend protection if instructed.
- If the utility says the BIOS isn’t compatible, stop and verify the model and downloaded file.
After the update: verify and stabilize
After flashing, spend a few minutes confirming the system behaves normally. This prevents “silent” issues from turning into larger problems.
What to check right away
- BIOS version/date in BIOS setup matches what you installed.
- The system boots to Windows normally.
- Devices like storage, keyboard, Wi‑Fi, and audio are detected.
- Check event logs in Windows if you notice errors (optional, but useful).
Stability verification
Try a short, controlled test: run your normal workload for 10–20 minutes, then restart once. If everything stays stable, you can move on.
Do these 3 things before closing this tab:
1Fix the driver behind crashes, sound loss and screen glitches2Repair Windows errors before they cause bigger problems3Scan for outdated or missing drivers - takes under a minuteCommon problems and troubleshooting
Even when you follow the steps, BIOS updates can go wrong. The right response depends on how far the flash progressed.
The update won’t start
Try these checks:
- Wrong file/model: confirm your Gateway model number and BIOS package match.
- USB formatting: use FAT32 and ensure the BIOS file is in the expected location (often the root).
- File corruption: re-download the BIOS package and verify you didn’t lose parts of the archive.
- BIOS menu not showing: some systems require a specific folder/file naming structure. Follow the readme exactly.
It fails mid-flash or reboots repeatedly
If flashing stops unexpectedly:
- Do not keep retrying on every reboot. Each failed attempt can increase wear or risk.
- Check whether the package provides a recovery mechanism (some models support capsule/recovery flashing or alternate BIOS regions).
- Make sure the USB drive is known-good (try another USB stick).
The system won’t boot after flashing
Actions that often work (if your model supports them):
- Try entering BIOS setup again. Some systems allow recovery flash even when normal boot fails.
- Attempt recovery flashing from USB using the vendor’s specified method (file placement and name matter a lot).
- If the vendor provides an RMA/recovery process, use it rather than experimenting.
If the machine shows signs of partial firmware corruption (no video, repeated power cycles), stop and consider professional service. BIOS recovery attempts can become complicated depending on whether the hardware supports dual BIOS or a recovery partition.
Rank #3
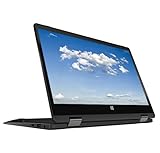
- 11.6inch HD (1366 x 768) IPS Touchscreen with 360' Rotation, Intel UHD Graphics
- Intel Processor Up to 2.79GHz, 4GB DDR4 Ram, 64GB Storage
- 2x USB Type A, 1x HDMI, 1x Headphone/Microphone Jack
- Super-fast Wifi and Bluetooth, HD Webcam
- Windows 11 OS, AC Charger Included, Pastel Black Color
BIOS settings revert or hardware stops working
- Reset BIOS settings: enter BIOS and confirm storage mode (AHCI/RAID) matches your OS configuration. A mismatch can make Windows fail to boot.
- Boot order: restore the boot device priority.
- Memory training: if the system is unstable, reseat RAM and rerun BIOS memory settings to defaults.
If your system uses RAID and the BIOS update changed SATA/RAID behavior, that’s a common cause of boot failures.
Free tools Windows power users keep installed
One-click scans. No signup required.
Safety checklist and common mistakes
These are the errors that most often lead to failed Gateway BIOS updates.
Do
- Use the exact BIOS file for your exact Gateway model.
- Keep AC power connected during the whole flash process.
- Use FAT32-formatted USB and correct file placement per vendor instructions.
- Record current BIOS settings so you can restore them.
Avoid
- Flashing a BIOS from a different model (even if it looks similar).
- Renaming BIOS files unless the readme explicitly requires it.
- Updating while the laptop is on battery only.
- Interrupting power during flashing.
- Running Windows utilities while disk encryption or virtualization features are in an unknown state (follow vendor notes).
Gateway BIOS updates: quick comparisons
| Method | Best for | Risk profile | Key requirement |
|---|---|---|---|
| BIOS setup + USB flash | Most users | Lower (fewer OS interruptions) | Correct FAT32 USB and file placement |
| Windows BIOS updater | Convenience (when provided) | Moderate (Windows can interfere) | Admin rights + no disruptive background activity |
| DOS/bootable flash | Recovery/advanced cases | Higher (more configuration sensitivity) | Exact command syntax and supported media |
FAQs about Gateway BIOS updates
Do I need to update my Gateway BIOS?
No, not unless you have a specific reason (stability fix, compatibility problem, security update) or the update is recommended for your exact hardware revision. BIOS updates shouldn’t be done “just because.”
Can I update BIOS from a USB if I don’t see the option in BIOS?
Sometimes the BIOS menu is model-dependent or requires a specific flash file structure. Re-check the BIOS package readme and confirm you formatted the USB as FAT32 and placed files exactly as instructed.
What happens if the power goes out during a flash?
That’s one of the highest-risk scenarios. Some systems include recovery features (dual BIOS or recovery methods). If you can’t recover, you may need vendor service or a hardware reflash.
Quick wins for a faster PC:
Repair Windows errors before they cause bigger problemsFix Now →Fix the driver behind crashes, sound loss and screen glitchesFind Drivers →Clear out junk files and repair common Windows errorsFree Scan →Should I update to the latest BIOS version immediately?
If the latest version is for your exact model and there’s no note requiring an intermediate step, updating directly is usually fine. If release notes mention prerequisite updates, follow the vendor’s sequence.
Will a BIOS update delete my files?
In normal circumstances, BIOS updates don’t erase your storage drive. Still, back up important data before firmware changes.
Why do my BIOS settings reset after updating?
Firmware updates sometimes reinitialize configuration tables. If your boot mode or storage mode changes (AHCI/RAID), Windows may fail to boot until settings are restored.
Bottom Line
Gateway BIOS updates are manageable if you treat them like firmware surgery: verify your exact model, use the correct BIOS package, flash with stable power, and confirm your version afterward. If anything feels off—wrong file, missing menu option, unexpected errors—pause and correct the setup rather than retrying blindly.
When you follow the BIOS-setup + USB method (when supported), keep the process uninterrupted, and restore essential BIOS settings, you dramatically reduce the chance of boot problems and get the benefits the update was intended to deliver.
Quick Recap
Product prices and availability are accurate as of the date/time indicated and are subject to change. Any price and availability information displayed on Amazon at the time of purchase will apply.




