For most beginners working mainly with wood, leather, paper, and dark or opaque acrylic, an enclosed diode laser engraver is the more practical starting point. Choose a CO₂ machine when clear acrylic, glass engraving, or more substantial non-metal cutting is central to your plans and you can provide the required exhaust, workspace, cooling, and supervision.
The decisive issue is not the laser label, advertised wattage, or a low headline price. It is whether the machine’s wavelength is absorbed by your materials and whether your room can safely support that exact model. A diode machine can be the wrong choice for clear acrylic; a CO₂ machine can be unnecessary complexity for simple wood projects.
As an Amazon Associate I earn from qualifying purchases.
The short answer: match the machine to your materials and room
A beginner should start by writing down the materials they actually intend to process, then checking the manufacturer’s material guidance for a specific machine. The broad rule is:
- Choose an enclosed blue-diode machine for engraving and light cutting in common opaque craft stock such as wood, plywood, MDF, bamboo, leather, paper, cardstock, felt, cork, and dark or opaque acrylic.
- Choose CO₂ when clear acrylic, glass engraving, or heavier non-metal cutting is a primary requirement rather than an occasional experiment.
- Delay either purchase if you cannot route exhaust outdoors or install an appropriate filtration system, supervise every job, and verify the safety of every material.
These are category-level guidelines, not guarantees. Lens configuration, optical power, bed size, air assist, enclosure, cooling, software, and the material’s exact color, coating, glue, and thickness can change the result. Treat each model’s current manual and supported-material list as the final authority.
#1 Best Overall

- 【Ultra-Precision Engraving】Equipped with a high-precision 10W laser module and 0.01mm ultra-fine accuracy, the BlazeX laser engraver delivers exceptional detail across over 300 different materials, including wood, leather, glass, and coated metal. Specifically optimized for desktop DIY, personalized jewelry, and small-batch production, its wide-ranging compatibility makes it the ideal portable laser engraver for creators.
- 【Versatile 2-in-1 Laser Cutter & Engraver】This laser cutter and engraver integrates professional engraving and powerful cutting capabilities. With ultra-fine precision of 0.01mm and a high-density laser beam, you can easily engrave complex patterns on metal and glass, or achieve clean cuts on wood and acrylic, making it the ideal tool for all your DIY projects.
- 【All-in-One Starter Kit】Start your creative journey in minutes! This comprehensive bundle includes a protective enclosure, tool kit, 13 engraving materials, and an essential honeycomb laser bed. The honeycomb bed is integral for providing stable support, enhancing airflow for cleaner cuts, and protecting your work surface from laser damage. With a straightforward setup, you can achieve impressive DIY results right from the first use—ideal for beginners and hobbyists alike.
- 【Class 1 Safety & Intelligent Protection】Engineered with a Class 1 Safety rating, this engraver filters harmful radiation for eye protection. The integrated fan exhausts smoke and odors while reducing noise for a quiet workspace. Smart sensors trigger an automatic stop if the machine tilts or the lid opens. Safe and low-noise, it is ideal for homes, creative studios, and educational use.
- 【Wide Compatibility & Reliable Support】Fully compatible with LightBurn, LaserGRBL, and CutLabX across Windows, macOS, iOS, and Android. Even beginners can master it in no time! We provide professional after-sales support and step-by-step tutorial videos on YouTube. Join our "BlazeX Laser Official" on Facebook for continuous technical assistance and creative inspiration to ensure a seamless experience.
Why wavelength changes what each laser can process
Laser energy only works efficiently when the target absorbs its wavelength. xTool’s technical guide identifies a representative blue-diode wavelength of approximately 450 nanometres and a CO₂ wavelength of 10,600 nanometres (10.6 micrometres). Those wavelengths interact differently with plastics, pigments, wood, and glass.
Blue light is readily absorbed by many dark and organic materials, which is why a diode can mark or cut a wide range of wood, leather, paper, and dark acrylic. Clear acrylic transmits much of the visible blue light instead of absorbing it, so a standard blue diode should not be expected to process clear acrylic merely because it works on black acrylic.
CO₂ energy is strongly absorbed by many non-metal materials, including acrylic and wood. That makes CO₂ a more versatile choice for clear acrylic and for projects where deeper or more substantial non-metal cutting is a recurring requirement. These wavelength descriptions come from a manufacturer guide, not an independent, same-condition comparison of specific machines.
Material compatibility by project type
| Material or project | Blue diode category | CO₂ category | Beginner check |
|---|---|---|---|
| Wood, plywood, MDF, bamboo | Commonly supported for engraving and some cutting; thickness depends on model and settings. | Commonly supported, with more cutting headroom on many models. | Check the exact species, adhesive content, thickness limits, air-assist requirements, and manufacturer test settings. |
| Leather | Commonly suitable for engraving and selected cutting applications. | Also commonly suitable. | Confirm whether the leather is vegetable-tanned or chemically treated; avoid unknown finishes. |
| Paper, cardstock, felt, cork | Often a good fit, but these materials ignite easily. | Also workable, with the same fire risk. | Use low-power test passes, air assist where specified, and continuous supervision. |
| Dark or opaque acrylic | Often compatible because the pigment absorbs blue light. | Compatible in many systems. | Verify the plastic type and additives; color alone does not prove safety. |
| Clear acrylic | Do not assume compatibility; xTool’s guide says clear acrylic transmits blue diode light. | A strong reason to consider CO₂. | Confirm the acrylic formulation and thickness in the CO₂ model’s documentation. |
| Glass | Not established as a general blue-diode capability in the cited guidance. | CO₂ is commonly chosen when glass engraving is important. | Look for instructions for the exact glass type and required masking or coating. |
| Bare metals | Not established by the cited beginner guidance. | Not established by the cited beginner guidance. | Do not assume either category marks bare metal; a different laser source or coating may be required. |
| PVC, vinyl, or unidentified plastic | Unsafe to assume for either category. | Do not process. Identify the material and consult its safety information first. | |
A material’s name is not enough. Plywood glue, leather dyes, acrylic additives, paint, adhesive backing, and protective films can change both absorption and emissions. Ask the supplier for the material composition and safety data when it is not obvious.
Cutting versus engraving: define the work before choosing
When engraving is the main goal
Signs, personalization, logos, photographs, and shallow decorative marks place less demand on cutting depth. A diode machine can be an efficient beginner platform for these jobs in wood, leather, paper, and suitable dark acrylic. An enclosure, camera or alignment aid, and dependable software workflow may matter more than choosing the category with the greatest nominal power.
Rank #2

- Fr*e Acmerstudio Engraving Software Included: The engraver is fully optimized for Acmerstudio, our self-developed engraving software, which is free to use and ready right out of the box. It also supports other popular engraving software for users who prefer alternative workflows.
- High-Precision Laser Engraving and Cutting: Acmer S1 laser engraver machine with 2500mW diode laser power, 24W machine output, 455±5nm wavelength, and 2mm focal length for ultra-fine accuracy. Achieve up to 10,000mm/min engraving speed and 0.01mm repeatable positioning accuracy—perfect for detailed, vivid engraving and cutting on various materials.
- 2-in-1 Engraving & Cutting Versatility: Dual-function laser cutter and engraver supports engraving on wood, bamboo, leather, plastic, PCB, aluminum oxide, ceramics, and more. Easily cuts through thin plywood, MDF, and acrylic—ideal for DIY, crafts, professional projects, and small business needs.
- Preassembled & Beginner-Friendly: Arrives 99% preassembled with just 1-minute laser head installation—no complex setup required. A user-friendly laser engraving machine perfect for beginners, hobbyists, and professionals seeking fast, easy operation without the learning curve.
- Lightweight, Durable & Portable Design: Built from industrial-grade aluminum alloy, the 2kg compact engraver is easy to carry and store. With a 130x130mm working area and machine size of 250×250×162mm, it's optimized for home use without sacrificing pro-level performance.
When cutting is the main goal
Cutting requires enough absorbed energy to travel through the entire thickness while controlling heat and smoke. A diode can cut some suitable stock, but the maximum thickness and number of passes vary substantially by model and material. CO₂ becomes more compelling when clear acrylic or repeated cuts in thicker non-metal sheet are central to the business or hobby.
Do not use a wattage number from one manufacturer as a universal speed or thickness promise. Compare the exact model’s tested material chart, work area, lens, air-assist arrangement, and recommended settings. No controlled, same-conditions evidence establishes a universal diode-versus-CO₂ winner for speed, precision, maintenance, or lifetime cost.
What’s actually slowing this PC down?
Pick the symptom - the matching free tool is one click away.
Workspace, enclosure, ventilation, and cooling
A safe installation is part of the machine purchase. OMTech’s beginner and home-use guidance recommends considering budget, intended materials, space, and ventilation before selecting a laser. Its crafts guidance distinguishes enclosed diode systems for wood, leather, and paper from CO₂ systems chosen for clear acrylic or glass versatility when adequate ventilation is available.
Enclosure and interlocks
Open-frame diode machines exist, and enclosed diode machines are also available. Desktop CO₂ machines are commonly enclosed, but enclosure quality, viewing windows, lid interlocks, and access panels differ. Verify that the machine prevents or limits operation when a safety cover is open and that the enclosure is appropriate for the intended installation; do not treat an enclosure as permission to leave a running machine unattended.
Exhaust and filtration
Both categories can produce smoke, particulates, and chemical vapours. Plan the exhaust path before delivery: determine whether the manufacturer requires a duct to the outside, an approved filter unit, or both, and check local building or workplace rules. A small room with no practical exhaust route can rule out a machine regardless of its advertised capability.
Rank #3

- 【Upgraded Laser Power with Air Assist Support】The TTS-55 PRO features a powerful 5500 mW (5.5W) laser (Class II) and includes a newly added metal air-assisted nozzle and red laser shield. These upgrades provide enhanced cutting performance and safety while making it easier to integrate an air assist system for cleaner, deeper cuts.
- 【High Precision Engraving & Cutting Across Multiple Materials】0.08*0.46mm super fine spot focus,Capable of engraving and cutting a wide range of materials including wood, leather, acrylic, paper, stainless steel, and more. Cut through 5mm plywood, 3mm acrylic, and 0.7mm leather with precision.Working area 300x300mm. Ideal for hobbyists, makers, and small business projects.
- 【Advanced Compression Laser Technology】Equipped with LD+FAC+C-Lens compression technology, the short 23mm focal length delivers stronger cutting power and sharper engraving detail. Achieve ultra-fine results with up to 0.1mm engraving accuracy.
- 【High-Speed, Smart 32-Bit Control Board】Runs on a fast dual-core 32-bit MCU, enabling engraving speeds up to 30,000mm/min. Supports both online and TF card offline engraving, plus built-in Wi-Fi for mobile app or computer web control—wireless engraving made easy.
- 【Software & System Compatibility】Fully compatible with LaserGRBL (Windows XP/7/8/10) and LightBurn (Windows, macOS, and Linux). Whether you’re a beginner or an experienced creator, you’ll find intuitive controls and powerful tools to bring your ideas to life.
Cooling and accessories
Cooling requirements vary by model. Some CO₂ systems need active cooling equipment, while diode systems may use simpler arrangements; confirm the exact requirement rather than inferring it from the category. Air assist can improve cutting and help control flare-ups, but whether a pump or kit is included is model-specific. Budget for compatible exhaust, air assist, cooling, ducting, and replacement consumables when comparing total ownership.
Free tools Windows power users keep installed
One-click scans. No signup required.
A beginner’s decision process
- List your first-year materials. Separate materials you will use every week from those you might try once. Mark any clear acrylic or glass requirement as a decisive need rather than an optional feature.
- Define the thickest routine cut. Record material type, thickness, desired edge quality, and how many pieces you expect to make. Engraving-only projects need a different setup from repeated full-sheet cutting.
- Check absorption and hazards. Confirm that the exact color, coating, adhesive, and plastic formulation are supported. Obtain safety data for unfamiliar stock; never rely on a photograph or seller’s generic label.
- Measure the installation site. Include the machine footprint, lid-opening clearance, duct route, electrical access, cooling equipment, and a non-combustible work surface. Leave room to inspect and clean the machine safely.
- Compare the complete setup. Evaluate enclosure and interlocks, exhaust, cooling, air assist, bed size, software compatibility, file workflow, included accessories, warranty, and local support—not just the laser type or advertised optical power.
- Read the current manual before ordering. Look for prohibited materials, ventilation specifications, electrical requirements, maintenance intervals, emergency procedures, and limitations on unattended operation.
- Choose the category that satisfies the non-negotiables. If clear acrylic is central and ventilation is workable, CO₂ is usually the more coherent starting point. If your core work is opaque craft material and you want a simpler installation, an enclosed diode is often the better fit.
When an enclosed diode is the better beginner choice
Your projects are mostly opaque craft materials
Wood ornaments, plywood signs, leather patches, paper products, cork labels, and dark acrylic tags align with the material set described in xTool’s diode guidance. A diode setup can let you learn vector preparation, raster settings, focus, masking, and smoke control without paying for capabilities you will not use.
You have limited but workable space
Enclosed diode models are available in compact formats. That does not eliminate exhaust planning, but it can simplify physical placement compared with a larger CO₂ installation. Confirm the enclosure dimensions, duct outlet, power requirements, and clearance around the lid before deciding that a machine will fit.
You want to learn gradually
For a beginner whose immediate goal is personalization rather than production cutting, a diode can provide a manageable path: begin with known plywood or vegetable-tanned leather, establish a test grid, and expand materials only after checking their composition and the manual.
When CO₂ is worth the added setup
Clear acrylic is a core material
Clear acrylic is the clearest category-level reason to consider CO₂. Because blue diode light can pass through clear acrylic, a standard diode should not be selected with the expectation that it will cut or engrave it effectively. A CO₂ machine is designed around a wavelength that acrylic absorbs more readily, subject to the model’s power, optics, and thickness limits.
Quick wins for a faster PC:
Clear out junk files and repair common Windows errorsFree Scan →Fix the driver behind crashes, sound loss and screen glitchesFind Drivers →Repair Windows errors before they cause bigger problemsFix Now →Rank #4
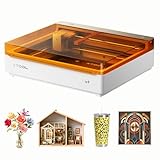
- NOTE: CMYK Inkjet module and RA3 Lite Rotary are not included in this M2 standalone, available separately as add-ons.
- Ultimate Versatility in One Machine: Innovative dual-mode architecture lets the M2 laser engraver add a CMYK Inkjet module((sold separately) to work with the laser. Transform 300+ materials—cardstock, felt, leather, wood, etc.—into masterpieces. Enjoy full-color printing (module required), precision cutting, and custom engraving with a seamless print-to-cut workflow in one setup.
- Smart Crafting with Dual-Camera: Built-in dual cameras, this M2 laser engraving machine offers a real-time preview of your workspace. Backed by ACS, it fuses this vision with motion control for a "Place & Go" experience-ensuring high accuracy while eliminating guesswork and wasted material.
- Effortless Software with Customizable Templates: Beginner-friendly xTool Studio offers hundreds of ready-to-use templates and an integrated AI image generator. Go from creative text ideas to finished personalized gifts and home decor in just minutes. No steep learning curve—just design, click, and create.
- Power Options for Every Creative Goal: Comes standard with 10W diode lasers. You can add the CMYK Inkjet module or 3W IR laser (both sold separately) to unlock full-color printing or fine engraving on metal/plastic. The M2 adapts to every project you imagine, from delicate engravings and high-speed batch cutting to full-color printing.
You need recurring non-metal cutting capacity
OMTech describes CO₂ systems for wood, leather, acrylic, and other non-metal materials, and identifies compact CO₂ machines as an entry-level option for buyers who want CO₂ cutting capability. If your workflow involves frequent sheet cutting rather than occasional small parts, the additional setup may be justified.
Glass engraving matters
CO₂ is commonly selected when glass engraving is part of the plan. Results depend on the glass, masking, focus, speed, and power settings, so use a machine-specific procedure and test pieces. Do not infer that every CO₂ machine handles every glass object identically.
Independent reader supportYour contribution helps us test, update, and keep practical guides available for everyone.Safety rules that apply to either category
The Full Spectrum Laser manual gives two unambiguous instructions:
“NEVER engrave or cut any material containing PVC or vinyl.”
DriversCrashes, No Sound, or Screen Glitches?PerformancePC Slower Than It Used to Be?DriversOutdated Drivers Are Slowing You DownSpecial offer. See more information about Outbyte and uninstall instructions. Please review EULA and Privacy policy.“NEVER operate the machine without a properly operating ventilation system.”
Best Value
 xTool S1 40W Laser Cutter and Laser Engraver for Tumblers, 23.93" x 15.16" Bed Size, 600mm/s Speed, Laser Engraving Machine, Laser Engraver for Wood and Metal, Acrylic, Big Project - Rotary Bundle
- [Unbeatable Power & Productivity] With a powerful 40W (40,000mW) laser, this advanced laser cutter and engraver machine slices through 18mm cherry wood as easily as butter in a single pass. Engrave at blazing speeds up to 600mm/s on a spacious 23.93" x 15.16" bed—perfect for large projects like door signs or up to 119 dog tags in one go.
- [Exclusive xTool Patented Technologies] Achieve next-level precision on your precious items with the xTool S1 laser engraver, thanks to xTool’s patented Pin-point Positioning technology. Enjoy stunning 3D engravings on curved surfaces like spoons and plates. Effortlessly tackle projects up to 118 inches (3000mm) with AutoPassthrough Technology.
- [Your First Laser Engraver, Easier Than Ever] Ready to use right out of the box. Auto-focus and powerful, intuitive software—xTool Creative Space (XCS)—make it simple for anyone to start creating. We’ve pre-tested over 400 materials with optimal parameter settings; just preview, click, and engrave. No design skills? No problem—input a few words, and the AI-powered software will create a unique design for you. Plus, there are over 1,000 step-by-step project tutorials to guide you.
- [Class 1 Safety, Safe with Kids and Pets Around] The protective cover filters 99% of laser light, safeguarding your eyes without the need for goggles. The enclosed design blocks smoke and noise, ensuring a comfortable and secure workspace. Built-in 5 flame sensors automatically halt operation if a flame is detected. With an emergency stop button and a lid-open stop feature, you’re fully protected for peace of mind.
- [Premium Quality, Built to Last] This laser engraving machine has a 3mm aerospace-grade aluminum frame for exceptional stability and durability. xTool prioritizes quality with over 71,830 hours of rigorous testing, including laser tube aging, power stability, and extreme conditions. Every S1 unit undergoes 7 strict pre-shipment inspections and 100% scenario testing to ensure flawless performance.
Those statements are from that manual; your machine’s current manual and applicable local workplace requirements still govern your installation. The same manual warns against unknown materials, describes fire hazards, and requires the operator to monitor the machine. An enclosure, camera, or automatic pause feature does not replace supervision.
- Identify every material. Reject stock with unknown composition, especially plastics, coated fabrics, and adhesive-backed sheets.
- Keep ventilation operating. Verify airflow before starting and stop if the exhaust or filtration system fails.
- Control ignition risk. Keep the bed and surrounding area free of scraps and flammable clutter. Paper, felt, wood dust, and some finishes can flare quickly.
- Stay present. Watch the first passes of every new material and remain able to stop power immediately.
- Follow electrical and cooling instructions. Use the specified supply, grounding, coolant, water level, and shutdown procedure.
- Use appropriate personal protection. Follow the machine manual for eye protection, enclosure viewing, and maintenance procedures; never defeat an interlock.
First-project setup workflow
- Prepare a known test material. Use a small piece of manufacturer-supported stock rather than an expensive finished blank.
- Inspect the machine. Confirm the enclosure, interlocks, lens, mirrors or optical path where applicable, bed, emergency stop, exhaust connection, and air-assist lines.
- Install exhaust and cooling. Route ducting as specified, check for leaks or kinks, and complete any required cooling fill or circulation check before enabling the laser.
- Configure the software. Confirm the supported file formats, device driver, origin, work area, and units. Run a framing or outline operation with the laser disabled if the software allows it.
- Focus and secure the stock. Follow the model’s focus method, keep the material flat, and remove protective film only as the material instructions permit.
- Run a small test grid. Vary speed and power within the manual’s safe range. Record the result, including material batch and thickness, instead of copying settings from an unrelated machine.
- Start the job while watching continuously. Confirm smoke extraction, listen for abnormal sounds, and stop immediately for flare-ups, stalled motion, loss of airflow, or cooling alarms.
- Inspect and clean after shutdown. Allow hot material to cool, remove residue, clean optics as directed, and document settings that produced an acceptable result.
Common buying and operating mistakes
| Mistake | Why it causes trouble | Better response |
|---|---|---|
| Choosing by advertised wattage alone | Optical design, focus, spot size, air assist, and material absorption also determine results. | Compare the exact model’s supported-material and thickness information. |
| Assuming all acrylic behaves the same | Clear, dark, cast, extruded, painted, and coated acrylic can absorb energy differently. | Identify the formulation and test a small sample; select CO₂ when clear acrylic is central. |
| Buying an open machine for a room with no exhaust plan | Smoke and vapour still require controlled extraction, and open frames add exposure concerns. | Plan the ventilation route first or choose an enclosed model that meets the same exhaust requirements. |
| Skipping the manual because the machine is marketed to beginners | Beginner positioning does not standardize interlocks, cooling, software, or prohibited materials. | Read the current manual and safety documentation before powering the machine. |
| Copying settings from another brand or model | Different optics, power calibration, focus, and material batches make settings non-transferable. | Run a controlled test grid and keep a material log. |
| Leaving a job unattended | Laser-cut stock can ignite even when a previous job was uneventful. | Monitor every run and keep an immediate stop method available. |
| Ignoring software and bed size | A capable laser is frustrating if your files, workflow, or intended sheet dimensions do not fit. | Verify software compatibility, usable work area, origin behavior, and support before purchase. |
Comparing total ownership rather than sticker price
The cited guides do not establish controlled lifetime-cost figures, and models differ too much for a universal “cheaper” winner. A fair comparison includes more than the machine:
- Purchase price and shipping or installation requirements.
- Enclosure, exhaust fan or fume extractor, ducting, and filters.
- Air-assist pump or kit if the machine requires or benefits from one.
- CO₂ cooling equipment where specified, along with coolant and maintenance.
- Replacement lenses, mirrors, tubes, windows, belts, beds, and other model-specific consumables.
- Software fees, supported file formats, updates, and the time needed to learn the workflow.
- Availability of technical support and safety documentation in your region.
Manufacturers often position diode systems as a lower-cost or simpler category and CO₂ systems as a way to obtain broader non-metal cutting capability. Treat those as general positioning, not a promise about every model’s purchase price or operating cost.
A practical comparison checklist
| Decision axis | Questions for a diode machine | Questions for a CO₂ machine |
|---|---|---|
| Materials | Does the manual support my wood, leather, paper, and dark acrylic, including their thickness and coatings? | Does it support my clear acrylic, glass, wood, and other non-metal stock? |
| Cutting | What thickness, number of passes, edge quality, and air-assist setup are documented? | What thickness and production rate are documented for the exact lens and power configuration? |
| Workspace | Is the enclosure interlocked, and can I route exhaust from the installation point? | What are the enclosure, duct, cooling, electrical, and service-clearance requirements? |
| Workflow | Which software, file formats, camera tools, and bed dimensions are supported? | Which controller, software, file formats, origin settings, and bed dimensions are supported? |
| Ownership | What accessories are included, and which are optional? | Are cooling, exhaust, air assist, and consumables included or separate? |
| Support | Can I obtain the current manual, material chart, and replacement parts? | Can I obtain the current manual, cooling guidance, alignment procedure, and replacement parts? |
Bottom-line decision
Start with an enclosed diode engraver if your real projects are predominantly opaque wood, leather, paper, felt, cork, or dark acrylic and you want a relatively straightforward entry into laser work. Select CO₂ when clear acrylic, glass engraving, or repeated deeper cuts in non-metal materials justifies the additional ventilation, cooling, and maintenance planning. In either case, confirm the exact material and machine documentation, build the exhaust system before the first job, and supervise every operation.
Quick Recap
Product prices and availability are accurate as of the date/time indicated and are subject to change. Any price and availability information displayed on Amazon at the time of purchase will apply.




