XMP on ASUS BIOS is one of the simplest ways to make your RAM run at its advertised speed instead of the slower default settings chosen by the system. By loading a memory profile stored on the RAM itself, your motherboard can automatically apply faster frequency, timing, and voltage settings without requiring full manual overclocking.
For many ASUS motherboard users, enabling XMP can improve performance in gaming, content creation, multitasking, and other memory-sensitive workloads. The process is usually quick, but it still depends on your CPU, motherboard, RAM kit, and BIOS version working well together.
As an Amazon Associate I earn from qualifying purchases.
This guide covers what XMP does, what to check before turning it on, how to enable it in ASUS BIOS, how to choose between XMP profile options, and how to test and fix common stability or boot problems afterward.
Quick wins for a faster PC:
Repair Windows errors before they cause bigger problemsFix Now →Fix the driver behind crashes, sound loss and screen glitchesFind Drivers →What XMP Does on ASUS Motherboards
XMP, short for Extreme Memory Profile, is a preset stored on compatible DDR memory modules that tells the motherboard how to run the RAM at its advertised high-performance settings. Without XMP enabled, an ASUS motherboard usually starts memory at a safe default speed defined by the JEDEC standard. For example, a DDR4 kit sold as 3200 MT/s may boot at 2133 or 2666 MT/s, while a DDR5 kit rated for 6000 MT/s may start much lower, depending on the CPU and board. XMP lets the BIOS apply the faster frequency, primary timings, and required voltage automatically.
#1 Best Overall

- A redefinition of everything by outstanding performance and design for releasing unlimited creativity
- Every recognition of memory overturned to reliable performance
- Lifetime warranty for maximum protection
- Before purchasing memory products, please refer to the QVL(Qualified Vendor List) compatibility list first of the motherboard.
- The quality of the CPU memory controller (IMC) and the version from the BIOS of motherboard may both potentially affect the operating frequency of the memory.
On ASUS motherboards, XMP is controlled through the UEFI BIOS, most often under the AI Tweaker menu. Enabling it changes several memory-related values at once instead of requiring you to enter them manually. These commonly include DRAM frequency, CAS latency, tRCD, tRP, tRAS, command rate, and DRAM voltage. On many ASUS Intel boards, the setting appears as AI Overclock Tuner, where you can select an XMP profile. On some ASUS AMD boards, the equivalent may be labeled DOCP, EXPO, or AEMP, depending on the platform, BIOS version, and memory kit.
The practical benefit is that your RAM can operate closer to the speed printed on the box. This can improve performance in workloads that respond well to memory bandwidth and latency, such as gaming on CPU-limited systems, integrated graphics performance, file compression, code compilation, simulation workloads, and certain creative applications. The gain is not always dramatic, and it varies by CPU, GPU, resolution, and software, but leaving fast RAM at default settings can waste performance you already paid for.
What changes when XMP is enabled
- Memory frequency: The RAM speed is raised from the default JEDEC value to the kit’s rated profile, such as DDR4-3600 or DDR5-6400.
- Primary timings: Latency values are adjusted to match the memory profile, for example 16-18-18-36 or 32-39-39-102.
- DRAM voltage: The board applies the voltage required by the profile, commonly 1.35 V for many DDR4 XMP kits and often 1.25 V to 1.40 V for DDR5 kits.
- Memory training behavior: The motherboard tests and configures the memory during boot, which can make the first boot after enabling XMP take longer than usual.
- Related controller settings: ASUS BIOS may adjust supporting values tied to the CPU memory controller, especially on higher-speed kits.
Although XMP is often described as automatic overclocking, it is still an overclock from the CPU’s official memory specification. A CPU may officially support DDR5-5600, while the installed kit is rated for DDR5-6400 through XMP. The RAM manufacturer has tested the module for that profile, but the final result also depends on the motherboard’s memory topology, BIOS maturity, the CPU’s memory controller, the number of DIMMs installed, and whether the kit is being used in the recommended slots. This is two systems with the same RAM may not behave identically.
The Tool Desk
Outbyte PC Repair FREEClear out junk files and repair common Windows errorsFree Scan →Outbyte Driver Updater FREEFix the driver behind crashes, sound loss and screen glitchesFind Drivers →ASUS adds its own tuning options around XMP to make memory setup easier. Some BIOS versions offer XMP I and XMP II. In general, XMP I lets the ASUS motherboard optimize some secondary settings while using the main XMP values, while XMP II follows the memory module’s stored profile more closely. Higher-end ROG and TUF boards may also include memory presets, training controls, and voltage options for users who want to fine-tune stability. For most users, XMP is the simplest starting point: it applies the rated RAM settings in one place while still allowing manual adjustments later if the system fails to boot, crashes, or needs a smaller speed step for stability.
Before You Enable XMP: Compatibility and Safety Checks
Before turning on XMP in an ASUS BIOS, confirm that your hardware can realistically run the memory profile printed on the RAM kit. XMP is a factory-tested overclock profile, but it is still an overclock from the CPU memory controller’s point of view. A kit rated for DDR4-3600 or DDR5-6000 may work perfectly on one system and need adjustment on another, depending on the motherboard, CPU, BIOS version, memory layout, and whether you are using two or four sticks.
Check motherboard and RAM compatibility
Start with your ASUS motherboard’s support page. Look for the memory QVL, which stands for Qualified Vendor List, and search for your RAM kit’s exact part number. The part number is usually printed on the RAM label and shown on the product box or invoice. If the kit appears on the QVL at its advertised speed and capacity, that is a strong sign it should work with XMP. If it is not listed, it may still work, but you have less certainty and may need to lower the speed or adjust voltages later.
- Match the full kit model: A 2×16 GB kit is not the same as buying two separate 1×16 GB sticks, even if the speed and brand match.
- Check supported memory type: DDR4 and DDR5 are not interchangeable, and ASUS BIOS options differ between platforms.
- Review slot population rules: For two sticks, most ASUS boards recommend using the A2 and B2 slots.
- Consider capacity and stick count: Four-DIMM setups are harder to run at high speeds than two-DIMM setups.
Verify CPU memory support
Your CPU matters as much as the motherboard. Intel and AMD processors include an integrated memory controller, and its quality affects how easily XMP speeds run. For example, a CPU officially rated for DDR5-5600 may still run DDR5-6000 or higher, but it is not guaranteed. On DDR4 systems, speeds such as 3200 MT/s are usually easy for modern platforms, while 4000 MT/s and above can require more tuning. On DDR5 systems, high-speed kits may need a current BIOS and a capable CPU memory controller.
| Check | What to Look For | What It Means |
|---|---|---|
| ASUS QVL | Exact RAM part number listed | Better chance of one-click XMP success |
| BIOS version | Recent release with memory compatibility updates | Improves DDR5 and high-speed DDR4 stability |
| DIMM slots | A2 and B2 for two sticks | Best signal quality on most ASUS boards |
| CPU memory controller | Official and typical supported speeds | Helps set realistic expectations |
Update BIOS and record current settings
If your system is new, unstable, or using DDR5, update to a stable recent BIOS before enabling XMP. ASUS often improves memory training, boot behavior, and compatibility through BIOS updates. Use the correct BIOS file for your exact motherboard model, and avoid interrupting the update process. After updating, load optimized defaults once, then configure XMP. This gives the board a clean baseline instead of layering new memory settings over older manual changes.
Rank #2

- Exclusive DDR5 memory for AMD. DDR5 - Leading the way into a new OC generation, compatible with AMD series chipset. AMD EXPO support for one-click overclocking. Compatible with AMD X670 series and Ryzen 7000 Series CPU.
- RGB colors & 120° ultra-wide lighting. Equipped with smart RGB IC controller that supports various lighting effect software.
- Power management ICs (PMICs) equipped for stable, efficient power usage. Strengthened PMIC cooling design. On-die ECC for stable system. High-Quality ICs selected for stability & reliability. Optimized for Both Intel XMP 3.0 & AMD EXPO.
- Lifetime warranty. Free Technical Support and Customer Service on TEAMGROUP's official website.
- Precautions: 1. Before purchasing memory products, please refer to the QVL(Qualified Vendor List) compatibility list first of the motherboard. 2. The quality of the CPU memory controller (IMC) and the version from the BIOS of motherboard may both potentially affect the operating frequency of the memory.
It is also smart to record your current stable configuration. Take photos of key BIOS screens or write down CPU settings, fan curves, boot order, and storage mode. If the system fails to boot after enabling XMP, you can restore these settings quickly after clearing CMOS or loading defaults. Also make sure the computer is stable at stock memory settings before changing anything; if it already crashes, freezes, or shows errors, XMP will make diagnosis harder.
Confirm safe voltage and cooling conditions
Check the voltage specified by the RAM manufacturer. Many DDR4 XMP kits use around 1.35 V, while some high-speed kits use more. DDR5 kits often list separate values such as DRAM VDD and VDDQ, commonly around 1.25 V to 1.40 V depending on speed. These values are normal for the rated profile when set by XMP, but unusually high voltages deserve extra caution for daily use. Good airflow also helps, especially with four sticks, compact cases, or tall RGB heat spreaders packed tightly together.
Finally, decide what “stable enough” means for your system. A gaming PC may only need to pass several hours of stress testing and normal use, while a workstation handling long renders, code builds, or financial data should be tested more strictly. Once compatibility, BIOS version, slot placement, baseline stability, and voltage expectations are checked, enabling XMP in ASUS BIOS becomes a controlled change rather than a blind overclock.
How to Enable XMP in ASUS BIOS
On ASUS motherboards, XMP is usually enabled from the UEFI BIOS using either the simplified EZ Mode screen or the full Advanced Mode interface. Before changing anything, restart the PC and repeatedly press Delete or F2 as soon as the system begins to boot. If Windows loads instead, restart and try again earlier, or use Windows Advanced Startup to enter UEFI firmware settings.
The quickest method is through EZ Mode. Once inside the ASUS BIOS, look for the memory profile option on the main screen. Depending on the motherboard and BIOS version, it may be labeled XMP, DOCP, EXPO, or Ai Overclock Tuner. Intel platforms commonly show XMP, while some AMD ASUS boards use DOCP for XMP-based DDR4 kits or EXPO for DDR5 kits designed for Ryzen. Select the available profile, confirm the advertised RAM speed, then save and reboot.
- Restart the PC and press Delete or F2 to enter the ASUS BIOS.
- If the BIOS opens in EZ Mode, find the memory profile setting near the system information or DRAM status area.
- Set the profile from Disabled or Auto to the listed XMP profile.
- Check that the target DRAM frequency matches your memory kit, such as 3200MHz, 3600MHz, 6000MHz, or another rated speed.
- Press F10, review the pending changes, then choose OK to save and restart.
If you prefer the full settings menu, press F7 to switch to Advanced Mode. Open the Ai Tweaker tab, then find Ai Overclock Tuner. Change it from Auto to XMP I or XMP II on supported Intel boards. On some AMD models, choose DOCP or EXPO instead. The BIOS should automatically fill in the primary memory speed, timings, and voltage from the profile stored on the RAM module.
After selecting the profile, review the main values before saving. For example, a DDR4-3600 kit might apply 3600 MT/s with 16-18-18 timings at 1.35V, while a DDR5-6000 kit may apply 6000 MT/s with its own rated timings and voltage. These numbers should be close to the specifications printed on the memory package or listed on the manufacturer’s product page. If the BIOS shows a much higher speed than expected, or an unusual voltage, cancel the change and recheck the selected profile.
What’s actually slowing this PC down?
Pick the symptom - the matching free tool is one click away.
| ASUS BIOS area | Setting to check | What to choose |
|---|---|---|
| EZ Mode | XMP, DOCP, or EXPO profile | Enabled profile matching your RAM kit |
| Advanced Mode > Ai Tweaker | Ai Overclock Tuner | XMP I, XMP II, DOCP, or EXPO |
| Ai Tweaker | DRAM Frequency | Rated memory speed |
| Ai Tweaker | DRAM Voltage | Rated kit voltage, commonly 1.35V for many DDR4 XMP kits |
When the system restarts, the first boot may take longer than usual while the motherboard trains the memory. This is common, especially with DDR5 or high-capacity kits. Once Windows loads, open Task Manager, CPU-Z, HWiNFO, or Armoury Crate to confirm the new memory speed. In Task Manager, go to Performance > Memory and check the reported speed. In CPU-Z, remember that the DRAM frequency is shown as half the effective DDR rate, so a DDR4-3600 kit may appear around 1800 MHz.
Rank #3
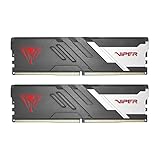
- Capacity: 32GB (2 x 16GB) 6000MHz
- Tested Timings: 30-40-40-76
- Feature Overclock: XMP 3.0 / EXPO overclocking supported
- Compatibility: Tested across latest DDR5 platforms for reliability on high performance
- Limited lifetime warranty
Choosing Between XMP I, XMP II, and Manual Memory Settings
On many ASUS motherboards, enabling memory overclocking is not limited to a single XMP switch. Depending on the board, BIOS version, CPU generation, and whether you are using DDR4 or DDR5, you may see options such as XMP I, XMP II, and manual memory tuning. These choices control how closely the board follows the memory kit’s advertised profile and how much ASUS applies its own automatic tuning for compatibility.
XMP I: ASUS-optimized settings
XMP I is usually the best first choice for most users. It loads the main XMP profile from the RAM kit, such as frequency, primary timings, and DRAM voltage, then lets the ASUS motherboard optimize some secondary and tertiary timings. For example, a DDR5-6000 CL30 kit may run at its rated 6000 MT/s, 30-38-38 timings, and 1.35 V, while the board adjusts deeper timing values to improve training success and day-to-day stability.
This mode is useful if you want a simple setup with a higher chance of booting cleanly. It is especially practical on systems using four DIMMs, higher-capacity modules, or CPUs with a memory controller that may not handle aggressive settings as easily. If your PC posts normally, runs games without crashes, and passes memory stability testing, there is often no need to move beyond XMP I.
Recommended Free Tools
XMP II: memory kit’s full stored profile
XMP II follows the profile programmed by the memory manufacturer more closely. It typically applies the kit’s specified frequency, primary timings, voltage, and more of the secondary timing values stored in the module’s SPD/XMP data. This can be useful if you want the settings closest to what the RAM vendor validated for that kit.
XMP II may perform slightly differently from XMP I, but the difference is often small in real workloads. It can be worth trying if XMP I is stable but you want to compare benchmark results, latency, or memory bandwidth. It can also help when ASUS automatic tuning behaves poorly with a specific kit. If XMP II causes boot loops, random blue screens, game crashes, or memory test errors, switch back to XMP I before making deeper changes.
Manual memory settings: for fine-tuning and problem solving
Manual tuning gives you control over frequency, timings, and voltages. This is the right path when XMP almost works but needs a small adjustment, or when you want to tune beyond the rated profile. Common manual changes include lowering memory speed one step, such as from DDR5-6400 to DDR5-6200, raising DRAM voltage slightly within safe daily-use limits, or relaxing timings such as CL30 to CL32. On some platforms, related voltages such as CPU memory controller or system agent voltage may also affect stability.
Manual settings require more testing because one unstable value can cause failed boots, data corruption, application crashes, or errors that only appear under load. Change one setting at a time and write down the original values before editing them. If the system becomes unstable, you can return to BIOS, load optimized defaults, or use the motherboard’s Clear CMOS function.
| Option | Best for | What it changes |
|---|---|---|
| XMP I | Most ASUS users who want quick, stable RAM overclocking | Loads main XMP values and applies ASUS-tuned supporting timings |
| XMP II | Users who want the RAM vendor’s profile applied more directly | Uses more of the memory kit’s stored XMP timing data |
| Manual | Advanced users or systems that need small stability adjustments | Lets you set speed, timings, and voltages yourself |
A sensible order is to start with XMP I, test stability, then try XMP II only if you want to compare behavior or performance. Use manual settings when both profiles fail, when your CPU cannot handle the rated memory speed, or when you want a carefully tuned configuration. For most gaming and productivity PCs, the best profile is not the one with the highest number; it is the one that stays stable under real workloads.
Rank #4
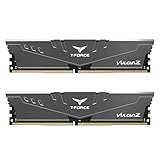
- Simple design to perfectly protect the cooling module with high thermal conductive adhesive
- Supports Intel & AMD motherboards
- Selected high-quality IC
- Supports XMP2.0
- Energy saving with ultra-low working voltage
Testing RAM Stability After Enabling XMP
After enabling XMP in your ASUS BIOS, do not assume the memory overclock is stable just because Windows loads. XMP applies higher memory frequency, tighter timings, and a specific DRAM voltage, and some instability only appears under sustained load. A proper stability test helps confirm that your RAM, CPU memory controller, and motherboard are working reliably at the selected profile.
Start with a few basic checks immediately after the first successful boot. Open Task Manager, CPU-Z, HWiNFO, or Armoury Crate and confirm that the memory speed matches the expected XMP setting. DDR memory reports its real clock at half the effective speed, so DDR5-6000 may appear as roughly 3000 MHz in some tools, and DDR4-3600 may appear as roughly 1800 MHz. Also check that the installed capacity is correct and that the system has not dropped to a safer fallback speed.
Recommended stability tests
- MemTest86: Bootable and useful before entering Windows. Run at least one full pass for a quick check, or four passes for stronger validation.
- TestMem5 with anta777 or absolut presets: A popular Windows-based memory test that can catch timing-related errors quickly.
- HCI MemTest: Run enough instances to cover most available RAM and aim for several hundred percent coverage.
- OCCT Memory test: Simple to use and helpful for detecting errors while monitoring temperatures and voltages.
- Karhu RAM Test: Paid software, but convenient for long RAM stability sessions.
For a practical home test, run a memory stress test for at least one to two hours after enabling XMP. If the PC is used for gaming, streaming, video editing, software builds, or other long workloads, test for four to eight hours or overnight. Any memory error should be treated as a failed test, even if the system appears usable. RAM instability can cause game crashes, blue screens, corrupted downloads, application errors, or rare file corruption.
Crashes, No Sound, or Screen Glitches?
Random freezes, missing sound and display glitches usually trace back to one bad driver. Find and replace yours safely.Free scan · under a minutePC Slower Than It Used to Be?
A free scan shows the junk files, broken settings and background clutter dragging Windows down - then fixes them in one click.Free scan · Windows 10 & 11What to monitor during testing
- Errors: A single reported memory error means the XMP profile is not fully stable with the current settings.
- System behavior: Watch for freezes, sudden restarts, application crashes, WHEA warnings, or blue screens.
- Temperatures: DDR5 and high-voltage DDR4 kits can become less stable when hot, especially in cases with poor airflow.
- Voltage readings: Confirm that DRAM voltage is close to the XMP value shown in BIOS, such as 1.35 V for many DDR4 kits or 1.25 V to 1.40 V for many DDR5 kits.
You should also test the system in the apps and games you actually use. Some PCs pass synthetic RAM tests but crash in a specific game engine, rendering workload, or browser-heavy multitasking session. Launch your most demanding games, open your normal background apps, and run a real workload for a while. If problems only appear during mixed CPU and GPU load, the issue may involve memory stability, CPU memory controller stress, thermals, or power delivery rather than the RAM alone.
If testing passes, save the working configuration as an ASUS BIOS profile if your motherboard supports it. In UEFI, this is usually found under the Tool menu as ASUS User Profile. Saving a known-good XMP setup makes it easier to recover after BIOS updates, CMOS resets, or future tuning. If testing fails, move on to troubleshooting by lowering the memory speed one step, relaxing timings, checking DRAM voltage, or trying the alternate XMP profile before assuming the RAM kit is defective.
Independent reader supportYour contribution helps us test, update, and keep practical guides available for everyone.Fixing Common XMP Problems on ASUS BIOS
If your ASUS system fails to boot, crashes in Windows, or shows memory errors after enabling XMP, the RAM profile is likely too aggressive for the CPU memory controller, motherboard BIOS version, or the exact DIMM configuration. XMP is usually safe, but it is still an overclock, so instability can happen even when the memory kit is rated for that speed. Start by making one change at a time so you can clearly identify what fixed the issue.
System will not boot after enabling XMP
A failed boot usually means the board could not train the memory at the selected XMP speed and timings. On many ASUS motherboards, the system may restart several times while memory training runs. Give it a minute before interrupting it. If it still does not post, power off the PC and use one of these recovery methods:
- Use the Clear CMOS button or jumper: This resets BIOS settings to defaults, including memory settings. Check your motherboard manual for the exact location.
- Remove the CMOS battery: With the power supply switched off and unplugged, remove the coin-cell battery for a few minutes, then reinstall it.
- Use ASUS Safe Boot: Some ROG and higher-end ASUS boards include a Safe Boot button that starts the system with safe BIOS values without fully clearing your settings.
- Use BIOS FlashBack: If the issue started after a BIOS change or the board struggles with your RAM kit, updating the BIOS can improve memory compatibility.
Windows boots but crashes, freezes, or shows memory errors
If the PC boots but becomes unstable under load, enter BIOS and reduce the memory frequency one step below the XMP rating. For example, if your kit is rated for DDR5-6000, try DDR5-5600; if it is DDR4-3600, try DDR4-3466 or DDR4-3200. Keep the XMP timings and voltage at first, then retest. This small reduction often stabilizes systems where the CPU memory controller cannot reliably handle the advertised profile.
Best Value

- Boosts System Performance: 32GB DDR5 RAM laptop memory kit (2x16GB) that operates at 5600MHz, 5200MHz, or 4800MHz to improve multitasking and system responsiveness for smoother performance
- Accelerated gaming performance: Every millisecond gained in fast-paced gameplay counts—power through heavy workloads and benefit from versatile downclocking and higher frame rates
- Optimized DDR5 compatibility: Best for 12th Gen Intel Core and AMD Ryzen 7000 Series processors — Intel XMP 3.0 and AMD EXPO also supported on the same RAM module
- Trusted Micron Quality: Backed by 42 years of memory expertise, this DDR5 RAM is rigorously tested at both component and module levels, ensuring top performance and reliability
- ECC Type = Non-ECC, Form Factor = SODIMM, Pin Count = 262-Pin, PC Speed = PC5-44800, Voltage = 1.1V, Rank And Configuration = 1Rx8
You can also try switching between XMP I and XMP II. XMP I uses ASUS-optimized secondary timings, while XMP II follows the memory kit’s programmed profile more closely. If one mode crashes, the other may train better. For persistent instability, manually set the DRAM voltage to the value printed on the memory label or product page, commonly 1.35 V for DDR4 XMP kits and often 1.25 V to 1.40 V for DDR5 kits. Avoid large voltage jumps unless you know the safe range for your specific platform.
Common fixes to try in ASUS BIOS
- Update to the latest stable BIOS: ASUS frequently improves DDR4 and DDR5 memory training through BIOS updates, especially on newer AMD AM5 and Intel DDR5 platforms.
- Check DIMM slots: For two sticks, use the recommended slots, usually A2 and B2. Incorrect placement can prevent XMP from working correctly.
- Disable memory context restore temporarily: On some AMD systems, this can help troubleshoot boot loops or training issues after enabling EXPO/XMP-style profiles.
- Test one stick at a time: If one module errors at default settings, the issue may be faulty RAM rather than XMP.
- Use a lower gear or divider setting if available: Some Intel systems are more stable when the motherboard selects a more conservative memory controller mode.
If nothing stabilizes the system, run the memory at default JEDEC settings and confirm the PC is stable before trying again. Then enable XMP and lower only the frequency while leaving the rest of the profile intact. A slightly lower speed with no crashes is better than a headline XMP number that causes game exits, blue screens, file corruption, or failed stress tests.
Frequently Asked Questions
Should I choose XMP I or XMP II on an ASUS motherboard?
Start with XMP I on most ASUS boards because it applies ASUS-optimized secondary timings and often boots more easily. If you want the exact memory profile programmed by the RAM manufacturer, try XMP II instead. If either profile causes crashes or boot loops, lower the memory speed one step or tune voltage and timings manually.
Do these 3 things before closing this tab:
1Fix the driver behind crashes, sound loss and screen glitches2Repair Windows errors before they cause bigger problems3Scan for outdated or missing drivers - takes under a minuteIs enabling XMP safe for my RAM and CPU?
Enabling XMP is generally safe when your motherboard, CPU memory controller, and RAM kit support the rated speed. It does run the memory above the default JEDEC speed, so stability is not guaranteed on every system. Keep DRAM voltage within the kit’s rated value, usually printed on the RAM label or product page.
What should I do if my ASUS PC will not boot after enabling XMP?
Power off the PC, then use the Clear CMOS button, jumper, or remove the CMOS battery to reset BIOS settings. After it boots again, update the BIOS, enable XMP again, and try a lower memory frequency such as 6000 instead of 6400 MT/s or 3200 instead of 3600 MT/s. Also make sure the RAM sticks are installed in the recommended slots, usually A2 and B2 for two modules.
How do I know if XMP is actually working in Windows?
Check memory speed with Task Manager, CPU-Z, HWiNFO, or Armoury Crate. In CPU-Z, the DRAM Frequency value is half the effective DDR speed, so 3000 MHz means DDR5-6000 or DDR4-6000 depending on the kit type. If the speed still shows a default value like 2133, 2666, or 4800 MT/s, the XMP profile did not apply successfully.
How long should I test RAM after turning on XMP?
Run at least one dedicated memory test pass before treating the system as stable. Tools such as MemTest86, TestMem5, Karhu RAM Test, or OCCT can catch errors that may not appear during normal browsing. If you see errors, blue screens, game crashes, or file corruption, reduce the memory speed or adjust settings before continuing to use the PC heavily.
Free tools Windows power users keep installed
One-click scans. No signup required.
Bottom Line
Enabling XMP on an ASUS BIOS is one of the simplest ways to get the RAM speed you actually paid for, often with a noticeable boost in responsiveness and gaming or productivity performance. Before turning it on, confirm your CPU, motherboard, and memory kit support the profile, then apply the correct XMP option in BIOS and save your changes.
After enabling XMP, run a stability test and watch for crashes, blue screens, or failed boots. If problems appear, reset BIOS, try a lower memory speed, update the BIOS, or adjust settings gradually until your system is fast and stable.




