Free tools Windows power users keep installed
One-click scans. No signup required.
This Si Lab project builds a three-stage, directly coupled common-emitter amplifier from discrete NPN transistors. The collector of each stage drives the base of the next, producing a very large open-loop voltage gain and an overall inverted response. A 1 MΩ resistor from the third collector back to the first input adds global negative feedback, reducing sensitivity and making the operating point easier to control.
It is an educational DC amplifier experiment, not a finished audio, RF, precision, or power amplifier. The simplified biasing, absent emitter resistors, direct coupling, and generic SPICE model make it ideal for learning—but unsuitable as a production design.
What the circuit demonstrates
A multi-stage amplifier cascades several amplifier sections: the output of one becomes the input of the next. If the individual voltage gains are G1, G2, and G3, the approximate open-loop relationship is:
Gtotal = G1G2G3
For small-signal work, use Av = ΔVout/ΔVin, or 20 log10|Av| in decibels. During this project, however, the useful observation is often the large-signal DC transfer: how collector voltages change as the potentiometer changes the first-stage input.
#1 Best Overall
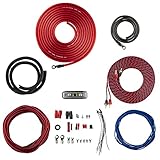
- COMPLETE AMPLIFIER WIRING KIT - AK4 is a perfect set to install 1 amplifier. 4 Gauge Installation cables 1200W that come with an ANL fuse holder with 80 amp fuse.
- BLACK/RED WIRE - 17ft 2-channel shielded twisted pair of RCA premium audio cable inter-connections.
- INSTALLATION PACKAGE - Install the amp wiring kit to 1 amplifier. All wire terminals, connectorss, wire ties, and wire loom are included in the box for simple installation.
- HIGH QUALITY MATERIALS - Super flex twist premium cables & Copper-Clad Aluminum (CCA) wires. Only the best materials are used with each kit.
- EVERYTHING INCLUDED - 17ft 4 GA Red power cable / 3ft 4GA Black ground cable / 17ft 12GA Red/Black speaker cable / 17ft 2Channel shielded twisted pair interconnect / 17ft remote turn/on wire / 6ft split loom tubing
Circuit topology and parts
The project is the “Si Lab – Multi-stage Amplifier” in the Discrete Semiconductor Circuit Projects series. Its schematic uses three NPN common-emitter stages, each with a 10 kΩ collector resistor and a 100 kΩ resistor feeding the following base. The third collector is the output. A 10 kΩ linear potentiometer supplies the first-stage input, and the optional 1 MΩ resistor returns the third collector signal to that input node.
| Part | Quantity | Role or qualification |
|---|---|---|
| 2N2222 or 2N3403 NPN transistor | 3 | Suggested alternatives; verify the exact package pinout and ratings before wiring. |
| 6 V battery | 2 | Connected in series for a nominal 12 V supply; actual voltage varies with battery type and state of charge. |
| 10 kΩ linear potentiometer | 1 | Manual input adjustment. |
| 1 MΩ resistor | 1 | Global feedback resistor, added after the open-loop test. |
| 100 kΩ resistors | 3 | Inter-stage/base input resistors. |
| 10 kΩ resistors | 3 | Collector load resistors. |
You will also need a solderless breadboard, jumpers, and a digital multimeter. A current-limited bench supply is a controllable alternative to batteries; an oscilloscope is useful for waveform and oscillation checks but is not required for the basic DC experiment.
Why three common-emitter stages invert
As base current rises, collector current rises. The increased current creates a larger voltage drop across the collector resistor, so collector voltage falls. One common-emitter stage therefore inverts. Two stages restore the original polarity, while three stages invert it again.
- Stage 1: inverted.
- Stage 2: non-inverted relative to the original input.
- Stage 3: inverted overall.
That DC polarity is why a connection from the third collector to the first input is intended to be negative feedback. Polarity alone does not prove stability at every frequency: loop gain, transistor capacitance, wiring, loading, and phase shift still matter.
Rank #2

- 100-Piece Bulk Value Pack ,Includes 10 types × 10 pieces (BD131, BD132, BD135, BD136, BD137, BD138, BD139, BD140, BD237, BD238)
- Wide Range of Applications,Perfect for circuit design, power amplification, motor control, and electronics repair,Supports audio amplifiers.
- Industrial-Grade Power Handling
- Hands-on practice for students, hobbyists, and professionals. Build amplifiers, oscillators.
- Cost-Effective Bulk Savings.Save nuch vs. buying individual packs.
Build safely in stages
1. Check parts and supply
- Read the datasheet for the exact transistor manufacturer and package. “2N2222” packages do not all use the same lead arrangement.
- Identify resistor values with color codes or a meter.
- Confirm the battery series polarity or set a bench supply to a nominal 12 V with a conservative current limit.
- Establish one common ground and check for supply-to-ground shorts before inserting transistors.
2. Build and test one stage
Construct a common-emitter stage first: emitter to the common reference, collector through 10 kΩ to the positive rail, and base driven through its 100 kΩ resistor. Measure collector-to-ground voltage before adding another stage. A correctly wired low-power stage should not make the transistor noticeably hot.
3. Cascade the stages
- Connect the first collector to the second-stage base through the second 100 kΩ resistor.
- Connect the second collector to the third-stage base through the third 100 kΩ resistor.
- Connect the potentiometer as the first-stage input control.
- Leave the 1 MΩ feedback resistor disconnected initially.
Recheck emitter, collector, base, rail, and ground connections before applying power.
Open-loop behavior: why adjustment is difficult
With feedback omitted, the three stage gains multiply. Even moderate gain in each section can drive the final transistor rapidly toward cutoff or saturation. The third collector may spend most of its adjustment range near a supply extreme, making the circuit look more like a switching transition than a linear amplifier.
Turn the potentiometer slowly and measure the third collector voltage. Also measure each collector in turn. The expected chain is that an increasing input tends to make the first collector fall, the second rise, and the third fall again. Tiny potentiometer movements can cause large output changes because the open-loop gain is high and the directly coupled bias points interact.
Windows Errors? Fix Them Before They Spread
Repair common Windows errors and clear accumulated junk for a smoother, more stable PC - no reinstall needed.Free scan · no reinstallOutdated Drivers Are Slowing You Down
One free scan finds every outdated or missing driver and matches the right update for your exact hardware.Free scan · exact hardware matchRank #3

- 60-Piece Bulk Value Pack ,Includes 6types *10 pieces (BD139 BD140 BD237 BD238 BD679 BD680)
- Wide Range of Applications,Perfect for circuit design, power amplification, motor control, and electronics repair,Supports audio amplifiers.
- Industrial-Grade Power Handling
- Hands-on practice for students, hobbyists, and professionals. Build amplifiers, oscillators.
- Cost-Effective Bulk Savings.Save nuch vs. buying individual packs.
Add the 1 MΩ global feedback resistor
Power down, then connect the 1 MΩ resistor from the third transistor’s collector to the first-stage input node—the same node receiving the potentiometer and first 100 kΩ resistor. Do not connect it to an unintended base or collector; the wrong node can reverse the intended feedback or create abnormal loading.
The returned signal opposes the original input in the intended low-frequency operating region. Compared with the open-loop circuit, expect a less “touchy” control, reduced effective gain, and improved operating-point repeatability. A smaller feedback resistance generally gives stronger feedback and lower gain; a larger value gives weaker feedback and greater sensitivity. This is a qualitative trend, not an exact op-amp formula: transistor bias, finite output resistance, base-emitter behavior, loading, and the feedback network itself all affect the result.
Measure the transfer and gain
Record collector-to-ground voltages at several potentiometer settings. Use a table like this, filling in actual measurements:
| Input voltage | Stage 1 collector | Stage 2 collector | Stage 3 collector (output) |
|---|---|---|---|
| 0.0 V | |||
| 0.2 V | |||
| 0.4 V | |||
| Continue in 0.2 V steps as useful |
Calculate a local end-to-end slope from two points in the approximately linear region:
What’s actually slowing this PC down?
Pick the symptom - the matching free tool is one click away.
Rank #4

- 750pcs A1015 C945 C1815 S8050 S8550 S9012 S9013 S9014 S9015 S9018 2N2222 2N3904 2N3906 2N5401 2N5551 transistor type: PNP NPN
- Transistor Model: 15 Values, A1015 C945 C1815 S8050 S8550 S9012 S9013 S9014 S9015 S9018 2N2222 2N3904 2N3906 2N5401 2N5551
- Transistors assortment kit including a large selection of the most widely used Power Transistors, which you will need in your audio-video, DIY electronics and vehicle repair projects.
- 750 pcs A1015 C945 C1815 S8050 S8550 S9012 S9013 S9014 S9015 S9018 2N2222 2N3904 2N3906 2N5401 2N5551 PNP NPN can unleash their creativity and problem-solving skills by designing and building their own transistor circuits. Whether it's creating amplifiers, oscillators or switching circuits, this kit fosters creativity and encourages hands-on experimentation.
- This transistors are commonly found in electronic components kits and are suitable for various projects involving amplification, switching, and signal processing, It is designed for both beginners and experienced electronics enthusiasts, providing a hands-on learning experience.
Av = (Vout,2 − Vout,1) / (Vin,2 − Vin,1)
Do not use points where a transistor is clearly in cutoff or saturation. A handheld meter reports DC or averaged behavior; it cannot reveal bandwidth, clipping waveforms, noise, or high-frequency oscillation. Use an oscilloscope if you extend the experiment to dynamic signals.
Change the feedback resistance
Repeat the measurements with values below and above 1 MΩ. Compare the usable input range, output slope, and onset of clipping.
- Lower resistance: normally stronger feedback, lower gain, and greater stabilization; excessive loading can alter the first-stage bias.
- Higher resistance: normally weaker feedback, higher gain, and a greater chance of nonlinear behavior.
- Extreme values: may provide negligible feedback or load the input enough to change the intended operating point.
SPICE DC simulation
The source provides this netlist for a three-stage circuit:
Multi-stage Common-emitter Amplifier
vsupply 1 0 dc 12
vin 2 0
r1 2 3 100k
r2 1 4 10k
q1 4 3 0 mod1
r3 4 7 100k
r4 1 5 10k
q2 5 7 0 mod1
r5 5 8 100k
r6 1 6 10k
q3 6 8 0 mod1
rf 3 6 1meg
.model mod1 npn bf=200
.dc vin 0 2.5 0.1
.plot dc v(6,0) v(2,0)
.end
It sweeps the input from 0 to 2.5 V in 0.1 V increments and plots v(6,0), the final collector voltage, against v(2,0), the input voltage. Change rf to compare feedback strengths and identify the approximately linear part of the transfer curve.
Best Value

- working voltage: 30V; Maximum allowable current: 0.05A; Maximum working frequency:<1MHZ
- Compact Design, Endless Possibilities,Sleek, space-saving TO-92 package – perfect for miniaturized projects like wearables, portable gadgets, or tight PCB layouts without limiting performance.
- Versatile Performance for Every Project,Reliably handles common electronics tasks – from signal amplification to LED driving and low-power switching – making it a go-to for DIY builds and commercial devices alike.
- Built to Last, Even in Tough Conditions,Engineered for durability: withstands temperature fluctuations, resists static shocks, and maintains stability through daily use or harsh environments.
- Effortless Integration,Standard E-B-C pinout works seamlessly with hand-soldering, automated assembly, and most PCBs – simplifies prototyping and mass production for makers and manufacturers.
The netlist uses a generic NPN model with bf=200, not a manufacturer model for a particular 2N2222 or 2N3403. Simulated voltages therefore need not match the breadboard. The physical project lists two nominal 6 V batteries, while the netlist specifies 12 V directly; these are nominally comparable supplies, not identical models of battery behavior. This is a DC sweep, not an AC frequency-response analysis.
Some SPICE dialects reject the bare vin 2 0 source declaration. If so, retain the original netlist for reference and try the compatibility form VIN 2 0 DC 0. Plot and device syntax can also vary by simulator.
Troubleshooting
Output stuck near the positive rail
- Check for cutoff, a wrong transistor pinout, reversed collector/emitter, a misplaced collector resistor, or missing feedback.
- Disconnect power, verify the exact package datasheet, test each stage alone, then reconnect stages one at a time.
Output stuck near ground
- Look for saturation, a shorted collector resistor, excessive base drive, a damaged transistor, or a missing supply reference.
No apparent gain
- Confirm the common ground, potentiometer wiring, input/output nodes, and each collector-to-next-base connection.
- Check that measurements are taken in the active region; a meter may average a changing signal.
Unexpected positive feedback or oscillation
- Recheck that the resistor runs from the third collector to the first input node.
- Shorten breadboard jumpers, improve supply wiring, and consider supply decoupling.
- Remember that intended DC negative polarity does not guarantee high-frequency stability.
Transistors become warm
Remove power immediately. Check orientation, supply polarity, collector resistors, accidental shorts, and excessive base drive. Normal low-power operation should not require visibly hot transistors.
How this differs from a practical amplifier
The project deliberately omits features normally used for predictable signal amplification:
Do these 3 things before closing this tab:
1Clear out junk files and repair common Windows errors2Fix the driver behind crashes, sound loss and screen glitches3Repair Windows errors before they cause bigger problems- Emitter resistors for thermal and bias stabilization.
- Voltage-divider bias networks to establish controlled quiescent currents.
- Coupling and bypass capacitors where AC isolation or gain shaping is needed.
- Defined load resistance, supply decoupling, headroom, and frequency-response analysis.
- A complete stability analysis and a transistor model matched to the selected device.
Direct coupling makes the experiment simple but lets each stage’s DC operating point influence the next. It should not be presented as a hi-fi amplifier, precision DC instrument, RF amplifier, speaker driver, or replacement for a properly biased op-amp circuit.
Useful extensions
- Build only two stages and verify that the overall polarity changes from inverted to non-inverted.
- Add emitter resistors and compare gain and bias stability.
- Compare direct coupling with capacitive inter-stage coupling.
- Replace the generic SPICE model with manufacturer models and compare devices.
- Sweep supply voltage, feedback resistance, and load resistance.
- Run an AC analysis and inspect clipping and oscillation with an oscilloscope.
Primary project reference
The original schematic, breadboard illustration, parts list, experiment instructions, and netlist are published at All About Circuits’ Multi-stage Amplifier experiment.
Quick Recap
Product prices and availability are accurate as of the date/time indicated and are subject to change. Any price and availability information displayed on Amazon at the time of purchase will apply.



