Recommended Free Tools
Removing the Raspberry Pi 3’s USB, Ethernet, GPIO, HDMI, CSI and DSI connectors can make the board far thinner for a permanent, space-constrained installation. Pimoroni’s 2017 project showed the approach, but it is destructive electronics rework: you lose the normal plug-in ports and can permanently damage the board.
What the modification removes
The project keeps the Pi 3’s main computer circuitry while stripping away connectors that add height and width. The demonstrated work covered:
| # | Preview | Product | Price | |
|---|---|---|---|---|
| 1 |

|
New Raspberry Pi 3 Model B+ Board (3B+) Raspberry PI 3B+ (1GB) (3B Plus) | $54.00 | Buy on Amazon |
| 2 |

|
Element14 Raspberry Pi 3 B+ Motherboard | $52.59 | Buy on Amazon |
| 3 |

|
Raspberry Pi 3 Model B+ Board (3B+) | $52.99 | Buy on Amazon |
| 4 |
|
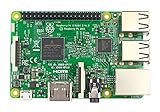
Raspberry Pi 3 Model B Board | $54.98 | Buy on Amazon |
As an Amazon Associate I earn from qualifying purchases.
- USB sockets
- Ethernet socket
- GPIO header pins and their plastic shroud
- HDMI connector
- CSI camera connector
- DSI display connector
Pimoroni first unfolded the metal housings around the USB and Ethernet sockets, removed their plastic interiors, and then desoldered the remaining pins. Hot air was used for the GPIO shrouding and the HDMI, CSI and DSI connectors. A solder sucker and desoldering braid cleaned excess solder from the joints.
Do these 3 things before closing this tab:
1Fix the driver behind crashes, sound loss and screen glitches2Repair Windows errors before they cause bigger problems3Scan for outdated or missing drivers - takes under a minuteWhy remove ports from a Pi 3?
The point is not cosmetic. A normal Pi 3 is difficult to fit into a narrow enclosure or embedded product when its connector stack determines the available clearance. Removing those parts can produce a much thinner custom board after the prototype has been tested with standard ports.
Raspberry Pi’s coverage of the project described the slimmed board as a way to retain Pi 3 capability in a tight installation. External peripherals may still be connected in a custom design, but port removal does not preserve convenient, universal plug-in access; the final wiring must be designed around the installation.
What thickness and power result were reported?
Pimoroni described the modified Pi 3 as almost as thin as a Pi Zero. It remained slightly thicker because the Pi 3’s microSD slot is mounted on the underside. The “World’s Thinnest” wording was playful and was not an officially ratified Guinness World Records claim.
Rank #2
- 1.4GHz 64-bit quad-core ARMv8 CPU, 1 GB RAM
- 802.11n Wireless LAN, 10/100Mbps Lan Speed
- Bluetooth 4.2, Bluetooth Low Energy
- 4 USB ports, 40 GPIO pins, Full HDMI port, Combined 3.5mm audio jack and composite video
- Camera interface (CSI),Display interface (DSI), Micro SD card slot (now push-pull rather than push-push), VideoCore IV 3D graphics core
In the same 2017 project write-up, Pimoroni reported about 260 mA at idle before the modification and 180 mA afterward, after disabling USB, Ethernet and HDMI in software. That is a single historical project result, not a controlled measurement or a guaranteed saving for every Pi 3. The reduction cannot be attributed to removing metal shells alone: software disabling was part of the reported configuration.
Free tools Windows power users keep installed
One-click scans. No signup required.
Equipment and skill required
This is hot-air and through-hole desoldering work on a multilayer computer board. The demonstrated equipment included:
- A hot-air gun or, preferably, a controlled hot-air rework station
- A soldering iron for touch-up work
- A desoldering pump (solder sucker)
- Desoldering braid
Work slowly, control heat, and avoid lifting pads or damaging nearby components. Raspberry Pi’s account stresses patience and knowing what you are doing; Hackster’s coverage likewise characterizes the desoldering as difficult for an uninitiated person. No source establishes a failure rate or guarantees that a modified board will continue to operate, so permanent board damage must be treated as a real possibility.
What you give up after the ports are gone
| Removed part | Immediate consequence | Design implication |
|---|---|---|
| USB sockets | No normal USB plug-in access | Plan internal wiring or another interface for required peripherals |
| Ethernet socket | No network cable connection | Provide networking through the installation’s custom hardware or wireless design, if suitable |
| GPIO header pins | No ready-made jumper connections | Use carefully planned direct wiring to the GPIO pads or another expansion method |
| HDMI connector | No standard display cable | Use an installation-specific display connection or configure the device headlessly |
| CSI and DSI connectors | No standard camera or display ribbon connection | Only remove them when the final hardware plan does not require those sockets |
The computer does not become a full-size Pi with hidden connectors. Once the sockets are removed, access is less convenient and every required connection has to be accounted for before the board is enclosed.
Rank #4
- This is raspberry pi 3 model b
- Raspberry pi 3 model b With WiFi & Bluetooth and it is 10 faster than Raspberry pi 2 model b
- 2.5 A power supply. With more processor speed and on-board connectivity, you'll need more power
Should you use a stripped Pi 3 or a Pi Zero?
The decision is mainly a trade-off between physical size and computing capability.
| Option | Best fit | Important limitation |
|---|---|---|
| Stripped Raspberry Pi 3 | A narrow build that specifically needs Pi 3 capability | Requires destructive rework and custom connections |
| Raspberry Pi Zero or Zero W | A project where the smaller footprint is more important and Zero-class capability is sufficient | May not provide the capability your Pi 3 design requires |
If a Zero or Zero W meets the application’s computing and interface requirements, choosing it avoids board surgery. Choose the stripped Pi 3 only when its capability is necessary and the enclosure’s thickness constraint justifies the risk and engineering effort.
A sensible workflow for an embedded build
- Prototype with the standard board. Confirm the operating system, peripherals, power arrangement and thermal behavior before removing anything.
- Draw the final connection plan. Identify how networking, input devices, displays, cameras and GPIO signals will be wired after the sockets disappear.
- Measure the enclosure. Verify that connector removal solves the actual clearance problem, including the underside microSD slot.
- Practice the rework. If you lack hot-air and desoldering experience, use a sacrificial board or have the work performed by someone skilled in electronics rework.
- Remove and clean the connectors. Follow the hot-air, solder-sucker and braid approach described by Pimoroni, using controlled heat and inspecting every pad.
- Test before installation. Check for shorts and boot the board before permanently enclosing it. Then verify every custom peripheral connection.
Bottom line
A connector-stripped Pi 3 can fit a narrow embedded enclosure while retaining the Pi 3 computer, and Pimoroni’s project demonstrated a near-Pi-Zero thickness result. It is not a beginner modification or a harmless slimming trick: USB, Ethernet, GPIO, HDMI, CSI and DSI access are sacrificed, custom wiring is required, and a mistake can destroy the board. For a simpler small installation, use a Pi Zero or Zero W when its capabilities are enough.
Quick Recap
Product prices and availability are accurate as of the date/time indicated and are subject to change. Any price and availability information displayed on Amazon at the time of purchase will apply.




