To make an iron golem yourself, place four iron blocks in a T shape and put a carved pumpkin on top. Villages can also produce golems, but an iron farm is an engineered village: you control beds, villagers, workstations, the village center, spawnable blocks, water transport and collection. The design is edition-specific, so a Java Edition tutorial should not be copied into Bedrock Edition without checking its mechanics.
Godlike.Host offers hosted Minecraft Java servers with its own game panel, SFTP access and free DDoS protection, if you would rather not host it yourself.
This guide explains the manual recipe, natural spawning, Bedrock requirements, farm construction, collection systems and the failure modes that make farms appear idle or inconsistent.
As an Amazon Associate I earn from qualifying purchases.
Windows Errors? Fix Them Before They Spread
Repair common Windows errors and clear accumulated junk for a smoother, more stable PC - no reinstall needed.Free scan · no reinstallOutdated Drivers Are Slowing You Down
One free scan finds every outdated or missing driver and matches the right update for your exact hardware.Free scan · exact hardware matchWhat an iron golem does
Iron golems are large village defenders. They attack hostile threats around villagers and can also be found in villages or, occasionally, at Pillager Outposts. A golem released from an outpost can help fight the pillagers there. Minecraft’s official material describes them as loyal defenders that cannot drown, take fall damage or be knocked back. They may also offer a poppy to a villager.
For players, golems have two practical uses. A manually built golem protects a settlement, trading hall or other area. A farm repeatedly creates golems, moves them into a controlled chamber and collects iron and poppies. The farm does not create iron directly: it creates the mob, then uses transport and a killing or holding system to turn its drops into resources.
#1 Best Overall
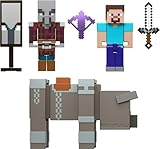
- Minecraft fans can join Steve on a quest to save the Village from attack with this Village Raid action figures and accessories set!
- The collectible pack includes 3 Minecraft action figures and 3 accessories to recreate the action in real life for play or display!
- Steve, a Raid Captain and a Ravager are included in 3-inch scale with movable joints for action moves and posability!
- Storm into the story with accessories that include an iron sword, enchanted crossbow and ominous banner!
- The collectible Minecraft set makes a fun, themed toy for video-game players and fans ages 6 years old and up!
Microsoft Learn’s documented Bedrock entity values list 100 health, a width of 1.4 blocks, a height of 2.9 blocks and attack damage ranging from 7 to 21. The same behavior reference records fall-damage immunity. Treat these as documented Bedrock behavior values rather than universal numbers for every edition or version.
The visual design is intentional. Minecraft designer Jens Bergensten explained that the developers made the golem resemble villagers because villagers would create a protector that looked like themselves.
How to build an iron golem by hand
Materials
- Four iron blocks. Each block requires nine iron ingots, so the complete construction consumes 36 ingots.
- One carved pumpkin.
The official recipe is a structure, not a crafting-table recipe. The pumpkin must be a carved pumpkin; an ordinary uncarved pumpkin will not complete the golem.
Placement pattern
- Place three iron blocks in a straight horizontal row.
- Place the fourth iron block directly beneath the center block, forming a T.
- Place the carved pumpkin on top of the center block.
The arrangement must have open space for the entity to appear. Build it on a surface where the newly created golem will not immediately be trapped in a wall, roof or other obstruction. Once the pumpkin is placed, the structure becomes an iron golem; there is no additional activation step.
Where to position a defensive golem
Put a manually built golem inside the area you want protected, but avoid placing it where its large body can block doors, narrow paths or villager movement. A secure enclosure keeps the defender near the villagers while reducing the chance that it wanders into caves, water channels or an unprotected perimeter. Because golems are immune to fall damage and knockback, height alone is not a reliable way to control one; use walls, gates and a deliberate path instead.
Where naturally occurring golems appear
Villages are the normal place to encounter iron golems. Pillager Outposts can also have them, and freeing an outpost golem gives you a temporary ally against pillagers. A naturally occurring golem can wander away from the settlement, become stuck in terrain or survive somewhere outside the area you are watching. That matters when diagnosing a farm: a surviving golem nearby can occupy the available population and suppress further spawning.
Rank #2

- Interactive Gaming Experience: Enhance your augmented reality gameplay with Minecraft Earth boost mini figure that keeps the fun going
- Authentic Video Game Characters: Based on characters from the famous video game with game-authentic features and Minecraft's signature 8-bit style
- In-Game Enhancement Features: Each boost mini figure offers a unique in-game boost such as attack power, defense power or resurrection to enhance your Minecraft Earth experience
- NFC Technology Integration: Features an NFC chip inside that you scan with a mobile device to unleash the boost for your character in the game
- Compact Collectible Size: Measures 1 inch in height, making it easy to display, collect, and trade with other members of the Minecraft community
Do not assume that finding a village proves a farm will work. A village is a collection of linked points of interest and villagers; a farm is a controlled version in which the center, beds, work access and valid spawn surfaces are deliberately arranged. Nearby beds, workstations, bells or extra villagers can change those links and move the effective center.
Java and Bedrock are not interchangeable
Iron-golem behavior is tied to edition-specific village mechanics. Bedrock farms have explicit requirements involving beds, villagers, workstations, the village center and simulation distance. The cited material does not provide a matching set of universal Java numbers, so do not apply Bedrock thresholds to Java or treat a Java tutorial as a Bedrock blueprint.
| Design question | Java Edition | Bedrock Edition |
|---|---|---|
| Villager and bed thresholds | Edition-specific; the cited material does not establish universal numeric thresholds. | At least 10 villagers and at least 20 beds. |
| Workstation activity | Use a design written for the exact Java version; Bedrock’s work-percentage rule should not be copied. | At least 75% of villagers must have worked at their workstations on the previous day. |
| Bed links | Follow the Java design’s village-link rules. | Every villager must be linked to a bed. |
| Trigger and population control | Use edition- and version-specific spawning rules. | The farm must meet the Bedrock village conditions and have fewer than one naturally generated or spawned golem per 10 villagers. |
| Village-center control | Center behavior differs by edition and design. | Critical: links to beds, bells and other points of interest can shift it. |
| Spawn volume | The cited material does not give a universal Java volume. | Random attempts use a 17×13×17 volume around the village center. |
| Simulation distance | Use the Java design’s chunk-loading assumptions. | The village must remain inside the player’s simulation-distance volume. |
| Transport and collection | Water, holding and killing layouts depend on the Java design. | Water channels commonly move golems to a holding or killing chamber, with hoppers and a chest for drops. |
| Typical failure causes | Wrong edition or version, invalid spawn area and an uncontrolled village are common categories; exact fixes depend on the design. | Broken bed links, insufficient work activity, center movement, an occupied spawn area, simulation distance and stray valid surfaces are the main checks. |
The safest workflow is to select the edition first, then use a farm plan written for that edition and version. Mixing modules from different tutorials often produces a structure that looks correct but has the wrong village center or trigger conditions.
Bedrock farm requirements
Bedrock farms depend on a set of conditions that must be true together. Meeting only the villager count is not enough.
Recommended Free Tools
Villagers and beds
- Provide at least 10 villagers.
- Provide at least 20 beds.
- Ensure every villager is linked to a bed.
Check the links after moving villagers, breaking beds or changing the layout. A single unlink can alter the village’s center and therefore the area in which the game looks for a golem.
Workstations and daily access
At least 75% of the villagers must have worked at their workstations during the previous day. This is a daily condition, not merely proof that workstations exist. Villagers need a valid path and access to the workstation they are linked to. If you move a workstation, obstruct the path or replace the villager, the percentage can fall below the threshold on the next check.
Rank #3

- Capture the excitement and adventurous play of Minecraft
- Each 3.25-inch scale Minecraft action figure comes with accessories to re-create favorite in-game moments
- The character figures are posable with movable joints for even more ways to play
- The designs of the figures and accessories stay true to the unique, pixelated world of Minecraft
- Makes a great toy for video-game players and fans ages 6 years old and up, who will want them all (Each sold separately, subject to availability.)
Simulation distance
The village must be inside a player’s simulation-distance volume. A farm can be built correctly yet stop producing when the player travels too far away for the village to remain simulated. Test the farm from the intended operating position rather than from a distant base or another dimension.
Golem population limit
Bedrock’s listed condition is fewer than one naturally generated or spawned golem per 10 villagers. A golem hidden behind the farm, below a platform or in nearby terrain can therefore stop new attempts. Search the surrounding area before rebuilding the villager module.
The Tool Desk
Outbyte PC Repair FREEClear out junk files and repair common Windows errorsFree Scan →Outbyte Driver Updater FREEFix the driver behind crashes, sound loss and screen glitchesFind Drivers →Control the village center before building the platform
The village center determines where the game evaluates possible golem positions. It can move when villagers link or unlink from beds, bells or other points of interest. This is why a farm that worked yesterday can begin spawning golems outside its collection area after a bed is broken, a new workstation is introduced or an extra villager joins.
Isolate the farm from nearby villages and from unrelated beds, workstations, bells and villagers. Build the bed-and-villager module first, verify the links and work access, and only then finalize the spawn platform. Bells deserve special caution: the tutorial material warns that they can cause pathfinding failures and unlinking, so many controlled designs omit them entirely.
For the Bedrock layout described in the tutorial material, designers commonly extend the spawn platform eight blocks horizontally from the relevant bed pillows and six blocks above or below the center. These distances are design guidance for covering the effective spawn area, not a replacement for checking the center after every change.
How Bedrock chooses a spawn position
Bedrock makes random spawn attempts in a 17×13×17 volume around the village center. A candidate position needs a solid block beneath the golem and enough open space for its body. A roof, wall, slab arrangement or other obstruction can invalidate a coordinate even when the platform looks large from above.
Rank #4

- Each Minecraft Legends figure is designed in 3.25-inch scale and comes with its own attack feature.
- Fans can trigger the figure's attack move and battle enemies with easy activation for dramatic play.
- Players will love fidgeting with the attack feature as they contemplate their next difficult in-game move!
- The action figures have movable joints, so Minecraft fans can pose them for action and storytelling play!
- Character design and personality details stay true to the unique, pixelated world of Minecraft Legends -- perfect for collecting!
The documented attempt rate is a 1/700 chance during each game tick when the conditions are met. The tutorial expresses that as an average of one attempt every 35 seconds. That is an attempt average, not a guaranteed timer: successful output is lower when random coordinates land on non-spawnable blocks.
Cover or remove every competing surface in the volume. If the only valid blocks are on your intended pad, successful attempts are much more likely to land there. If caves, roofs, ledges or nearby ground remain valid, golems can appear outside the water stream and occupy the population.
Build sequence for a controlled farm
- Choose the edition and design. Confirm whether the plan targets Java or Bedrock and the relevant game version. Do not combine a Bedrock villager module with a Java spawn platform.
- Select an isolated site. Keep unrelated beds, workstations, bells and villagers far enough away that they cannot become part of the controlled village. Also inspect the ground, caves and roofs for surfaces that could become valid spawn locations.
- Build the villager module. Place the required beds and workstations, then move the villagers into their positions. On Bedrock, verify at least 10 villagers, 20 beds, complete bed links and workstation access before proceeding.
- Allow the daily work condition to update. Bedrock requires at least 75% of villagers to have worked at their workstations the previous day. Give the villagers a safe, unobstructed work period before judging production.
- Establish the center. Avoid adding bells or spare points of interest. Recheck bed links after every adjustment; the spawn platform is only correctly located relative to the center that actually exists in game.
- Build the spawn platforms. Cover the center’s horizontal and vertical range with solid spawnable blocks and sufficient headroom. Remove, light or block unwanted surfaces around and below the pad, including accessible caves and roofs.
- Add water transport. Use water channels to push golems toward a holding or killing chamber. Test the flow with temporary blocks so a golem cannot stop against a corner, current break or low ceiling.
- Install the collection system. A common arrangement uses a controlled killing area, hoppers below the drop point and a collection chest. The tutorial material also identifies lava as a common component of a killing system; contain it so it cannot reach villagers or destroy drops.
- Secure the enclosure. Light and seal the farm against hostile mobs. A zombie attack can kill villagers or disrupt the farm, and wandering mobs can enter through an unprotected opening.
- Test from operating distance. Stand within simulation distance, observe where the first golems appear and search for any that are stuck outside the stream. Do not measure rates until the village, spawn area and collection path remain stable.
Transport, killing and collection choices
Spawning is only half of an iron farm. The golem must leave the spawn pad quickly enough that it does not remain in the village’s effective population area. Water channels are a practical way to move the mob without relying on complicated pathfinding. Shape the channels so currents converge on one holding point and do not leave dry ledges where a golem can stand indefinitely.
Do these 3 things before closing this tab:
1Repair Windows errors before they cause bigger problems2Scan for outdated or missing drivers - takes under a minute3Clear out junk files and repair common Windows errorsA holding chamber is useful when you want to keep golems alive for defense or visual inspection. A killing chamber is appropriate when the goal is automatic iron and poppy collection. If lava is used, place it where it damages the golem while allowing drops to fall onto the hopper line. Protect villagers from the same lava and keep the chest accessible for unloading.
Use hoppers under the final drop area and route them into a chest. Test the entire item path with a small, safe drop before leaving the farm unattended. A chest that fills, a hopper facing the wrong direction or a blocked collection corner can make a working farm appear to produce nothing.
Independent reader supportYour contribution helps us test, update, and keep practical guides available for everyone.Troubleshoot an iron golem farm that is not working
No golems appear
- Confirm that the build matches the edition. Bedrock requirements do not validate a Java farm.
- On Bedrock, count the villagers and beds: you need at least 10 villagers and 20 beds, with every villager linked to a bed.
- Check that at least 75% of Bedrock villagers worked at their workstations the previous day.
- Make sure the village is within simulation distance.
- Inspect the spawn volume for roofs, walls, water, foliage or other obstructions that invalidate candidate positions.
- Search nearby terrain for a surviving golem that is occupying the population allowance.
Golems spawn outside the farm
First re-check the village center. A shifted center changes the effective 17×13×17 Bedrock search volume and can make a previously safe ledge valid. Remove or block every competing solid surface in that volume, including ground outside the visible platform, cave floors and roofs. Then verify that beds, bells, workstations and villagers have not been added or unlinked since the platform was built.
Best Value

- Epic Minecraft lineup in your hands; features 12 fan-favorite characters including Steve, Alex, and Snow Golem
- Die-cast durability meets blocky style; each figure crafted in solid metal with pixel-perfect detailing for display or play
- Sized for collectors and kids alike; 1.65-inch scale fits easily on shelves, desks, or in toy worlds of their own
- Ready for creative adventures; includes animals, mobs, and heroes like Glow Squid, Yellow Llama, and Wild Axolotl
- Jada Toys – official Minecraft partner; trusted for authentic die-cast figures from the world’s biggest brands
The farm worked, then stopped
Look for a golem stuck behind the farm, under the platform or in a nearby cave. Check the water route for a dry pocket or blocked corner. On Bedrock, recheck bed links and the previous day’s workstation activity after any villager movement. A broken bed, inaccessible workstation or changed point of interest can invalidate the village even when the blocks appear unchanged.
What’s actually slowing this PC down?
Pick the symptom - the matching free tool is one click away.
Production is intermittent
Intermittent output can be normal when random spawn attempts land on invalid coordinates, but a large drop usually indicates excessive non-spawnable space, a shifted center or simulation-distance problems. Improve the pad’s coverage, remove competing surfaces and observe the farm while standing in its operating area. The 1/700-per-tick figure is an average attempt rate, not a promise that a golem will appear on a fixed schedule.
Villagers or golems die
Light and close the enclosure. Hostile mobs can wander in from outside if the farm is not protected. Separate the villager area from the killing chamber, cover water channels where necessary and ensure lava is confined to its intended block. A secure perimeter also prevents a golem from leaving the collection route and becoming a hidden population occupant.
Maintenance checklist
- Keep the villager count, bed links and workstations unchanged unless you are prepared to retest the center.
- Do not place a bell or spare bed near the farm without checking how it changes village linking.
- Inspect caves, roofs and ledges for stray golems and unwanted spawn surfaces.
- Keep the farm inside simulation distance from the player’s normal AFK or operating position.
- Empty the collection chest before it fills and verify that hoppers still point toward it.
- After repairs, watch one complete transport cycle before leaving the farm unattended.
Iron golem facts at a glance
| Fact | Documented detail |
|---|---|
| Manual recipe | Four iron blocks in a T shape plus one carved pumpkin. |
| Typical locations | Villages; sometimes Pillager Outposts. |
| Bedrock villager minimum | 10 villagers. |
| Bedrock bed minimum | 20 beds, with every villager linked to a bed. |
| Bedrock work condition | At least 75% worked at workstations the previous day. |
| Bedrock spawn volume | 17×13×17 around the village center. |
| Bedrock attempt rate | 1/700 per game tick under qualifying conditions; an average attempt about every 35 seconds. |
| Documented Bedrock health | 100. |
| Documented Bedrock dimensions | 1.4 blocks wide and 2.9 blocks high. |
| Documented Bedrock attack damage | 7 to 21. |
| Defensive traits | Official material says golems cannot drown, take fall damage or be knocked back. |
Choosing between a defender and a farm
Build one golem by hand when you need immediate protection and have 36 iron ingots plus a carved pumpkin. Build a farm when you need a repeatable supply and are willing to manage villagers, beds, workstations, spawn geometry, transport and security. A farm is not simply a larger version of the manual recipe: its output depends on village state and valid spawn locations, and Bedrock’s conditions must be maintained over time.
If a design fails, start with the village rather than the collection chest. Confirm the edition, links, work activity, simulation distance and center; then inspect the spawn volume and only afterward tune water, lava and hoppers. That order fixes the causes that prevent a golem from existing before you spend time repairing the machinery that moves its drops.
Quick Recap
Product prices and availability are accurate as of the date/time indicated and are subject to change. Any price and availability information displayed on Amazon at the time of purchase will apply.




