macOS Sequoia’s release for all users is scheduled for September 16. If you’re planning to upgrade on day one (or you just want to be ready for it), the best time to think about backup, storage, and compatibility is before your Mac starts downloading.
This guide walks you through what “released to all users” really means, how to upgrade safely on macOS, what to verify after the install, and what to do when things go sideways.


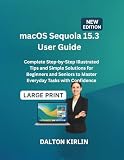


As an Amazon Associate I earn from qualifying purchases.
What macOS Sequoia release on September 16 means
When Apple releases a macOS update to all users, it stops being limited to specific channels like developer previews and public betas. By September 16, the same macOS Sequoia installer is available broadly through normal update paths.
Practically, that means you should see the update in System Settings > General > Software Update (or via the Mac App Store, depending on your setup) without needing any special enrollment.
macOS Sequoia compatibility: which Mac models can upgrade
Compatibility is the first gate. If your Mac isn’t supported, you won’t see macOS Sequoia in Software Update, or the installer will refuse to run.
Use this quick method to check your current macOS version and model:
- Click Apple menu () > About This Mac
- Note the macOS version and model year / chip
Then compare your Mac to Apple’s official macOS Sequoia supported Mac list. If you want a low-friction path on September 16, confirm compatibility before you commit to a long download.
Before you upgrade: prerequisites that prevent headaches
Most “update failures” are really storage, network, power, or app-compatibility issues. Knock those out first and the install usually becomes routine.
1) Back up your Mac (really)
Have a backup you can trust. For most users, Time Machine is enough; for higher-risk scenarios, consider creating an extra bootable backup using Disk Utility or a clone tool.
- Time Machine: verify the backup disk is connected and not erroring.
- Free space: aim for at least 20–30 GB available if your Mac has a smaller drive.
2) Use stable power and avoid sleep
If you’re on a desktop, you’re usually fine. On a MacBook, plug in the charger and keep the lid open (or prevent sleep) so the download and install don’t get interrupted.
3) Check storage and clear space early
macOS updates need room not just for the download, but also for temporary install files. Check storage and remove large items you don’t need.
Crashes, No Sound, or Screen Glitches?
Random freezes, missing sound and display glitches usually trace back to one bad driver. Find and replace yours safely.Free scan · under a minuteWindows Errors? Fix Them Before They Spread
Repair common Windows errors and clear accumulated junk for a smoother, more stable PC - no reinstall needed.Free scan · no reinstall- Go to System Settings > General > Storage
- Remove old iOS backups, unused downloads, and oversized files
4) Update critical third-party apps ahead of time
Web browsers, password managers, VPN clients, and audio/MIDI utilities are common sources of post-update problems. Before September 16, update those apps to their latest versions when possible.
How to update to macOS Sequoia on September 16
Apple typically rolls the public release through standard update mechanisms. Here are the viable paths depending on what you see on your Mac that day.
Update via System Settings (recommended)
- Open System Settings.
- Go to General > Software Update.
- Wait for macOS Sequoia to appear.
- Click Update Now (or Upgrade Now).
- Agree to prompts, enter your password if requested, and allow the download to complete.
- When prompted, click Restart to begin the install.
Don’t put the Mac to sleep during the install phase. If you must step away, keep power connected and let it run.
Update via Mac App Store (alternative)
- Open Mac App Store.
- Search for macOS Sequoia (or check your updates page).
- Select the macOS Sequoia entry.
- Click Get or Update.
- Follow the installer prompts, then restart when macOS tells you to.
This path is useful if System Settings isn’t offering the update yet, or if you prefer App Store delivery.
Update using a downloaded installer (if available)
- In Software Update, select the option to download the installer if your Mac offers it.
- When the download finishes, open the installer package from Applications or from the installer prompt.
- Complete the install steps and restart when prompted.
Having a local installer can reduce the risk of network interruptions during the final install.
What to expect during the install
The upgrade experience is usually smooth, but it’s still smart to plan for time and potential restarts.
Time estimates and restart cycles
Actual time varies by Mac model, storage speed, and network conditions. A typical day-one major update can take anywhere from 30 minutes to a few hours end-to-end.
You may see one or more restarts. That’s normal. Don’t force power-off unless the Mac is clearly unresponsive for an extended period.
Quick wins for a faster PC:
Scan for outdated or missing drivers - takes under a minuteDriver Scan →Repair Windows errors before they cause bigger problemsFix Now →Fix the driver behind crashes, sound loss and screen glitchesFind Drivers →Battery and power considerations
Use wall power if you’re on a laptop. If the MacBook loses power mid-install, you may end up with a failed install and extra recovery steps.
Storage requirements and cleanup
If you’re short on disk space, install prep can fail even after a successful download. Free up storage before starting the install to avoid getting stuck halfway through.
- Clear Downloads and trash
- Remove old large app caches (where safe)
- Consider offloading large media temporarily
After upgrading: set up and verify
Once macOS Sequoia boots, don’t just start using your Mac—verify the things that commonly break after major updates.
Check critical settings
- System Settings > General for any new prompts
- Privacy & Security for permissions (camera, mic, accessibility)
- Software Update again to confirm you’re fully current
Confirm apps and peripherals work
Test your most important apps and devices right away—especially VPNs, printers, external drives, audio interfaces, and any automation tools.
Do these 3 things before closing this tab:
1Scan for outdated or missing drivers - takes under a minute2Repair Windows errors before they cause bigger problems3Fix the driver behind crashes, sound loss and screen glitchesIf something fails, check whether the developer released a macOS Sequoia compatible update. Avoid reinstalling apps repeatedly; instead, check versions and known compatibility.
Review privacy and security prompts
Major macOS updates sometimes reset or prompt for permission changes. If a browser can’t access a site feature or an app can’t control your keyboard, audio, or screen recording, the cause is usually a permission prompt you didn’t see.
Common problems and troubleshooting
Below are the failure modes you’re most likely to hit around launch day September 16—plus what to try in order.
Update won’t start or keeps retrying
- Restart your Mac and try again.
- Check Software Update for any smaller prerequisites or additional components.
- Verify date/time settings are correct: System Settings > General > Date & Time.
macOS Sequoia update fails during download
- Switch networks (Wi‑Fi to Ethernet if possible, or the reverse).
- Resume the update from Software Update—some downloads will partially cache.
- Free storage before retrying. Low disk can interrupt the download pipeline.
Install fails after reboot
If the Mac reboots and install fails, don’t keep hammering the same attempt back-to-back. Give your Mac time, then follow a structured recovery approach.
- Retry after rebooting once more.
- Check whether you have enough free disk space for the install to complete.
- Disconnect unnecessary USB devices (hubs, unneeded drives, nonessential peripherals).
If it still won’t complete, try recovery options like using Disk Utility to verify the startup volume. If problems persist, you may need to reinstall macOS from recovery and then restore from backup.
Wi‑Fi or Ethernet issues during update
Launch-day traffic can cause timeouts. If the update repeatedly errors while downloading, try one of these:
- Move closer to your router or use a wired connection
- Disable VPN temporarily (if you use one) and retry
- Turn off ad-blocking DNS/proxies that could interfere with downloads
App incompatibility or unexpected crashes
After upgrading, verify your core apps first. If a specific app crashes:
- Update the app to the latest version available.
- Restart the app and reboot the Mac once.
- If it still fails, check the developer’s support notes for macOS Sequoia compatibility.
Common culprits include VPN clients, browser extensions, audio plugins, and accessibility tools.
Recommended Free Tools
Downgrade and rollback: what you can and can’t do
On macOS, “rollback” usually means restoring from a backup rather than simply clicking a revert button.
Best Value
- If you backed up with Time Machine before upgrading, you can restore your previous state.
- If you didn’t, you may still recover data, but returning the whole system configuration is harder.
Because the safest path involves restoration, it’s worth doing the backup step before the September 16 upgrade starts.
Should you upgrade right away?
Day-one upgrades are normal, but they aren’t mandatory. Your priorities—work deadlines, production software, and device reliability—should decide timing.
Upgrade sooner if…
- You rely on the newest security fixes and you can tolerate minor friction
- You have a solid backup and critical data is protected
- Your essential apps are already updated and used regularly
Wait a few days if…
- You run mission-critical workflows where downtime costs money
- You have specialized hardware (audio, MIDI, imaging, lab equipment) and no vendor updates yet
- You can’t spare time to troubleshoot if something breaks
FAQ about macOS Sequoia and the September 16 release
Will macOS Sequoia appear immediately on September 16 for everyone?
It depends on Apple’s rollout timing and your region. Most Macs will show the update on day one through Software Update, but delays can happen.
What’s actually slowing this PC down?
Pick the symptom - the matching free tool is one click away.
Do I need to erase my Mac to install macOS Sequoia?
No. A standard upgrade keeps your apps and settings. Erasing is only needed for special scenarios (like clean installs), and it increases risk.
What if I have a beta of macOS Sequoia installed already?
If you’re coming from a beta channel, the final public build is usually treated as the next update. Still, verify backups and ensure you’re fully current before making major changes.
How much free space should I have before starting?
Plan for at least 20–30 GB free. If you’re tight on storage, clear space before clicking Update Now.
Can I use Time Machine to restore after a failed upgrade?
Yes, if you have a recent Time Machine backup. In a worst-case scenario, you can restore after reinstalling or using recovery tools, but the exact steps depend on your failure state.
The Tool Desk
Outbyte Driver Updater FREEFix the driver behind crashes, sound loss and screen glitchesFind Drivers →Outbyte PC Repair FREEClear out junk files and repair common Windows errorsFree Scan →Bottom Line
macOS Sequoia being released to all users on September 16 is a straightforward upgrade for most people—but only if you prepare. Back up first, confirm compatibility, and start the update when you have stable power and storage.
If you hit an error, don’t guess. Follow the troubleshooting order above: stabilize the network, free disk space, disconnect unnecessary devices, then retry or use recovery and restore if needed.
Quick Recap
Product prices and availability are accurate as of the date/time indicated and are subject to change. Any price and availability information displayed on Amazon at the time of purchase will apply.




