Free tools Windows power users keep installed
One-click scans. No signup required.
The fastest way to learn Killing Floor 2 is to treat every wave as a team-positioning problem, not a target-count contest. Fight through successive waves of Zeds, spend the money you earn at the trader, preserve a route out of trouble, and arrive at the boss wave with ammunition, health and a formation that can still move. Your perk determines what you contribute, but awareness of the map, your teammates and the threats approaching from behind matters just as much.
To host your own Killing Floor 2 server alongside these gameplay lessons, Godlike.Host offers Killing Floor 2 game servers with a Pterodactyl-based game panel and 24/7/365 support by live chat or ticket. Its Killing Floor 2 plans list 10, 20 and 30 slots; Survival is a 6-player mode and Versus Survival an up-to-12-player mode (Tripwire’s Killing Floor 2 wiki, archived 11 Jul 2026).
| # | Preview | Product | Price | |
|---|---|---|---|---|
| 1 |
![Killing Floor 2 [PlayStation 4 PS4]](https://m.media-amazon.com/images/I/51ebSAtY2rL._SL160_.jpg)
|
Killing Floor 2 [PlayStation 4 PS4] | $34.99 | Buy on Amazon |
| 2 |

|
JEU Console KOCH Media Killing Floor 2 - PS4 | $28.75 | Buy on Amazon |
| 3 |
|
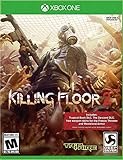
Killing Floor 2 Xbox One | $34.75 | Buy on Amazon |
| 4 |
|
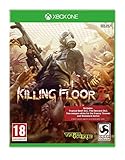
Killing Floor 2 (Xbox One) | $41.99 | Buy on Amazon |
| 5 |
|
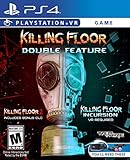
Killing Floor, Double Feature - PlayStation 4 | $29.99 | Buy on Amazon |
As an Amazon Associate I earn from qualifying purchases.
The Killing Floor 2 match loop
In Solo or Co-op, the basic structure is a sequence of waves followed by a boss encounter. Tripwire Interactive describes the objective as engaging hordes of AI-controlled Zeds across multiple waves until the players reach the boss or die trying. Between waves, the trader is your preparation window: sell or keep weapons, buy ammunition and armor, fill grenades or healing supplies where appropriate, and choose where the next fight will happen.
The official Steam listing advertises six-player Co-op and 12-player Versus capacity. Treat those as the listed feature figures for the game version and platform you are using; matchmaking availability and rules can vary. A full lobby is not automatically safer. More players also produce larger, busier engagements, so a team that scatters can lose faster than a smaller group that shares a fallback route.
#1 Best Overall
- Spawn and establish roles. Check which perks your team is using, who can heal or supply ammunition, and which players are equipped for precision or explosive damage.
- Clear the wave without breaking the formation. Shoot the approaching horde, but keep checking both sides and the rear. A surviving escape route is often more valuable than one extra kill.
- Recognize priority threats. Ordinary Zeds can consume attention while a large or specialist enemy closes the distance. Call dangerous targets and focus them before they force the team out of position.
- Use the trader window deliberately. Reload, collect dropped equipment if it is safe, buy the next weapon or ammunition you can actually carry, and confirm the route to the trader before the timer expires.
- Choose the next hold or rotation point. A defensible room is useful only if you can leave it. Mark a loop, a fallback and the direction from which the horde is likely to arrive.
- Enter the boss wave as a functioning group. Save enough resources to damage the boss, keep healing and support options available, and avoid starting the encounter in a dead end.
The trader is therefore more than a shop. It is the rhythm that separates one tactical decision from the next. Buying the most expensive item every time can leave a perk without ammunition, armor or the utility that keeps the formation alive.
Which perk should a beginner play?
There is no universal best perk. Perks are role packages with their own skills, powers and weapon families, so the right choice depends on what your team lacks and which way you naturally solve problems. The table below describes the intended job of each standard perk without treating any of them as a required pick.
| Perk | Primary job | Weapon handling and mobility | Large-Zed or boss contribution | Team value and learning curve |
|---|---|---|---|---|
| Berserker | Front-line melee control and holding space when the horde reaches the team. | Uses melee weapons and must manage distance, timing and incoming attacks rather than relying on a long sightline. Its close-range nature demands an escape route. | Can pressure large targets at close range and create openings through stagger or sustained contact, but a mistimed approach is dangerous. | Offers frontline presence and can protect less mobile allies. Learn enemy tells and disengage before being surrounded. |
| Commando | Reliable automatic-fire damage against ordinary Zeds and threats that require sustained mid-range fire. | Rifle handling is flexible and forgiving when you keep a clear lane. Mobility is good while repositioning, but continuous firing can encourage tunnel vision. | Contributes consistent damage while teammates expose or control a large target; precision still matters when ammunition is limited. | Useful in almost any public team because it can fill gaps. Practice target selection instead of emptying magazines into the nearest body. |
| Support | Shotgun-based crowd clearing in close and medium spaces. | Shotguns reward deliberate positioning and timing. They are powerful when the horde enters a lane, but less comfortable when the team is spread across long sightlines. | Can deliver heavy close-range bursts to large enemies when the group has control of the engagement. | Often brings ammunition or carrying support that benefits the whole squad. Learn when to hold fire so shells are available for a breach. |
| Field Medic | Healing, sustain and keeping teammates fighting through a damaged formation. | Medic weapons are generally practical at close to medium range, allowing the player to move between allies. You must watch health bars as well as your own crosshair. | Usually contributes steady damage while prioritizing survival and emergency healing over chasing maximum personal damage. | One of the clearest ways to help an inexperienced team. It requires map awareness because a heal cannot rescue a teammate who is already unreachable. |
| Demolitionist | Explosive area damage and control over clustered Zeds. | Explosives reward spacing and prediction. Firing into a teammate or a wall at close range is costly, so maintain a safe angle and a retreat lane. | Can deliver strong bursts to large enemies when the team creates a clean target, but ammunition and reload timing limit careless spam. | Excellent when the team needs crowd control, less forgiving when you cannot read where allies will move. Reserve key explosives for genuine pressure points. |
| Firebug | Area denial and close-to-mid-range control of dense groups. | Fire weapons let you shape where ordinary Zeds can advance, but visual effects can obscure a threat. Keep enough visibility to see a flanking route. | Its main contribution is controlling the approach so precision perks can work; do not assume every large target should be handled by fire alone. | Helpful on cramped approaches and during a retreat. Learn to avoid filling the whole screen with effects when the team needs to identify a priority target. |
| Gunslinger | Fast, precise pistol damage and mobile single-target pressure. | High mobility and quick weapon handling suit players who can keep moving while landing accurate shots. Missed shots reduce the benefit of the perk’s ammunition. | Strong when aiming at vulnerable points on large enemies, provided you have room to dodge and a teammate is not blocking the firing lane. | Rewards confident aim and movement. It is less forgiving if you stand still or let the horde remove your space. |
| Sharpshooter | Longer-range precision against priority targets. | Rifles and deliberate shots favor open sightlines and a stable firing position. Mobility is mainly about relocating before the lane closes. | Designed to contribute accurate weak-point damage to large Zeds and bosses while the rest of the team contains the crowd. | Extremely valuable when the map provides visibility, but precision is a liability if the team fights in a cramped room or ignores rear approaches. |
| SWAT | Close-to-mid-range automatic fire and control while moving through pressure. | Submachine-gun handling supports rapid repositioning and sustained fire. Keep track of ammunition because high rates of fire can empty reserves quickly. | Can keep a large target occupied or vulnerable while another perk supplies heavier precision damage. | Strong for players who like an active, mobile style. Learn to alternate suppression with movement instead of standing in the center of the lane. |
| Survivalist | Flexible hybrid play when the team needs a generalist rather than a narrowly specialized role. | Can adapt weapon choices to the situation, but flexibility also means fewer automatic answers. Decide before the wave whether you are clearing, supporting or controlling. | Can assist a large-Zed or boss plan, but normally does not replace a specialist’s peak precision, healing or explosive output. | Useful for learning different weapon types and filling a missing slot. Its challenge is avoiding an unfocused loadout that does several jobs poorly. |
Use the perk’s intended job as your buying rule. A Commando or SWAT should not spend the trader phase on equipment that leaves no ammunition for sustained fire. A Sharpshooter needs a sightline and enough distance to work. A Field Medic should reserve resources for keeping the group functional rather than racing to the top of the damage display. A Demolitionist or Firebug should communicate before using area effects in a narrow retreat lane.
The Tool Desk
Outbyte Driver Updater FREEScan for outdated or missing drivers - takes under a minuteDriver Scan →Outbyte PC Repair FREEClear out junk files and repair common Windows errorsFree Scan →Simple team-building decisions
- No healing or sustain: a Field Medic can prevent a small mistake from becoming a wipe.
- No answer for dense trash: Support, Commando, SWAT, Firebug or Berserker can keep ordinary Zeds away from the formation.
- No precision or heavy burst: Sharpshooter, Gunslinger or Demolitionist can focus the threats that ordinary rifles cannot remove quickly.
- A team that keeps getting surrounded: add a perk that controls space, then agree on one direction to rotate instead of having every player flee separately.
These are role checks, not a mandatory composition. Killing Floor 2 allows unusual combinations; the important question is whether every dangerous situation has someone prepared to answer it.
Rank #2
- KOCH MEDIA
- 2 ans
- 1017310
What are the Zeds, and which ones come first?
Zeds are not one interchangeable horde. Basic Clots and Crawlers create attention-management problems: they occupy lanes, slow a retreat and hide the approach of a more dangerous enemy. The official material also highlights major threats such as Scrakes and Fleshpounds, with bosses such as the Patriarch waiting at the end of the wave sequence.
Use a priority ladder
- Protect the route. Clear anything physically blocking the doorway, loop or fallback position your team has chosen.
- Call the dangerous specialist or large Zed. Stop shooting random trash long enough for the team to recognize the target and assign focus.
- Control the crowd around the target. A large enemy is easier to handle when ordinary Zeds cannot pin the player who is dealing the damage.
- Return to cleanup only after the pressure is safe. A high kill count is not useful if the team loses its escape lane.
Update notes for the game document evasion and blocking behavior for selected enemies. That means some attacks are poor choices when an enemy is actively blocking or dodging. If shots appear to be absorbed by resistant arms or a target is repeatedly evading, stop feeding ammunition into the same animation: flank, wait for the block to end, or coordinate a different angle. The correct response is often patience and positioning rather than more trigger pulls.
Why tunnel vision kills teams
Focusing on a single target can hide a Clot or Crawler entering from the rear, a teammate retreating through your firing lane, or a second large threat arriving before the first one is finished. Assign one player to keep scanning the approach whenever the team is committed to precision fire. If nobody can see behind the group, the group does not have a secure position, regardless of how strong the room looks.
Awareness habits that keep a wave alive
- Watch the map and the physical room. The minimap can show where teammates are separating, but doors, corners and vertical changes determine whether you can actually reach them.
- Track team health and distance. A heal or rescue is possible only while the injured player remains within a route you can travel.
- Keep a rear check in your rhythm. After every focused burst, glance away from the main lane. The horde does not wait for you to finish reloading.
- Protect an escape route. Do not stack so tightly in a doorway that the first player to retreat blocks everyone else.
- Rotate early. Move while the route is still open, not after the last gap has closed. A controlled retreat preserves aim; a panic sprint usually scatters the team.
- Communicate a target and a direction. “Large target left” and “fall back to trader side” are more useful than unstructured warnings.
How to read a map
A map is a tactical system, not just scenery. Before a wave becomes busy, identify the trader route, one loop, a chokepoint that can be held briefly, a fallback position and the sightlines needed by precision perks.
Rank #3
Trader route
Learn how to reach the trader from the area where you normally fight. A route that looks short on the map may pass through several doors or narrow turns. During the trader window, follow the path once rather than assuming you will remember it while under pressure.
Loops and fallback positions
A loop lets the team move around a threat while maintaining forward momentum. A fallback is the place you intend to occupy when the first hold becomes unsafe. The fallback should have at least one additional exit; a room with a single door is a temporary stand, not a reliable long-term plan.
Chokepoints and sightlines
Chokepoints compress the horde and make crowd-control weapons efficient, but they also become traps when a large Zed reaches the front. Open sightlines help Sharpshooters and Gunslingers identify priority targets, while narrow corridors favor controlled close-range damage. Do not force every perk to fight in the same geometry.
Do these 3 things before closing this tab:
1Scan for outdated or missing drivers - takes under a minute2Clear out junk files and repair common Windows errors3Fix the driver behind crashes, sound loss and screen glitchesHold or rotate?
- Hold when the team has multiple exits, a clear firing lane and enough space behind the front player to retreat.
- Rotate when the rear is filling, a door is about to be overwhelmed, ammunition is low, or a large target has removed the only safe lane.
- Never rotate one player at a time. Call the move, cover the last player through the route and regroup before resuming fire.
Two contrasting examples
Tripwire’s description of Biotics Labs emphasizes maze-like corridors. In that kind of environment, memorize turns, avoid retreating into an unknown branch and give the team a clear order for which corridor is the fallback. Narrow geometry makes explosive and fire effects powerful, but it also magnifies friendly obstruction and the danger of being boxed in.
Rank #4
- Visceral Gore - KILLING FLOOR 2 ramps up the gore with a proprietary, high powered persistent blood system bringing new levels of fidelity to the genre.
- Six player co-op or solo play- A multitude of varied playable characters await for players to choose from.
- Terrifying Zeds - New enemies and fan favourites from the original game.
- Unique Blend Of Weaponry - From modern militaristic assault rifles, brutal improvised makeshift weapons, classic historical guns, and off the wall "Mad Scientist".
- Expanded Perk System - Perks from the original game have been reimagined with more added to the fold.
Black Forest is described as an outdoor woodland environment with different visibility and spacing. Longer views can help precision perks identify a target sooner, while trees, terrain and multiple approaches can make rear security harder. Keep the team close enough to support one another without forming a stationary cluster that can be surrounded.
Independent reader supportYour contribution helps us test, update, and keep practical guides available for everyone.How the game modes differ
| Mode | Player objective | Pacing and progression | Map or rule considerations | Beginner suitability |
|---|---|---|---|---|
| Solo | Survive the wave sequence and boss alone. | Every threat and support decision is yours, so mistakes cannot be covered by another player. | Practice routes, trader timing and perk handling without coordinating a group. | Good for learning a map and testing a weapon plan, though it gives less room for recovery than Co-op. |
| Co-op / Survival | Work with the team through successive waves and the boss. | Roles, communication and shared positioning matter more than individual kill totals. | The official feature listing gives six players for Co-op. A larger group still needs one agreed hold and fallback. | The best starting format for learning team roles if you stay with the group. |
| Versus Survival | Two teams alternate as humans and Zeds. | Tripwire describes teams of up to six, with four waves plus a boss wave in a match. | Human and Zed turns change what information, movement and threat priorities mean. Learn normal Survival first so the basic wave rhythm is familiar. | Better after you understand the maps and ordinary Zed behavior; the opposing-player element adds another layer of unpredictability. |
| Objective | Complete map-specific objectives rather than only clearing a sequence. | Movement and task completion can interrupt the normal hold-and-clear rhythm. | Expect the route and the required destination to matter as much as the kill zone. Read the current objective before committing to a room. | Playable once you understand movement, but less straightforward for a first lesson in wave management. |
| Endless | Continue surviving through an extended progression rather than stopping at the ordinary endpoint. | Resource management and fatigue become increasingly important over a longer run. | Preserve equipment and a rotation plan; a strategy that works for one wave may not be sustainable indefinitely. | Useful after learning the basic loop, especially for practicing long-term purchasing decisions. |
| Weekly or event variants | Play the current special rule set or event challenge. | Rules, enemy behavior or progression can differ from the baseline. | Read the active description before choosing a perk. Weekly and event content is changeable, so do not assume a past rule is still active. | Try them after learning standard Survival; unusual rules are easier to understand when the normal expectations are familiar. |
The exact event rotation, weekly rules and marketplace availability are time-sensitive. Check the current in-game description rather than relying on an old guide.
How to survive the boss wave
The boss wave tests every habit you used earlier: route planning, target focus, resource discipline and communication. Bosses such as the Patriarch can force the group to move, so do not begin in a room whose only exit is already behind the boss or the horde.
Prepare before the final trader window
- Reload every weapon and buy the ammunition your perk actually uses.
- Keep healing available for the player most likely to be isolated, not only for the person with the highest damage score.
- Choose a large area with a loop or at least two exits; do not select a room solely because it has a convenient doorway.
- Agree on the call for retreat and the direction of the first rotation.
Fight as a formation
Let the player with the clearest precision angle call the boss’s location while crowd-control perks keep ordinary Zeds from collapsing the rear. Avoid every player chasing the boss in the same direction. The boss is one problem; the horde that cuts off your route is the other.
Best Value
- Includes Killing Floor 2 fan favorite Mrs. Foster Playable Character DLC for free as part of the physical release (in-box)
- Mow down hordes of Zed using a vast arsenal of weapons in Killing Floor 2, or get up close and personal using PlayStation VR in Killing Floor Incursion
- Team up with up to 6 players in online co op, go head to head in 12 player PVP in Killing Floor 2, or watch your friend's back in VR in Killing Floor Incursion's 2 player co op
- Enemies use deadly artificial intelligence to coordinate attacks against you, increasing the difficulty and fear factor; Updated content released every season
- Playstation VR required to play Killing Floor Incursion
Spend resources in phases
Use ordinary weapons to preserve limited burst tools until the team has a safe target and a clear lane. When the boss moves or the formation breaks, stop firing long enough to re-establish spacing. Wasting ammunition while running usually leaves the team unable to finish the encounter after it regroups.
Recover from a broken hold
- Call the fallback instead of silently fleeing.
- Move through the route together, with one player watching the rear.
- Heal the teammate who can restore the formation, not necessarily the player who dealt the most damage.
- Once the group is stable, resume focused damage and clear the immediate blockers before pursuing the boss again.
Common beginner mistakes and fixes
Buying a weapon without a role
Symptom: You own an expensive gun but cannot answer the situation your perk was chosen for. Fix: Buy ammunition and utility first, then add a weapon that reinforces your perk’s job. A flexible loadout is useful only when you can explain what each item is for.
Standing in the first room that looks safe
Symptom: The team holds until the doorway is full and discovers that the rear is also blocked. Fix: Mark the fallback before the wave becomes dangerous and rotate while the route is open.
What’s actually slowing this PC down?
Pick the symptom - the matching free tool is one click away.
Firing into a block or evasion
Symptom: Ammunition disappears while a selected Zed takes little effective damage. Fix: Wait for the defensive animation, change angle or have another player draw its attention. Update notes specifically document blocking and evasion for selected enemies, so this is a positioning problem, not simply a damage problem.
Splitting to chase kills
Symptom: One player disappears around a corner and is overwhelmed before help arrives. Fix: Stay within a support distance of the group and let the route, not the nearest red marker, determine where you fight.
Ignoring the rear while aiming forward
Symptom: The team loses health before anyone sees the threat that entered behind it. Fix: Rotate the scanning duty. After each reload or focused burst, check the rear and confirm that the escape lane is still open.
A practical first-session plan
- Start with Solo or Co-op Survival on a forgiving difficulty. The goal is to learn the wave, trader and movement rhythm, not to prove that you can recover from every mistake.
- Choose one perk and keep its purpose simple. For example, clear ordinary Zeds, heal the group, control a chokepoint or land precision damage. Change perks after you understand why the first loadout failed.
- Learn one map at a time. During the first two waves, identify the trader route, a loop, a fallback and the most open sightline.
- Stay with teammates. Watch their health, maintain a shared direction and announce large threats before they enter the formation.
- Buy for the next wave, not for a fantasy build. Ammunition, armor and the utility that solves your role’s main weakness are usually more valuable than an item you cannot sustain.
- Review the wipe. Ask whether the failure came from a blocked route, an uncalled priority target, an empty magazine, a missed heal or a team split. Fix one cause on the next attempt.
Once the ordinary Survival loop feels familiar, use Objective, Endless, Versus or a current weekly variant to learn how changing rules alter your decisions. The transferable skill is the same in every format: preserve a route, keep the team connected, recognize the dangerous Zed early and spend resources with the next wave in mind.
Quick Recap
Product prices and availability are accurate as of the date/time indicated and are subject to change. Any price and availability information displayed on Amazon at the time of purchase will apply.




