Do these 3 things before closing this tab:
1Clear out junk files and repair common Windows errors2Scan for outdated or missing drivers - takes under a minute3Repair Windows errors before they cause bigger problemsThe Intel Core i5-4690K (Haswell, 2014) can still feel surprisingly fast today—if you overclock it the right way. A safe, repeatable tuning process matters more than chasing a single magic number, because voltage and heat are what determine both stability and long-term reliability.
This guide focuses on manual overclocking: setting multiplier, managing CPU voltage and LLC, then proving stability with realistic stress tests and temperature monitoring. If you follow the targets and the testing plan, you’ll get a performance boost with a much lower risk profile.
As an Amazon Associate I earn from qualifying purchases.
Scope note: Motherboard BIOS labels vary a lot (ASUS/MSI/Gigabyte/ASRock). The steps below use common naming patterns, and the troubleshooting section shows how to recover when things go wrong.
Quick wins for a faster PC:
Clear out junk files and repair common Windows errorsFree Scan →Scan for outdated or missing drivers - takes under a minuteDriver Scan →Repair Windows errors before they cause bigger problemsFix Now →Why overclock the i5-4690K in 2024?
The 4690K’s unlocked multiplier is one of the reasons it’s still popular for older rigs. In 2024, gains usually show up most in CPU-bound scenarios: older esports titles, emulators, browser-heavy workloads, and games that don’t scale well with newer architectures.
#1 Best Overall

- 4 cores, 4 threads
- Intel HD Graphics 4600 (1200 MHz)
- Intel Turbo Boost Technology 2.0
- Dynamic Acceleration/Turbo Boost
- 6MB Intel Smart Cache
You’re not trying to replace a modern CPU. You’re squeezing extra headroom from a platform you already own—often improving 1% lows and smoothing frame pacing more than average FPS.
Prerequisites and safety checklist
- Cooling: A real aftermarket air cooler (tower-style) or a 240mm AIO is the practical baseline. If you’re on Intel stock cooler, expect low clocks and borderline thermals.
- Power delivery: Make sure your motherboard VRM isn’t overheating. Some older boards will throttle or behave inconsistently under AVX-heavy stress.
- Thermal paste: If the cooler was installed years ago, consider replacing paste. Dry paste can add 5–10°C and force you to use more voltage.
- BIOS update: If your board supports it, update to the latest BIOS version available from the manufacturer site. Newer microcode and stability fixes can help.
- Recovery plan: Know how to clear CMOS (jumper or button). Keep the PC accessible during early tuning.
- Patience: Stable OC is earned in small steps, not by jumping from 3.5 GHz to 4.7 GHz in one attempt.
Understand the core settings you will change
Overclocking the 4690K is mostly about four levers: multiplier, base clock (usually left alone), CPU voltage, and LLC. Extra options exist, but you’ll get the most reliable results by changing fewer things.
Multiplier and base clock
The 4690K is unlocked, so you typically increase CPU Multiplier and keep Base Clock (BCLK) at 100.00 MHz. Raising BCLK can break things like PCIe/ SATA stability on Haswell platforms.
CPU voltage (Vcore / Core Voltage)
Voltage is what lets the CPU run higher frequencies while maintaining correct switching behavior. Too low: crashes and instability. Too high: heat, throttling, and faster degradation risk.
LLC (Load-Line Calibration)
LLC compensates for voltage droop under load. Higher LLC can reduce droop, but it can also increase overshoot spikes during load transitions. You’re aiming for stable reported and actual under load voltage, not just a pretty BIOS number.
Ring/uncore and cache-related voltages
Haswell has an internal cache and ring-like components. On many 4690K boards, the system ties cache/uncore to core clock behavior through “System Agent” and related rails. For most users, the safest path is to set only core multiplier/voltage and keep cache settings close to stock initially.
Recommended targets (clock, voltage, temps)
Silicon quality varies. Still, you can use conservative targets that work for most air-cooled and many AIO setups.
Clock targets
- Safe starting goal: 4.0–4.2 GHz (usually easy on modest cooling with reasonable voltage).
- Common sweet spot: 4.3–4.4 GHz (strong day-to-day gains).
- Upper tier (not guaranteed): 4.5–4.6 GHz with good cooling and a decent chip.
Voltage guidance (conservative)
Because motherboard voltage reporting and LLC overshoot differ, treat these as guardrails, not a promise.
- Conservative everyday target: keep under-load Vcore around 1.20–1.30 V if your cooling is solid.
- Hard limit approach: if you routinely see higher under-load voltage to hold clocks stable, stop pushing and back down. Use your temperatures and stability as your true limit.
Important: Many “max voltage” numbers found online are based on older assumptions. Your goal is stable operation at the lowest voltage that passes tests.
Rank #2
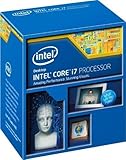
- Compatible with Z87 and Z97 motherboards. Z87 motherboard users may need to apply a BIOS update for compatibility. Not compatible with Intel Motherboards.
- LGA 1150
- Intel Rapid Storage Technology
- Quick Sync Video enabling faster video conversion
- Intel Device Protection with Boot Guard Intel IPT with PKI Intel Turbo boost technology
Temperature targets
Monitor Core temperature under load. On Haswell, throttling protection exists, but you don’t want to live near it.
- Practical ceiling for stress testing: aim for ≤ 85–90°C on the hottest core.
- Better long-term: ≤ 80–85°C during your stress test mix.
Tools and monitoring (what to install and what to watch)
You’ll need two categories: stability test software and monitoring tools.
What’s actually slowing this PC down?
Pick the symptom - the matching free tool is one click away.
Monitoring
- HWInfo64 (recommended): watch per-core temperatures, “Package Power,” and voltage sensors (names vary).
- CPU-Z: confirm multiplier and clock behavior under load.
- RealTemp or CoreTemp: optional for cross-checking temps.
Stability testing
- Cinebench R23: quick sanity check for thermal behavior and general stability.
- Prime95: use carefully. For Haswell, “small FFTs” can drive extreme load; it’s good at finding instability but can be harsh.
- OCCT (very useful): has customizable stress modes and good reporting.
- Game/real workload testing: 30–60 minutes of the games/applications you actually care about.
Baseline first: verify stock behavior
Before changing anything, confirm your system is stable at factory settings. This makes troubleshooting far easier later.
- Boot to BIOS, note your current CPU multiplier and voltage mode.
- On Windows, run HWInfo64 for 5–10 minutes while running Cinebench R23 once.
- Check that temperatures under stock loads are reasonable (no obvious thermal throttling and no sudden shutdowns).
If your stock system is already unstable, the OC won’t fix it. Address cooling, RAM errors, drivers, or power issues first.
Step-by-step BIOS overclock (manual tuning)
Every motherboard has different menus, but the logic is consistent. Make one change at a time, boot, validate, then move on.
Step 1: Load optimized defaults
In BIOS, choose Load Optimized Defaults (or equivalent) to remove previous experiments. Then save and reboot back into BIOS.
Free tools Windows power users keep installed
One-click scans. No signup required.
Step 2: Set CPU multiplier and base clock
Set:
- Base Clock (BCLK): 100.00 MHz (leave at default)
- CPU Core Ratio / Multiplier: start modestly
- CPU Ratio Mode: Manual (or Fixed)
Example starting points (pick based on your cooling):
- Start test: 4.2 GHz → multiplier x42
- More conservative start: 4.0 GHz → x40
Step 3: Configure voltage mode and key voltages
Find CPU Core Voltage / Vcore. Options are usually Auto, Manual, Offset, or Adaptive.
- Safer beginner method: try Manual/Fixed Vcore first so you can control outcomes.
- More refined method later: switch to Offset/Adaptive once you find a stable baseline.
Start with a conservative Vcore guess and adjust after stability/temps. A common starting range for 4.0–4.2 GHz is around 1.15–1.25 V, but your chip may differ.
Rank #3

- Core i5-4690 Processor (6M Cache, 3.50 GHz)
Step 4: Set LLC (Load-Line Calibration) deliberately
LLC levels can be labeled like “Auto,” “Level 1–8,” “Standard,” or “High.” If you don’t know what your LLC does, choose a moderate level and avoid extremes.
- If LLC is too aggressive: you’ll see higher under-load voltage and rising temps.
- If LLC is too weak: voltage droop may cause load instability.
Practical move: set LLC to a mid-high option (often around the middle of the available levels), then measure under load in HWInfo64 to ensure Vcore doesn’t spike or droop excessively.
Step 5: Leave non-essential settings alone
To avoid introducing randomness, don’t change these during early tuning:
- RAM timings and XMP/DOCP profiles (especially if you haven’t validated them)
- Uncore/cache multipliers (leave near stock initially)
- System agent / ring-related voltages (leave defaults at first)
Step 6: Boot, validate temps, and repeat in small increments
- Save BIOS changes and reboot.
- Immediately run HWInfo64 and launch Cinebench R23 (one pass).
- If you get a crash/BSOD during boot or Cinebench, your voltage is too low or you picked an unstable multiplier.
- If temperatures are fine, rerun Cinebench once more for consistency.
- Then increase multiplier by +1 step (e.g., x42 → x43) and repeat.
When you increase frequency, raise voltage slightly—think +0.01 V steps (or similar) rather than big jumps.
Step 7: Stability testing with real workloads
At the first stable boot, don’t assume you’re done. Run a structured test plan. Use both synthetic and real apps.
Start with a short run, then escalate. Stability isn’t only “it didn’t crash once.” A stable OC should survive long gaming sessions and sustained load.
Common stable overclock ranges (real-world expectations)
There’s no universal guarantee, but most i5-4690K chips (with decent cooling) fall into recognizable bands.
| Target | Typical Multiplier | Typical Under-Load Vcore (Ballpark) | What to expect |
|---|---|---|---|
| 4.0 GHz | x40 | ~1.10–1.20 V | Often stable quickly; low heat overhead. |
| 4.2 GHz | x42 | ~1.15–1.25 V | Common “comfortable daily” zone. |
| 4.4 GHz | x44 | ~1.20–1.32 V | Needs careful LLC/voltage tuning and good cooling. |
| 4.5–4.6 GHz | x45–x46 | ~1.28–1.38 V | Not guaranteed; tends to hit thermal/voltage limits. |
If you have to use high voltage to hold the last few hundred MHz and your hottest core approaches your temperature ceiling, it’s usually smarter to drop to 4.3–4.4 GHz and call it a day.
Stability testing plan (what passes and what to re-test)
Use a tiered plan. It saves time and helps you avoid “false stability.”
Crashes, No Sound, or Screen Glitches?
Random freezes, missing sound and display glitches usually trace back to one bad driver. Find and replace yours safely.Free scan · under a minutePC Slower Than It Used to Be?
A free scan shows the junk files, broken settings and background clutter dragging Windows down - then fixes them in one click.Free scan · Windows 10 & 11Rank #4

- 10 cores (6 P-cores plus 4 E-cores) and 16 threads
- Performance hybrid architecture integrates two core microarchitectures, prioritizing and distributing workloads to optimize performance
- Up to 4.7 GHz unlocked. 20MB Cache
- Compatible with Intel 600-series (with potential BIOS update) and 700-series chipset-based motherboards
- PCIe 5.0 and 4.0 support. DDR4 and DDR5 Memory support. RM1 thermal solution included. Discrete graphics required.
Tier 1: Quick validation (20–30 minutes)
- Cinebench R23: 2 runs back-to-back
- OCCT: short CPU stress (choose a mode that matches your expected load)
If this fails, don’t waste time trying to “power through.” Reduce frequency or increase Vcore slightly and retest.
Tier 2: Serious stress (1–2 hours)
- Prime95 (small FFTs): 60–120 minutes
- HWInfo64 open the whole time
This is where unstable marginal settings tend to show up. Watch for sudden temperature spikes and voltage spikes (LLC overshoot).
Tier 3: Real-world usage (4–8 hours total across sessions)
- 2–4 hours gaming (or your heaviest CPU workloads)
- 1–2 hours typical desktop use plus background tasks (browsers, streaming, downloads)
Some crashes are workload-specific. A “synthetic stable” OC can still fail in a game after an hour due to memory controller timing interactions.
Failure modes and troubleshooting
When an overclock fails, the right response is methodical: identify the symptom, adjust one variable, then retest.
The Tool Desk
Outbyte Driver Updater FREEScan for outdated or missing drivers - takes under a minuteDriver Scan →Outbyte PC Repair FREERepair Windows errors before they cause bigger problemsFix Now →PC won’t boot or keeps rebooting
- Likely cause: Vcore too low, wrong LLC behavior, or unstable multiplier/correlated settings.
- Fix: clear CMOS, then return to BIOS and either lower multiplier by 1 step or raise Vcore slightly.
- If you’re using Offset/Adaptive: switch to Manual/Fixed to regain control and repeat the test.
Boots but crashes in games
- Likely cause: marginal Vcore under burst loads, or memory stability issues.
- Fix: try increasing Vcore by a small increment (+0.01 V) while keeping multiplier constant.
- Also check RAM: if you enabled XMP/overclocked RAM recently, revert RAM to stock JEDEC timings while you finish CPU tuning.
Prime95 small FFT fails quickly
- Likely cause: frequency too high for that voltage, or LLC droop/overshoot mismatch.
- Fix: raise Vcore slightly OR lower multiplier by 1 step. Re-test Tier 1 first.
- If temps are high: you may hit thermal limits before stability. Improve cooling or reduce clocks.
System is stable in benchmarks but not in daily use
- Likely cause: instability appears only under specific power states or background load changes.
- Fix: extend Tier 3 testing and test with your “real” application mix. If instability persists, step back 1 multiplier step.
Temperatures climb too fast
- Likely cause: cooler mounting issue, bad thermal paste, insufficient fan curves, or dust buildup.
- Fix: repaste and re-seat cooler, clean heatsink, and set conservative but adequate fan curves.
- Then tune: don’t respond to high temps by massively increasing Vcore—reduce multiplier first.
How to tune safely when you hit diminishing returns
Overclocking often becomes “expensive” in voltage for the last 100–200 MHz. At that point, prioritize stability and temperature over raw numbers.
- If you’re within 0.5–1°C of your comfort temperature, reduce multiplier by 1 step instead of increasing voltage.
- If stability requires voltage jumps larger than +0.02 V per +0.1 GHz, step back and stop there.
- If your load voltage is far higher than expected (LLC overshoot), lower LLC aggressiveness and retest.
Alternatives if you want safer gains than full manual OC
Manual tuning is the most controllable, but there are alternatives that can be safer on user time and reduce the odds of overshooting.
Use motherboard auto-OC carefully (and then verify)
Some boards offer “CPU Upgrade,” “OC Genie,” or “AI overclock.” Auto-OC can work, but it often uses higher voltage than necessary.
- Enable the auto feature to reach a baseline.
- Boot and immediately check Vcore and temps in HWInfo64 under load.
- If voltage is high, manually dial back multiplier by 1 step or reduce Vcore while keeping the system stable.
Try an undervolt-first approach (where possible)
Undervolting isn’t universally available the way it is on newer CPUs, but if your motherboard supports it (often via Offset), you can sometimes lower voltage while holding a stable multiplier.
Recommended Free Tools
Only attempt this after you have a known stable overclock. Reduce Vcore in small steps and stress test each change.
Best Value

- SSE2 / Streaming SIMD Extensions 2
- SSSE3 / Supplemental Streaming SIMD Extensions 3
- SSE4 / SSE4.1 + SSE4.2 / Streaming SIMD Extensions 4
Lower power limits instead of pushing voltage
If your BIOS exposes power/thermal limits (rare on older boards, but not impossible), you can cap behavior to avoid runaway thermals. This can reduce peak voltage under boost-like behavior and improve consistency.
If you don’t see those options, your main “power management” lever is still multiplier and Vcore.
BIOS setting references by typical labels
Here’s a quick mapping to help you translate your motherboard’s menu names into the settings that matter.
| Common BIOS label | What it controls | What to do during safe tuning |
|---|---|---|
| CPU Ratio / Core Ratio | Multiplier (x40, x42, x44…) | Increase in +1 steps |
| Base Clock (BCLK) | Platform clock foundation | Keep at 100.00 MHz |
| CPU Core Voltage / Vcore | Core voltage request | Use Fixed/Manual first; adjust in small steps |
| Load-Line Calibration (LLC) | Droop/overshoot compensation | Choose moderate level; verify with HWInfo64 |
| CPU Cache Ratio | Uncore/cache multiplier | Leave stock until core OC is stable |
| Memory Voltage | RAM rail | Don’t change during CPU OC unless you’re intentionally tuning RAM |
Common mistakes that cause wear or wasted time
- Using Auto voltage + high LLC and calling it “stable.” You can end up with unnecessary voltage spikes.
- Only testing benchmarks once. A single Cinebench run proves little about long load stability.
- Ignoring RAM stability while changing CPU settings. Mixed issues can look like a CPU problem.
- Chasing temperature headroom too late. If you’re already near your thermal target, stop increasing voltage and step back the multiplier.
- Changing multiple settings at once. If it fails, you won’t know what caused it.
FAQ about i5-4690K overclocking
Is 4.4 GHz on an i5-4690K realistic?
For many chips with decent air cooling and careful voltage/LLC tuning, yes. Expect variability: some CPUs will do 4.4 GHz easily; others need more voltage or won’t fully stabilize at that frequency.
Should I raise BCLK instead of using the multiplier?
Usually no. On Haswell boards, keeping BCLK at 100.00 MHz avoids collateral instability (PCIe/SATA-related issues). The 4690K is unlocked, so multiplier tuning is the clean path.
What stress test should I trust for stability?
Trust the combination. Prime95 small FFTs is good for catching core compute instability, while OCCT and long gaming sessions catch different failure patterns. A stable OC is one that passes your stress plan and your real workloads.
How do I know if my voltage is too high?
Use two signals: temperatures under sustained load and under-load Vcore behavior in HWInfo64. If you can’t stabilize a reasonable clock without high under-load voltage and you see temps trending toward your ceiling, reduce frequency.
Free tools Windows power users keep installed
One-click scans. No signup required.
My PC boots but crashes during loading screens. What should I change first?
First, rule out RAM instability by returning memory to stock while you finish CPU tuning. If RAM is stock and it still fails, increase Vcore slightly (+0.01 V) or reduce multiplier by 1 step.
Bottom Line
A safe i5-4690K overclock in 2024 is about controlled voltage, sensible LLC behavior, and a stability checklist that matches your actual usage. Most users can land a strong daily OC around 4.2–4.4 GHz with good cooling and conservative voltage targets.
Work incrementally, monitor temps and under-load voltage, and stop pushing when stability costs too much heat. If you do that, you’ll get the performance uplift you’re after without turning your tuning session into a long-term reliability gamble.
Quick Recap
Product prices and availability are accurate as of the date/time indicated and are subject to change. Any price and availability information displayed on Amazon at the time of purchase will apply.




