The Tool Desk
Outbyte PC Repair FREEClear out junk files and repair common Windows errorsFree Scan →Outbyte Driver Updater FREEFix the driver behind crashes, sound loss and screen glitchesFind Drivers →A dead-on-arrival (DOA) CPU is one that fails to initialize at all—no POST, no debug activity, and no signs of life during minimal boot. The tricky part is that other components can produce the exact same symptoms, so you need a method that isolates the CPU instead of guessing.
This guide walks you through practical checks—from visual socket inspection to minimal-boot testing, motherboard debug indicators, and swap methodology—so you can reach a defensible conclusion. You’ll also learn the common gotchas that cause false “dead CPU” diagnoses.
As an Amazon Associate I earn from qualifying purchases.
Prerequisites and safety checks
Before testing, gather basic tools and follow safe handling rules. Most DOA “finds” are actually bent pins, ESD damage, or a bad BIOS/RAM combo.
What you should have
- Working PSU that matches your system (and ideally a known-good one)
- Motherboard with CPU support for your intended CPU generation
- One stick of known-good DDR (or the minimum supported configuration)
- Access to motherboard debug indicators (Q-LEDs, 7-segment codes, or debug LEDs in the manual)
- Isopropyl alcohol (90%+), lint-free swabs/pads, and proper thermal paste for reseating
- For deeper checks: a flashlight, magnifier, and (optionally) a multimeter
ESD and handling
Wear an anti-static wrist strap if possible, and avoid touching pins/contacts. When reseating the CPU, hold it by the edges, and ensure the retention mechanism fully locks (no partial clamp).
#1 Best Overall

- [Quick PC Diagnostic Tool] Is your new PC build showing a black screen? This motherboard speaker translates silent hardware failures into clear BIOS beep codes. Instantly identify if your RAM, CPU, or GPU is causing the boot failure without guessing.
- [Essential for DIY PC Builders] Modern motherboards often lack built-in audio alerts. Plugging in this mini piezo buzzer before your first boot ensures you hear the satisfying “single beep” of a successful POST, giving builders immediate peace of mind.
- [Universal 4-Pin Header Compatibility] Wondering if it fits your board? It features a standard 4-pin female connector (with 2 active wires) that perfectly matches the “SPEAKER” or “SPK” front panel header on almost all ATX, Micro-ATX, and Mini-ITX motherboards.
- [Clean Wiring & Loud Alarm] Designed with an approx. 3-inch cable, it is long enough to easily plug into the motherboard but short enough to reduce PC case wiring clutter. The premium piezo element delivers a loud, crisp beep that is impossible to miss.
- [Valuable 3-Pack for IT Repair] Includes 3 internal BIOS buzzers in one pack. Perfect for IT technicians keeping spare diagnostic tools in their repair kits, or PC enthusiasts testing multiple rigs. A cost-effective solution to save hours of troubleshooting.
First triage: rule out the non-CPU causes
Before concluding the CPU is DOA, verify the most common “won’t POST” causes. In practice, RAM, BIOS compatibility, PSU, and power cabling account for the majority of no-POST scenarios.
Checklist: quick eliminate
- CPU power: confirm the 8-pin (or 4+4) CPU/EPS connector is seated firmly
- 24-pin ATX power: confirm it’s fully clicked in
- RAM seating: remove/reinsert only one DIMM; try different DIMM slot(s) per the motherboard manual (often A2 first)
- BIOS version: confirm BIOS supports the exact CPU model/stepping
- No extra peripherals: disconnect USB devices, extra drives, and expansion cards during diagnosis
Be suspicious of these symptoms
If the system shows any sign of life—fans spin, debug LEDs change, a Q-code advances—then the CPU may not be dead. A completely frozen state (no fan spin at all) points more toward PSU, power wiring, or a short than a DOA CPU.
Visual and physical inspection (fastest confirmation attempts)
A visual inspection can sometimes “prove” the CPU isn’t viable. This is especially effective for LGA sockets with contact dents and pin damage, and for PGA CPUs with bent pins.
PGA (pin grid array) CPUs: check pins
- Use a bright light and magnifier.
- Look for bent pins, missing pins, or groups of pins that look misaligned.
- If pins are bent, a DOA diagnosis may be wrong; however, bent pins often indicate physical damage and may void warranty.
LGA CPUs: check socket contacts and CPU pads
- Inspect the motherboard socket for debris, dust, or bent/flattened contacts.
- Inspect the CPU’s contact pads for dark spots, residue, or uneven wear.
- Never use metal tools to “fix” contacts; use compressed air rated for electronics and careful cleaning only if you’re confident.
Signs that point to DOA or damage
| Observation | What it suggests | Action |
|---|---|---|
| 明显 bent pins / cracked substrate | Physical damage, high likelihood of DOA | Document with photos and contact seller/AMD/Intel support |
| Socket contacts look crushed or irregular | Socket damage; CPU may be fine | Check socket first, consider RMA for board |
| Thermal paste applied inconsistently with no contact pattern | Possible improper seating | Reseat with correct mount pressure |
Minimal-boot tests to isolate the CPU
Minimal-boot testing is the most reliable DIY path. The goal is to remove everything except what’s needed to POST.
Minimal boot configuration (standard)
- Leave the CPU installed.
- Install only one RAM stick in the slot recommended by your motherboard manual (often the primary slot).
- Disconnect all storage drives.
- Disconnect front-panel USB headers and all non-essential SATA power.
- Connect only essential power: 24-pin ATX + CPU (EPS/8-pin).
Reset and retry discipline
Power down, switch the PSU off, then press the case power button once to discharge. Then power on and observe debug LEDs/Q-codes (if present).
Rank #2

- Type: 5PCS PC computer motherboard alarm buzzer, length 2.3 inches
- Uses: The sound made by the buzzer is used to determine the working status of the motherboard.Easy to install, 4-pin female connector, plug and play, easy to plug into the speaker connector on the front panel of the motherboard
- Wiring: red positive pole, black negative pole (in fact, as long as the interface is connected to the speaker, both positive and negative poles can be used)
- How To Use: After turning on the computer, we will hear the familiar "beep" sound, usually indicating that the computer is working properly, the sound comes from this buzzer. If it is not normal, you can judge the fault by its sound
- 100% brand new and high quality
What “CPU likely DOA” looks like in minimal boot
- No POST behavior at all (no debug LED changes, no Q-code progression) even with confirmed correct power cabling
- Motherboard fails at the CPU initialization stage consistently (if the debug display has a CPU code)
- After reseating CPU and RAM, results don’t change
Use motherboard POST/debug features
Many modern boards include debug LEDs (labeled CPU/DRAM/VGA/BOOT) and 7-segment Q-code displays. These are your best clues for isolating the failing component.
Q-LED / debug LED interpretation
Refer to your motherboard manual for exact meanings, but the common pattern is:
- If the CPU LED remains lit and the DRAM LED never progresses, it often points to CPU or CPU power.
- If DRAM LED is stuck, it’s more often RAM-related than CPU-dead.
- If VGA/BOOT lights without CPU/DRAM progression, it can be configuration or power related.
7-segment or Q-code patterns
If your board displays a code sequence, look for codes that specifically mention CPU/initialization or memory training failures. Record the exact code and LED state; you’ll need it for RMA or support.
Swap tests: known-good parts methodology
Swap testing is the fastest way to reach an evidence-based conclusion. The key is to swap in a way that isolates the CPU.
Recommended swap order
- Swap PSU first if you don’t have a known-good one (but only if symptoms are consistent with power issues)
- Swap RAM with known-good modules
- Swap motherboard (if you have access) before declaring CPU DOA
- Swap CPU with a known-good CPU for the same socket and BIOS support
How to interpret results
- CPU A installed + minimal boot fails → CPU B installed on the same board passes: CPU A is very likely DOA.
- CPU A installed fails but CPU B fails too: board/BIOS/RAM/PSU likely.
- CPU A fails on one motherboard but works on another: the first board is likely the issue.
Breadboarding vs. in-case testing
Breadboarding reduces the chance that a short from the case, standoffs, or front-panel wiring is preventing POST. If your system won’t power or shows erratic behavior, breadboard testing is a high-value step.
Rank #3

- Used to obtain beep codes from motherboards,alarm systems and other electronics. Keep your computer case internal cable tidy.
- Plugs right into your motherboard where the speaker hooks up. Red Line: connected to the positive(
- After the computer is turned on, we will hear the familiar sound of
- These internal speaker will emit a series of beep codes both long and short and also steady and intermittent to indicate to the troubleshooter what the source of the error is.
- Material: Metals and plastics.Package Includes: 3 PCS.
When to breadboard
- System has no POST and no debug LED progress
- You installed the motherboard in a new case (possible standoff/short)
- You changed multiple components at once
Breadboard setup basics
- Place motherboard on a non-conductive surface (cardboard or anti-static mat).
- Connect 24-pin ATX + CPU EPS.
- Install CPU + one RAM stick + (optional) GPU if your board lacks iGPU.
- Connect only essential front-panel power switch (or short the power header with a screwdriver per the manual guidance).
Electrical checks (advanced, when you have the tools)
You can test for gross power problems with a multimeter, but safe, CPU-level fault isolation is limited without proper equipment. Treat electrical checks as “power sanity,” not definitive CPU proof.
What’s actually slowing this PC down?
Pick the symptom - the matching free tool is one click away.
What you can check safely
- PSU rails at the PSU or motherboard headers (5V standby, 12V main)
- Whether CPU power (EPS/8-pin) is present when powered on
What not to do
- Do not probe tiny SMD rails unless you know the exact test points and reference schematics.
- Do not “jumper” the board to force power unless the manufacturer documentation explicitly supports it.
If you suspect a short (e.g., standoff screw touches a trace), don’t keep powering it. Re-seat and inspect for contact shorting before deep electrical probing.
BIOS/firmware and compatibility gotchas
It’s common for a fresh CPU to be incompatible with an older BIOS revision. Some boards support CPU-less BIOS updates; others require an already-supported CPU to flash BIOS.
Confirm exact CPU compatibility
Check the motherboard manufacturer’s CPU support list for your exact CPU model and revision. For example, Intel and AMD frequently release BIOS updates tied to specific CPU support, sometimes in multiple stages (initial support, then microcode revisions).
Symptoms of BIOS incompatibility
- Board powers on but never successfully trains memory (DRAM LED stuck)
- Debug codes repeat at the same initialization step
- No OS boot obviously, but the failure is consistent and repeatable
CPU-less BIOS update options
Some boards offer “BIOS Flashback” or “USB BIOS Flashback.” If your board has this feature, it can allow boot with the CPU installed even when the original CPU was unsupported. Use the vendor’s exact steps (USB format, filename, and which port to use), because they can be strict.
Rank #4
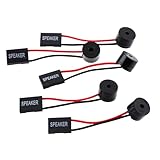
- Instructions for Use: When you start the computer, you will hear a familiar "beep" sound, indicating that the system is running normally. This sound is emitted by the pc motherboard speaker. If there is a problem, the sound of the motherboard speaker can help you diagnose the problem
- Wiring: Equipped with a red wire for positive and a black wire for negative. However, any pole can be applied interchangeably as long as the interface is connected to the speaker
- Main Function: These pc motherboard speaker will make a sound to help you determine the operating status of the motherboard. They are easy to install, equipped with a 4-pin female connector, plug and play, and quickly integrated into the speaker connector on the front panel of the motherboard
- Material: These motherboard speakers are made of metal material, durable and not easy to damage. Reliable performance, can be applied for a long time
- Package Content: You will get 5 pcs motherboard speaker, each with a length of 2.3 inches
When you should conclude DOA vs. keep troubleshooting
You’re looking for evidence. DOA is most defensible when the CPU fails in multiple controlled configurations.
A practical DOA decision standard
- Same motherboard + known-good PSU/RAM: CPU fails minimal boot consistently
- Swap with known-good CPU: same board passes, same test method
- Reseating doesn’t help: correct mounting, correct thermal paste removal/reapply, no changes in debug state
If you can’t perform a known-good swap, rely on debug codes/LEDs plus physical inspection. Then document everything and escalate for warranty/RMA rather than powering repeatedly.
Common mistakes that lead to false DOA calls
- Skipping BIOS support checks and assuming the CPU can’t initialize
- Using the wrong RAM slots or unsupported RAM speed/latency
- Forgetting CPU EPS power (8-pin/4+4 not connected)
- Over-tightening or uneven mounting pressure (especially with tower coolers)
- Misidentifying debug LED meaning without checking the motherboard manual
- Assuming “no fan spin” = CPU DOA; short circuits or PSU faults can be the real cause
Troubleshooting playbook: what to try when it won’t POST
Use this as a structured path. Stop when you find a change in behavior—changing behavior usually means you’re closer to the real issue.
| Observed behavior | Most likely causes | What to do next |
|---|---|---|
| CPU debug LED stays on; fans spin | CPU, CPU power, BIOS mismatch | Verify EPS/8-pin seating; reseat CPU; try different RAM slot; check BIOS CPU support list |
| DRAM debug LED stuck; CPU LED off | RAM seating, bad RAM, BIOS training | Try 1 DIMM only; test other DIMM; raise or reset BIOS memory settings (if accessible); confirm supported RAM QVL |
| No debug LEDs; no video; fans spin steadily | GPU/BOOT issue, front-panel power/header wiring, BIOS | Remove GPU if iGPU exists; connect monitor to correct output; ensure power switch wiring is correct |
| No fans or immediate shutoff | Short, PSU fault, mis-standoff | Power off; inspect standoffs; breadboard test; try different PSU |
| Repeated Q-code that mentions CPU init | CPU/power incompatibility | Document code; reseat CPU; verify EPS power; update BIOS via Flashback if available |
Step-by-step minimal isolation workflow
- Inspect CPU and socket contacts. Clean gently with 90%+ isopropyl if residue exists (no liquid pooling).
- Reseat CPU: remove cooler, clean paste with isopropyl, reinstall CPU ensuring full lock and correct orientation.
- Install one known-good RAM stick in the motherboard’s recommended slot.
- Connect 24-pin ATX and the correct CPU EPS cable(s).
- Disconnect all drives and extra PCIe cards.
- Power on and record: which debug LEDs light, any Q-code sequence, and whether behavior changes between attempts.
- If still failing, repeat with the same board but swap RAM first; then PSU; then—if available—swap CPU.
FAQs
Can a CPU be DOA but still get warm?
Yes, it can. Some systems will provide standby power and light indicators even if full initialization fails. DOA typically means it can’t complete POST; temperature alone isn’t proof.
Does bent CPU pins always mean it’s DOA?
Often, yes, especially if the bend is severe or contacts are damaged. But minor pin bends sometimes still cause intermittent behavior. Your safest move is to document damage and test with the correct motherboard/RAM using controlled minimal boot.
Best Value
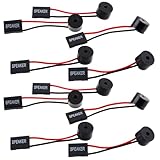
- Essential Tool: This PC motherboard internal speaker is a crucial diagnostic component for any computer build or repair. When you start your computer, the familiar boot 'beep' sound indicates normal system operation. More importantly, specific beep code patterns emitted by this BIOS alarm buzzer help diagnose hardware issues like memory errors, graphics card failures, or power supply problems
- Simple Plug and Play Installation: Installing this computer case speaker is straightforward and requires no technical expertise. It comes equipped with a standard 4-pin female connector designed to match the speaker header pins on the front panel of virtually any motherboard. The wiring is clearly indicated with red for positive and black for negative, though polarity is often interchangeable
- Durable and Reliable Construction: Built for long-term reliability, this motherboard speaker is constructed from sturdy metal and plastic materials. The robust build ensures it won't break easily during installation or from regular system vibrations. Its reliable performance means it will serve you consistently over the long term, providing clear, audible beep codes whenever you power on your PC
- Clear POST Code Audibility: In environments where external multimedia speakers are unnecessary, such as office servers, test benches, or minimalist setups, this internal PC speaker is indispensable. It allows you to hear the essential BIOS beep codes that confirm a successful boot or signal hardware faults
- Versatile Multi-Pack Value: This package includes 10 pieces of motherboard speaker offering exceptional value for frequent builders, repair shops, or IT departments. Each unit features an approximately 3-inch cable to minimize wiring clutter inside the computer case
What if my motherboard’s debug LEDs don’t show anything?
That points to power delivery, a boot-loop prevention state, or a dead board segment. Breadboard test the board outside the case, verify both ATX 24-pin and CPU EPS connections, and test with a known-good PSU.
Will BIOS update fix a DOA CPU?
If the CPU is truly DOA, a BIOS update won’t make it post. However, BIOS mismatch can look identical to CPU failure, so verifying CPU support and using Flashback (when available) is a necessary step before RMA.
How many reseats should I try?
Do it once with careful inspection and correct orientation, then again only after you change a variable (RAM slot, BIOS version, PSU, or breadboard setup). Repeated power cycling with a potentially damaged component is risky.
Do these 3 things before closing this tab:
1Clear out junk files and repair common Windows errors2Fix the driver behind crashes, sound loss and screen glitches3Repair Windows errors before they cause bigger problemsBottom Line
You can’t reliably “diagnose DOA” by symptom alone—no-POST is shared by CPUs, RAM, PSU, BIOS compatibility, and even short circuits. The fastest path to certainty is controlled minimal boot plus debug indicator reading and, when possible, a known-good swap.
If the CPU still fails in a well-isolated setup and a known-good CPU makes the same system POST, treat it as DOA and proceed with warranty/RMA using your recorded debug codes and inspection photos.
Quick Recap
Product prices and availability are accurate as of the date/time indicated and are subject to change. Any price and availability information displayed on Amazon at the time of purchase will apply.




