Windows Errors? Fix Them Before They Spread
Repair common Windows errors and clear accumulated junk for a smoother, more stable PC - no reinstall needed.Free scan · no reinstallCrashes, No Sound, or Screen Glitches?
Random freezes, missing sound and display glitches usually trace back to one bad driver. Find and replace yours safely.Free scan · under a minuteTurn on the iPhone 17, connect it to the internet, sign in with your Apple Account, and choose the correct transfer method before changing personal preferences. This walkthrough covers preparation, iPhone and Android migration, the first setup screens, security and accessibility reviews, Action button and Camera Control choices, and practical Lock Screen and Home Screen customization. Menu names and availability can differ by iOS version, iPhone model, language, and region.
Before you turn on the iPhone 17
Put the new iPhone where you can keep it near your previous phone, tablet, or backup. Have three things ready:
As an Amazon Associate I earn from qualifying purchases.
- A Wi-Fi or other internet connection. Setup can use cellular data in some circumstances, but Wi-Fi is generally the more predictable choice for downloading an operating-system update and restoring content.
- Your Apple Account email address, password, and any verification method required for sign-in.
- Your previous iPhone or iPad, or a current backup, if you want to bring over apps, settings, photos, messages, and other content. Apple describes the available setup and transfer choices in its setup basics guide.
If your old phone is Android, keep it charged and install Apple’s Move to iOS app before starting the iPhone’s initial setup. Move to iOS is an initial-setup route; it is not presented as a normal migration option after the iPhone has already been configured.
Have a passcode in mind and make sure you can receive verification codes. Cellular activation, SIM, and eSIM screens vary by country, carrier, and iPhone configuration, so follow the options shown on your specific device rather than assuming every iPhone 17 has the same sequence.
#1 Best Overall
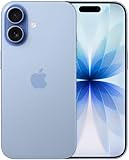
- This phone is unlocked and compatible with any carrier of choice on GSM and CDMA networks (e.g. AT&T, T-Mobile, Sprint, Verizon, US Cellular, Cricket, Metro, Tracfone, Mint Mobile, etc.).
- Please check with your carrier to verify compatibility.
- When you receive the phone, insert a SIM card from a compatible carrier. Then, turn it on, connect to Wi-Fi, and follow the on screen prompts to activate service.
- The device does not come with headphones or a SIM card. It does include a generic (Mfi certified) charger and charging cable.
- Tested for battery health and guaranteed to have a minimum battery capacity of 80%.
Choose how to move your data
The right transfer method depends mainly on whether your previous device is an iPhone or iPad, whether you need both phones during the move, and whether you have a reliable network connection. Apple does not promise one method will always finish fastest; transfer time depends on network conditions and the amount of data.
| Starting device | Method | What happens | Important trade-off |
|---|---|---|---|
| iPhone or iPad | Quick Start with direct transfer | Data moves from the nearby device to the iPhone 17. | Both devices remain occupied until the transfer completes. Keep them close together and connected to power. |
| iPhone or iPad | Quick Start with iCloud download | The iPhone 17 begins downloading apps and data from iCloud while setup finishes. | You can reach the Home Screen sooner, but downloads continue in the background and depend on your connection and data volume. |
| Android phone | Move to iOS during initial setup | The Android phone sends supported content through the Move to iOS flow shown on the new iPhone. | If setup is already complete, Apple’s documented choices are to erase the iPhone and start again, or move content manually. |
Apple’s Quick Start instructions explain that transfer times vary. Do not disconnect either device or move it out of range while the transfer is still running.
Transfer from an old iPhone or iPad with Quick Start
1. Prepare the old device
- Turn on Wi-Fi and Bluetooth on the current iPhone or iPad.
- Plug both devices into power, or make sure they have enough charge to remain on until the process finishes.
- Place the old device beside the powered-off or newly reset iPhone 17.
2. Start the pairing prompt
Turn on the iPhone 17. After choosing language and country or region, a Quick Start prompt should appear on the nearby iPhone or iPad. Unlock the old device and follow the onscreen instructions. When asked, use the old device’s camera to authenticate the moving animation, then enter the old device’s passcode on the iPhone 17.
3. Select direct transfer or iCloud download
Quick Start presents the available transfer choices. Select direct transfer when you want the new phone to copy data from the old one before you begin using it. Select the iCloud option when getting to the Home Screen sooner is more useful and you are comfortable with apps and content continuing to download in the background. Neither option has a universal completion time.
Rank #2
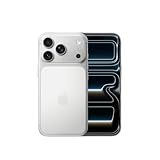
- This phone is unlocked and compatible with any carrier of choice on GSM and CDMA networks (e.g. AT&T, T-Mobile, Sprint, Verizon, US Cellular, Cricket, Metro, Tracfone, Mint Mobile, etc.).
- Please check with your carrier to verify compatibility.
- When you receive the phone, insert a SIM card from a compatible carrier. Then, turn it on, connect to Wi-Fi, and follow the on screen prompts to activate service.
- The device does not come with headphones or a SIM card. It does include a generic (Mfi certified) charger and charging cable.
4. Leave the devices alone until the process ends
Keep the phones close together and connected to power. Avoid opening apps, turning off Bluetooth or Wi-Fi, or separating the devices. If the prompt does not appear, confirm that the old device is unlocked, Wi-Fi and Bluetooth are enabled, and both devices are close enough to communicate. Apple’s current process is described in its Quick Start support article.
Move from Android with Move to iOS
Use Move to iOS while the iPhone 17 is still showing its first-time setup screens:
- Start the iPhone 17 and proceed through language, region, and network screens until the transfer section appears.
- Choose the option to move data from Android. The iPhone displays a temporary code.
- On the Android phone, open Move to iOS, enter that code, and join the temporary Wi-Fi network created for the transfer when prompted.
- Select the categories of content you want to bring over, then leave both phones connected to power and undisturbed until the iPhone reports completion.
- Continue the remaining iPhone setup screens.
Apple states in its “Turn on and set up iPhone” guide that Move to iOS belongs to the initial setup flow. If you already finished setup, the supported choices are to erase the iPhone and begin again, or to transfer items manually. Erasing removes content and settings currently on the iPhone, so confirm that you have anything important backed up and understand the consequences before choosing that route.
Complete the first setup screens
After migration, or if you are starting fresh, follow the onscreen sequence. The exact order can change with iOS updates, model, region, and language, but the decisions normally include:
Rank #3

- This phone is unlocked and compatible with any carrier of choice on GSM and CDMA networks (e.g. AT&T, T-Mobile, Sprint, Verizon, US Cellular, Cricket, Metro, Tracfone, Mint Mobile, etc.).
- Please check with your carrier to verify compatibility.
- When you receive the phone, insert a SIM card from a compatible carrier. Then, turn it on, connect to Wi-Fi, and follow the on screen prompts to activate service.
- The device does not come with headphones or a SIM card. It does include a generic (Mfi certified) charger and charging cable.
- Tested for battery health and guaranteed to have a minimum battery capacity of 80%.
- Language and region: Choose the values that control formats such as date, time, temperature, and keyboard defaults.
- Internet connection: Join Wi-Fi or continue with cellular service if the screen permits it. A connection is needed for activation and account services.
- Apple Account: Sign in to an existing account or create one. This account connects iCloud, App Store downloads, Find My, backups, and other Apple services.
- Passcode: Create a device passcode. You may be offered alternatives to the standard numeric length; choose one you can remember but that is not easily guessed.
- Face ID: Enroll your face if your model and region offer the feature. You can complete enrollment during setup or configure it later in Settings.
- Cellular service: Follow the carrier, SIM, or eSIM instructions shown. Availability and activation steps differ by country and carrier.
- Terms, updates, and services: Review the prompts for software updates, location services, Siri, Apple Pay, and analytics. You can revisit many choices in Settings.
Once the Home Screen appears, leave the iPhone connected to power and Wi-Fi for a while if you selected an iCloud download. Apps, photos, and other content may still be restoring even though setup looks finished.
Review essential settings on day one
There is no single best configuration for every owner. Use the following areas as a review list rather than a requirement to change everything. Apple’s settings index is useful when a label has moved or differs from the one shown here.
| Area | Path to check | What to review |
|---|---|---|
| Software updates | Settings > General > Software Update | Install an available update, review automatic-update behavior, and keep enough battery or connect power during installation. |
| Battery | Settings > Battery | Inspect usage by app, charging information, and any recommendations. Use the data to identify unusually high consumption rather than disabling features blindly. |
| Privacy and security | Settings > Privacy & Security | Review permissions for location, camera, microphone, photos, Bluetooth, contacts, and tracking. Grant access only where it serves a purpose. |
| Focus | Settings > Focus | Create or adjust modes for work, sleep, driving, or personal time. Choose allowed people and apps, schedules, and the Lock Screen associated with each mode. |
| Accessibility | Settings > Accessibility | Check text size, display options, motion, touch, hearing, spoken features, and accessibility shortcuts that match your needs. |
| Camera | Settings > Camera | Review formats, composition aids, preserve-settings choices, and other camera behaviors before taking important photos. |
| Connectivity | Settings > Wi-Fi, Bluetooth, and Cellular | Confirm the preferred network, paired accessories, cellular-data behavior, and roaming choices for your plan. |
| Appearance | Settings > Display & Brightness | Choose light or dark appearance, text and display options, brightness behavior, and the screen-lock interval that fits your use. |
| Payments | Settings > Wallet & Apple Pay | Add cards only when you are ready and complete the verification required by each issuer. |
Security choices worth making early
- Use a passcode even if Face ID is enabled; the passcode is required in several security situations.
- Confirm that Find My is enabled for the iPhone and that your Apple Account recovery details are current.
- In Privacy & Security, inspect which apps can access precise location, photos, microphone, and camera. “Ask next time” or limited-photo access can be preferable to permanent access when you are uncertain.
- Review notification previews if other people may see your Lock Screen. You can change them per app without turning off all notifications.
Customize the Action button
The iPhone 17 includes an Action button. Apple says you can choose the function performed when you press it. Open Settings > Action Button to select an action. Depending on configuration and availability, the choices include:
- Silent Mode
- Focus
- Camera
- Visual Intelligence on supported configurations
- Flashlight
- Voice Memo
- Recognize Music
- Translate
- Magnifier
- Controls
- Shortcut
- Accessibility
- No Action
Some selections are one-step choices; others expose a second control. If you choose Controls, select the specific control beneath it. If you choose Shortcut, pick the shortcut to run. If you choose Accessibility, select the feature that the button should invoke. Test the press behavior after saving, especially if you rely on the button for silence, a Focus mode, or emergency-adjacent accessibility access.
Rank #4

- This phone is unlocked and compatible with any carrier of choice on GSM and CDMA networks (e.g. AT&T, T-Mobile, Sprint, Verizon, US Cellular, Cricket, Metro, Tracfone, Mint Mobile, etc.).
- Please check with your carrier to verify compatibility.
- When you receive the phone, insert a SIM card from a compatible carrier. Then, turn it on, connect to Wi-Fi, and follow the on screen prompts to activate service.
- The device does not come with headphones or a SIM card. It does include a generic (Mfi certified) charger and charging cable.
- Tested for battery health and guaranteed to have a minimum battery capacity of 80%.
Choose the action that solves a frequent problem rather than copying someone else’s setup. Camera is useful for fast capture, Flashlight is convenient in dark places, and a Shortcut can combine several tasks, while No Action prevents accidental activation.
Understand Camera Control and Visual Intelligence
Apple’s iPhone 17 model guide lists both Camera Control and the Action button. Camera Control is a separate physical control from the Action button and is intended for camera-related interaction. Its exact behavior and available options can change with iOS updates and the camera configuration.
Visual Intelligence is not a universal promise for every owner. Apple’s Visual Intelligence guide describes using Camera Control on supported models and lists alternate access methods on some other models. Availability depends on Apple Intelligence eligibility, software version, language, and region. If Visual Intelligence does not appear in the Action button list or Camera Control workflow, check those requirements and Apple’s current availability information instead of treating it as a hardware fault.
Recommended Free Tools
Personalize the Lock Screen and Home Screen
After transfers and updates settle, customize the interface in ways that make daily actions obvious. Apple’s iPhone User Guide for iOS 26 covers these controls.
Best Value

- This phone is unlocked and compatible with any carrier of choice on GSM and CDMA networks (e.g. AT&T, T-Mobile, Sprint, Verizon, US Cellular, Cricket, Metro, Tracfone, Mint Mobile, etc.).
- Please check with your carrier to verify compatibility.
- When you receive the phone, insert a SIM card from a compatible carrier. Then, turn it on, connect to Wi-Fi, and follow the on screen prompts to activate service.
- The device does not come with headphones or a SIM card. It does include a generic (Mfi certified) charger and charging cable.
Lock Screen
- Touch and hold the Lock Screen, then tap Customize or the add button.
- Choose a wallpaper, clock style, and available widgets.
- Set which information appears at a glance, such as weather, calendar events, battery state, or Focus status.
- Review notification privacy so sensitive previews are not visible when the phone is locked.
Different Focus modes can use different Lock Screens. That lets a work screen show a calendar while a personal screen emphasizes communication or fitness, without changing the underlying apps.
Home Screen
- Touch and hold an empty area until the icons jiggle, then drag apps into folders or between pages.
- Use widgets for information you check repeatedly, and remove widgets that add clutter or consume attention.
- Choose which Home Screen pages appear for particular Focus modes if that option is available.
- Use the App Library to keep rarely opened apps off the main pages without deleting them.
Text size, display, and sound
Open Settings > Accessibility > Display & Text Size for larger text, bold text, contrast, and related display controls. Settings > Display & Brightness also contains appearance and brightness choices. Check Settings > Sounds & Haptics for ringtone, alert volume, vibration, and haptic behavior. Ringtones are optional personalization; choose a sound that is easy for you to notice without making every notification disruptive.
First-day problems and what to check
Quick Start never appears
Unlock the old iPhone, verify Wi-Fi and Bluetooth are on, bring the devices together, and make sure both have power. If the old device is not running a supported software version or is not connected to the same general setup environment, update it when practical and try again. You can also choose a backup-based setup path shown on the iPhone.
Quick wins for a faster PC:
Fix the driver behind crashes, sound loss and screen glitchesFind Drivers →Clear out junk files and repair common Windows errorsFree Scan →Scan for outdated or missing drivers - takes under a minuteDriver Scan →The transfer seems stuck
Do not judge progress by a fixed number of minutes. Apple says network conditions and data volume affect timing. Keep both devices close and powered. Interrupting a transfer can leave the new phone only partially restored, requiring another setup attempt.
You finished setup but still need Android migration
Move to iOS is intended for initial setup. If you choose Apple’s erase-and-start-again route, read the erase warning carefully and verify that the iPhone contains nothing you need to keep. Otherwise, use manual methods for contacts, photos, documents, and individual apps.
Apps or photos are missing after reaching the Home Screen
If you selected iCloud download, restoration may still be running. Connect to reliable Wi-Fi and power, then check again later. Confirm that you signed in with the Apple Account associated with the backup or purchased apps.
A setting or feature is missing
Search in Settings, check the relevant category, and account for differences in iOS version, language, region, and model. Action button actions, Visual Intelligence, cellular options, and some accessibility features are not identical on every configuration.
Do these 3 things before closing this tab:
1Fix the driver behind crashes, sound loss and screen glitches2Repair Windows errors before they cause bigger problems3Scan for outdated or missing drivers - takes under a minuteQuick Recap
A practical first-day checklist
- Internet connection working and Apple Account sign-in complete.
- Transfer method selected deliberately: Quick Start direct, Quick Start iCloud, or Android Move to iOS.
- Passcode and Face ID configured according to your preference.
- Cellular service, SIM or eSIM, and Wi-Fi verified.
- Software Update, Battery, Privacy & Security, Focus, Accessibility, and Camera reviewed.
- Action button assigned and tested.
- Camera Control and Visual Intelligence checked for your model, software, language, and region.
- Lock Screen, Home Screen, widgets, text size, notification previews, and ringtones adjusted.
- Important apps opened once to confirm that accounts, permissions, and restored data are present.
Product prices and availability are accurate as of the date/time indicated and are subject to change. Any price and availability information displayed on Amazon at the time of purchase will apply.




