What’s actually slowing this PC down?
Pick the symptom - the matching free tool is one click away.
To add visual regression checks to a Cypress end-to-end test, install Applitools’ Cypress Eyes SDK, run its setup command, provide an Applitools API key securely, and add Eyes checkpoints around the application states you want to protect. Cypress still drives the app; Eyes captures those states, compares them with baselines, and presents differences for review. The commands below are vendor-documented examples, so confirm the current package and SDK syntax before adopting them in a new project.
Before adding Eyes, make sure Cypress works
First run your existing end-to-end tests successfully. Keep the application startup and Cypress configuration working before layering visual checks on top; this makes failures easier to isolate. Applitools’ walkthrough uses npx cypress run to run the suite. Applitools’ Cypress tutorial is an example of that workflow.

As an Amazon Associate I earn from qualifying purchases.
Install and configure the Cypress integration
- Check the current SDK instructions. Applitools lists Cypress among its Eyes SDK options. Consult the current Cypress integration page for supported package names, versions, and compatibility before installing. Tutorials have used
@applitools/eyes-cypress; treat that as a documented example, not a guarantee that it is the current package. - Install the documented example package if it matches your current setup.
npm install @applitools/eyes-cypress --save-dev - Run guided setup. The vendor walkthrough uses
npx eyes-setupto configure the integration and add its Cypress commands. - Set your API key as a secret. The tutorial instructs users to obtain an Applitools API key and set
APPLITOOLS_API_KEYas an environment variable. For CI, store it in the CI platform’s secret manager; do not commit it to the repository. Confirm the current SDK’s key configuration in Applitools’ documentation.
These package and setup commands come from Applitools tutorial material and may change. Check the current integration documentation rather than assuming an older tutorial reflects the latest release.
Add Eyes checkpoints to a Cypress test
Open an Eyes test, use Cypress as usual to reach a meaningful UI state, capture a named checkpoint, and close the Eyes test. For example, this schematic illustrates the documented command pattern:
#1 Best Overall

- Grafco Ishihara Test Chart Book
- Package Info: Each
- Includes four special plates for tests to determine the kind and degree of defect in color vision.
- Image may not reflect actual product sold. Please read description carefully.
- GHF1254
it('shows the account overview', () => {
  cy.eyesOpen({ appName: 'Web App', testName: 'Account overview' });
  cy.visit('/account');
  cy.eyesCheckWindow('Account overview');
  cy.get('[data-testid="menu"]').click();
  cy.eyesCheckWindow('Account menu open');
  cy.eyesClose();
});
Replace the route, selector, app name, and test name with values from your project. Put checkpoints at stable states that matter to users—for example, after the account page loads and after a menu opens—not after every incidental action. Use consistent names so results are understandable when you review them. This example is illustrative, not run or validated here; confirm exact syntax and test cleanup behavior for the SDK version you install. The open/check/close pattern is described in Applitools’ Cypress visual-testing tutorial.
Run the spec and review visual differences
- Run Cypress as you normally do. To target a spec, the tutorial’s example uses
npx cypress run --spec "cypress/e2e/account.cy.js"; adjust the path to your project’s spec location. - Open the Eyes result link or Test Manager to review the captured checkpoint against its stored baseline. The documented flow sends checkpoint images to Eyes Server for comparison and returns a result for review.
- Decide whether a difference is expected. A real UI regression may need a code fix; an intentional redesign may justify approving an updated baseline. A detected visual difference is not automatically a defect.
Baseline and first-run behavior can depend on SDK version or account configuration; the cited workflow establishes comparison and review, not a universal auto-accept policy. See the Applitools workflow description for the test-to-review sequence.
Rank #2

- individuals with color vision defect should see a different figure from individuals with normal color vision.
- Makes use of the peculiarity that in red-green blindness, blue and yellow appear remarkably bright compared with red and green
- Diagnostic plates: intended to determine the type of color vision defect
- Ishihara Test Chart Books for Color Deficiency 24 Plates with usar manual
Extend visual checks across browsers
Applitools describes Ultrafast Grid as a way to render visual tests across selected browser and viewport configurations. Its tutorial lists configuration through cy.eyesOpen() arguments, environment variables, or an applitools.config.js file. In this model, Cypress exercises the application and Eyes performs visual rendering and validation for selected targets; do not assume Cypress itself executes in every target browser.
Quick wins for a faster PC:
Fix the driver behind crashes, sound loss and screen glitchesFind Drivers →Repair Windows errors before they cause bigger problemsFix Now →The cited grid tutorial is older, so check current SDK documentation for supported browsers, device targets, account limits, and configuration syntax before choosing a matrix. Applitools’ cross-browser tutorial describes the configuration approaches.
Rank #3

- Vanishing design: Only people with good color vision can see the sign. If you are colorblind you won’t see anything.
- Transformation design: Color blind people will see a different sign than people with no color vision handicap.
- Hidden digit design: Only colorblind people are able to spot the sign. If you have perfect color vision, you won’t be able to see it.
- Classification design: This is used to differentiate between red- and green-blind persons. The vanishing design is used on either side of the plate, one side for deutan defects an the other for protans.
Troubleshooting common setup problems
eyesOpenoreyesCheckWindowis undefined: Confirm the SDK package is installed, run the integration setup for the project, and check that the spec loads the Cypress commands as required by the installed version.- Authentication fails: Check that
APPLITOOLS_API_KEYis present in the shell or CI job running Cypress, and that the secret is configured for that environment. Avoid printing the key in logs. - The test fails before a checkpoint: Run the original Cypress test without Eyes and verify the app URL, startup process, and selectors. Fix the underlying functional-test failure before diagnosing visual comparison.
- Results show unexpected changes: Compare the checkpoint with the baseline in Test Manager, then determine whether the change is an unintended regression or an intentional UI update. Approve a new baseline only for an expected change.
- A package or command is unavailable: Tutorials may use older names or syntax. Verify the currently supported package and setup process on the official Cypress integration page.
Or skip the browser setup
If your goal is to capture a page rather than add visual assertions to a Cypress suite, ScreenshotNeo is a website screenshot API and MCP server. A single request can return an image or PDF:
Quick Recap
Rank #4
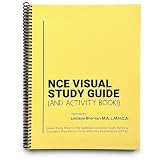
- This illustrated & interactive study guide for the National Counselor Exam (NCE) uses images, colors, mnemonics, and humor to engage brains in effective study.
- 150+ page activity book including coloring book pages, fill in the blank sheets, and tear-out flashcards with content addressing all domains covered in the NCE + CPCE counselor exams.
- Full size 8.5x11, spiral-bound for lie-flat studying.
- Printed on premium, 80lb textured paper you can color and highlight with no bleed.
- Drawn by (human!) hand. Printed and bound in the USA.
curl -G "https://api.screenshotneo.com/v1/shot" -d access_key=YOUR_API_KEY --data-urlencode url=https://stripe.com -o shot.webpSee the ScreenshotNeo API documentation for request options. ScreenshotNeo accepts cookie/consent banners and removes more than 60 known consent platforms, newsletter popups, and chat widgets before capture; those steps can be turned off. Bot checks, blank pages, timeouts, failed loads, and cache hits are not billed, and response headers identify the page verdict and billing status. An MCP server provides take_screenshot, get_page_info, and capture_pdf tools for AI agents. The free plan includes 1,000 screenshots per month with no card; paid plans start at $5 for 3,000 shots. Sign up for 1,000 free screenshots a month with no card.
Product prices and availability are accurate as of the date/time indicated and are subject to change. Any price and availability information displayed on Amazon at the time of purchase will apply.




