The Tool Desk
Outbyte PC Repair FREERepair Windows errors before they cause bigger problemsFix Now →Outbyte Driver Updater FREEScan for outdated or missing drivers - takes under a minuteDriver Scan →To use a custom VLC skin, download a .vlt skin, place it in VLC’s skins folder, switch the interface from native to skins in settings, and restart VLC. VideoLAN says VLC skins do not work on Mac OS X; its page does not provide a Mac workaround.
Before you start: check your platform
VideoLAN’s official VLC skins page says: “Skins do not work on Mac OS X!” The page does not describe a workaround, so these instructions apply to Windows and Linux/Unix rather than promising custom skins on macOS.

As an Amazon Associate I earn from qualifying purchases.
Download a skin from the official skins page. It lists individual skins as well as a pack of skins, which VideoLAN describes as updated daily. A skin is a package VLC can load; you do not need to edit XML or build anything to install an existing one.
Crashes, No Sound, or Screen Glitches?
Random freezes, missing sound and display glitches usually trace back to one bad driver. Find and replace yours safely.Free scan · under a minuteWindows Errors? Fix Them Before They Spread
Repair common Windows errors and clear accumulated junk for a smoother, more stable PC - no reinstall needed.Free scan · no reinstallInstall a skin on Windows or Linux/Unix
- Download the skin. Choose a skin from VideoLAN’s VLC skins page. The skin package commonly uses the
.vltextension. - Put the VLT file in VLC’s skins folder.
- Windows: place it in the
skinsfolder under the VLC installation directory. VideoLAN givesC:Program FilesVideoLANVLCskinsas an example, not a universal path. If you installed VLC elsewhere, use that installation’sskinsfolder. - Linux/Unix: VideoLAN lists
~/.local/share/vlc/skins2.
- Windows: place it in the
- Switch VLC to skins mode. Open VLC settings, change the interface from native to skins, then restart VLC. VideoLAN says a restart is required to change to skins mode.
VideoLAN’s page does not give separate paths for every Linux distribution, package format, or customized Windows installation. If your install does not use the listed location, consult its packaging or installation details rather than assuming the example path applies.
#1 Best Overall

- You don’t need to change the Music with your fingers. This bluetooth remote control can scroll the pause/play Music APP. Next Prevtrack,Volume yp or down,mute etc. Of course, it is a good helper for you to take selfie or videos.
- capture stunning photos&video remotely with easy - Say goodbye to blurry photos. Eliminate camera shake for razor crisp photos every time. Snap photos and Start/Stop video recording with the click of a button.
- 【!!!You must read it if your device is Iphone or Ipad etc. IOS system devices】!!! TThe" Home "button not fit for Ios System like iphone ipad itouch.
- It is follow ergonomic. Comfortable hand feeling. Pleasant sound of silicone keypad built-in light strength pot piece .High grade acrylic panel. Standby time more than one year
- There is a call answer and end button
Choose or change the active skin
After VLC has restarted in skins mode, choose the skin in settings. You can also right-click somewhere on the skinned VLC interface and select Interface > Choose Skin. If the skin you just downloaded is not listed, confirm the VLT file is in the appropriate folder and restart VLC after adding it.
What a VLC skin file contains
VideoLAN’s skin-creation guide describes skins as artwork and structure, including image resources and an XML file that defines layout and behavior. It says VLC can load skin archives directly and recommends the .vlt extension for archive packages, partly because some skin-change dialogs filter for .vlt or .xml. The guide is older technical documentation (copyright 2004–2013), so it is best treated as background rather than a current troubleshooting manual.
Making your own skin
If you want to create rather than install a skin, VideoLAN describes its VLC Skin Editor as a WYSIWYG tool intended to make skin creation possible without learning the internal file structure. Its page lists Java Runtime Environment 6 or later as a requirement; that is the requirement stated on the page, not confirmation that the editor is currently maintained or compatible with modern Java releases. The creation guide also describes image, font, and XML elements and links to VLC’s skin-format documentation.
For ordinary installation, you can skip the editor and XML work: download a skin package, place it in the correct folder, switch the interface to skins, and restart VLC.
Quick Recap
Best Value

- Original and Easy to use, No need to program this replacment remote, work directly after you install the batteries.
- This remote control compatible with below knowing Android TV Box models: For T95, T95 MAX, T95Z Plus, T95K T95V T95U T95W Pro, T95 X2, Qbox, Q Plus, X96, H96, MX1, MX10, T9, TX3, TX6, H50, X88, HK1
- This replaced remote control made of high quality ABS material, Wear resistant andDurable, reliable to use.
- Package included: 1x TV box remote control (NO battery NO instruction in the package).
- We provide 18-monthsWarranty and friendly customer service, if you have any quality problems, please feel free toContact us.
Rank #4

- Multi-Device Compatibility: This V3 Pro Voice Remote is compatible with vSeeBox select models, including vSeeBox V5 Pro, V3 Plus, V3 Pro, V2, V2 Pro, V1, V1 Pro, V1 Max, Elite, Max. Note: V1 Max, V1 Pro, and V2 Pro do not support voice command functionality.
- Two operating modes: The V3 Pro voice remote features V3 operating mode and V2 operating mode. Press and hold the number 5 key for over ten seconds to switch modes. V3 Pro operating mode is compatible with V3 Pro; V2 Pro operating mode is compatible with V1 Pro, V2 Pro, Max, and Elite. Compatible with vSeebox V3 remote controls default to V3 operating mode. If you have a V1 Pro, V2 Pro, Max, or Elite, press and hold the number 5 key for over 10 seconds. When the indicator light flashes, it indicates you have switched to V2 mode.
- Pairing Method: Press and hold the [OK] and [Vol-] buttons on the V3 Pro Voice Remote simultaneously for at least 5 seconds. The LED indicator will flash rapidly. Release the buttons to enter pairing mode. Once pairing is successful, the LED indicator will turn off. If pairing fails, the LED indicator will turn off after 30 seconds and automatically exit pairing mode. If pairing fails, please first remove the old device from the system, then repeat the steps.
- Outstanding performance: The V3 Pro voice remote control has excellent performance, can stand by for about 6 months, has ultra-low power consumption, and is more energy-efficient. The V3 Pro voice remote control has a precise control distance of over 25 feet, and the total number of key clicks can exceed 160,000. High quality is only for you to enjoy the quality experience, so you no longer need to worry about finding a durable remote control.
- Worry-Free Shopping: Should you have any questions during the purchase or use of our V3 Pro Voice Remote, please log in to your Amazon buyer account > click Your Account > Your Orders > Contact Seller for the fastest assistance. We will provide a solution within 24 hours until your issue is resolved!
Rank #3
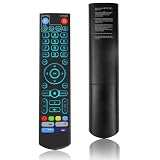
- [Wide Compatibility] V5 Pro Backlit Voice Remote is compatible with vSeeBox models, Applicable to V5 Pro/V3 Pro/V3 Plus/V1/V1 Pro/V2/V2 Pro/V1 Max/Elite/Max.Crafted from ABS plastic and silicone, v5 remote offers exceptional comfort and durability. Utilizing infrared technology, it delivers extended transmission range (over 40 feet), rapid response time (as fast as 0.2 seconds), and key durability tested for over 120,000 clicks.
- [Quick Pairing] Simultaneously press and hold the OK and Vol- buttons (approximately five seconds) until remote's indicator light flashes continuously, indicating Bluetooth is enabled on the V5 Pro remote. Navigate to System Settings- Bluetooth - Pair New Device, locate the remote, and connect to device. If pairing fails, please remove the old device from the system first, then follow the steps again.This voice remote features V3 and V2 operating modes. Press and hold the number 5 button for over ten seconds to switch modes. (Default mode: V3)
- [Premium Features] V5 Pro Voice Remote Control features illuminated buttons. When buttons are hard to see at night, touch any button to activate the backlight for easier visibility. Its voice control is exceptionally convenient—use voice commands to switch channels, adjust volume, or search for movies.. (Note: Voice control is not supported on some models.)
- 【Programming Instructions】1. Press and hold the Power button for 5 seconds until the LED stays lit; 2. Press the button within the V5 remote control area to program; 3. Align the V5 remote control face-to-face with the remote, then press the button. If programming succeeds, the LED will flash 3 times; 4. Repeat steps 2-3 to program remaining buttons; 5. Press any other button to exit learning mode, LED turns off.
- [Perfect After-Sales Service] For pairing issues or inquiries about V5 Pro Backlit Voice Remote, log into your Amazon buyer account - click "Account - Orders - Contact Seller" for the fastest response. We guarantee solutions within 24 hours until your issue is resolved!
Product prices and availability are accurate as of the date/time indicated and are subject to change. Any price and availability information displayed on Amazon at the time of purchase will apply.




