The Tool Desk
Outbyte Driver Updater FREEScan for outdated or missing drivers - takes under a minuteDriver Scan →Outbyte PC Repair FREERepair Windows errors before they cause bigger problemsFix Now →Linux exposes hard disk details through several layers: block device listings, partition tools, udev metadata, kernel messages, and drive firmware utilities. With the right commands, you can identify a disk’s model, serial number, capacity, transport type, partition layout, filesystem usage, health status, firmware version, and performance-related capabilities.
Before checking specs, it is essential to confirm the correct device name, such as /dev/sda, /dev/nvme0n1, or /dev/sdb, especially on systems with mulle internal, USB, SATA, or NVMe drives. Many read-only commands work as a normal user, but hardware-level queries often require sudo and packages such as smartmontools, hdparm, or lshw.
As an Amazon Associate I earn from qualifying purchases.
Identify Disk Devices and Names
Before checking model numbers, SMART data, partitions, or performance details, first identify the Linux device name for the disk you want to inspect. Linux exposes storage devices under /dev, commonly as /dev/sda, /dev/sdb, and so on for SATA, SAS, USB, and many virtual disks. NVMe drives usually appear as /dev/nvme0n1, /dev/nvme1n1, with partitions such as /dev/nvme0n1p1. Older MMC or SD card storage may appear as /dev/mmcblk0 with partitions like /dev/mmcblk0p1.
Do these 3 things before closing this tab:
1Scan for outdated or missing drivers - takes under a minute2Clear out junk files and repair common Windows errors3Fix the driver behind crashes, sound loss and screen glitchesA practical first command is lsblk, which displays block devices in a tree so you can see disks, partitions, mount points, and sizes together:
#1 Best Overall

- 2.5" SATA Drives Only — SSD & HDD: Compatible with 2.5" SATA I/II/III SSDs and laptop HDDs. NOT compatible with: M.2 NVMe drives, M.2 SATA drives, 3.5" desktop HDDs, or slim SATA optical drives. Verify your drive has a standard 2.5" SATA connector before purchasing.
- USB Bus-Powered — No Adapter Needed for Most Drives: Powers most 2.5" SATA SSDs and laptop HDDs directly from USB. Note: Some older or high-capacity 2.5" mechanical HDDs may draw more current than a single USB port provides — if a drive fails to spin up, try a powered USB hub or a different USB 3.0 port.
- USB 3.0 (USB-A) — 5Gbps with UASP: Host connection is USB Type-A (USB-A). Computers with only USB-C ports require a separate USB-C to USB-A adapter (not included). UASP support for faster transfers on compatible systems.
- Plug & Play: No drivers required; hot-swappable design for quick access to drives on Windows, macOS, and Linux
- Usage Note: Not intended for all configurations such as system boot drives or certain embedded systems; compatibility may vary by device
lsblk -o NAME,TYPE,SIZE,MODEL,SERIAL,TRAN,MOUNTPOINTS
In the output, entries with TYPE set to disk are whole drives, while part entries are partitions. The TRAN column can help distinguish sata, usb, nvme, or other connection types, and MOUNTPOINTS shows which partitions are actively mounted. If MODEL or SERIAL appears blank, try running the command with elevated privileges: sudo lsblk -o NAME,TYPE,SIZE,MODEL,SERIAL,TRAN,MOUNTPOINTS.
List disks without partitions
When you only want whole disks, use lsblk -d. This is useful on systems with many partitions, LVM volumes, or loop devices:
lsblk -d -o NAME,SIZE,MODEL,SERIAL,TRAN,ROTA
The ROTA column indicates whether the device is rotational: 1 usually means a spinning hard disk, while 0 usually indicates an SSD, NVMe drive, or flash device. This is not a full specification report, but it is a quick way to separate HDDs from solid-state storage.
Free tools Windows power users keep installed
One-click scans. No signup required.
Use stable device paths
Names such as /dev/sda can change after rebooting, adding a USB disk, moving drives between ports, or changing controller order. For scripts, maintenance s, and safer identification, check the persistent links under /dev/disk/:
/dev/disk/by-id/lists devices by hardware identifiers such as vendor, model, serial number, and WWN./dev/disk/by-uuid/lists filesystems by UUID, useful for mount configuration./dev/disk/by-label/lists filesystems by label, if labels exist./dev/disk/by-path/identifies drives by controller path and port, useful when tracing physical connections.
For example, run ls -l /dev/disk/by-id/ to see which persistent identifier points to ../../sda or ../../nvme0n1. This is often the safest way to confirm that the disk you are about to inspect is the intended physical drive.
Check mounted filesystems and device usage
To see which device backs a mounted filesystem, use:
df -hT
This shows filesystem type, used space, available space, and mount point. It is helpful when you know a path such as /var, /home, or /mnt/backup and need to trace it back to a block device. For a more direct lookup, use findmnt:
findmnt /

findmnt /home

findmnt /mnt/backup
On systems using LVM, device mapper, RAID, or encryption, the mounted device may be something like /dev/mapper/vg0-root rather than a physical disk. In that case, run lsblk and follow the tree upward to find the underlying drive, such as /dev/sda, /dev/nvme0n1, or a member of an mdadm RAID array.
Check Basic Disk Size, Model, and Transport Details
After you know the correct device name, the quickest way to inspect basic disk specifications is with lsblk. It reads kernel block-device information and presents it in a practical layout, including size, vendor, model, rotational status, and connection type. For a broad overview of all disks, run lsblk -d -o NAME,SIZE,MODEL,SERIAL,ROTA,TYPE,TRAN. The -d option hides partitions so you can focus on whole drives such as sda, nvme0n1, or vda. The TRAN column may show values such as sata, usb, nvme, or virtio, depending on how the device is attached.
For a single disk, specify the device path to reduce clutter. For example, lsblk -d -o NAME,PATH,SIZE,VENDOR,MODEL,SERIAL,REV,ROTA,TRAN /dev/sda shows a concise hardware-oriented view of /dev/sda. The ROTA value is also useful: 1 normally indicates a spinning hard disk, while 0 usually indicates an SSD, NVMe device, virtual disk, or flash storage. This is not a benchmark, but it is a fast way to separate HDDs from solid-state devices when checking a mixed system.
Useful lsblk columns for disk specs
| Column | Meaning | Example |
|---|---|---|
NAME |
Kernel block device name | sda, nvme0n1 |
SIZE |
Advertised block device size | 931.5G, 1.8T |
MODEL |
Drive or virtual device model string | Samsung SSD 870 |
SERIAL |
Device serial number, when exposed | S5XXXXXXXX |
ROTA |
Rotational flag | 1 for HDD, 0 for non-rotational |
TRAN |
Transport or bus type | sata, usb, nvme |
Another built-in command for basic capacity and sector information is blockdev. It is less descriptive than lsblk, but useful when you need exact byte counts or sector sizes. For example, sudo blockdev --getsize64 /dev/sda prints the disk size in bytes, while sudo blockdev --getss /dev/sda shows the al sector size. On many systems these queries work without elevated privileges, but using sudo avoids permission differences across distributions and device policies.
Windows Errors? Fix Them Before They Spread
Repair common Windows errors and clear accumulated junk for a smoother, more stable PC - no reinstall needed.Free scan · no reinstallCrashes, No Sound, or Screen Glitches?
Random freezes, missing sound and display glitches usually trace back to one bad driver. Find and replace yours safely.Free scan · under a minuteRank #2
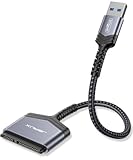
- 【Important Note】: Can not available for 3.5” hard drive. Not compatible with ATA(IDE), MSATA, and M.2 interfaces. No power adapter included. Please confirm your hard drive type before purchase
- 【Quickly Access a SATA SSD or HDD】: Add drive space to your laptop by connecting to a SATA 2.5" SATA SSD or HDD using this SATA to USB cable. You can connect to an external drive to add storage, perform backups, create disk images, implement data recoveries, and transfer content to your laptop
- 【5Gbps High Speed Output】: The SATA to USB adapter supports USB 3.0 super speed data transfer up to 5Gbps, but you can experience transfer speeds up to 70% faster than conventional USB 3.0 when connected to a computer that also supports UASP
- 【Slim and Portable】: The usb to sata adapter designed as portable as possible and tucks easily into the pocket of your laptop bag, you can use it anywhere with no external power required ( 2.5" SSD/HDD Only)
- 【Save Time】: The hard drive transfer cable lets you easily swap between drives with no need to install the drive inside an enclosure. It’s plug-and-play and doesn’t require drivers
For SCSI, SATA, USB storage, and many virtual disks, cat /sys/block/sda/device/model and cat /sys/block/sda/device/vendor can also reveal the model and vendor directly from sysfs. Transport details can often be cross-checked with ls -l /sys/block/sda, because the symlink path usually includes hints such as usb, ata, or a PCI controller path. NVMe devices expose similar identity clues under paths such as /sys/block/nvme0n1/device/model, /sys/block/nvme0n1/device/serial, and /sys/block/nvme0n1/device/firmware_rev.
If a field appears blank, it does not always mean the information is unavailable from the drive itself. USB adapters, RAID controllers, hypervisors, and some storage enclosures may hide model, serial, firmware, or transport data from normal kernel interfaces. In that case, compare lsblk output with hardware-focused tools covered later, such as udevadm, lshw, smartctl, or interface-specific utilities for NVMe and SATA drives.
View Partition Tables and Filesystem Information
After identifying the disk name, inspect its partition table to see how the device is divided and which filesystems are present. This is different from checking the drive model or transport type: partition tools describe the al layout, such as GPT or MBR labels, partition sizes, filesystem types, mount points, UUIDs, and boot or EFI partitions. Run these commands against the correct whole-disk device, such as /dev/sda, /dev/nvme0n1, or /dev/vda, rather than guessing from a mounted directory.
The most convenient starting point is lsblk. It shows disks, partitions, filesystems, labels, UUIDs, and mount points in a tree, making it easy to connect a physical disk to the volumes currently in use. For a compact overview, use lsblk -f. For more detail, specify the columns you want:
Recommended Free Tools
lsblk -o NAME,TYPE,SIZE,FSTYPE,FSVER,LABEL,UUID,PARTUUID,MOUNTPOINTS

lsblk -o NAME,MODEL,SERIAL,SIZE,TYPE,FSTYPE,MOUNTPOINTS /dev/sda
In the output, entries with TYPE set to disk are whole devices, while part entries are partitions. On NVMe drives, partitions are named with a p separator, such as /dev/nvme0n1p1. On SATA, USB, and many virtual disks, partition names usually look like /dev/sda1 or /dev/vda2. The MOUNTPOINTS column is especially useful on systems using bind mounts, snapshots, or mulle mount locations.
Inspect the partition table with fdisk, parted, and sfdisk
To view the partition table itself, use fdisk for a familiar sector-based listing. Reading partition information is safe, but it may require root privileges depending on the system:
sudo fdisk -l /dev/sda

sudo fdisk -l /dev/nvme0n1
fdisk reports the disk size, sector size, disklabel type such as gpt or dos, disk identifier, and each partition’s start and end sectors. For script-friendly output, sfdisk can print the same kind of layout in a format that is easier to parse or save:
sudo sfdisk -l /dev/sda
parted is useful when you want clear size units and GPT details. The following command prints the partition table without entering an interactive prompt:
sudo parted /dev/sda print

sudo parted -l
parted -l lists all detected disks, which is helpful when comparing several attached drives. Look for flags such as boot, esp, bios_grub, raid, or lvm. These can reveal whether a disk contains an EFI System Partition, legacy boot area, Linux RAID member, or LVM physical volume.
Check filesystem type, UUID, and labels
For filesystem metadata, blkid is a direct and reliable tool. It reads signatures and reports fields commonly used in /etc/fstab, including UUID, LABEL, TYPE, PARTUUID, and PARTLABEL:
sudo blkid

sudo blkid /dev/sda1

sudo blkid /dev/nvme0n1p2
This helps distinguish a partition’s filesystem from its partition-table type. For example, a GPT partition may have a partition type indicating “Linux filesystem,” while the actual filesystem detected by blkid might be ext4, xfs, btrfs, vfat, ntfs, or swap. If a partition is part of LUKS encryption, LVM, or RAID, blkid may show crypto_LUKS, LVM2_member, or linux_raid_member instead of the filesystem inside the container.
Rank #3

- Easy Hard Drive Access: The SATA to USB 3.0 adapter allows you to connect a 3.5"/2.5" SSD HDD with your computer to expand storage, upgrade the system, back up files, retrieve and recover data
- 5Gbps with UASP Accelerated: This external SATA hard drive reader supports data transfer speed up to 5 Gbps. Equipped with UASP technology, which is 70% faster than traditional USB 3.0 and reduces 80% required processor resources
- Plug & Play Simple Operation: No need to install a driver , just plug and play. Hot-swap supported. Always eject the hard drive safely before unplugging the IDE to USB adapter from your computer in case of data loss
- 12V 2A Power Adapter Included: This SATA to USB cable is equipped with a DC-Jack port and comes with a 12V/2A Power Adapter, which ensures enough power supply for a 3.5" hard dr
- Wide Compatibility: This SATA III to USB 3.0 adapter is compatible with PS4, Xbox, Windows 10/8.1/8/7/Vista/XP, Mac OS. Supports 2.5"/3.5 '' SATA HDD SSD up to 20TB max. Compatible with WD Blue 3.5 HDD, Crucial MX500 SSD, Samsung 860 EVO SSD 2.5 etc
To see what is currently mounted, combine partition data with findmnt. It shows the active mount tree, source devices, filesystem types, and mount options:
findmnt

findmnt -o SOURCE,TARGET,FSTYPE,SIZE,USED,AVAIL,OPTIONS

findmnt /home
For space usage on mounted filesystems, df -hT adds filesystem type information to the usual capacity report:
df -hT
Together, lsblk, fdisk or parted, blkid, findmnt, and df give a practical view of both the partition layout and the filesystems Linux is using. Use read-only listing commands first, double-check whether you are targeting a disk or a partition, and avoid interactive write commands unless you intend to modify the partition table.
Get Hardware Details with udevadm and lshw
After checking device names with tools such as lsblk, fdisk, or parted, you can dig further into hardware metadata with udevadm and lshw. These tools show how Linux identified the disk, which driver and bus it uses, and what persistent device links are available. That is useful when you need to distinguish two similar drives, confirm whether a disk is attached through SATA, NVMe, USB, or a virtual controller, or map a device such as /dev/sdb back to a physical slot or enclosure.
The udevadm command queries the Linux device manager database. It is usually available by default on systemd-based distributions. To inspect a disk, run it against the block device name, for example:
Quick wins for a faster PC:
Scan for outdated or missing drivers - takes under a minuteDriver Scan →Repair Windows errors before they cause bigger problemsFix Now →Fix the driver behind crashes, sound loss and screen glitchesFind Drivers →udevadm info --query=all --name=/dev/sdb
The output can include properties such as ID_MODEL, ID_SERIAL, ID_VENDOR, ID_BUS, ID_PATH, ID_WWN, and DEVLINKS. The ID_SERIAL field is often the most convenient identifier for scripting, while ID_PATH can help identify the physical connection path, such as a PCI controller, USB bridge, or SATA port. The DEVLINKS field lists stable names under /dev/disk/by-id/, /dev/disk/by-path/, and sometimes /dev/disk/by-uuid/. These links are safer than relying on /dev/sdb, which can change after rebooting or adding hardware.
Useful udevadm queries
udevadm info --query=all --name=/dev/nvme0n1shows all known udev properties for an NVMe disk.udevadm info --attribute-walk --name=/dev/sdawalks up the device tree and displays kernel attributes from the disk and its parent devices.ls -l /dev/disk/by-id/lists persistent disk names based on model, serial number, WWN, or USB bridge data.ls -l /dev/disk/by-path/lists persistent names based on the hardware path, such as controller and port location.
For a broader hardware inventory, use lshw. It may already be installed on some distributions; otherwise, install the package named lshw with your package manager. Running it with administrative privileges gives more complete results, especially for serial numbers and bus details:
sudo lshw -class disk -class storage
This command reports storage controllers and disk devices in a readable tree. For each disk, you may see the product name, vendor, al name, size, bus info, firmware version, serial number, sector size, and capabilities. A SATA disk might appear under a storage controller with bus information such as scsi@2:0.0.0, while a USB-attached drive may show a USB parent device. NVMe drives can appear with PCI bus details, depending on the distribution and kernel.
Readable and script-friendly lshw formats
sudo lshw -class diskshows disk devices only.sudo lshw -class storageshows storage controllers, including SATA, RAID, USB, and NVMe controllers.sudo lshw -short -class diskgives a compact table with hardware paths, device names, and descriptions.sudo lshw -json -class diskoutputs JSON for automation or inventory collection.
When comparing udevadm and lshw, use udevadm when you need exact kernel and udev properties for a specific device, especially persistent names and connection paths. Use lshw when you want a human-readable hardware overview that ties disks to controllers. On servers with many drives, combine both: identify the candidate device with lsblk, confirm stable identifiers with udevadm, then use lshw to view the surrounding controller and bus information.
What’s actually slowing this PC down?
Pick the symptom - the matching free tool is one click away.
Read SMART Health, Serial Number, and Firmware Data
SMART data is the best place to check a disk’s built-in health status, serial number, firmware revision, power-on hours, temperature, error counters, and self-test history. On most Linux systems, this is handled with smartmontools, which provides the smartctl command. Install it with your package manager, for example sudo apt install smartmontools on Debian or Ubuntu, sudo dnf install smartmontools on Fedora, or sudo pacman -S smartmontools on Arch Linux.
First, identify the correct disk device, such as /dev/sda, /dev/sdb, or /dev/nvme0n1, using commands like lsblk -o NAME,SIZE,MODEL,SERIAL,TRAN. Then query the drive with elevated privileges. For a SATA or SAS disk, run sudo smartctl -a /dev/sda. For an NVMe drive, run sudo smartctl -a /dev/nvme0n1. The -a option prints the full available report, including identity, health assessment, SMART attributes, error logs, and self-test logs where supported.
Rank #4

- SATA DRIVES ONLY — 2.5in & 3.5in: Works with SATA I/II/III hard drives and SSDs. Does NOT support IDE/PATA, M.2 NVMe, M.2 SATA, SAS, or drives already in a USB enclosure. Check your drive's connector before ordering — a bare SATA drive has a wide flat L-shaped edge connector, not a ribbon cable or a small M.2 gold-finger card.
- USB TYPE-A HOST CABLE — NOT A USB-C PORT: The included host cable ends in USB Type-A and plugs into a USB 3.0 Type-A port. If your computer has only USB-C ports, you will need a USB-C to USB-A adapter, which is not included. For stable operation plug directly into the computer — USB hubs and USB 2.0 ports may cause intermittent disconnections.
- REAL-WORLD SPEED, NOT INTERFACE MATH: USB 3.0 with UASP support (UASP-capable host required). Typical mechanical HDD transfer speeds are 100-160 MB/s, which is the drive's own limit, not the port's; SSD speeds vary up to the USB interface maximum. Backward compatible with USB 2.0 and USB 1.1.
- 12V POWER ADAPTER INCLUDED — REQUIRED FOR 3.5in DRIVES: A 12V/2A AC power adapter is in the box and a wall outlet is needed. 3.5in HDDs cannot run on USB power alone — without the adapter the drive will fail to spin up or drop out during use. 2.5in drives are generally bus-powered, but the adapter is recommended for stability.
- PLUG AND PLAY, TOOL-FREE, HOT-SWAP: No drivers on Windows 10/11, macOS, or Linux. Lay-flat bay accepts a bare drive without tools, swaps without rebooting, and an LED shows power and activity. Note: S.M.A.R.T. diagnostics are not passed through the USB bridge, and on macOS a drive may need remounting after sleep. Drive not included.
Fields to look for in smartctl output
- Device Model or Model Number: the vendor model string, useful for matching the physical disk to vendor documentation.
- Serial Number: the manufacturer serial number, often needed for inventory, warranty checks, and replacing the correct drive.
- Firmware Version: the installed drive firmware revision.
- User Capacity: the advertised disk size in bytes and TB or GB.
- SMART overall-health self-assessment test result: a high-level pass or fail status for many ATA disks.
- Power_On_Hours: total powered-on lifetime for the device.
- Temperature_Celsius or NVMe temperature fields: current operating temperature.
- Reallocated_Sector_Ct, Current_Pending_Sector, and Offline_Uncorrectable: sector-related indicators commonly reviewed on HDDs and SATA SSDs.
- Percentage Used: an NVMe wear estimate that indicates consumed endurance.
A typical SATA command is sudo smartctl -a /dev/sda. To show only drive identity and SMART capability information, use sudo smartctl -i /dev/sda. To check health with less output, use sudo smartctl -H /dev/sda. To print SMART attributes on ATA drives, use sudo smartctl -A /dev/sda. For NVMe devices, sudo smartctl -a /dev/nvme0n1 displays controller identity, serial number, firmware revision, temperature sensors, unsafe shutdown count, media errors, data units read and written, and available spare information.
SMART can also run built-in self-tests. A short test usually takes a few minutes: sudo smartctl -t short /dev/sda. A long test scans much more of the device and can take hours on large disks: sudo smartctl -t long /dev/sda. After the estimated completion time, view results with sudo smartctl -l selftest /dev/sda. These tests are performed by the drive firmware and normally do not destroy data, but they can add I/O load, so schedule long tests carefully on busy systems.
USB adapters can hide SMART data or require an explicit device type. If smartctl reports that SMART support is unavailable for a USB-attached disk, try sudo smartctl -a -d sat /dev/sdb. Some bridge chipsets need another type such as -d scsi, -d ata, or a vendor-specific mode listed in man smartctl. Hardware RAID controllers may also require controller-specific syntax, because the visible device may be a virtual volume rather than the physical disk.
Inspect SATA, NVMe, and USB Drive-Specific Information
After you know the correct device name, use interface-specific tools to see details that generic commands may hide. SATA disks, NVMe SSDs, and USB-attached drives expose different identifiers, protocol features, queue settings, and health fields. Always verify the target first with lsblk -o NAME,MODEL,SERIAL,SIZE,TRAN,TYPE,MOUNTPOINTS so you do not query or benchmark the wrong disk. Most low-level commands require root privileges, so run them with sudo.
SATA and SAS drives
For SATA drives such as /dev/sda, hdparm can show the drive model, serial number, firmware revision, supported DMA modes, write cache state, and transfer features:
sudo hdparm -I /dev/sdaprints ATA identity data, including model, serial, firmware, standards, security state, and supported features.sudo hdparm -tT /dev/sdaruns a simple cached and buffered read speed test. Use it when the system is otherwise idle for more consistent results.sudo smartctl -a /dev/sdashows SMART health, power-on hours, temperature, error logs, and SATA-specific attributes.
If a SATA drive sits behind a RAID controller or USB bridge, direct ATA commands may not work with the plain device path. In those cases, smartctl --scan often suggests the correct device type, such as -d sat, -d scsi, or a controller-specific option.
NVMe SSDs
NVMe disks appear as names such as /dev/nvme0n1, with partitions like /dev/nvme0n1p1. The nvme-cli package provides the most complete view of NVMe-specific data:
sudo nvme listlists NVMe namespaces with model, serial number, firmware, namespace size, and device path.sudo nvme id-ctrl /dev/nvme0shows controller details, including vendor, firmware, supported features, and power states.sudo nvme id-ns /dev/nvme0n1displays namespace size, logical block size, and metadata settings.sudo nvme smart-log /dev/nvme0reports temperature, percentage used, data units read and written, unsafe shutdowns, media errors, and warning status.
For NVMe, distinguish the controller device from the namespace. Commands that query the controller often use /dev/nvme0, while filesystem and partition commands usually use /dev/nvme0n1. SMART data can also be viewed with sudo smartctl -a /dev/nvme0, but nvme-cli exposes more NVMe-native fields.
USB-attached drives
USB external disks commonly appear as /dev/sdX, but the reported model may be the USB enclosure rather than the disk inside. Start with lsusb to identify the USB bridge chipset, then correlate it with block devices:
lsusblists USB devices by bus, device number, vendor ID, product ID, and product name.lsusb -tshows USB speed and driver path, such as 480M for USB 2.0, 5000M for USB 3.x Gen 1, or 10000M for USB 3.x Gen 2.udevadm info --query=property --name=/dev/sdbshows properties such asID_BUS=usb,ID_SERIAL, andID_USB_DRIVER.sudo smartctl -a -d sat /dev/sdbcan read SMART data through many USB-to-SATA bridges.
Some USB enclosures block SMART passthrough, report incomplete serial numbers, or hide the internal drive model. If smartctl fails, try sudo smartctl --scan and test the suggested -d option. For performance clues, combine lsusb -t with lsblk -o NAME,TRAN,ROTA,DISC-MAX,SIZE,MODEL: this helps separate slow spinning disks, SATA SSDs in USB adapters, and native USB flash drives.
Free tools Windows power users keep installed
One-click scans. No signup required.
Compare Quick Commands for Common Disk Detail Tasks
When you already know the disk name, such as /dev/sda, /dev/nvme0n1, or /dev/sdb, the fastest approach is to choose the command that matches the detail you need. Use whole-disk device paths for hardware information, not partition paths such as /dev/sda1, unless you are checking filesystems or mount points. Most read-only inventory commands work as a regular user, but hardware queries, SMART data, and some ATA/NVMe details usually need sudo.
Best Value

- QUICKLY ACCESS A SATA SSD OR HDD: Add drive space to your laptop by connecting to a SATA 2.5" SATA SSD or HDD using this SATA to USB cable. You can connect to an external drive to: add storage, perform backups, create disk images, implement data recoveries, and transfer content to your laptop. Cable will work ONLY with 2.5" SATA drives.❌3.5"/5.25" and M.2 drives are NOT SUPPORTED.
- SuperSpeed USB 3.0: Data transfer rates of up to 6Gbps only for SSD. USB 3.0 version, supports data transfer speeds up to 5 Gbps, Backward compatible with USB 2.0 / 1.1. (Note: actual rate will depend on the capability of your device.)
- UASP Function: Provides faster transfers up to 70% faster read speeds and 40% faster write speeds over traditional USB 3.0
- SAVE TIME: The hard drive transfer cable lets you easily swap between drives with no need to install the drive inside an enclosure. It’s plug-and-play and doesn’t require drivers.
- 18 MONTH WARRANTY - Exclusive BENFEI Unconditional 18-month Warranty ensures long-time satisfaction of your purchase; Friendly and easy-to-reach customer service to solve your problems timely.
| Task | Command | What to look for |
|---|---|---|
| List disks with size, model, and transport | lsblk -d -o NAME,SIZE,MODEL,SERIAL,TRAN,ROTA,TYPE |
Disk name, capacity, model, serial number, SATA/USB/NVMe transport, rotational flag |
| Show partition layout | lsblk -o NAME,SIZE,FSTYPE,LABEL,UUID,MOUNTPOINTS |
Partitions, filesystems, labels, UUIDs, and where they are mounted |
| Print partition table details | sudo fdisk -l /dev/sda |
Disklabel type, sectors, partition start/end offsets, partition type |
| Check filesystem metadata | sudo blkid /dev/sda1 |
Filesystem type, UUID, label, PARTUUID |
| Get udev hardware properties | udevadm info --query=property --name=/dev/sda |
ID_MODEL, ID_SERIAL, ID_BUS, ID_PATH, WWN values |
| Show detailed hardware inventory | sudo lshw -class disk -class storage |
Controller, bus path, product name, vendor, logical name, capabilities |
| Read SMART health and attributes | sudo smartctl -a /dev/sda |
Health status, power-on hours, reallocated sectors, temperature, firmware |
| Read NVMe controller and health data | sudo nvme id-ctrl /dev/nvme0sudo nvme smart-log /dev/nvme0 |
NVMe model, serial, firmware, temperature, percentage used, media errors |
| Check SATA drive parameters | sudo hdparm -I /dev/sda |
ATA model, serial, firmware, supported speeds, cache, security state |
For a quick one-screen inventory, start with lsblk -d -o NAME,SIZE,VENDOR,MODEL,SERIAL,TRAN,ROTA. The ROTA column is useful for separating spinning disks from SSDs: 1 usually means rotational media, while 0 usually means SSD or flash storage. The TRAN column helps distinguish internal SATA drives from USB adapters and NVMe devices, which matters because USB bridges sometimes hide SMART data or expose a different serial number than the actual drive.
For troubleshooting or asset records, combine commands rather than relying on a single source. For example, use lsblk to confirm the device name and size, udevadm to capture stable identifiers such as ID_SERIAL or ID_WWN, and smartctl -a to record firmware, health status, and lifetime counters. On NVMe hardware, prefer nvme id-ctrl and nvme smart-log for controller-native details; smartctl can also handle many NVMe devices, but the nvme-cli output maps closely to NVMe terminology.
Be careful when several disks have similar sizes or model names. Before running commands that target a specific drive, confirm the mapping with lsblk, findmnt, or df -h if mounted filesystems are involved. Avoid guessing from names such as /dev/sdb, since device letters can change after reboot, hot-plug events, or controller changes. For scripts and documentation, prefer persistent identifiers under /dev/disk/by-id/, especially when referencing a disk by serial number or WWN.
Frequently Asked Questions
How do I make sure I am checking the correct disk and not a partition?
Use lsblk -o NAME,SIZE,TYPE,MODEL,SERIAL,MOUNTPOINTS to see disks, partitions, sizes, models, and where each device is mounted. Whole disks usually appear as /dev/sda, /dev/nvme0n1, or /dev/vda, while partitions look like /dev/sda1 or /dev/nvme0n1p1. Before running commands that can change drive settings, confirm the device by comparing its size, model, serial number, and mounted filesystems.
Which command shows the hard disk model, serial number, and size quickly?
A good first command is lsblk -d -o NAME,SIZE,MODEL,SERIAL,TRAN, which lists only whole disks and shows common identifying fields. If the serial number is blank, try sudo smartctl -i /dev/sdX for SATA/SAS drives or sudo nvme id-ctrl /dev/nvme0 for NVMe drives. Some USB adapters hide serial numbers or report the adapter’s details instead of the actual disk.
Do I need sudo to view hard disk specifications on Linux?
Some basic information is visible without root using commands like lsblk, df -h, and cat /sys/block/sdX/device/model. More detailed hardware and health data usually requires elevated permissions, especially with smartctl, hdparm, udevadm, and lshw. If a command returns incomplete data or a permission error, rerun it with sudo.
How can I check whether a disk is SATA, NVMe, USB, or virtual?
Run lsblk -d -o NAME,TRAN,MODEL,SIZE and check the TRAN column for values such as sata, nvme, usb, or virtio. You can also inspect paths with udevadm info --query=property --name=/dev/sdX or use lshw -class disk for a hardware-oriented view. NVMe drives typically use names like /dev/nvme0n1, while SATA, USB, and many virtual disks often appear as /dev/sdX or /dev/vdX.
What is the best way to check disk health and SMART status?
Install smartmontools and run sudo smartctl -a /dev/sdX for SATA/SAS disks or sudo smartctl -a /dev/nvme0 for NVMe controllers. Look for the overall health result, reallocated or pending sectors on HDDs, media errors on SSDs, power-on hours, temperature, and wear indicators where available. If the drive is connected through USB, you may need a device type option such as -d sat, depending on the USB-to-SATA bridge.
Bottom Line
Linux gives you several reliable ways to inspect hard disk details, from quick built-in commands like lsblk, blkid, fdisk, and lshw to deeper tools such as smartctl and hdparm. Together, they can reveal the drive model, serial number, capacity, partition layout, interface, health status, and performance-related settings.
Start by identifying the correct device name with lsblk, then use read-only checks before running anything that can modify disks. For routine administration, install smartmontools and periodically review SMART data so you can spot failing drives before they cause downtime or data loss.
Quick Recap
Product prices and availability are accurate as of the date/time indicated and are subject to change. Any price and availability information displayed on Amazon at the time of purchase will apply.




