Recommended Free Tools
On Ubuntu, configure software RAID with Linux MD and mdadm. Use the Server installer for a guided setup, or the mdadm command line when you need exact partitioning, metadata, spares, or boot control. Before touching a partition table, make and test an independent backup: RAID can keep a system running after some disk failures, but it is not a backup.
Antihost offers Linux VPS plans with full root access, unlimited traffic on a 1 Gbps port and a 14-day free trial.
What Ubuntu software RAID does
RAID (Redundant Array of Independent Disks) combines multiple physical drives so Linux can present them as one logical device. Ubuntu’s software implementation is Linux MD, administered with mdadm. The array layer sits below a filesystem: you create or assemble an /dev/md* device, put a filesystem on that device, and mount the filesystem normally.
As an Amazon Associate I earn from qualifying purchases.
Outdated Drivers Are Slowing You Down
One free scan finds every outdated or missing driver and matches the right update for your exact hardware.Free scan · exact hardware matchWindows Errors? Fix Them Before They Spread
Repair common Windows errors and clear accumulated junk for a smoother, more stable PC - no reinstall needed.Free scan · no reinstallThe Ubuntu Community Help Wiki describes RAID as “a method of using multiple hard drives to act as one.” The same guide says the installer can create arrays, while “the mdadm CLI provides” full control. An array improves availability or capacity according to its layout; it does not protect against accidental deletion, corruption synchronized to every member, theft, fire, ransomware, or an administrator selecting the wrong disk.
Choose the RAID level before partitioning
Pick a layout from the workload and failure policy, not from a speed claim. The Ubuntu guide specifies the minimum member counts below. Actual throughput and latency depend on the drives, controller path, CPU, filesystem, queue depth, and workload; the cited Ubuntu material does not publish a universal performance ranking.
#1 Best Overall
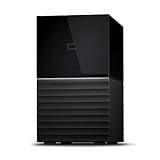
- Massive capacity storage with auto and system backup
- RAID-0 ready out of the box
- USB 3.1 Gen 1-ready, USB 3.0 compatibility
- 2x USB 3.0 hub ports
- 256-bit AES hardware encryption and password protection
| Level | Minimum devices | Usable capacity | Failed-device tolerance | Read/write behavior and rebuild exposure | Boot suitability |
|---|---|---|---|---|---|
| RAID0 (striping) | 2 | Approximately the number of members multiplied by the smallest member size | None; one failed member makes the array unavailable | Data is striped across members. It can increase parallelism, but every member is part of every file, so there is no redundancy and no degraded rebuild path. | Not a fault-tolerant boot design. Use only where data can be recreated and the firmware/boot layout has been validated. |
| RAID1 (mirroring) | 2 | Approximately the size of the smallest member | One failed member in a two-way mirror | Each member stores a copy. Reads may be served from either copy; writes must update all active copies. Rebuilding reads the surviving copy and writes a replacement. | The stock Ubuntu bootloader supports softRAID 1 for /boot, subject to a complete boot design and boot code on the required disks. |
| RAID5 (single parity) | 3 | Approximately (number of members minus one) multiplied by the smallest member size | One failed member | Parity permits recovery from one failure. Small random writes incur parity work, and the array is vulnerable to a second failure or an unrecoverable read error during a long rebuild. | The cited Ubuntu guide restricts the stock bootloader’s softRAID use for /boot to RAID1, so do not place /boot directly on RAID5 without a separately validated boot arrangement. |
| RAID6 (dual parity) | 4 | Approximately (number of members minus two) multiplied by the smallest member size | Two failed members | Dual parity gives more failure tolerance than RAID5, with additional parity calculation and write overhead. Rebuilds still consume I/O and should be monitored. | As with RAID5, plan a separate RAID1 or another installer/firmware design for /boot; the stock bootloader limitation still applies. |
Usable-capacity formulas are planning approximations. Metadata, filesystem overhead, and unequal member sizes reduce the space you can actually use. In normal arrays, the smallest participating partition determines the common member size, so deliberately equalize partitions or reserve the unused tail consistently.
Prerequisites and a safe disk plan
- Independent backup: Make a current backup to storage that is not part of the new array, and verify that you can restore representative files. Keep it available while repartitioning and during the first rebuild.
- Known hardware: Use enough physical drives for the chosen level. An Ubuntu Server installation ISO includes software-RAID options, but the installer cannot create an array when the machine does not expose enough usable devices.
- Verified identities: Record model, serial, size, transport, and current mounts with
lsblkandblkid. Linux names such as/dev/sdacan change when disks are added or firmware enumeration changes. - Consistent partitions: Create equivalent partitions on every member, with the same or deliberately planned size and alignment. Leave space for an EFI System Partition,
/boot, swap, metadata, or future replacement requirements as your design dictates. - Boot decision: Decide whether the operating system,
/boot, and data will be separate. The stock Ubuntu bootloader cannot use a softRAID level other than RAID1 for/boot. A data RAID5 or RAID6 therefore normally needs a separate RAID1 boot arrangement or another boot design tested on the target firmware. - Encryption interaction: Ubuntu 24.04 LTS release notes warn that TPM-backed full-disk-encryption kernel constraints can make hardware such as the
vmdmodule required for NVMe RAID unavailable in some configurations. Validate the exact NVMe, firmware, installer, and encryption combination before committing to that path.
Ubuntu 24.04 LTS receives security maintenance for five years, through 31 May 2029. Package names and installer labels can change in later releases, so confirm the labels shown by the release you are installing.
Create an array in the Ubuntu Server installer
The installer is suitable when you want guided partitioning and a conventional server layout. The following sequence follows the Ubuntu guide’s manual-partitioning path; wording can vary slightly by release.
- Boot the Ubuntu Server installation media and choose Manual or custom storage partitioning when prompted.
- On each intended disk, create equivalent partitions. Do not select an existing data partition unless you have already backed it up and intend to destroy its contents.
- Select Configure Software RAID and confirm the warning that the selected partitions will be used by an MD array.
- Choose Create new MD drive.
- Select the RAID type. The documented minimums are two drives for RAID0 or RAID1, three for RAID5, and four for RAID6.
- Set the number of active devices and, if your design uses them, dedicated spare devices. A spare remains unused until a member fails and recovery starts.
- Select the member partitions by identity, checking size and device details rather than relying on their order in the list.
- After the MD device appears, assign a filesystem and mount point. For example, a data array might use ext4 at
/srv/raid; an operating-system layout needs the separate EFI,/boot, root, and swap decisions made earlier. - Review the final storage summary carefully. Confirm that no source disk containing your backup or unrelated data is marked for formatting.
- Finish installation, reboot, and verify that the array assembles and the expected filesystems mount before copying important data.
For a non-RAID data array, the installer’s storage summary is not a substitute for a boot test. If the machine must start with one disk absent, remove that disk only during a controlled maintenance window after installing boot code on every disk your design requires.
Create and prepare an array with mdadm
The command line is preferable when you need a repeatable layout, explicit metadata choices, custom spare policy, or an array on an already installed system. “For those that want full control over the RAID configuration, the mdadm CLI provides this,” according to the Ubuntu guide.
1. Install the management tools
sudo apt install mdadmOn a server, accept the package’s configuration prompts only after you understand whether the array will be needed during early boot. The package supplies the administration commands and integration used to assemble arrays at startup.
Do these 3 things before closing this tab:
1Clear out junk files and repair common Windows errors2Fix the driver behind crashes, sound loss and screen glitches3Repair Windows errors before they cause bigger problemsRank #2
- Massive capacity storage with auto and system backup
- RAID-0 ready out of the box
- USB 3.1 Gen 1-ready, USB 3.0 compatibility
- 2x USB 3.0 hub ports
- 256-bit AES hardware encryption and password protection
2. Identify the exact member partitions
lsblk -o NAME,SIZE,TYPE,FSTYPE,MOUNTPOINTS
sudo blkid
Compare the output with the physical labels or serial numbers recorded during planning. Unmount anything that will become a member, stop services that write to it, and remove stale filesystem signatures only when you are certain the partition is disposable. Never substitute guessed /dev/sdX names in a destructive command.
3. Create the MD device
sudo mdadm --create /dev/md0 --level=1 --raid-devices=2 /dev/<partition1> /dev/<partition2>This is an illustrative RAID1 pattern, not a command to paste unchanged. Replace the device paths with the verified partitions and change --level, --raid-devices, spare arguments, and metadata settings to match the actual design. For RAID5 or RAID6, the number of listed member partitions must match the chosen active-device count. Creating an array writes metadata and makes the selected contents unavailable as ordinary files.
4. Watch initial synchronization
cat /proc/mdstat
sudo mdadm --detail /dev/md0
Creation may begin a consistency check or resync immediately. Keep monitoring until the state is clean or the operation reports completion. Do not treat a mounted, accessible filesystem as proof that redundancy is ready.
5. Make a filesystem and mount it
sudo mkfs.ext4 /dev/md0
sudo mkdir -p /srv/raid
sudo mount /dev/md0 /srv/raid
Choose the filesystem and mount point for the workload. Formatting the MD device destroys any data on it; do not run mkfs against a member partition or an existing array that contains data.
Free tools Windows power users keep installed
One-click scans. No signup required.
6. Persist assembly and mounting
Record the array’s UUID and member information in /etc/mdadm/mdadm.conf. The mdadm.conf(5) documentation describes ARRAY definitions and the configuration file’s role in assembly. A common discovery pattern is:
sudo mdadm --detail --scan | sudo tee -a /etc/mdadm/mdadm.confInspect the resulting file and remove duplicate or incorrect definitions rather than blindly appending repeatedly. Rebuild the initramfs when the array is required before the root filesystem is available:
Rank #3

- Up to 48TB (1) of max capacity on two 7200RPM Ultrastar Enterprise-class hard drives inside
- Ships in RAID 0 for improved performance with transfer speeds up to 540MB/s read and 490MB/s write (2) (48TB only)
- PRO-BLADE SSD Mag slot to easily add SSD capacity and performance for fast transfers, editing, and backup without adding to your workspace.
- Color-coded cable indicators to connect the right cables and get the most out of your device performance.
- High-performance Thunderbolt 3 (40Gbps) interface and USB 3.2 Gen 2x1 (10Gbps)
sudo update-initramfs -uUse the filesystem UUID or a deliberately chosen label in /etc/fstab, not an unstable member-device name. Obtain the UUID with blkid, add the intended mount options, then test without rebooting:
sudo mount -aResolve every error before placing production data on the mount. The correct metadata version, array name, filesystem, and boot arrangement depend on the host; there is no universal one-line configuration.
Verify health and monitor synchronization
Read the kernel status view
cat /proc/mdstatThis file lists active arrays, member counts, and operations such as resync, recovery, or check. A progress percentage and estimated finish time indicate that redundancy is still being rebuilt. A healthy two-member mirror commonly shows [UU]; a healthy three-member set can show [UUU]. A missing or failed member appears as a different marker, such as an underscore, and means the array is degraded even if the filesystem remains mounted.
Inspect detailed member state
sudo mdadm --detail /dev/md0Check the array state, active and working device counts, failed devices, spare devices, and each member’s role and state. Confirm that the UUID and level are the ones you intended. Keep logs and alerting available on servers; a degraded array should generate an operational response, not wait for the next manual inspection.
Test assembly before relying on the data
After recording the configuration and completing synchronization, reboot during a maintenance window and verify that the array assembles and the filesystem mounts. If an array is present but not automatically assembled, the Ubuntu guide documents:
sudo mdadm --assemble --scanUse this only after confirming that the discovered metadata belongs to the intended host. Investigate duplicate UUIDs, stale arrays, and incorrect initramfs contents instead of forcing an assembly that could expose the wrong device.
Rank #4
- Massive capacity storage with auto and system backup
- RAID-0 ready out of the box
- USB 3.1 Gen 1-ready, USB 3.0 compatibility
- 2x USB 3.0 hub ports
- 256-bit AES hardware encryption and password protection
Replace a failed RAID member safely
Replacement is a sequence of identification, removal, preparation, and monitored recovery. The most dangerous mistake is removing a healthy member or adding a disk that still carries metadata from another array.
- Confirm the failure. Run
sudo mdadm --detail /dev/md0and review system logs. Match the failed partition to the physical drive by serial, bay, or enclosure identifier. Do not infer identity from the current/dev/sdXletter alone. - Record the degraded state. Save the array UUID, level, member list, and current recovery status. Check that the remaining members are active before performing hardware work.
- Mark and remove the failed member. The Ubuntu guide documents the
--removeoperation. Use the exact failed partition shown bymdadm --detail; never remove a device merely because it is convenient to reach. - Install a compatible replacement. Match the interface and capacity requirements. The replacement partition must be at least as large as the array’s member partition and aligned with the other members. If the original disk held several RAID partitions, reproduce the complete partition scheme, including any separate boot or swap partitions required by the host.
- Clear stale metadata only after identification. Ensure the new disk is not part of another live array and wipe old signatures only when you have verified that it contains no needed data.
- Add the replacement. Use
sudo mdadm --add /dev/md0 /dev/<replacement-partition>with the real partition path. The array should transition into recovery or rebuild. - Monitor to completion. Watch
cat /proc/mdstat,sudo mdadm --detail /dev/md0, and system logs until the state is clean and all expected members are active. Rebuild speed competes with normal workload I/O; do not reboot or remove another member merely because progress is slow. - Restore boot resilience if needed. If the replaced disk is boot-capable, reinstall boot code on it according to your firmware and Ubuntu layout, then test a controlled boot with each intended boot disk available.
A spare can start recovery automatically, but it does not remove the need to replace the failed physical device and verify that the final partitioning and boot configuration are correct.
Booting Ubuntu from RAID and operating degraded
Data arrays and boot arrays have different constraints. The Ubuntu guide states: “the /boot filesystem cannot use any softRAID level other than 1 with the stock Ubuntu bootloader.” Therefore, a RAID5 or RAID6 data volume should normally be paired with a separate RAID1 arrangement for /boot, or with a firmware and installer design that has been validated specifically for that machine.
Install boot code on every disk that must boot independently. The Ubuntu guide gives grub-install examples for additional disks, but the exact target device, EFI System Partition handling, and UEFI versus legacy-BIOS procedure depend on the host. Confirm the firmware boot entries after installation; an array can be healthy while the machine still cannot start if only one disk contains usable boot code.
What’s actually slowing this PC down?
Pick the symptom - the matching free tool is one click away.
A degraded boot is a recovery operation, not a normal test to perform casually. Schedule it during maintenance, confirm a verified backup, document which disk is being removed, and ensure remote access or console access remains available. After the test, reassemble the array, replace the missing member if necessary, and wait for recovery to finish.
Troubleshooting common problems
| Symptom | Likely cause | Safe next action |
|---|---|---|
| The installer cannot create the selected array | Too few physical drives, partitions are not equivalent, or a partition is still mounted/in use | Return to storage details, verify the documented minimum device count, unmount or delete only the intended partitions, and recreate matching member partitions. |
| The array is accessible but shows degraded status | A member failed, was detached, or has a cabling/power problem | Use mdadm --detail and logs to identify the exact member, then stabilize hardware before removing or replacing anything. |
| Recovery does not start after adding a disk | The replacement partition is too small, has incompatible metadata, or was added to the wrong MD device | Check sizes, UUIDs, partition type, and the mdadm --detail member list. Remove the incorrect device only after confirming its identity, then repartition and add the correct one. |
| The filesystem does not mount after reboot | /etc/fstab uses an unstable device name, the array was not included in initramfs, or the UUID is wrong |
Boot into recovery or an alternate shell, inspect blkid, /etc/mdadm/mdadm.conf, and /etc/fstab, run mdadm --assemble --scan when appropriate, update the initramfs, and test mount -a. |
| Ubuntu boots only when one particular disk is present | Boot code or an EFI entry exists on only one disk | Install boot code on every intended boot disk, verify firmware entries, and perform a controlled single-disk boot test. |
| Resync is much slower than expected | Large members, busy application I/O, conservative rebuild settings, or a marginal disk | Keep monitoring instead of interrupting repeatedly. Check logs and drive health, schedule heavy workloads around the rebuild, and retain a backup because the array remains exposed until recovery completes. |
| The machine’s NVMe RAID setup fails only when encryption is enabled | TPM-backed full-disk-encryption kernel constraints can omit a required vmd module in some Ubuntu 24.04 configurations |
Validate the specific hardware, kernel, firmware, installer, and encryption combination before deploying; do not assume that a working unencrypted test proves the encrypted design works. |
Operational checklist
- Keep an independent, tested backup and document the restore procedure.
- Record array UUID, level, member serials, partition layout, filesystem UUID, mount point, and boot-disk policy.
- Use stable filesystem identifiers in
/etc/fstaband maintain/etc/mdadm/mdadm.conf. - Ensure initramfs contains the array definition whenever the array is needed during boot.
- Alert on degraded, failed, rebuilding, and checking states; review logs after every disk event.
- Replace failed members promptly, but only after confirming the failed partition and replacement identity.
- Do not treat a clean status as proof against deletion, corruption, or site-wide disasters; those still require independent backups.
- After upgrades or hardware changes, reboot during a maintenance window and verify assembly, mounts, and boot from the intended disks.
Final decision
For most Ubuntu servers that need simple disk-failure tolerance, a carefully planned RAID1 data or boot arrangement is the least complicated starting point. RAID5 or RAID6 can provide more usable capacity with parity, but they demand more members, parity work, and disciplined rebuild monitoring. RAID0 offers no protection and should be reserved for disposable or reproducible data. Whichever level you choose, partition consistently, identify disks by more than their Linux device letters, persist the MD and filesystem configuration, and verify recovery before the array holds irreplaceable data.
Quick Recap
Product prices and availability are accurate as of the date/time indicated and are subject to change. Any price and availability information displayed on Amazon at the time of purchase will apply.




