On many desktops and laptops, BIOS/UEFI decides which graphics controller initializes first—integrated graphics (iGPU) or a dedicated GPU (dGPU) like NVIDIA GeForce or AMD Radeon. Changing the default display adapter can fix “black screen,” enable the correct monitor output, or reduce power use by preferring iGPU.
Because every motherboard vendor labels settings differently, the real trick is finding the right option (often called Primary Display, Initial Display Output, or Graphics Device) and pairing it with the correct physical display port.
As an Amazon Associate I earn from qualifying purchases.
What Changing the Default Display Adapter in BIOS Actually Does
The setting controls which GPU gets initialized first during POST (power-on self-test) and which one BIOS uses for the early boot display. After Windows starts, the OS usually can use other adapters too, but the BIOS initialization order affects what you can see during boot and which monitor port works immediately.
The Tool Desk
Outbyte Driver Updater FREEScan for outdated or missing drivers - takes under a minuteDriver Scan →Outbyte PC Repair FREERepair Windows errors before they cause bigger problemsFix Now →This is especially important on systems with:
- iGPU + dGPU, where the motherboard can route video through both.
- Multiple display outputs (HDMI/DisplayPort on both motherboard and GPU).
- Hybrid graphics (often called Intel iGPU + NVIDIA/AMD dGPU).
- Headless or remote setups, where you need the correct adapter for KVM/monitor detection.
When You Should Change It (and When You Shouldn’t)
Changing the default adapter helps most when you’re hitting boot-display issues or want predictable monitor behavior.
#1 Best Overall
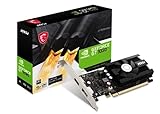
- Chipset: NVIDIA GeForce GT 1030
- Video Memory: 4GB DDR4
- Boost Clock: 1430 MHz
- Memory Interface: 64-bit
- Output: DisplayPort x 1 (v1.4a) / HDMI 2.0b x 1
- Change it if you can’t see BIOS/POST on the monitor plugged into a specific port.
- Change it if Windows boots but the monitor shows “No Signal” until you move cables.
- Change it if you want iGPU-first for lower power on Intel/AMD systems.
- Don’t change it if your current setup works and you don’t need anything BIOS-specific.
Prerequisites Before You Start
Before touching BIOS, collect a few details so you don’t guess blindly.
- Know your GPU types: iGPU (Intel UHD/Iris Xe or AMD Radeon iGPU) and dGPU (NVIDIA GeForce/RTX or AMD Radeon).
- Know which port your monitor uses (HDMI/DisplayPort). If your monitor is plugged into the motherboard, it typically relies on iGPU; if it’s plugged into the GPU, it relies on dGPU.
- Have a recovery plan: clear CMOS access method (jumper or button), and ideally a second display port if you have one.
- Update BIOS first (optional but smart): if you’re on an older UEFI version and the option behaves strangely, updating can fix missing settings. Don’t do risky BIOS updates right before other troubleshooting.
Find the Right Setting in BIOS/UEFI
Different BIOS vendors use different names. Look for terms like these:
| Common setting names | What it usually means |
|---|---|
| Primary Display | Which GPU BIOS uses as the first output |
| Initial Display Output | Which graphics output BIOS initializes (often iGPU vs PCIe) |
| Graphics Device | Initializing iGPU vs PCIe GPU |
| IGD Multi-Monitor | Enables multiple displays on iGPU outputs |
| Multi-GPU / iGPU/dGPU Switching | Hybrid graphics behavior (common on laptops) |
| Onboard Graphics / PEG / PCIe | Where the primary display is sourced from |
Also watch for settings that can override your choice, such as CSM, Secure Boot (usually not the cause), or Primary Graphics Adapter locked to a mode.
Step-by-Step: Change Default Display Adapter (Common BIOS Layouts)
The flow is consistent: enter BIOS/UEFI, find the display initialization setting, change it, save, and verify. Exact labels vary.
Option A: iGPU (Intel/AMD) as Primary, dGPU Disabled or Secondary
Use this when your monitor cable is plugged into the motherboard’s video ports (HDMI/DisplayPort) or you want better power savings on systems with functional iGPU output.
- Reboot and enter BIOS/UEFI (commonly Del or F2; laptops often use F1).
- Go to Advanced (or Chipset / North Bridge depending on vendor).
- Find Primary Display, Initial Display Output, or Graphics Device.
- Select the iGPU option (examples you might see: IGD, iGPU, Integrated Graphics, Onboard).
- If there’s a separate option for dGPU enablement, set it to Disabled or Auto (wording varies).
- Save changes with Save & Exit (commonly F10).
- Confirm the monitor is plugged into the motherboard port if you expect BIOS output there.
Option B: dGPU (NVIDIA/AMD Radeon) as Primary
Use this when your monitor is connected directly to the graphics card, or when you want BIOS to initialize the PCIe card first.
- Enter BIOS/UEFI.
- Open Advanced / Chipset / PCIe / Graphics depending on your model.
- Find Primary Display or Initial Display Output.
- Choose the PCIe GPU option (examples: PEG, PCIe, PCI Graphics, Discrete Graphics).
- Set iGPU to Enabled (if available) but not primary, or set to Disabled if the BIOS offers a “dGPU only” mode.
- Save and exit.
- If you have both ports available, keep the monitor connected to the dGPU port to confirm early output.
Option C: Auto / Initial Display Output
Many systems offer Auto. It can work, but it may pick the “wrong” adapter for your cables. If you’re troubleshooting, try a forced selection rather than Auto.
Rank #2

- Powered by NVIDIA GeForce GT 610, 40nm chipset process with 523MHz core frequency, integrated with 2048MB DDR3 memory and 64-bit bus width
- Compatible with windows 11 system, no need to download driver manually
- HDMI / VGA 2 ports output available. HDMI Max Resolution-2560x1600, VGA Max Resolution-2048x1536
- Support DirectX 11, OpenCL, CUDA, DirectCompute 5.0
- Original half height bracket matches with the low profile brackets make the Glorto GeForce GT 610 graphics card fit well with all PC tower, small form factor and HTPC(except micro form factor)
- Set Initial Display Output (or equivalent) to Manual if there’s a mode toggle.
- Select iGPU or PCIe explicitly, depending on where the monitor cable is plugged.
- Save and reboot.
Platform-Specific Paths (Brand BIOS Terms and Menus)
These are the most common locations by vendor. If you don’t see the setting under these exact menus, use BIOS search (if your BIOS supports it) or look around Advanced and Chipset.
ASUS (UEFI BIOS)
ASUS boards often place the option under Advanced or Chipset/Graphics.
- Enter BIOS with Del.
- Go to Advanced → System Agent (SA) → Graphics Configuration (Intel) or Advanced → Onboard Devices Configuration (varies).
- Set Primary Display to IGD or PEG.
- Save with F10.
Gigabyte (UEFI DualBIOS)
Gigabyte frequently uses terms like Initial Display Output under BIOS features.
- Enter BIOS with Del.
- Open BIOS tab or Peripherals / Chipset depending on model.
- Find Initial Display Output and choose PCIe Slot or IGD.
- Save and reboot.
MSI (Click BIOS / Advanced)
MSI typically exposes it under Settings for graphics/PCIe.
Free tools Windows power users keep installed
One-click scans. No signup required.
- Enter BIOS with Del or F2.
- Go to Settings → Advanced or Boot (varies) and look for Graphics options.
- Set Primary Display / Initiate Graphic Adapter to IGD or PEG.
- Save (F10) and restart.
ASRock (UEFI)
ASRock often uses “Primary Graphics Adapter” or “Onboard Graphics.”
- Enter BIOS with F2 or Del.
- Go to Advanced or Chipset.
- Locate Primary Graphics Adapter and choose IGD or PCIe.
- Save and exit.
Lenovo ThinkPad / IdeaPad
Laptop BIOS tends to use hybrid graphics options and may restrict control depending on the model.
- Reboot and press F1 or F2 to enter BIOS.
- Find Config or Display (wording varies).
- Look for Graphics, Hybrid Graphics, or Discrete Graphics.
- If offered, switch the primary to the discrete GPU or set an option like Discrete only.
- Save and exit.
Dell (PowerEdge/Latitude/OptiPlex)
Dell frequently places display initialization under BIOS video/graphics or “Integrated Devices.”
Rank #3
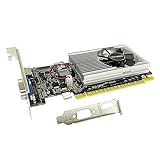
- The Geforce 210 is with a 589MHz core clock,up to 1066Mbps effective,perfect for working,video and photo editing,allows good fluency,which can effectively meet your needs.
- PCI Express 2.0 interface,offers compatibility with a range of systems. Also includes VGA and HDMI outputs for expanded connectivity,supports up to 2 monitors.Good for adding a simple low profile gpu to a small form factor pc.
- The computer graphics cards is small in size and saves more space,easy to install,plug and play,you can build a compact PC system easily for slim/ITX chassis.
- This low profile video card is good value option for entry level, if you just want basic upgrade graphics and daily simple work for your computer, or not be AAA gamer.(include low profile bracket)
- No external power supply and the all-solid-state capacitor keeps low power consumption and high performance,supports Windows 10/8/7/Vista/XP(not compatible with windows 11).
- Enter BIOS using F2 at the Dell logo.
- Open System Configuration or Video.
- Set Primary Display to GPU / Integrated Graphics (exact options vary).
- Save changes.
Multi-Monitor Gotchas After Changing the BIOS Setting
BIOS choice affects which adapter provides early boot, but your OS and monitors decide the final experience. Common issues:
Recommended Free Tools
- Monitor plugged into the “wrong” side: if you force iGPU as primary but the monitor is on the dGPU ports, you may see no BIOS/POST output.
- Windows display topology reset: after BIOS changes, Windows may re-detect and move monitors to different numbering.
- Hybrid graphics limitations: on some laptops, both GPUs can’t render to the same physical output the way desktops can.
- HDMI vs DisplayPort quirks: some systems require DisplayPort for correct handshake with certain adapters.
If you recently changed cables and still have issues, verify the port you’re using matches the GPU you selected in BIOS.
Windows Verification: Confirm the Adapter You Actually Booted With
Even if BIOS shows a different adapter, you should confirm what Windows is using. Do this after the change.
Check Device Manager and Display Adapters
- Right-click the Start button → Device Manager.
- Expand Display adapters.
- You should see both iGPU and dGPU entries (or only one if you disabled the other in BIOS).
Confirm active GPU in Task Manager
- Press Ctrl + Shift + Esc.
- Go to Performance → pick GPU 0, GPU 1, etc.
- Check which GPU reports usage when you open a GPU-heavy app.
On Windows 10/11, you can also check the per-app GPU preference under Settings → System → Display → Graphics.
If the BIOS Change Doesn’t Take Effect
If the display adapter you selected still doesn’t initialize correctly, the BIOS setting may be ignored due to firmware conditions or a competing option.
Crashes, No Sound, or Screen Glitches?
Random freezes, missing sound and display glitches usually trace back to one bad driver. Find and replace yours safely.Free scan · under a minutePC Slower Than It Used to Be?
A free scan shows the junk files, broken settings and background clutter dragging Windows down - then fixes them in one click.Free scan · Windows 10 & 11Common causes
- CSM/Legacy boot state interfering with expected UEFI behavior (especially on older boards).
- Monitor connected to the wrong port for the adapter you selected.
- dGPU not seated (or power cable missing) so BIOS can’t initialize it.
- BIOS setting locked by hardware: some laptops restrict hybrid graphics options based on docking or model.
- Fast Boot or mis-saves: the change didn’t persist because you didn’t choose the correct “save & exit” item.
Recovery steps
- Power off the PC fully.
- Power on and enter BIOS again.
- Restore defaults: look for Load Optimized Defaults or Restore Defaults.
- Save changes with Save & Exit (don’t just exit).
- If you still can’t get display, clear CMOS using your board’s jumper or documented method. Then try again with the monitor connected to the most likely port (often the GPU port if you want dGPU-first).
Rollback and Safety: How to Avoid Getting Stuck
If you’re changing a critical BIOS setting, make small moves. Change one display-related option at a time and reboot immediately.
Keep a backup habit: if the BIOS allows it, note your previous values. If you end up with no video, clear CMOS and return the adapter choice to what matched your current working cable connection.
Rank #4

- 【4GB VRAM for Smooth Multitasking】: Equipped with 4GB DDR3 memory and a 128-bit bus width, this GT 740 provides a significant performance boost over standard 2GB models. It ensures smooth 1080P video playback and lag-free performance for office multitasking and basic graphic design.
- 【Triple Display Versatility (HDMI+DVI+VGA)】: Features a comprehensive output interface including HDMI, DVI, and VGA ports. Connect to modern monitors or legacy projectors without needing expensive adapters. Ideal for setting up a dual-monitor workstation to increase productivity.
- 【The Perfect Legacy PC Upgrade】: An excellent, cost-effective solution for reviving older desktop PCs. This card supports DirectX 12 (11_0) and is fully compatible with Windows 11/10/7, making it the go-to choice for upgrading from integrated graphics to a dedicated GPU.
- 【Low Power & Plug-and-Play】: Designed for high efficiency, this graphics card draws all its power directly from the PCIe slot with no external power connector required. It is compatible with standard power supplies, making installation quick and hassle-free.
- 【Quiet & Reliable Cooling System】: Built with an optimized heatsink and a low-noise cooling fan that maintains stable temperatures even during extended use. Perfect for building a Quiet Office PC or a dedicated HTPC for the living room.
Frequently Asked Questions
Can I change the default display adapter without entering BIOS?
You can often control runtime GPU usage in Windows (per-app GPU preference), but BIOS controls the early boot/POST display initialization order. If you’re getting no signal during BIOS/POST, you usually need BIOS/UEFI changes.
What if I don’t see the Primary Display option in BIOS?
Some systems hide it based on CPU model, hybrid graphics design, or firmware policy. Update your BIOS, check other tabs like Chipset or Peripherals, and confirm your dGPU is detected in the BIOS hardware list.
What’s actually slowing this PC down?
Pick the symptom - the matching free tool is one click away.
Why does the screen stay black after selecting dGPU-first?
Most commonly, the monitor is still plugged into the motherboard video port while BIOS now expects output from the graphics card. Plug the monitor into the dGPU’s HDMI/DisplayPort, or revert BIOS to iGPU-first.
Will changing BIOS default display adapter disable my other GPU in Windows?
Not necessarily. BIOS “primary” usually only changes initialization order. Disabling iGPU or dGPU explicitly can affect what Windows detects, but “primary display” alone often keeps both available.
Does Secure Boot or CSM affect this setting?
Secure Boot typically doesn’t directly control GPU selection, but CSM/boot mode can change how firmware behaves during early display. If behavior is inconsistent, try switching to UEFI-only (if available) and retesting the adapter setting.
Bottom Line
To change the default display adapter in BIOS/UEFI, find the firmware option that controls primary display / initial display output, set it to the GPU you intend to use first, then match your monitor’s cable to that adapter’s ports.
Quick wins for a faster PC:
Fix the driver behind crashes, sound loss and screen glitchesFind Drivers →Repair Windows errors before they cause bigger problemsFix Now →If the change doesn’t stick or you get a black screen, restore BIOS defaults or clear CMOS, and verify the hardware is detected (especially the dGPU’s PCIe seating and power) before trying again.
Quick Recap
Product prices and availability are accurate as of the date/time indicated and are subject to change. Any price and availability information displayed on Amazon at the time of purchase will apply.




