Recommended Free Tools
Google’s release of Pixel 6a bluejay factory images is the kind of update that only matters—until it does. If you’re dealing with a broken build, a stuck OTA, or you just need a clean, known-good system image, factory images give you full control over what boots on your phone.
This guide covers what bluejay factory images are, what you need before flashing, and the two practical ways to install them: Android Flash Tool (web-based) and fastboot (local command line). You’ll also get verification steps and troubleshooting for the most common errors people hit during flashing.
| # | Preview | Product | Price | |
|---|---|---|---|---|
| 1 |

|
Google (1-Meter/3.3-Ft) USB-C to USB-C Cable - White (G016C) | $11.99 | Buy on Amazon |
| 2 |
|
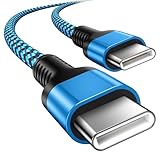
USB C to USB C Fast Charging Cable 10Ft for Google Pixel 11 10 9 Pro XL/10a | $5.99 | Buy on Amazon |
As an Amazon Associate I earn from qualifying purchases.
What Google means by Pixel 6a bluejay factory images
Pixel 6a’s internal codename is bluejay. A factory image is a complete set of partitions—boot, system, vendor, bootloader-related components—packaged so you can reflash the device to the exact build Google published.
Compared with an OTA update, a factory image isn’t a “patch.” It’s essentially a full rebuild of the device software stack to match a specific build fingerprint. That’s why it’s useful for recovery and for predictable testing.
#1 Best Overall
- Connect your USB-C enabled device to transfer data and charge devices
- 3.3 feet cable length
- Reversible USB-C Connectors
When you should use factory images (and when you shouldn’t)
Factory images are powerful, but they’re not a daily-driver tool. Use them when you have a clear reason.
Good reasons to flash
- Fix a bootloop after an update or a failed sideload.
- Recover from a soft-brick (device boots to recovery/bootloader but won’t complete system start).
- Move between builds for testing (while respecting rollback rules and bootloader constraints).
- Repair radio/modem-related issues when the packaged partitions are the right fix.
Reasons to avoid factory images
- You’re not willing to back up and accept the possibility of data loss.
- You’re chasing a minor app issue—reinstalling the app or using Safe Mode is usually enough.
- You don’t know whether you’re unlocked enough to accept the changes (bootloader state matters).
Prerequisites before you flash
Before downloading anything, make sure your device and computer are ready. Missing prerequisites are the #1 cause of “it won’t flash” reports.
On the phone
- Backup your data. Factory images can require a data wipe.
- Enable Developer options and USB debugging.
- If using fastboot flashing: unlock the bootloader (you may already have it unlocked).
On your computer
- A USB cable that supports data (not just charging).
- Windows/macOS/Linux PC with an active USB port.
- For fastboot method: platform-tools (adb/fastboot). Keep your version consistent.
Platform-tools version (what to look for)
Use a current platform-tools package from Google. If you’re debugging failures, updating platform-tools can fix issues with device detection and newer bootloader behaviors.
The Tool Desk
Outbyte PC Repair FREEClear out junk files and repair common Windows errorsFree Scan →Outbyte Driver Updater FREEFix the driver behind crashes, sound loss and screen glitchesFind Drivers →Where to get the bluejay factory images
Factory images are typically distributed via Google’s published Pixel image listings. The important part is selecting the correct package for Pixel 6a (bluejay) and the specific build variant you want (the build number will be visible in the package name and/or metadata).
When you download, verify that the archive contains the expected fastboot images for bluejay (commonly boot-related images plus partition images used by the flash script).
Method 1: Flash Pixel 6a factory images with Android Flash Tool
Android Flash Tool is the least painful method because it handles the sequence for you, usually with less manual error-prone command-line work. It requires compatible browser/device pairing and may work best when you can boot into the right connection mode.
- Download the correct bluejay factory image package file(s) from Google.
- On your PC, open Android Flash Tool in a supported browser and sign in if required by the workflow.
- On the Pixel 6a: enable USB debugging.
- Connect the phone to the PC via USB and follow the on-screen prompts to authorize the connection.
- In Android Flash Tool, select the option to install from the factory image package and point it to the downloaded file(s).
- Confirm the device and the build you’re flashing, then start the process.
- Wait for completion. The phone may reboot more than once while partitions are written.
Method 2: Flash Pixel 6a factory images with fastboot (command line)
Fastboot flashing is the most deterministic path, especially when you need to recover without relying on a web tool. You’ll use fastboot plus the images contained in the bluejay factory image archive.
Before you start: check the archive contents
Most factory image downloads include either:
- A flash script (e.g.,
flash-all/flash-all.bat/ a shell equivalent), or - Separate image files you flash manually (boot/system/vendor/etc.).
If the archive includes an official script, prefer it. It reduces the chance you miss a partition step.
Windows setup
- Install Google’s platform-tools and make sure
fastboot.exeis available in your terminal path (or run it from the extracted folder). - Connect Pixel 6a by USB.
- Boot the phone into bootloader/fastboot mode (typical flow: power off, then use the key combo for bootloader; confirm in your device instructions).
- In Command Prompt (run as your user), verify detection:
fastboot devices - If the list is empty, check the USB cable, USB port, and Windows driver state, then re-try.
macOS setup
- Install platform-tools or download them from Google, then extract so you have
fastbootavailable. - Connect Pixel 6a via USB.
- Boot into bootloader/fastboot mode.
- Verify detection:
./fastboot devices(orfastboot devicesif your PATH includes it).
Linux setup
- Install platform-tools (or download and extract).
- Connect Pixel 6a to the PC via USB.
- Boot into bootloader/fastboot mode.
- Verify detection:
fastboot devices - If permission errors occur, ensure you have proper udev rules for Android fastboot devices and re-run
fastboot devices.
Flash using the provided flash-all script (recommended)
- Extract the bluejay factory image archive into a working folder.
- Boot the Pixel 6a into fastboot mode.
- Run the appropriate script for your OS:
- Windows:
flash-all.bat - macOS/Linux: typically a shell script such as
flash-all.sh(name varies by package)
- Windows:
- Watch the terminal output. The process will flash multiple partitions and then reboot.
- Do not unplug the cable mid-flash.
Flash manually (when you don’t have a script)
Manual flashing depends on the exact set of image filenames in your factory image package. Use the archive’s included documentation or the filenames present.
At a high level, you’ll:
- Flash boot-related partitions (often via
fastboot flashwith the partition name). - Flash system/vendor-related partitions.
- Optionally flash radio/other components if included in that build.
- Reboot:
fastboot reboot
If the factory image archive includes a machine-readable manifest (or an HTML/text readme), follow its exact partition mapping for that bluejay package. Don’t guess partition names.
How to verify the install (build number and boot state)
After the phone boots into Android, verify you flashed what you intended.
Free tools Windows power users keep installed
One-click scans. No signup required.
Rank #2
- 【Broad Device Compatibility】This is the USB C to USB C cable Not the USB C to USB A cable, Compatible with virtually all USB C devices. For Google Pixel 11 Pro Fold/11 Pro XL/11 Pro/11/10a/10 Pro Fold/10 Pro XL/10 Pro/10/9a/9 Pro XL/9 Pro/9/9 Pro Fold/8a/8 Pro/8/7a/7 Pro/7/6a/6 Pro/6,for iPhone Duo/18Pro Max/18 Pro/17e/17/Air/17 Pro/17 Pro Max/16e/16/16 Plus/16 Pro/16 Pro Max/15/15 Plus/15 Pro/15 Pro Max, iPad Pro 12.9/11 inch, iPad Air 4/5th, iPad Mini 6th, Galaxy S26 FE/S26 Ultra/S26+/S26/S25 FE/S25 Ultra/S24 Ultra/S25+/S25/S24, and more USB C devices.
- 【High-Speed Charging】Our USB C to USB C fast charging cord type c supports PD3.0, QC3.0, and QC4.0 fast charging, output up to 20 V/3 A, suit with USB C adapters such as 18W/30W/45W/60W, the data transfer speed of up to 480 Mbp/s.The USB C wire can quickly transfer 1GB of music, documents, or the entire photo library in less than a minute, Say goodbye to sluggish transfers.
- 【Long-Lasting】Type c to type c fast charging cable has a premium wear-resistant nylon outer layer adding additional durability and is tangle-free, increases its lifetime, bends freely and can withstand 40000+ bends. The USB C charging wire has a Strong all-metal shell and aluminum alloy connector, Unique SR joint reinforced technology makes the connector less prone to breakage.
- 【Safety First Always】Our USB C cord comes equipped with intelligent safety features, that intelligently match the required current like short-circuit, overvoltage, overheating and overcurrent protection. Smart chip & upgraded automatic temperature control technology significantly reduce the temperature during charging, charge up without worries, and increase charging efficiency by 80% while increasing stability by 90% compared to 60W charging cables
- 【What You Get】We provide this cable c to USB c 1 Pack 10 foot, We are confident in the long-lasting performance of our product. If you have any questions about these USB C wires, please contact us, and we will reply within 24 hours.
- Go to Settings > About phone.
- Check the Build number (and Android version/security patch level).
- Compare the build identifier with the factory image package you downloaded.
If the device still boots into recovery or keeps restarting, treat it as a failed flash and jump to troubleshooting.
Independent reader supportYour contribution helps us test, update, and keep practical guides available for everyone.Common failure points and troubleshooting
Factory image flashing usually fails in predictable places. Here are targeted fixes that match the failure mode, not generic “try again” advice.
Device won’t enter fastboot / bootloader mode
- Confirm the phone is fully powered off before attempting the bootloader key combo.
- Try a different USB cable and a different port (especially on desktops with front-panel ports).
- Charge the phone for at least 15–30 minutes if the battery is low.
fastboot can’t see the phone
- Run
fastboot devicesand confirm you see a serial number. - On Windows, check Device Manager for an Android device entry while in fastboot mode.
- On macOS/Linux, ensure your user has permissions for USB devices and that platform-tools is the same architecture you’re executing.
- Update platform-tools and re-check cable/port.
Flashes succeed but boot loops
- Reboot into bootloader and ensure you flashed the complete set of partitions (including images required by that build).
- If the package provides a “wipe” mode (often part of
flash-all), re-run the script that performs a full wipe rather than a minimal flash. - Confirm you didn’t mix builds (example: system image from one build with boot image from another).
Errors about missing images or wrong package
- Make sure the archive is for Pixel 6a and the bluejay codename, not another Pixel model.
- Re-extract the archive (corruption during download is common). Re-download if checks fail.
- If you’re flashing manually, ensure each
fastboot flash <partition> <image-file>pair matches filenames in the package.
Factory images vs OTA updates vs factory reset
People often mix these terms. Here’s what changes in practice.
| Method | What it changes | Typical use | Data impact |
|---|---|---|---|
| Factory images (bluejay) | Reflashes full partition set to a specific build | Recovery, testing, fixing broken updates | Often wipes data; depends on script and configuration |
| OTA updates | Applies update to move from current build to next build | Normal upgrades/patches | Usually preserves data (if OTA succeeds) |
| Factory reset | Wipes user data; keeps system build | Fixing app/config problems without changing firmware | Wipes user data |
Safety, data loss, and rollback expectations
Flashing is not a casual operation. A factory image restores system partitions to a known state, but it may require a data wipe and can have bootloader policy constraints.
Do these 3 things before closing this tab:
1Repair Windows errors before they cause bigger problems2Fix the driver behind crashes, sound loss and screen glitches3Clear out junk files and repair common Windows errors- Unlock status matters: if your bootloader is locked, fastboot flashing won’t work.
- Rollback constraints: depending on the build and security patch level, some downgrades may be restricted.
- Battery and cable stability: don’t flash on a nearly-dead battery or with a flaky cable.
FAQs about Pixel 6a bluejay factory images
Do I need to unlock the bootloader to flash bluejay factory images?
For fastboot flashing, yes—unlocked bootloader is typically required to flash partitions. Android Flash Tool may still depend on device state, but factory installs generally assume the ability to flash bootloader-related components.
Will factory images remove my apps and photos?
Most factory image workflows end up wiping user data. Back up what you care about before you begin, and plan for a fresh setup on first boot.
Can I flash a different region or carrier build than my phone?
Factory images are packaged for specific device variants. Stick to the exact build targeting Pixel 6a bluejay and the package’s intended variant; mixing can cause boot problems or modem issues.
How long does the process take?
Typical flashing takes several minutes, but first boot after a full image can take longer due to system initialization. Don’t interrupt the cable during partition writes.
What if I only need to fix one issue, not reinstall everything?
If the phone is stable but you have app or configuration troubles, a factory reset (user data wipe) or a targeted OTA may be safer than a full factory image. Use factory images when you need firmware-level repair.
Bottom Line
Pixel 6a bluejay factory images are the most direct path to restoring or upgrading your phone to a specific, verifiable build. If you follow the prerequisites, use the correct package, and verify the build number after flashing, the process is usually straightforward.
If you hit problems, don’t guess—match your troubleshooting to the failure mode (fastboot visibility, missing images, or boot loops) and re-check that every partition belongs to the same bluejay factory image release.
Quick Recap
Product prices and availability are accurate as of the date/time indicated and are subject to change. Any price and availability information displayed on Amazon at the time of purchase will apply.




