A VPN connection can fail before it even reaches the server if your device cannot translate the VPN server’s domain name into an IP address. This is what the “VPN failed due to unsuccessful domain name resolution” error usually means: DNS is not working correctly, the server address is wrong, or something on the device or network is blocking name resolution.
The problem is commonly linked to unstable internet access, corrupted DNS cache, misconfigured DNS servers, proxy settings, firewall or antivirus interference, outdated VPN software, or an incorrect VPN profile. On Windows, it can also appear after network changes, driver issues, or system updates that alter adapter settings.
As an Amazon Associate I earn from qualifying purchases.
The fixes below start with basic checks and move through DNS resets, network configuration changes, VPN client repairs, and provider-side verification so you can isolate whether the issue is coming from your computer, your network, or the VPN service itself.
Quick wins for a faster PC:
Fix the driver behind crashes, sound loss and screen glitchesFind Drivers →Repair Windows errors before they cause bigger problemsFix Now →What the Domain Name Resolution VPN Error Means
The error “VPN failed due to unsuccessful domain name resolution” means your device could not translate the VPN server’s hostname into an IP address. Most VPN apps connect to servers using names such as us-east.vpnprovider.com instead of fixed numeric IP addresses. Before the VPN tunnel can start, Windows or your operating system asks a DNS server to look up that name. If DNS does not return a valid address, the VPN client has nowhere to connect, so the connection fails before authentication or encryption even begins.
#1 Best Overall
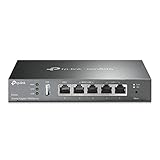
- 【Five Gigabit Ports】1 Gigabit WAN Port plus 2 Gigabit WAN/LAN Ports plus 2 Gigabit LAN Port. Up to 3 WAN ports optimize bandwidth usage through one device.
- 【One USB WAN Port】Mobile broadband via 4G/3G modem is supported for WAN backup by connecting to the USB port. For complete list of compatible 4G/3G modems, please visit TP-Link website.
- 【Abundant Security Features】Advanced firewall policies, DoS defense, IP/MAC/URL filtering, speed test and more security functions protect your network and data.
- 【Highly Secure VPN】Supports up to 20× LAN-to-LAN IPsec, 16× OpenVPN, 16× L2TP, and 16× PPTP VPN connections.
- Security - SPI Firewall, VPN Pass through, FTP/H.323/PPTP/SIP/IPsec ALG, DoS Defence, Ping of Death and Local Management. Standards and Protocols IEEE 802.3, 802.3u, 802.3ab, IEEE 802.3x, IEEE 802.1q
This problem is usually related to DNS or network configuration rather than your VPN username and password. For example, your internet connection may work in a browser because cached websites still load, but the VPN hostname lookup may fail. Public Wi-Fi networks, corporate networks, hotel networks, captive portals, custom DNS settings, proxy settings, or filtering software can all interfere with DNS requests. In some cases, the VPN provider may have changed server addresses, retired an endpoint, or published a hostname that your current DNS server cannot resolve correctly.
Common causes
- Incorrect VPN server address: A typo in the server hostname or an outdated profile can prevent DNS from finding the VPN gateway.
- Broken or slow DNS server: DNS servers from an ISP, router, office network, or public hotspot may fail to answer lookup requests reliably.
- Corrupted local DNS cache: Your device may store an old or invalid DNS result, causing the VPN client to repeatedly try the wrong destination.
- Proxy or firewall interference: Security tools, web filters, and proxy configurations can block DNS traffic or prevent the VPN app from reaching its resolver.
- Network restrictions: Some networks block VPN-related domains, DNS over certain ports, or protocols commonly used by VPN services.
- VPN client or profile issue: An outdated app, damaged configuration file, or mismatched protocol setting can cause the client to request the wrong server name.
On Windows, this error can appear in built-in VPN connections, Cisco AnyConnect, FortiClient, GlobalProtect, OpenVPN, WireGuard-based apps, and consumer VPN clients. The wording may vary, but the failure point is the same: the client cannot resolve the VPN gateway’s domain name. If the same VPN works on another network, the issue is likely with your current DNS, router, firewall, or ISP path. If it fails everywhere, the VPN profile, server address, or provider-side configuration is more likely to be the source.
A useful way to narrow the issue is to separate internet access from name resolution. If websites do not load at all, fix the general connection first. If websites load but the VPN fails, focus on DNS settings, cached DNS records, the VPN server hostname, and software that may inspect or block network traffic. The next fixes walk through those areas in a practical order, starting with basic connectivity and the VPN server address before moving into DNS resets, alternate DNS servers, security software conflicts, and VPN client repairs.
Free tools Windows power users keep installed
One-click scans. No signup required.
Check Your Internet Connection and VPN Server Address
Before changing DNS settings or reinstalling your VPN client, confirm that your connection can reach the internet normally and that the VPN server name is valid. The error “VPN failed due to unsuccessful domain name resolution” often appears because the VPN app is trying to connect to a hostname that your device cannot look up, such as vpn.company.com or us-east.provider.net. If your internet connection is unstable, blocked by a captive portal, or using an incorrect VPN server address, DNS resolution can fail before the VPN tunnel even starts.
1. Confirm that your internet connection works outside the VPN
Disconnect from the VPN completely, then test your regular internet connection. Open several websites, preferably ones you do not visit often, such as your bank, a news site, or your VPN provider’s website. This helps confirm that your browser is not simply loading cached pages. If web pages do not load, the VPN error is likely a symptom of a broader network issue rather than a problem with the VPN itself.
- Restart your modem and router by unplugging them for 30 seconds, then reconnecting them.
- Switch from Wi-Fi to Ethernet if possible to rule out weak wireless signal or router interference.
- Try a different network, such as a mobile hotspot, to see whether the VPN connects there.
- If you are on hotel, airport, campus, or office Wi-Fi, open a browser and check for a sign-in or acceptable-use page.
Captive portals are a common cause of this error. Many public Wi-Fi networks block most DNS and VPN traffic until you sign in through a browser. If you connect to public Wi-Fi and immediately start your VPN, the VPN client may fail because the network has not yet granted full internet access.
2. Check that the VPN server address is correct
If your internet connection works, review the VPN server address configured in your VPN app or Windows VPN profile. A small typo, outdated hostname, missing domain suffix, or copied extra space can stop DNS from resolving the server. For example, vpn.example.com is not the same as vp.example.com, and some corporate VPNs require the full address rather than a short internal name.
- Open your VPN app or Windows VPN settings.
- Find the server, gateway, remote host, or address field.
- Compare it with the address provided by your VPN provider or IT administrator.
- Remove any leading or trailing spaces if you copied and pasted the address.
- If your provider lists multiple server names, try another server location.
On Windows, go to Settings > Network & internet > VPN, select your VPN profile, and choose Advanced options or Edit. Confirm that the Server name or address field contains the correct hostname or IP address. If your organization gave you a new VPN portal address, replace the old one and save the profile before reconnecting.
3. Test whether the server name resolves
You can quickly check whether Windows can resolve the VPN hostname. Open Command Prompt and run nslookup vpn.example.com, replacing the example with your actual VPN server address. If the command returns an IP address, DNS resolution is working at least at the system level. If it returns a timeout or “non-existent domain,” the hostname may be wrong, your DNS server may be failing, or the server may only be resolvable on a specific network.
Rank #2
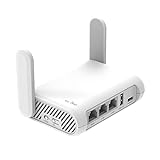
- 【AC1200 Dual-band Wireless Router】Simultaneous dual-band with wireless speed up to 300 Mbps (2.4GHz) + 867 Mbps (5GHz). 2.4GHz band can handles some simple tasks like emails or web browsing while bandwidth intensive tasks such as gaming or 4K video streaming can be handled by the 5GHz band.*Speed tests are conducted on a local network. Real-world speeds may differ depending on your network configuration.*
- 【Easy Setup】Please refer to the User Manual and the Unboxing & Setup video guide on Amazon for detailed setup instructions and methods for connecting to the Internet.
- 【Pocket-friendly】Lightweight design(145g) which designed for your next trip or adventure. Alongside its portable, compact design makes it easy to take with you on the go.
- 【Full Gigabit Ports】Gigabit Wireless Internet Router with 2 Gigabit LAN ports and 1 Gigabit WAN ports, ideal for lots of internet plan and allow you to connect your wired devices directly.
- 【Keep your Internet Safe】IPv6 supported. OpenVPN & WireGuard pre-installed, compatible with 30+ VPN service providers. Cloudflare encryption supported to protect the privacy.
| Test result | What it usually means | Next action |
|---|---|---|
| Websites do not load | General internet or Wi-Fi issue | Restart router, sign in to captive portal, or try another network |
| Only VPN fails | VPN hostname, DNS, or client issue | Verify the server address and test another VPN location |
| Server resolves on mobile hotspot | Current network may block DNS or VPN traffic | Use another network or contact the network administrator |
If the VPN works on a mobile hotspot but not on your home or office network, the issue is probably tied to that network’s DNS, router rules, or security filtering. If the server address does not resolve anywhere, check your provider’s status page or contact support to confirm that the hostname is still active.
Flush DNS Cache and Reset Network Settings
If your VPN client fails before it can connect and mentions unsuccessful domain name resolution, your device may be using stale or corrupted DNS records. DNS cache entries help websites and services load faster, but they can also point your VPN app to an old or unreachable server IP address. Flushing the DNS cache forces Windows to request fresh DNS information the next time the VPN tries to resolve its server hostname.
On Windows, open Command Prompt as administrator before running network repair commands. Click Start, type cmd, right-click Command Prompt, and select Run as administrator. Then run these commands one at a time:
- ipconfig /flushdns clears the local DNS resolver cache.
- ipconfig /release releases the current IP address from your router or network.
- ipconfig /renew requests a fresh IP address.
- netsh winsock reset resets the Windows Sockets catalog used by network applications.
- netsh int ip reset resets TCP/IP settings back to default values.
After running these commands, restart your computer instead of immediately reopening the VPN. The restart allows Windows to reload the network stack cleanly. Once the system is back on, connect to your normal Wi-Fi or Ethernet network first, confirm that regular websites load, and then launch the VPN client again. If the error was caused by a bad local DNS cache, expired lease, or damaged socket configuration, the VPN should now resolve its server address properly.
You can also reset network settings through the Windows Settings app if command-line repairs do not help. Go to Settings > Network & Internet > Advanced network settings > Network reset, then choose Reset now. This removes and reinstalls network adapters and restores common networking components to their default state. Use this after simpler DNS flushing steps, because you may need to reconnect to Wi-Fi networks, re-enter saved passwords, or reconfigure static IP settings afterward.
For general VPN setups on macOS, Linux, routers, or mobile devices, the same principle applies: clear cached DNS data and refresh the network connection. Restarting the device and router is often enough for home networks. On macOS, toggling Wi-Fi off and on or renewing the DHCP lease under System Settings > Network can help. On phones, switch Airplane Mode on for 10 seconds, turn it off, reconnect to the network, and retry the VPN. If your VPN is configured on a router, reboot the router and modem, then check whether the VPN hostname resolves after the WAN connection comes back online.
Change DNS Servers to Google, Cloudflare, or ISP DNS
If flushing the DNS cache did not fix the VPN failed due to unsuccessful domain name resolution error, the DNS servers assigned to your device may be slow, unreachable, filtered, or unable to resolve the VPN server hostname correctly. This often happens on public Wi-Fi, school or office networks, hotel networks, or after a router or ISP outage. Switching to a known reliable DNS provider can help your computer translate the VPN server address into the correct IP address before the VPN tunnel starts.
Common public DNS options include Google DNS, Cloudflare DNS, and your ISP’s own DNS servers. Google and Cloudflare are widely used and generally fast, while ISP DNS may work better if your VPN provider or location depends on local routing. You can try one set, reconnect to the VPN, and then switch to another if the error continues.
| Provider | Preferred DNS | Alternate DNS |
|---|---|---|
| Google DNS | 8.8.8.8 | 8.8.4.4 |
| Cloudflare DNS | 1.1.1.1 | 1.0.0.1 |
| ISP DNS | Provided by your ISP | Provided by your ISP |
Change DNS servers on Windows 11 or Windows 10
- Right-click the Start button and open Settings.
- Go to Network & internet, then select Wi-Fi or Ethernet, depending on your connection.
- Open your active network connection and find DNS server assignment.
- Select Edit, change the setting from automatic to Manual, and enable IPv4.
- Enter a preferred DNS server, such as 1.1.1.1, and an alternate DNS server, such as 1.0.0.1.
- Save the settings, disconnect from the network for a few seconds, reconnect, and try the VPN again.
You can also change DNS through Control Panel if you prefer the older Windows interface. Open Control Panel, go to Network and Internet, then Network and Sharing Center. Select Change adapter settings, right-click your active adapter, and choose Properties. Select Internet Protocol Version 4 (TCP/IPv4), click Properties, choose Use the following DNS server addresses, and enter the DNS values you want to test. If your VPN or network also uses IPv6, repeat the process for Internet Protocol Version 6 (TCP/IPv6) or temporarily disable IPv6 as a test.
Rank #3

- New-Gen WiFi Standard – WiFi 6(802.11ax) standard supporting MU-MIMO and OFDMA technology for better efficiency and throughput.Antenna : External antenna x 4. Processor : Dual-core (4 VPE). Power Supply : AC Input : 110V~240V(50~60Hz), DC Output : 12 V with max. 1.5A current.
- Ultra-fast WiFi Speed – RT-AX1800S supports 1024-QAM for dramatically faster wireless connections
- Increase Capacity and Efficiency – Supporting not only MU-MIMO but also OFDMA technique to efficiently allocate channels, communicate with multiple devices simultaneously
- 5 Gigabit ports – One Gigabit WAN port and four Gigabit LAN ports, 10X faster than 100–Base T Ethernet.
- Commercial-grade Security Anywhere – Protect your home network with AiProtection Classic, powered by Trend Micro. And when away from home, ASUS Instant Guard gives you a one-click secure VPN.
Change DNS on a router or other devices
If several devices fail to connect to the same VPN, change DNS on the router instead of editing each device. Sign in to your router’s admin page, usually through an address such as 192.168.0.1 or 192.168.1.1, then look for Internet, WAN, or DNS settings. Replace automatic DNS with Google, Cloudflare, or ISP DNS, save the changes, and restart the router. On macOS, iOS, Android, and Linux, the same idea applies: edit the active network connection, replace automatic DNS with a reliable provider, reconnect, and test the VPN hostname again.
Recommended Free Tools
After changing DNS, fully close the VPN app and reopen it before testing. If the VPN connects by IP address but not by server name, DNS is still the likely issue. If no DNS provider works, the VPN hostname may be wrong, blocked on the current network, or temporarily unavailable on the provider’s side.
Disable Proxy, Firewall, or Security Software Conflicts
If DNS changes did not fix the “VPN failed due to unsuccessful domain name resolution” error, check whether another network filter is interfering with name lookups or the VPN tunnel. Proxies, firewalls, antivirus web shields, DNS filtering tools, and endpoint protection suites can intercept traffic before it reaches your VPN client. When they block DNS requests, rewrite them incorrectly, or prevent the VPN app from contacting its gateway, the client may report a domain resolution failure even though your internet connection works normally.
Turn off proxy settings in Windows
A proxy is useful on some corporate or school networks, but an incorrect proxy can break VPN login, server lookup, or DNS resolution. On Windows 10 or Windows 11, open Settings, go to Network & Internet, then select Proxy. Turn off Use a proxy server unless your organization specifically requires it. You can usually leave Automatically detect settings enabled, but if the VPN still fails, test again with it disabled as well.
You should also check the older Internet Options proxy panel because some applications still use it. Press Windows + R, type inetcpl.cpl, and press Enter. Open the Connections tab, click LAN settings, and make sure Use a proxy server for your LAN is unchecked. After changing these settings, close and reopen the VPN client before reconnecting.
What’s actually slowing this PC down?
Pick the symptom - the matching free tool is one click away.
Temporarily test firewall and security software
Security tools can block VPN-related DNS traffic, especially after an update or when a new VPN client is installed. As a short test, temporarily disable third-party antivirus, firewall, web protection, secure DNS, or parental control features, then try connecting to the VPN again. Do not leave protection disabled permanently; this test is only to confirm whether the security tool is causing the failure.
- Windows Security firewall: Go to Windows Security > Firewall & network protection and check whether the VPN app is allowed through the firewall.
- Third-party antivirus suites: Look for features named web shield, HTTPS scanning, network protection, DNS protection, or firewall control.
- DNS filtering apps: Temporarily pause tools such as ad blockers, parental control agents, or secure DNS clients that install local network drivers.
- Corporate endpoint protection: If the device is managed, contact IT before disabling or changing policy-controlled security settings.
If the VPN connects while security software is disabled, re-enable protection and add exceptions instead of keeping it off. Allow the VPN application executable, its background service, and its VPN protocol through the firewall. Depending on the provider, you may need to allow UDP ports used by WireGuard or OpenVPN, TCP 443 for SSL-based VPN connections, or IKEv2/IPsec services. Many consumer VPN apps include a repair option that recreates these firewall rules automatically.
Check for conflicting network tools
Mulle VPN clients, proxy apps, packet capture tools, and virtual network adapters can conflict with each other. If you have older VPN software installed, disconnect it and exit it completely from the system tray. Then open Control Panel > Network and Internet > Network Connections and review unused virtual adapters. Avoid deleting adapters unless you know which application created them, but disabling an old VPN adapter for testing can help identify conflicts.
After changing proxy, firewall, or security settings, restart Windows and test the VPN on a different network if possible, such as a mobile hotspot. If it works on the hotspot but not on your usual Wi-Fi, the router, ISP security service, or network-level DNS filter may be blocking the VPN provider’s hostname. In that case, check router security features, disable DNS filtering on the router, or ask the network administrator to allow the VPN service.
Rank #4

- 【DUAL BAND WIFI 7 TRAVEL ROUTER】Products with US, UK, EU, AU Plug; Dual band network with wireless speed 688Mbps (2.4G)+2882Mbps (5G); Dual 2.5G Ethernet Ports (1x WAN and 1x LAN Port); USB 3.0 port.
- 【NETWORK CONTROL WITH TOUCHSCREEN SIMPLICITY】Slate 7’s touchscreen interface lets you scan QR codes for quick Wi-Fi, monitor speed in real time, toggle VPN on/off, and switch providers directly on the display. Color-coded indicators provide instant network status updates for Ethernet, Tethering, Repeater, and Cellular modes, offering a seamless, user-friendly experience.
- 【OpenWrt 23.05 FIRMWARE】The Slate 7 (GL-BE3600) is a high-performance Wi-Fi 7 travel router, built with OpenWrt 23.05 (Kernel 5.4.213) for maximum customization and advanced networking capabilities. With 512MB storage, total customization with open-source freedom and flexible installation of OpenWrt plugins.
- 【VPN CLIENT & SERVER】OpenVPN and WireGuard are pre-installed, compatible with 30+ VPN service providers (active subscription required). Simply log in to your existing VPN account with our portable wifi device, and Slate 7 automatically encrypts all network traffic within the connected network. Max. VPN speed of 100 Mbps (OpenVPN); 540 Mbps (WireGuard). *Speed tests are conducted on a local network. Real-world speeds may differ depending on your network configuration.*
- 【PERFECT PORTABLE WIFI ROUTER FOR TRAVEL】The Slate 7 is an ideal portable internet device perfect for international travel. With its mini size and travel-friendly features, the pocket Wi-Fi router is the perfect companion for travelers in need of a secure internet connectivity on the go in which includes hotels or cruise ships.
Update or Reinstall the VPN Client
If DNS changes and network resets do not fix the “VPN failed due to unsuccessful domain name resolution” error, the VPN application itself may be the problem. VPN clients maintain server lists, DNS handling rules, virtual network adapters, drivers, certificates, and protocol settings. If any of these components are outdated or corrupted, the client may fail before it can resolve the VPN gateway address.
Start by checking for updates inside the VPN app. Most commercial VPN clients include an update option under Settings, About, or Help. Install the latest version, then restart the computer before testing again. A restart is useful because VPN clients often install background services and network drivers that do not fully reload until Windows starts again.
Update the VPN client on Windows
- Open your VPN application.
- Go to Settings, Help, or About.
- Select Check for updates if the option is available.
- Install the update and allow any driver or adapter changes.
- Restart Windows.
- Reconnect to the VPN and test the same server again.
If the VPN was installed from the Microsoft Store, open Microsoft Store, go to Library, and select Get updates. If your VPN was installed from the provider’s website, download the newest installer directly from that provider rather than using a third-party download site. This reduces the risk of installing an outdated, modified, or incompatible package.
Reinstall the VPN client cleanly
If updating does not help, perform a clean reinstall. This can repair damaged virtual adapters, broken DNS rules, missing services, or corrupted configuration files. Before uninstalling, make sure you know your VPN login details and have any required manual configuration files, such as .ovpn, WireGuard tunnel files, certificates, or company VPN profiles.
Do these 3 things before closing this tab:
1Repair Windows errors before they cause bigger problems2Fix the driver behind crashes, sound loss and screen glitches3Clear out junk files and repair common Windows errors- Disconnect from the VPN.
- Open Settings in Windows.
- Go to Apps > Installed apps.
- Find your VPN client, select the menu button, and choose Uninstall.
- Restart the computer after removal.
- Download the latest version from the official VPN provider website.
- Install the app as an administrator if prompted.
- Sign in again and reconnect.
After reinstalling, check whether Windows created a fresh VPN adapter. Open Control Panel > Network and Internet > Network Connections and look for adapters related to your VPN, such as TAP, TUN, WireGuard, or the provider’s own adapter name. If old disabled adapters remain from previous installations, avoid deleting them unless your VPN provider instructs you to do so, but make sure the active adapter is enabled.
Try another VPN protocol or server after reinstalling
Once the client is updated or reinstalled, test more than one server location. A single VPN hostname may be temporarily unavailable or failing DNS resolution from your network. If your client allows protocol changes, switch between options such as WireGuard, OpenVPN UDP, OpenVPN TCP, or IKEv2. Some networks block or mishandle specific VPN protocols, and changing the protocol can force the client to use a different connection path and DNS lookup method.
For corporate VPNs, reinstalling may not be enough if the client depends on managed certificates, endpoint security checks, or a company DNS suffix. In that case, ask your IT team for the current installer and configuration profile instead of reusing an old setup file. For consumer VPNs, if the fresh install still cannot resolve any VPN server names, collect the exact error message, app version, Windows version, selected protocol, and server location before contacting support.
Independent reader supportYour contribution helps us test, update, and keep practical guides available for everyone.Verify VPN Configuration and Contact Your VPN Provider
If DNS changes, network resets, and client updates did not clear the “VPN failed due to unsuccessful domain name resolution” error, inspect the VPN profile itself. A small mismatch in the server hostname, protocol, port, certificate, or authentication method can prevent the VPN client from resolving or reaching the correct gateway. This is especially common with manually configured VPNs, workplace VPNs, and profiles imported from older setup files.
The Tool Desk
Outbyte PC Repair FREERepair Windows errors before they cause bigger problemsFix Now →Outbyte Driver Updater FREEFix the driver behind crashes, sound loss and screen glitchesFind Drivers →Start by comparing your VPN settings with the latest configuration details from your VPN provider or IT administrator. Do not rely on saved screenshots, old onboarding emails, or copied profiles from another device unless they were recently confirmed. VPN providers sometimes rotate server names, retire regional gateways, change DNS hostnames, or move users to new endpoints after infrastructure updates.
Best Value
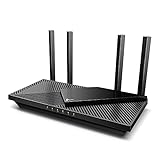
- Next-Gen Gigabit Wi-Fi 6 Speeds: 2402 Mbps on 5 GHz and 574 Mbps on 2.4 GHz bands ensure smoother streaming and faster downloads; support VPN server and VPN client¹
- A More Responsive Experience: Enjoy smooth gaming, video streaming, and live feeds simultaneously. OFDMA makes your Wi-Fi stronger by allowing multiple clients to share one band at the same time, cutting latency and jitter.²
- Expanded Wi-Fi Coverage: 4 high-gain external antennas and Beamforming technology combine to extend strong, reliable, Wi-Fi throughout your home.
- Improved Battery Life: Target Wake Time helps your devices to communicate efficiently while consuming less power.
- Improved Cooling Design: No heat ups, no throttles. A larger heat sink and redefined case design cools the WiFi 6 system and enables your network to stay at top speeds in more versatile environments.
Check the VPN profile details
- Server address: Confirm the hostname is typed correctly, such as us.examplevpn.com, with no extra spaces, missing characters, or outdated region codes.
- VPN protocol: Make sure the selected protocol matches the provider’s requirements, such as WireGuard, OpenVPN UDP, OpenVPN TCP, IKEv2, L2TP/IPsec, or SSTP.
- Port number: Verify that the correct port is being used. For example, OpenVPN may use UDP 1194 or TCP 443 depending on the provider.
- Authentication method: Check whether the connection requires a username and password, certificate, pre-shared key, SSO login, MFA prompt, or device approval.
- Certificates and keys: Reimport any required CA certificates, client certificates, or configuration bundles if they are expired, missing, or recently replaced.
- Custom DNS settings: If the VPN profile defines internal DNS servers, confirm those DNS addresses are still valid and reachable after connection.
On Windows, open Settings > Network & internet > VPN, select the affected VPN profile, and review its properties. If the profile was created manually, remove it and create a fresh one using the current setup instructions. For OpenVPN or WireGuard, delete the old imported profile and import a newly downloaded configuration file from the provider portal. For corporate VPNs such as Cisco, GlobalProtect, FortiClient, or AnyConnect, sign out of the client, remove stale gateways if available, then reconnect using the official portal address supplied by IT.
If you are using a hostname for the VPN server, test whether your computer can resolve it outside the VPN connection. Open Command Prompt on Windows and run nslookup vpn-server-name, replacing the name with your actual VPN gateway. If the lookup fails on mulle DNS providers and from another network, the server hostname may be down, changed, or restricted. If it resolves on your phone’s mobile data but not on your current network, your local ISP, router, DNS filter, or workplace network may be blocking the lookup.
What to send to your VPN provider
When contacting support, include precise details so they can identify whether the issue is account-related, DNS-related, or caused by a retired endpoint. Send the exact error message, your operating system version, VPN client version, server address, selected protocol, approximate time of failure, and whether the issue happens on other networks. Also mention the troubleshooting already completed, such as flushing DNS, changing DNS servers, disabling proxy settings, and reinstalling the client. Avoid sending passwords, private keys, or full certificate contents unless your provider gives you a secure upload method.
PC Slower Than It Used to Be?
A free scan shows the junk files, broken settings and background clutter dragging Windows down - then fixes them in one click.Free scan · Windows 10 & 11Crashes, No Sound, or Screen Glitches?
Random freezes, missing sound and display glitches usually trace back to one bad driver. Find and replace yours safely.Free scan · under a minute| Symptom | Likely configuration issue | Next action |
|---|---|---|
| Hostname does not resolve | Incorrect or retired VPN server address | Request the current gateway hostname |
| Connection times out after DNS resolves | Wrong protocol, port, or blocked network path | Try the provider’s alternate protocol or port |
| Authentication fails immediately | Expired password, certificate, token, or account access | Reset credentials or re-enroll the device |
| Only one region fails | Regional VPN endpoint outage or migration | Switch to another server location temporarily |
Frequently Asked Questions
What does “VPN failed due to unsuccessful domain name resolution” mean?
It means your device could not translate the VPN server’s domain name, such as vpn.example.com, into an IP address. This usually points to a DNS problem, an incorrect VPN server address, a blocked DNS request, or a temporary issue with your internet connection or VPN provider.
How do I know if the problem is my DNS or the VPN server itself?
First, check whether normal websites load without the VPN connected. Then verify the VPN server address is typed correctly and try connecting to a different VPN location or server if your provider offers one. If other websites work but only the VPN server name fails, the issue may be with DNS, the server hostname, or your VPN provider’s infrastructure.
Which DNS servers should I use to fix this VPN error?
You can try reliable public DNS servers such as Google DNS at 8.8.8.8 and 8.8.4.4, Cloudflare DNS at 1.1.1.1 and 1.0.0.1, or the DNS servers provided by your internet service provider. After changing DNS, flush your DNS cache and reconnect to the VPN. If you are on a work or school VPN, ask your administrator before changing DNS because internal VPN names may require company DNS servers.
Can a firewall, antivirus, or proxy cause this VPN domain name resolution error?
Yes, security software or proxy settings can block DNS requests, VPN traffic, or the VPN client’s connection to its servers. Temporarily disable third-party antivirus, firewall filtering, or proxy settings and test the VPN again. If the VPN works afterward, add the VPN client as an allowed app instead of leaving protection disabled.
What’s actually slowing this PC down?
Pick the symptom - the matching free tool is one click away.
What should I do if flushing DNS and changing DNS servers does not fix it?
Update or reinstall the VPN client, restart your router, and reset your network settings if the problem continues. Also check that the VPN profile uses the correct server name, protocol, port, and authentication settings. If none of these steps work, contact your VPN provider and ask whether the server hostname has changed or whether there is an outage affecting DNS resolution.
Bottom Line
A VPN error caused by unsuccessful domain name resolution usually points to DNS, network connectivity, VPN client settings, or system configuration problems. Start with the simple fixes first: check your internet connection, restart the VPN and router, flush DNS, change DNS servers, and make sure the VPN client is up to date.
If the issue continues, review firewall rules, proxy settings, TAP/WAN adapters, and any custom DNS or split-tunneling configuration. Once the VPN can resolve its server address correctly, the connection should complete normally; if not, contact your VPN provider or network administrator with the exact error message and troubleshooting steps you’ve already tried.
Quick Recap
Product prices and availability are accurate as of the date/time indicated and are subject to change. Any price and availability information displayed on Amazon at the time of purchase will apply.
Quick wins for a faster PC:
Clear out junk files and repair common Windows errorsFree Scan →Scan for outdated or missing drivers - takes under a minuteDriver Scan →Repair Windows errors before they cause bigger problemsFix Now →



