Quick wins for a faster PC:
Scan for outdated or missing drivers - takes under a minuteDriver Scan →Repair Windows errors before they cause bigger problemsFix Now →Fix the driver behind crashes, sound loss and screen glitchesFind Drivers →Start with Steam Machine’s 1080p default, then change resolution only when your display or a particular game gives you a reason. Valve uses 1080p for Steam Machine Verified testing, making it the most useful baseline for judging how a game is intended to run on the system.
After resolution, work inside the individual game’s graphics menu. There is no Valve-approved universal order for ray tracing, shadows, anti-aliasing, upscaling, frame generation, or frame caps; the best choice depends on the game, connected display, Steam Machine settings, and whether you want cleaner image quality or steadier performance. Treat HDR and SDR brightness as display-appearance controls, not automatic performance fixes.
As an Amazon Associate I earn from qualifying purchases.
Why 1080p is the correct starting point
Valve Support identifies 1080p as Steam Machine’s system-default game resolution. In the Display dropdown menu, it appears as Default. Valve also uses 1080p when testing games for Steam Machine Verified status, so it is the clearest supported reference point before you begin changing options.
Recommended Free Tools
That default is not a promise that every television or monitor should always remain at 1080p. A 4K display may present a different native output, and an individual game may expose its own resolution controls. The practical rule is to leave the system at Default initially, launch the game, and inspect the result on the display you actually use. If the picture is correctly framed and performance is acceptable, changing resolution may provide no benefit.
#1 Best Overall

- 【INTEGRATED SPEAKERS】Whether you're at work or in the midst of an intense gaming session, our built-in speakers provide rich and seamless audio, all while keeping your desk clutter-free.
- 【EASY ON THE EYES】 Protect your eyes and enhance your comfort with Blue-Light Shift technology. This feature reduces harmful blue light emissions from your screen, helping to alleviate eye strain during long hours of use and promoting healthier viewing habits.
- 【WIDEN YOUR PERSPECTIVE】Our sleek minimal bezel design ensures undivided attention. The nearly bezel-free display seamlessly connects in a dual monitor arrangement, delivering an unobstructed view that lets you focus on more at once, completely distraction-free.
Valve’s documentation does not publish a universal frame-rate target, preset recommendation, or cross-game ranking of graphics options. A title with demanding lighting can react very differently from a simpler game, even on the same Steam Machine. Resolution therefore comes first because it establishes a known baseline, not because it solves every performance problem.
Choose the right place to change resolution
Steam Machine has two separate resolution scopes. A global setting affects the system’s default game resolution, while an in-game setting applies only to that title. They are useful for different problems.
| Control scope | Where to find it | When to use it | What to verify |
|---|---|---|---|
| Global game resolution | Settings > Display, using the Display dropdown menu | When you want a system-wide starting resolution for games | Check how each game renders on the connected display |
| Per-game resolution | The game’s own graphics or display settings | When one title needs a different output from your global choice | Confirm the game’s image is correctly scaled and remains playable |
| HDR | Settings > Display > Advanced | When adjusting high-dynamic-range presentation | Judge brightness, highlights, and shadow detail on the display |
| SDR content brightness | Settings > Display > Advanced | When standard-dynamic-range content looks too dark or bright alongside HDR use | Check ordinary SDR games and menus, not only HDR scenes |
Use the global setting for a clean baseline
Open Settings > Display and leave the Display dropdown at Default, which corresponds to 1080p. This is the least disruptive first step because it matches Valve’s stated system default and Verified-testing resolution. Launch the game you want to evaluate and note its menus, text, camera view, and demanding scenes before changing anything else.
Use per-game resolution for exceptions
If one game looks soft, is incorrectly scaled, or performs differently from the rest of your library, open that game’s graphics menu and change its resolution there. A per-game choice lets other titles retain the global baseline. The game may use labels that differ from Steam Machine’s Display menu, so verify the actual output after applying the change rather than assuming the selected number is presented natively.
A disciplined order for game-level tuning
Once resolution is established, adjust visual-quality options in the game itself. Valve cautions that picture-quality choices depend on Steam Machine settings, the connected display, and the individual game. The following process is a safe way to make decisions without pretending that one setting order works for every title.
Rank #2
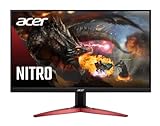
- 23.8" Full HD (1920 x 1080) Widescreen VA Monitor | AMD FreeSync Premium Technology
- Refresh Rate: 165Hz | Response Time: 1ms (VRB) | Pixel Pitch: 0.275mm | Color Saturation: NTSC 72%
- Zero-Frame Design | HDR Ready
- VESA mounting compliant (100 x 100mm) | Ergonomic Tilt: -5° to 15°
- Ports: 1 x Display Port 1.2 and 2 x HDMI 2.0 (HDMI Cable Included)
- Record the baseline. Play a repeatable section with the default game settings. Look for the symptoms that matter to you: inconsistent motion, distracting shimmer, poor shadow detail, or an image that is simply too soft.
- Define the goal. Decide whether you are seeking steadier motion, a sharper image, better lighting, or a balance. A setting that improves one goal can compromise another.
- Change one option at a time. Apply a single graphics change, return to the same scene, and compare. Changing a whole preset at once hides which option produced the improvement or the regression.
- Use the game’s own explanation. Read its descriptions for ray tracing, shadows, anti-aliasing, upscaling, texture quality, and frame limits. Their cost and appearance vary by engine and by title.
- Keep the change only if the result is visible. If an option does not address the symptom you observed, restore it and test another. Do not assume a more expensive setting is automatically better on your display.
When the goal is smoother performance
Begin with the game’s performance indicators or built-in preset descriptions, if it provides them. Resolution and any internal-resolution or upscaling control can have a large visual effect, but their behavior is title-specific. Test them in a busy scene, not just in a quiet menu. Then examine other options the game identifies as performance-heavy, such as advanced lighting or shadows, and change them individually.
A lower setting is not automatically the right fix. A game may spend its time on a different effect, or a resolution change may make text and fine geometry uncomfortably soft. Keep the highest setting that meets your chosen motion target and remains legible on your display.
When the goal is image quality
Start from 1080p and inspect the game’s anti-aliasing, texture, lighting, and shadow choices at normal viewing distance. Some options mainly remove flicker or jagged edges; others alter lighting or surface detail. Increase one setting, revisit the same camera angles, and keep it only when the improvement is meaningful on your screen.
Ray tracing deserves particular caution. Valve does not identify it as a universally recommended first change, and its effect differs by game. Enable or raise it only after checking that the title remains comfortable to play at your chosen resolution and performance target.
When the game offers upscaling or frame generation
These features are game-specific and are not ranked by Valve’s Steam Machine support guidance. Read the title’s descriptions, note whether the option changes internal rendering resolution or generated frames, and compare the result in motion. Watch for artifacts, latency, or a softer image instead of judging from a still screenshot. Keep the feature only when its trade-off suits your goal.
Rank #3
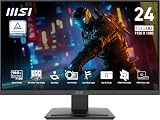
- MSI's 23.8-inch Full HD IPS gaming monitor (1920×1080) delivers a 1500:1 contrast ratio with wide 178°/178° viewing angles — producing deeper blacks, brighter highlights, and accurate colors from virtually any position for gaming and productivity.
- TÜV Rheinland certified Flicker Free and Low Blue Light — eliminating the ~200Hz screen flicker common on standard monitors and reducing harmful blue light exposure to minimize eye strain during extended gaming or work sessions.
- 144Hz high refresh rate delivers ultra-smooth motion and sharper tracking versus standard 60Hz or 75Hz monitors — keeping every frame fluid and responsive for fast-paced FPS, racing, and action games without screen tearing or stuttering.
- MSI's built-in Eye-Q Check provides a vision assessment tool to help optimize display settings for healthier long-term viewing — designed for professionals and students spending extended hours in front of a Full HD IPS screen.
- Tilt-adjustable stand (-5°~20°) for comfortable viewing at any desk setup, with VESA 100×100mm wall mount compatibility for monitor arms, brackets, and multi-monitor arrangements — reducing neck strain during long gaming or work sessions.
Adjust HDR and SDR brightness for the display
For system-level picture controls, open Settings > Display > Advanced. Valve lists HDR and SDR content brightness there.
Do these 3 things before closing this tab:
1Fix the driver behind crashes, sound loss and screen glitches2Clear out junk files and repair common Windows errors3Scan for outdated or missing drivers - takes under a minuteHDR
Use HDR when your connected display supports it and you want the game or desktop to use high-dynamic-range presentation. Evaluate bright highlights, dark areas, and color transitions in an actual game. HDR changes how the display presents the signal; Valve’s support material does not claim that enabling it increases frame rate or otherwise improves game performance.
SDR content brightness
SDR content brightness controls the appearance of standard-dynamic-range material when HDR-related display behavior is involved. Adjust it while looking at ordinary menus or an SDR game, then check a second piece of content. A setting that looks correct in one scene can make another look washed out or too dark.
These controls belong after you have decided that the problem is presentation rather than rendering speed. If motion is uneven, changing HDR or SDR brightness is unlikely to address the cause.
How Steam Machine hardware affects expectations
Valve’s Steamworks developer documentation describes Steam Machine as running SteamOS with a discrete, semi-custom AMD desktop-class CPU and GPU. Valve characterizes the platform as roughly six times more powerful than Steam Deck. That is a broad platform comparison, not a prediction that every game will run at a particular frame rate or preset.
Rank #4

- High-Performance Display: 24.5-inch Full HD (1920x1080) Fast IPS gaming monitor with overclock to 310Hz refresh rate designed for professional gamers and immersive gameplay
- Ultra-Fast Response Time: ASUS Fast IPS technology enables a 0.3ms (GTG) response time(min.) for sharp gaming visuals with high frame rates
- Adaptive Sync Technology: FreeSync Premium and G-Sync compatible delivers a seamless, tear-free gaming experience
- Advanced Motion Blur Reduction: ASUS Extreme Low Motion Blur Sync (ELMB SYNC) technology enables ELMB together with variable refresh rate, eliminating ghosting and tearing for sharp gaming visuals with high frame rates
- Convenient Monitor Control: DisplayWidget Center enables easy OSD access and monitor settings adjustments with a mouse
The hardware description explains why a game may expose more demanding options than it did on Steam Deck, but it does not remove the need for title-specific testing. Engine workloads, display resolution, effects, and developer defaults still determine the result. Use the 1080p baseline and the game’s own menu to find the appropriate balance rather than translating the six-times comparison into a guaranteed setting.
Independent reader supportYour contribution helps us test, update, and keep practical guides available for everyone.A practical troubleshooting path
The image is stretched, cropped, or surrounded by borders
- Return to Settings > Display and check the Display dropdown.
- Launch the game and inspect its own display or graphics resolution.
- Apply the resolution that matches the intended presentation, then verify menus and gameplay.
- If only one title is affected, keep the correction in that game instead of changing the global setting.
The game looks soft after a resolution change
Confirm whether the game has its own render-scale or upscaling control. A displayed output resolution and an internal rendering resolution may be separate options. Test the game’s available choices one at a time and restore the setting that gives readable text and acceptable detail.
Performance changed after enabling a visual feature
Reproduce the same scene, then undo the last option you changed. If the problem disappears, that option is a likely contributor for this title. Test a less demanding value or disable the feature, and record the result before trying another setting. Avoid changing several options simultaneously, because you will not know which one caused the change.
HDR looks wrong but performance is fine
Keep the game resolution and quality settings unchanged, then adjust HDR or SDR content brightness under Settings > Display > Advanced. Check both HDR and ordinary SDR material. If the display still looks incorrect, compare the game’s own HDR toggle and calibration controls with the system setting; the two controls may serve different parts of the signal path.
What to change first: a concise decision framework
- No obvious problem: Keep the global Display setting at Default (1080p) and use the game’s defaults.
- One game has a display-specific issue: Change resolution in that game first, leaving the global setting alone.
- Motion is uneven: Test the game’s resolution, internal-resolution or upscaling controls, and other options the game identifies as costly, one at a time.
- The picture is too harsh, dark, or washed out: Address HDR or SDR content brightness in Settings > Display > Advanced.
- You want more visual detail: Keep 1080p as the reference, then test the title’s quality options individually and retain only visible improvements that fit your performance goal.
Limits of a universal preset recommendation
Steam Machine’s support guidance establishes the 1080p starting point and the locations of the display controls, but it does not publish a cross-game sequence such as “lower shadows first” or “enable ray tracing last.” Such rules can be useful inside a specific game when backed by that game’s own descriptions and repeatable testing, but presenting them as universal Steam Machine guidance would overstate what Valve documents.
SteamOS interface labels and defaults can change with updates. If your menus differ, use the current Settings and game-display labels shown on your system, and confirm the resulting picture in the title you are tuning. Valve’s support page does not identify an individual author or publication date, so its documented 1080p baseline should be treated as the stated support guidance rather than a dated benchmark.
The Bottom Line
Leave Steam Machine at its 1080p Default first. Change resolution globally only when your display requires it, use per-game resolution for individual exceptions, and then tune that game’s visual options one at a time for your specific goal. Use HDR and SDR content brightness under Settings > Display > Advanced to correct presentation, not to chase performance gains.
Quick Recap
Product prices and availability are accurate as of the date/time indicated and are subject to change. Any price and availability information displayed on Amazon at the time of purchase will apply.
What’s actually slowing this PC down?
Pick the symptom - the matching free tool is one click away.

