Windows Errors? Fix Them Before They Spread
Repair common Windows errors and clear accumulated junk for a smoother, more stable PC - no reinstall needed.Free scan · no reinstallOutdated Drivers Are Slowing You Down
One free scan finds every outdated or missing driver and matches the right update for your exact hardware.Free scan · exact hardware matchTo connect two IPv4 LANs, place a Linux machine on both networks, enable IPv4 forwarding on that machine, and add a route on the sending host that points to the router’s address on its own subnet. This lab uses 192.168.110.0/24 and 192.168.120.0/24; the commands are temporary and are intended for a controlled KVM, VirtualBox, or physical test network.
Why two subnets need a router
Hosts on the same IPv4 subnet can deliver frames through their local switch. A host sending to a different subnet cannot deliver that traffic directly: it sends the packet to a router, which forwards it through another interface and broadcast domain.
This example keeps the networks separate:
| Device or network | Address | Purpose |
|---|---|---|
| LAN 1 | 192.168.110.0/24 |
First broadcast domain |
| Router interface on LAN 1 | 192.168.110.126 |
Next hop for hosts on LAN 1 |
| Host 1 | 192.168.110.125 |
Originating host |
| LAN 2 | 192.168.120.0/24 |
Second broadcast domain |
| Router interface on LAN 2 | 192.168.120.136 |
Router address on LAN 2 |
| Host 2 | 192.168.120.135 |
Destination host |
The router must have one interface attached to each isolated network. Do not connect both virtual networks to the same bridge or switch, or you will no longer be testing routed traffic between separate LANs.
Choose a safe lab layout
KVM or VirtualBox
Create two virtual switches or bridges. Attach the router VM to both, Host 1 only to the 192.168.110.0/24 network, and Host 2 only to the 192.168.120.0/24 network. Interface names vary by distribution and hypervisor; the tutorial uses ens3 for Host 1, but your system may show names such as enp1s0 or another predictable name.
Do these 3 things before closing this tab:
1Clear out junk files and repair common Windows errors2Fix the driver behind crashes, sound loss and screen glitches3Repair Windows errors before they cause bigger problems#1 Best Overall

- DUAL-BAND WIFI 6 ROUTER: Wi-Fi 6(802.11ax) technology achieves faster speeds, greater capacity and reduced network congestion compared to the previous gen. All WiFi routers require a separate modem. Dual-Band WiFi routers do not support the 6 GHz band.
- AX1800: Enjoy smoother and more stable streaming, gaming, downloading with 1.8 Gbps total bandwidth (up to 1200 Mbps on 5 GHz and up to 574 Mbps on 2.4 GHz). Performance varies by conditions, distance to devices, and obstacles such as walls.
- CONNECT MORE DEVICES: Wi-Fi 6 technology communicates more data to more devices simultaneously using revolutionary OFDMA technology
- EXTENSIVE COVERAGE: Achieve the strong, reliable WiFi coverage with Archer AX1800 as it focuses signal strength to your devices far away using Beamforming technology, 4 high-gain antennas and an advanced front-end module (FEM) chipset
- OUR CYBERSECURITY COMMITMENT: TP-Link is a signatory of the U.S. Cybersecurity and Infrastructure Security Agency’s (CISA) Secure-by-Design pledge. This device is designed, built, and maintained, with advanced security as a core requirement.
Physical hardware
A physical test needs three computers, two Ethernet switches, and Ethernet cabling. Connect the router computer to both switches, then connect each host to only its corresponding switch. An unmanaged Ethernet switch is sufficient for this basic two-LAN topology.
Inspect the Linux router first
On the router, confirm that both interfaces have addresses in the correct networks:
ip addr show
ip route show
The route table should contain connected routes for both 192.168.110.0/24 and 192.168.120.0/24. If an interface is down, attached to the wrong virtual network, or has an address from the wrong subnet, fix that before testing forwarding.
Rank #2

- 𝗢𝗻𝗲 𝗦𝘄𝗶𝘁𝗰𝗵 𝗠𝗮𝗱𝗲 𝘁𝗼 𝗘𝘅𝗽𝗮𝗻𝗱 𝗡𝗲𝘁𝘄𝗼𝗿𝗸: 5× 10/100/1000Mbps RJ45 Ports supporting Auto Negotiation and Auto MDI/MDIX.
- 𝗚𝗶𝗴𝗮𝗯𝗶𝘁 𝘁𝗵𝗮𝘁 𝗦𝗮𝘃𝗲𝘀 𝗘𝗻𝗲𝗿𝗴𝘆: Latest innovative energy-efficient technology greatly expands your network capacity with much less power consumption and helps save money.
- 𝗥𝗲𝗹𝗶𝗮𝗯𝗹𝗲 𝗮𝗻𝗱 𝗤𝘂𝗶𝗲𝘁: IEEE 802.3X flow control provides reliable data transfer and Fanless design ensures quiet operation.
- 𝗣𝗹𝘂𝗴 𝗮𝗻𝗱 𝗣𝗹𝗮𝘆: Easy setup with no software installation or configuration needed.
- 𝗔𝗱𝘃𝗮𝗻𝗰𝗲𝗱 𝗦𝗼𝗳𝘁𝘄𝗮𝗿𝗲 𝗙𝗲𝗮𝘁𝘂𝗿𝗲𝘀: Prioritize your traffic and guarantee high quality of video or voice data transmission with Port-based 802.1p/DSCP QoS and IGMP Snooping.
Enable IPv4 forwarding
Check the current setting
sysctl net.ipv4.ip_forwardA value of 0 means the kernel is not forwarding IPv4 packets between interfaces. A value of 1 permits forwarding, subject to any firewall policy.
Enable it for this lab session
echo 1 > /proc/sys/net/ipv4/ip_forwardThis is the tutorial’s temporary lab command. It is not persistent and is not a complete production router configuration. Firewall rules, filtering, logging, and an appropriate persistent configuration still need to be designed for a real network.
Add a static route on Host 1
Host 1 needs to know that the second network is reachable through the router interface on Host 1’s own LAN. Run this on Host 1:
Rank #3
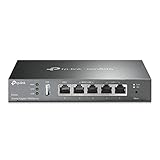
- 【Five Gigabit Ports】1 Gigabit WAN Port plus 2 Gigabit WAN/LAN Ports plus 2 Gigabit LAN Port. Up to 3 WAN ports optimize bandwidth usage through one device.
- 【One USB WAN Port】Mobile broadband via 4G/3G modem is supported for WAN backup by connecting to the USB port. For complete list of compatible 4G/3G modems, please visit TP-Link website.
- 【Abundant Security Features】Advanced firewall policies, DoS defense, IP/MAC/URL filtering, speed test and more security functions protect your network and data.
- 【Highly Secure VPN】Supports up to 20× LAN-to-LAN IPsec, 16× OpenVPN, 16× L2TP, and 16× PPTP VPN connections.
- Security - SPI Firewall, VPN Pass through, FTP/H.323/PPTP/SIP/IPsec ALG, DoS Defence, Ping of Death and Local Management. Standards and Protocols IEEE 802.3, 802.3u, 802.3ab, IEEE 802.3x, IEEE 802.1q
ip route add 192.168.120.0/24 via 192.168.110.126 dev ens3The via address is 192.168.110.126, not the router’s address on LAN 2. The dev value must be Host 1’s actual interface connected to LAN 1.
Verify the route:
ip route showYou should see a route for 192.168.120.0/24 using 192.168.110.126. In practical terms, Host 1 can now access that network through the router interface at 192.168.110.126.
Recommended Free Tools
Make the return path work
Routing is two-way. Host 2 must also know how to reach 192.168.110.0/24. You can provide that route explicitly on Host 2:
Rank #4

- Dual-band Wi-Fi with 5 GHz speeds up to 867 Mbps and 2.4 GHz speeds up to 300 Mbps, delivering 1200 Mbps of total bandwidth¹. Dual-band routers do not support 6 GHz. Performance varies by conditions, distance to devices, and obstacles such as walls.
- Covers up to 1,000 sq. ft. with four external antennas for stable wireless connections and optimal coverage.
- Supports IGMP Proxy/Snooping, Bridge and Tag VLAN to optimize IPTV streaming
- Access Point Mode - Supports AP Mode to transform your wired connection into wireless network, an ideal wireless router for home
- Advanced Security with WPA3 - The latest Wi-Fi security protocol, WPA3, brings new capabilities to improve cybersecurity in personal networks
ip route add 192.168.110.0/24 via 192.168.120.136Alternatively, configure the router interface on each LAN as the host’s default gateway. Use only one deliberate design: an explicit lab route is useful for learning, while a default gateway is common when the router is responsible for all off-subnet traffic.
Test in a useful order
- From Host 1, ping the router’s LAN 1 address,
192.168.110.126. - From Host 2, ping the router’s LAN 2 address,
192.168.120.136. - From Host 1, ping Host 2 at
192.168.120.135. - From Host 2, ping Host 1 at
192.168.110.125after installing the return route or setting the appropriate gateway. - On each machine, use
ip route showto confirm that the route selected for the destination points to the expected next hop.
A failed ping does not identify the fault by itself. Virtual-machine and distribution combinations can produce inconsistent ping results, so check interface state, addresses, routes, forwarding, and firewall behavior at each hop.
Independent reader supportYour contribution helps us test, update, and keep practical guides available for everyone.Remove the temporary route and reset the lab
On Host 1, remove the route with:
ip route del 192.168.120.0/24Remove the corresponding route from Host 2 if you added one. The tutorial’s route and forwarding changes are nonpersistent: they disappear after a restart. That makes them convenient for experiments but unsuitable as the final configuration for a server or permanent router.
The Tool Desk
Outbyte PC Repair FREEClear out junk files and repair common Windows errorsFree Scan →Outbyte Driver Updater FREEScan for outdated or missing drivers - takes under a minuteDriver Scan →Best Value

- GIGABIT ETHERNET PORTS: Features 5 x 1.0Gbps Ethernet ports for high-speed connectivity. Auto-negotiating ports detect the optimal speed for connected devices and work with existing Cat5e or Cat6 Ethernet cables.
- PLUG-AND-PLAY UNMANAGED NETWORK SWITCH: Simple plug-and-play setup with no software to install or configuration required.
- FLEXIBLE MOUNTING OPTIONS: Compact metal design supports desktop or wall-mount placement for versatile installation.
- SILENT & ENERGY-EFFICIENT OPERATION: Fanless design ensures silent performance, while IEEE 802.3az Energy Efficient Ethernet reduces power consumption without compromising high-speed network performance.
- REGIONAL COMPATIBILITY: Made for use in U.S. & CA only
Persist the configuration on a current distribution
For a lasting setup, save addresses, gateways, forwarding policy, and static routes in the network-management system your distribution actually uses. Common choices include NetworkManager, systemd-networkd, and netplan; configuration file names and commands differ by release. After saving the configuration, reboot or restart the relevant network service and verify again with ip addr show, ip route show, and sysctl net.ipv4.ip_forward. Do not assume that a command which works interactively will survive a reboot.
Troubleshooting: why one subnet cannot ping the other
The router cannot reach both LANs
- Confirm each router interface is connected to the intended virtual bridge or physical switch.
- Check that the LAN 1 interface has an address in
192.168.110.0/24and the LAN 2 interface has an address in192.168.120.0/24. - Use
ip route showto verify both connected routes.
Forwarding is disabled
Run sysctl net.ipv4.ip_forward on the router. If it returns 0, enable forwarding for the lab and test again.
Host 1 has no route to LAN 2
Run ip route show on Host 1 and confirm the route specifies 192.168.120.0/24, next hop 192.168.110.126, and the interface attached to LAN 1.
The destination has no return route
Host 2 must send replies toward 192.168.120.136, either through an explicit route to 192.168.110.0/24 or through a suitable default gateway.
A firewall blocks forwarded traffic
Successful pings to each router interface prove local connectivity, not that the router is allowed to forward packets. Review the router’s firewall and any host firewall rules before changing the network design.
Quick Recap
What this exercise teaches
- A subnet boundary is a routing boundary, not merely a different label.
- A Linux router needs interfaces in both networks and IPv4 forwarding enabled.
- The sender needs a route to the remote network, and the receiver needs a return path.
ip route showis often more informative than a single ping result.- Interactive
ipandsysctlchanges are excellent for a disposable lab but must be translated into distribution-specific persistent configuration for regular use.
Product prices and availability are accurate as of the date/time indicated and are subject to change. Any price and availability information displayed on Amazon at the time of purchase will apply.




