What’s actually slowing this PC down?
Pick the symptom - the matching free tool is one click away.
CasaOS still works, but it is no longer the actively updated platform many older tutorials imply. The official repository lists CasaOS v0.4.15, released December 19, 2024. IceWhale now describes ZimaOS as evolved from CasaOS. For an existing or experimental homelab, CasaOS remains a convenient Linux-and-Docker dashboard; for a new long-lived server, compare it with ZimaOS, conventional Docker Compose, or a storage-first platform before committing.
What CasaOS does—and what it does not
CasaOS is a web management layer installed on Linux. It uses Docker to run applications and gives you a browser dashboard for app installation, container controls, logs, basic resource visibility, files, and storage paths. Its app store supplies Docker Compose-based definitions maintained by official and community contributors.
As an Amazon Associate I earn from qualifying purchases.
It is not a bare-metal operating system, a backup system, or a security guarantee. You still need Linux administration, Docker troubleshooting, external backups, and a deliberate remote-access policy. An app-store listing does not prove that an image is current, trustworthy, or compatible with your CPU architecture.
The project describes itself as an open-source personal-cloud system focused on a simple Docker-based home-cloud experience (project repository; documentation).
#1 Best Overall
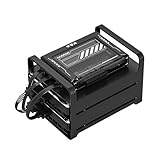
- 【Build Your Own NAS & Homelab — Not Just Storage】 More than a traditional NAS, ZimaBlade 7700 is a flexible x86 mini server for building your own homelab, personal cloud, or Docker host. Perfect for DIY NAS, self-hosting, container apps, and even retro systems — not limited like typical ARM-based NAS devices.
- 【x86 Platform — Broad Compatibility, Real Freedom】 Powered by an Intel quad-core x86 processor, it runs a wide range of operating systems and software with native compatibility. Ideal for Linux, Docker, CasaOS, and more — designed for flexibility and experimentation rather than locked-down appliance use.
- 【16GB RAM for Smooth Multi-Service Workloads】 Handle file sharing, media streaming, backups, and multiple lightweight services at once. Optimized for low-power, always-on operation — a great fit for home labs and personal servers running 24/7.
- 【Smooth 4K Media Streaming — Plex Direct Play Ready】 Stream your personal media library smoothly with Plex and similar media servers. Supports 4K playback on compatible devices via direct play, delivering a reliable home media experience without the need for heavy transcoding.
- 【Complete 2-Bay NAS Kit — Ready to Build】 Includes power supply, 16GB RAM, metal drive cage for 2 HDD/SSD, and dual SATA cables — everything you need to start building your own NAS right out of the box.
Decide whether CasaOS fits your server
| Need | CasaOS assessment |
|---|---|
| Simple dashboard for a few Docker apps | Good fit, especially on a personal or family homelab |
| Existing CasaOS installation | Reasonable to maintain with backups and cautious updates |
| Advanced RAID, snapshots, ACLs, or enterprise identity | Use a storage-first NAS/server platform instead |
| Many stacks with infrastructure-as-code and predictable rollback | Use Compose with Portainer or Dockge, keeping files as the source of truth |
| New IceWhale appliance deployment | Evaluate ZimaOS, which IceWhale describes as evolved from CasaOS |
Do not call CasaOS discontinued: the evidence shows an old latest release and a product-direction shift, not a formal discontinuation notice.
Hardware and operating-system prerequisites
- Use a spare or dedicated machine rather than your everyday desktop.
- Prefer wired Ethernet and reserve a stable DHCP lease in your router.
- An SSD is preferable for Linux, Docker metadata, and application databases; use separate disks for large media and backups.
- 64-bit x86 (amd64) offers the broadest image compatibility. CasaOS documentation also lists arm64 and armv7.
- Have SSH access or a directly attached keyboard and display.
- Ensure working DNS, HTTPS access, accurate system time, and no competing service on the ports CasaOS needs.
The official getting-started guide identifies Debian 12 as tested and recommended, with Ubuntu Server 20.04 and Raspberry Pi OS listed as tested systems. Elementary OS, Armbian, Alpine, OpenWrt, and Arch Linux are community-tested, not equivalent recommendations (official requirements).
There is no useful universal RAM or disk minimum: Nextcloud, Jellyfin transcoding, Immich, Home Assistant, and databases determine the real requirement.
Prepare a clean Linux host
A fresh Debian 12 installation is safer than layering CasaOS onto an already complicated Docker server. Log in through SSH or a local terminal and update it:
sudo apt update
sudo apt full-upgrade -y
sudo reboot
After reconnecting, verify the machine before installing:
hostnamectl
ip addr
df -h
free -h
lsblk -f
findmnt- Confirm the expected hostname and LAN address.
- Identify the disk or mount point that will hold application data.
- Check free space on the boot disk.
- Confirm that an existing reverse proxy, web server, or Docker stack will not collide with CasaOS.
Install CasaOS safely
The official quick-start methods are:
wget -qO- https://get.casaos.io | sudo bashor:
curl -fsSL https://get.casaos.io | sudo bashThese commands execute a downloaded installer with root privileges. Use HTTPS, inspect the official project and installer source when appropriate, and do not run this on a production host without a recovery plan. Run it from SSH or a directly attached terminal—not from CasaOS’s browser terminal.
Installation can take several minutes while Docker and CasaOS services are configured. If it fails, do not repeatedly rerun it blindly; check the distribution, architecture, DNS, HTTPS, permissions, and existing Docker setup first.
Rank #2

- Entry-level NAS Personal Storage:UGREEN NAS DH2300 is your first and best NAS made easy. It is designed for beginners who want a simple, private way to store videos, photos and personal files, which is intuitive for users moving from cloud storage or external drives and move away from scattered date across devices. This entry-level NAS 2-bay perfect for personal entertainment, photo storage, and easy data backup (doesn't support Docker or virtual machines).
- Set Your Devices Free, Expand Your Digital World: This unified storage hub supports massive capacity up to 64TB.*Storage drives not included. Stop Deleting, Start Storing. You can store 22 million 3MB images, or 2 million 30MB songs, or 43K 1.5GB movies or 67 million 1MB documents! UGREEN NAS is a better way to free up storage across all your devices such as phones, computers, tablets and also does automatic backups across devices regardless of the operating system—Window, iOS, Android or macOS.
- The Smarter Long-term Way to Store: Unlike cloud storage with recurring monthly fees, a UGREEN NAS enclosure requires only a one-time purchase for long-term use. For example, you only need to pay $459.98 for a NAS, while for cloud storage, you need to pay $719.88 per year, $2,159.64 for 3 years, $3,599.40 for 5 years. You will save $6,738.82 over 10 years with UGREEN NAS! *NAS cost based on DH2300 + 12TB HDD; cloud cost based on 12TB plan (e.g. $59.99/month).
- Blazing Speed, Minimal Power: Equipped with a high-performance processor, 1GbE port, and 4GB RAM on Board, this NAS handles multiple tasks with ease. File transfers reach up to 125MB/s—a 1GB file takes only 8 seconds. Don't let slow clouds hold you back; they often need over 100 seconds for the same task. The difference is clear.
- Let AI Better Organize Your Memories: UGREEN NAS uses AI to tag faces, locations, texts, and objects—so you can effortlessly find any photo by searching for who or what's in it in seconds. It also automatically finds and deletes similar or duplicate photo, backs up live photos and allows you to share them with your friends or family with just one tap. Everything stays effortlessly organized, powered by intelligent tagging and recognition.
Open the dashboard and complete first-run setup
- Find the server address with
ip addr. - From another device on the same LAN, open that IP address in a browser.
- Create the administrator account with a unique, strong password.
- Reserve the address in your router so bookmarks and app links remain stable.
- Reboot the host and confirm the dashboard returns.
casaos.local may work through local name discovery, but an IP address is the dependable fallback because mDNS, VLANs, and router support vary. Do not assume a fixed port from an old tutorial. The reverse-proxy guide uses local port 82 in its example; verify your installation with:
sudo ss -tulpn
sudo systemctl --type=service | grep -i casaos
docker ps
Secure the installation before adding services
- Use strong, unique CasaOS and Linux passwords; use SSH keys where practical.
- After confirming key login, disable password-based SSH.
- Patch Debian, Docker applications, and CasaOS deliberately.
- Never forward the CasaOS administration port directly from your router.
- Prefer a VPN for remote administration.
- If a public service is necessary, use a maintained reverse proxy, HTTPS, certificate renewal, and application-level authentication.
- Segment untrusted IoT devices from the server when practical.
- Do not install arbitrary community app entries without inspecting their images, ports, volumes, privileges, and update history.
CasaOS’s reverse-proxy guidance recommends considering a VPN and notes that failures may belong to Docker, Compose, CasaOS, the web server, or the network (official proxy guide).
Plan storage before installing applications
Keep these roles distinct:
- Operating-system disk
- Docker image and container storage
- Application configuration and databases
- User files and media
- Backup destinations
A practical layout is:
/data/
├── AppData/
│   ├── jellyfin/
│   ├── nextcloud/
│   └── immich/
├── Media/
│   ├── Movies/
│   ├── TV/
│   └── Music/
└── Backups/
CasaOS installations often use /DATA, but never copy that path without checking your own mounts. Create directories only after confirming the correct disk:
sudo mkdir -p /data/AppData /data/Media /data/BackupsPersistent data belongs in host bind mounts or named Docker volumes. Removing a container is normally different from removing its volume, but a wrong bind-mount path can make destructive actions affect the wrong files. The official guides include a procedure for moving Docker images and volumes when a boot disk is too small (CasaOS guides).
Install your first application
- Open App Store and search for a modest first service such as File Browser, Jellyfin, or Home Assistant.
- Inspect the publisher, image name, architecture support, ports, credentials, storage paths, and notes.
- Choose a persistent host directory or named volume for configuration and user data.
- Set a unique application password.
- Install and open the application from the dashboard.
- Check logs if it does not start.
- Stop and start it, then reboot the host to confirm its data persists.
The store’s Compose definition, Docker image, upstream release, and CasaOS presentation metadata are separate layers. The app-store documentation describes standard Compose settings and CasaOS-specific x-casaos metadata (app-store repository; Compose specification). Treat the store as a convenience, not a safety or freshness guarantee.
Import a custom Docker Compose stack
For an application absent from the store, obtain its Compose file from the upstream project, then review every image, port, environment variable, volume, device, network, and privileged setting before importing it through CasaOS’s custom-install workflow.
Keeping Compose files on disk gives you a portable fallback. For a project at /opt/stacks/example:
Rank #3

- Dell PowerEdge R730xd 24B SFF 2U Server
- 2x Intel Xeon E5-2690 v4 2.6Ghz 14-Core (28-cores Total)
- 128GB DDR4 RAM – 4x 1.2TB 10K SAS 2.5” 12Gb/s
- Dell H730P mini 2GB 12Gb/s RAID
- 2x 750W PSU - 2x 10Gb SFP+ 2x 1Gb (RJ45) NIC
cd /opt/stacks/example
docker compose config
docker compose pull
docker compose up -d
docker compose ps
docker compose logs --tail=100
Use docker compose down only when you understand its effect. It removes that project’s containers and networks but normally leaves named volumes. Never use docker compose down -v casually.
A harmless test stack is:
name: whoami

services:
  whoami:
    image: traefik/whoami:v1.10
    ports:
      - "8080:80"
    restart: unless-stopped
Validate it with docker compose config, start it with docker compose up -d, and open port 8080 only on your trusted LAN.
Updates: three different maintenance jobs
Update Debian
Apply normal operating-system security updates through Debian’s package manager and reboot when required.
Update CasaOS
Check the installed version with:
casaos -vThe official repository lists v0.4.15 as released December 19, 2024. Its documented manual update commands are:
wget -qO- https://get.casaos.io/update | sudo bashor:
curl -fsSL https://get.casaos.io/update | sudo bashRun this from SSH or a local terminal. The official guidance warns against using CasaOS’s own UI terminal because the update can terminate the interface performing it.
Crashes, No Sound, or Screen Glitches?
Random freezes, missing sound and display glitches usually trace back to one bad driver. Find and replace yours safely.Free scan · under a minuteWindows Errors? Fix Them Before They Spread
Repair common Windows errors and clear accumulated junk for a smoother, more stable PC - no reinstall needed.Free scan · no reinstallUpdate each application
For a Compose project:
cd /opt/stacks/example
docker compose pull
docker compose up -d
docker image prune
Use docker image prune only after confirming that old images are not needed for rollback. Do not assume the latest tag is safe; use pinned or release-specific tags when the application publisher recommends them. Back up databases and configuration before upgrades.
Backups and recovery
CasaOS is not a backup. Preserve application configuration, databases, irreplaceable files, Compose files, securely stored .env files, and mount information. Keep one local copy on a separate disk and another copy on a different device or physical location, then test restores periodically.
Rank #4

- 【Advanced Home Data & Media Hub】For advanced home users who need phone backup, file storage, and centralized data management. Centralize family photos, 4K videos, movies, computer backups, and personal files in one place while running multiple apps for home entertainment and everyday data management. Suitable for households with growing digital libraries and multiple NAS use cases.
- 【Built for Creators, Media Servers & Advanced Apps】Powered by the Intel N100 Quad-Core CPU, 8GB DDR5 RAM, 2.5GbE networking, and dual M.2 NVMe slots, DXP2800 handles large files and heavier workloads with ease. Run Docker, virtual machines, and media server applications compatible with Plex—ideal for content creators, tech enthusiasts, and advanced home users managing 4K videos, RAW photos, personal media libraries, and multiple NAS apps.
- 【Up to 80TB for Growing Digital Libraries】 Supports up to 80TB of storage using two HDD bays and two M.2 NVMe SSD slots for family photos, movies, RAW photos, 4K videos, work files, and device backups. AI photo management supports recognition of people, objects, scenes, and locations, album organization, and duplicate photo detection. HDDs and SSDs are not included.
- 【AI-powered Home Surveillance】Turn DXP2800 into a centralized home surveillance hub by connecting compatible network cameras and storing recordings locally on your NAS. AI-powered features include Face Recognition, People Detection, and Pet Detection, helping advanced home users review important events more efficiently while managing home surveillance and personal data in one place.
- 【One data Center Across Your Devices】Keep files from desktops, laptops, phones, tablets, and other devices together instead of scattered across cloud accounts and external drives. Access, back up, organize, and share data across Windows, macOS, Android, iOS, web browsers, and compatible smart TVs—ideal for creators and advanced home users working across multiple devices.
For database-backed applications, use the application’s dump procedure or stop it before copying database files. A live database directory is not automatically a valid backup.
sudo rsync -aHAX --delete /data/AppData/ /mnt/backup/AppData/--delete removes destination files absent from the source. Verify both paths before running it.
The Tool Desk
Outbyte PC Repair FREERepair Windows errors before they cause bigger problemsFix Now →Outbyte Driver Updater FREEScan for outdated or missing drivers - takes under a minuteDriver Scan →Remote access: LAN first, VPN second
- Use the dashboard locally on your home LAN.
- Connect to the home network through a VPN for administration.
- Expose only carefully selected public applications through a maintained HTTPS reverse proxy.
- Never directly publish the CasaOS administrator interface.
The documented proxy example references local port 82, but port, WebSocket requirements, authentication, certificate renewal, and topology must be verified for your installation. Old proxy instructions may not match current CasaOS behavior (guide).
Troubleshoot common failures
| Symptom | First checks |
|---|---|
| Installer fails | curl -I https://get.casaos.io, cat /etc/os-release, uname -m, sudo apt update |
| Dashboard unavailable | ip addr, sudo ss -tulpn, sudo systemctl --failed, sudo systemctl status casaos; also check VLAN, firewall, changed IP, scheme, and port |
| Container exits | docker ps -a, docker logs --tail=200 <container_name>, docker inspect <container_name>, df -h |
| Port collision | sudo ss -tulpn and the Compose port mappings |
| Data disappears | Check bind mounts, findmnt, df -h, and whether the intended disk was mounted before Docker started |
| Update breaks an app | docker compose logs --tail=200, docker compose ps, docker image ls; restore the prior Compose file or image tag when appropriate |
| Disk fills | df -h and docker system df |
For a failed CasaOS update, use SSH or a local terminal, preserve application directories and Compose files, and consult the official reinstall guidance. CasaOS v0.3.3 and newer document casaos-uninstall; uninstalling the management layer does not substitute for application-data backups.
Alternatives worth considering
ZimaOS
IceWhale describes ZimaOS as evolved from CasaOS, with an appliance-oriented experience, OTA updates, and improved disk management (repository; releases). It is a different platform, not simply a CasaOS update. The official download page warns that CasaOS migration carries configuration files but excludes user data (migration information).
Docker Compose with Portainer or Dockge
This keeps Compose files as the source of truth and makes stacks easier to move between conventional Linux servers. You retain more control but must handle storage, backups, updates, and troubleshooting yourself. Portainer’s official site is portainer.io.
Quick wins for a faster PC:
Repair Windows errors before they cause bigger problemsFix Now →Fix the driver behind crashes, sound loss and screen glitchesFind Drivers →UmbrelOS
Umbrel offers a more appliance-like personal-cloud experience, but hardware and platform constraints may be less flexible. Its site showed Umbrel Home from $549 and Umbrel Pro from $699 in the observed search results; prices, currency, tax, shipping, storage, and availability must be checked for your region and purchase date (Umbrel).
Storage-first platforms
TrueNAS, Unraid, OpenMediaVault, and similar systems are better candidates when snapshots, shares, RAID, ACLs, and formal storage lifecycle matter more than a lightweight Docker dashboard. Compare filesystem support, licensing, hardware requirements, VM/container support, upgrades, and recovery tools.
Quick Recap
Product prices and availability are accurate as of the date/time indicated and are subject to change. Any price and availability information displayed on Amazon at the time of purchase will apply.

