Do these 3 things before closing this tab:
1Fix the driver behind crashes, sound loss and screen glitches2Clear out junk files and repair common Windows errors3Scan for outdated or missing drivers - takes under a minuteShort answer: Set up a HomePod or HomePod mini in the Apple Home app while signed in as the Home owner, and it automatically becomes a home hub. The hub keeps your accessories, automations and shared access available when you are away. You can check which hub is active at Home > More (…) > Home Settings > Home Hubs & Bridges, and you can choose a preferred hub when more than one is available.
What a HomePod home hub does
A HomePod home hub is the always-on coordinator for your Apple Home. It connects the Home app and Siri to compatible lights, locks, thermostats, blinds, sensors and other accessories. Without a reachable hub, many commands work only when your iPhone or iPad is on the same local network. With a hub, Apple Home can relay commands when you are away, run automations, and keep shared household access working.
| # | Preview | Product | Price | |
|---|---|---|---|---|
| 1 |

|
Apple - HomePod mini - Yellow | $141.78 | Buy on Amazon |
| 2 |
|
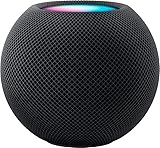
Apple - HomePod mini - Black | $144.00 | Buy on Amazon |
| 3 |

|
Apple - HomePod mini - Orange | $144.00 | Buy on Amazon |
| 4 |

|
Amazon Echo Dot (newest model) - Vibrant sounding speaker, Designed for Alexa+, Great for bedrooms,... | $79.99 | Buy on Amazon |
| 5 |

|
Apple - HomePod mini - Space Gray | $169.99 | Buy on Amazon |
As an Amazon Associate I earn from qualifying purchases.
Apple’s setup guidance states: “When you set up HomePod mini and HomePod,* they automatically become home hubs.” You do not need to enable a separate “hub mode” switch after setup. If you have several eligible devices, Apple Home normally selects one automatically and can fail over to another when necessary.
Free tools Windows power users keep installed
One-click scans. No signup required.
Capabilities a hub adds
- Remote control: Use the Home app to check and control configured accessories while away from home.
- Siri control: Ask Siri to operate accessories and scenes from a HomePod or another Apple device.
- Automations: Run actions at a time of day, when your location changes, or when an accessory such as a motion or contact sensor changes state.
- Shared access: Invite household members to control the home from their own Apple Accounts.
- Accessory coordination: Provide the network and Apple Home connection needed by compatible Matter and HomeKit devices.
Requirements before you begin
Prepare the account, network and hardware before opening the setup flow. These checks prevent most “no home hub” and remote-access problems.
#1 Best Overall
- Rich, 360-Degree Sound – Delivers deep bass and crisp high frequencies for immersive audio in any room.
- Siri Voice Assistant – Control music, smart home devices, and get information hands-free.
- Seamless Apple Integration – Works effortlessly with iPhone, iPad, Mac, and Apple TV for a connected experience.
- Compact & Stylish Design – Small but powerful, fits perfectly in any space.
- Privacy & Security – Designed to keep your personal information safe and secure.
Use the Home owner’s Apple Account
The person adding the HomePod and accessories should be the Apple Home owner. Sign in to the Apple Account associated with that home on the iPhone or iPad used for setup. A guest or invited resident may be able to control accessories, but the owner is the account that should create and administer the home.
Enable iCloud Keychain and two-factor authentication
Turn on iCloud Keychain and two-factor authentication for the Home owner’s Apple Account. Apple Home relies on these account security features for syncing and remote access. If either is disabled, hub setup or away-from-home control can be incomplete.
Provide continuous power and Wi-Fi
Place the HomePod where it can remain powered and connect to the same home Wi-Fi network used by your Apple Home accessories. A hub that is unplugged, repeatedly losing Wi-Fi, or moved outside the home cannot provide dependable remote control or automation execution.
PC Slower Than It Used to Be?
A free scan shows the junk files, broken settings and background clutter dragging Windows down - then fixes them in one click.Free scan · Windows 10 & 11Crashes, No Sound, or Screen Glitches?
Random freezes, missing sound and display glitches usually trace back to one bad driver. Find and replace yours safely.Free scan · under a minuteKeep software current
Update the HomePod, HomePod mini, Apple TV and the iPhone or iPad you use to manage the home. Version mismatches can produce stale hub status, failed accessory pairing or missing Home settings. If a device reports an unavailable hub after an update, restart the HomePod and check its status again.
Set up HomePod as the home hub
- Sign in as the owner. On your iPhone or iPad, use the Apple Account that owns the home. Confirm iCloud Keychain and two-factor authentication are enabled.
- Open the Home app. Start the HomePod or HomePod mini setup flow from the Home app and follow the onscreen instructions.
- Assign a room. Choose the room where the speaker is physically located. A correct room assignment makes Siri requests unambiguous and keeps the Home app organized.
- Finish setup and leave the speaker powered. After setup completes, the HomePod is enrolled as a home hub automatically. Keep it connected to home Wi-Fi rather than treating it like a portable speaker.
- Verify the hub. In Home, tap More (…), choose Home Settings, then open Home Hubs & Bridges. The active hub is shown at the top of the list.
There is no additional pairing code or “make this a hub” command for a normally configured HomePod. The important actions are completing setup under the owner’s account, assigning the device to the correct home and maintaining power and network access.
Rank #2
- Rich, 360-Degree Sound – Delivers deep bass and crisp high frequencies for immersive audio in any room.
- Siri Voice Assistant – Control music, smart home devices, and get information hands-free.
- Seamless Apple Integration – Works effortlessly with iPhone, iPad, Mac, and Apple TV for a connected experience.
- Compact & Stylish Design – Small but powerful, fits perfectly in any space.
- Privacy & Security – Designed to keep your personal information safe and secure.
Check or change the active hub
Open Home > More (…) > Home Settings > Home Hubs & Bridges whenever you need to diagnose remote access or automation behavior. The device at the top is the hub currently serving the home. The list can also show other eligible hubs, such as another HomePod or an Apple TV.
Automatic Selection
Leave Automatic Selection enabled for most homes. Apple Home can choose an available hub and move service to another eligible device if the preferred one becomes unreachable. This is generally more resilient than fixing the home to one speaker that might later be unplugged.
Manual preference
Turn off Automatic Selection only when you have a specific reason to prefer one hub—for example, a wired or centrally placed device that gives your accessories a more reliable network path. Select the desired hub in Home Hubs & Bridges, then confirm it remains available. A manually preferred hub that is powered off or disconnected can leave the home without a usable active hub until you correct the connection or restore automatic selection.
Add HomeKit and Matter accessories
Once the hub is online, add accessories from the Home app rather than from a separate generic Bluetooth or Wi-Fi pairing screen.
- Open Home and choose Add Accessory.
- Follow the onscreen pairing flow.
- When prompted, scan the accessory’s QR code, enter its Apple Home setup code, or enter its Matter code, depending on the product.
- Assign the accessory to the room where it is installed.
- Give it a short, distinctive name that Siri can understand, such as “hall light” or “front door lock.”
- Test a command in the Home app before mounting or relocating the device permanently.
A clear room and name are functional settings, not just labels. “Turn on the kitchen lights” is easier for Siri to interpret than two devices both called “light,” and room-based automations depend on the assigned location.
Rank #3
- Rich, 360-Degree Sound – Delivers deep bass and crisp high frequencies for immersive audio in any room.
- Siri Voice Assistant – Control music, smart home devices, and get information hands-free.
- Seamless Apple Integration – Works effortlessly with iPhone, iPad, Mac, and Apple TV for a connected experience.
- Compact & Stylish Design – Small but powerful, fits perfectly in any space.
- Privacy & Security – Designed to keep your personal information safe and secure.
Thread and Matter requirements
Some Matter accessories use Thread, a low-power mesh network. A Thread Matter device needs a Thread-enabled home hub; an arbitrary HomeKit hub or an iPhone alone is not sufficient for the Thread portion of the connection. Apple lists HomePod mini and HomePod (2nd generation) among its Thread-enabled hub choices.
If a Thread accessory will not pair, first confirm that one of those Thread-capable hubs is set up in the same home and is visible under Home Hubs & Bridges. Then update the hub and accessory, retry Add Accessory, and keep the phone near the accessory during initial commissioning. The product’s Matter setup instructions determine whether you scan a QR code or type a numeric Matter code.
HomePod mini or HomePod (2nd generation)?
Both models are documented by Apple as home-hub choices. The better fit depends on the room, audio expectations and whether Thread accessories are part of your plan. Regional availability and the current retail model can change, so check the model sold in your country before buying.
| Decision factor | HomePod mini | HomePod (2nd generation) |
|---|---|---|
| Home hub role | Automatically becomes a hub after setup. | Automatically becomes a hub after setup. |
| Thread support | Thread-enabled hub for compatible Thread Matter accessories. | Thread-enabled hub for compatible Thread Matter accessories. |
| Audio and room use | Compact speaker suited to desks, shelves and smaller rooms. | Larger speaker intended for stronger, room-filling audio. |
| Temperature and humidity sensing | Includes temperature and humidity sensors. | Includes temperature and humidity sensors. |
| Placement | Easy to place in more locations because of its small footprint. | Requires more shelf or table space and should remain in a stable, suitable location. |
| Purchase price | Varies by region and current retail listing; no single worldwide price is established here. | Varies by region and current retail listing; no single worldwide price is established here. |
Choose the mini when discreet placement, lower space requirements or a Thread hub for a smaller room matters most. Choose the second-generation HomePod when the speaker itself must deliver substantially fuller audio and its larger footprint is acceptable. For hub reliability, placement and network quality matter more than speaker size.
Use HomePod sensors in automations
HomePod mini and HomePod (2nd generation) include temperature and humidity sensors. You can view those readings in Home and use them as conditions or triggers where the Home app offers the relevant automation option—for example, reacting when a room becomes unusually warm.
What’s actually slowing this PC down?
Pick the symptom - the matching free tool is one click away.
Rank #4
- Your favorite music and content – Play music, audiobooks, and podcasts from Amazon Music, Apple Music, Spotify and others or via Bluetooth throughout your home.
- Alexa is happy to help – Ask Alexa for weather updates and to set hands-free timers, get answers to your questions and even hear jokes. Need a few extra minutes in the morning? Just tap your Echo Dot to snooze your alarm.
- Keep your home comfortable – Control compatible smart home devices with your voice and routines triggered by built-in motion or indoor temperature sensors. Create routines to automatically turn on lights when you walk into a room, or start a fan if the inside temperature goes above your comfort zone.
- Do more with device pairing – Fill your home with music using compatible Echo devices in different rooms, or create a home theatre system with Fire TV.
- Say goodbye to drop-offs and buffering - With eero Built-in, Echo Dot doubles as a mesh wifi extender, adding up to 1,000 sq. ft. of wifi coverage to your existing eero network.
Apple says sensing is optimized for indoor conditions around 15–30 °C and 30–70% relative humidity. Accuracy can decrease during extended high-volume playback. Do not position the speaker next to a heater, in direct sun, in a damp area, or inside an enclosed cabinet if you need representative room readings.
Other useful HomePod functions
- Intercom: Send announcements between supported Apple devices in the home.
- HomeKit Secure Video doorbell announcements: Have a compatible doorbell announce activity through HomePod.
- Alarms and timers: Set and hear timers and alarms from the speaker.
- Smoke and carbon-monoxide sound recognition: A compatible HomePod can listen for these alarm sounds and notify you through Apple Home. Treat this as an additional notification feature, not as an emergency safety system or a replacement for certified alarms.
Create remote-control and automation routines
Remote control while away
After the HomePod appears as the active hub, open the Home app from a different network, such as cellular data, and try a simple accessory command. The accessory must be added to that home, the owner’s account must have the required security features enabled, and the hub must remain powered and online. If the command works only at home, return to Home Hubs & Bridges and check the active status before changing accessory settings.
Time-based automation
Use a time-of-day trigger for predictable routines such as switching on a lamp in the evening. Select the accessory or scene to control, then save the automation in Home. The hub executes the routine even when your iPhone is not at home.
Location-based automation
Location triggers can run when household members arrive or leave, subject to the location permissions and people selected in the Home automation. Review which residents are included so one person’s departure does not unexpectedly turn off devices needed by someone who remains home.
Sensor- or accessory-based automation
A sensor or another accessory can trigger an action—for example, a contact sensor changing state can control a light. Give every trigger device a correct room and distinctive name, and test the routine under the real conditions in which it should run.
Best Value
- Rich, 360-Degree Sound – Delivers deep bass and crisp high frequencies for immersive audio in any room.
- Siri Voice Assistant – Control music, smart home devices, and get information hands-free.
- Seamless Apple Integration – Works effortlessly with iPhone, iPad, Mac, and Apple TV for a connected experience.
- Compact & Stylish Design – Small but powerful, fits perfectly in any space.
- Privacy & Security – Designed to keep your personal information safe and secure.
Share control with household members
A home hub allows the Home owner to invite other people to control the home from their Apple Accounts. Add household members through the Home app’s home settings, then choose the access level offered by the current Home interface. Invitees should accept the invitation while signed in to the Apple Account intended for that home. If an invited person cannot see accessories, verify that the invitation was accepted and that their device software is current.
Troubleshoot an unavailable or unreliable hub
Work through these checks in order. Change one condition at a time, then revisit Home > More (…) > Home Settings > Home Hubs & Bridges to see whether the status changes.
- Confirm ownership. Make sure the person who added the HomePod or accessory is the Home owner, not only an invited resident.
- Check account security. Turn on iCloud Keychain and two-factor authentication for the owner’s Apple Account.
- Verify power and location. Confirm the HomePod is plugged in, assigned to the correct home, and physically within the home where its Wi-Fi is available.
- Check Wi-Fi. Make sure the HomePod is connected to the home Wi-Fi network and that the network itself has not changed names, passwords or access rules.
- Update every relevant device. Install current software on the HomePod, HomePod mini, Apple TV and the iPhone or iPad used for control.
- Restart the HomePod. A restart can clear a transient unavailable status after a network or software change.
- Recheck hub selection. Open Home Hubs & Bridges. If Automatic Selection is off and the preferred hub is unavailable, restore Automatic Selection or choose an available hub.
- Retry the accessory operation. For a failed pairing, return to Add Accessory, use the correct QR, Apple Home or Matter code, and confirm that a Thread-enabled hub is present for Thread devices.
When remote control works intermittently
Intermittent control usually points to power, Wi-Fi or hub selection rather than the accessory name. Observe whether the active hub changes in the status screen, and avoid placing the only hub in a room with weak Wi-Fi coverage. If you have multiple eligible hubs, automatic selection provides a fallback; a manually selected hub does not help if that particular device is offline.
Quick wins for a faster PC:
Fix the driver behind crashes, sound loss and screen glitchesFind Drivers →Repair Windows errors before they cause bigger problemsFix Now →When a Thread Matter accessory cannot be added
Confirm that the accessory actually uses Thread, that a HomePod mini or HomePod (2nd generation) is in the home, and that the Thread-capable hub is online. Update the HomePod and controlling iPhone or iPad, then retry the Matter code flow. A non-Thread hub cannot substitute for the required Thread border-router capability.
Placement and reliability checklist
- Keep at least one eligible hub powered continuously.
- Place it where the home Wi-Fi signal is stable, not at the edge of coverage.
- Assign the real room during setup and use unique accessory names.
- Keep software current on hubs and control devices.
- Leave Automatic Selection on unless you have a tested reason to prefer one hub.
- For temperature or humidity automations, keep the speaker in a normal indoor location within Apple’s stated sensing range.
- Do not rely on smoke/CO sound recognition as a replacement for certified safety alarms.
Bottom line
To use a HomePod as a HomeKit smart home hub, set it up in the Home app under the owner’s Apple Account, assign its room and leave it powered on with home Wi-Fi. It becomes a hub automatically. Verify the active device under Home Hubs & Bridges, use a HomePod mini or HomePod (2nd generation) for Thread Matter accessories, and keep account security, software and network conditions current for dependable remote control and automations.
Quick Recap
Product prices and availability are accurate as of the date/time indicated and are subject to change. Any price and availability information displayed on Amazon at the time of purchase will apply.

