What’s actually slowing this PC down?
Pick the symptom - the matching free tool is one click away.
You can increase PS4 capacity without sacrificing your games or progress, but the safe method depends on whether you replace the internal drive or add a USB extended-storage drive. For an internal swap, sync trophies, make a complete backup, install the replacement 2.5-inch drive, reinstall PS4 system software from USB, and restore your data. For the least invasive upgrade, format a compatible external HDD as extended storage and move applications to it; saves, themes, and captures remain on the PS4’s system storage.
Choose the right storage upgrade
There are two fundamentally different ways to add space. An internal replacement gives you a new system drive inside the console. It is the more permanent solution, but it requires opening the PS4, reinstalling the operating system, and restoring or redownloading content. USB extended storage is quicker and avoids opening the console, yet the drive must remain connected whenever you launch an application stored on it.
As an Amazon Associate I earn from qualifying purchases.
| Route | Best for | What it stores | Main trade-off |
|---|---|---|---|
| Internal 2.5-inch HDD or SSD replacement | A permanent capacity increase inside the PS4 | System storage, applications, saved data, screenshots, clips, and settings after restoration | Requires a model-specific drive swap, system-software reinstallation, and a restore or download cycle |
| USB extended-storage HDD | The fastest, least invasive expansion | Applications and add-ons; applications can be moved between system and extended storage | Saved data, themes, screenshots, and video clips cannot be stored there, and the drive must stay connected to run its applications |
If you only need room for more installed games, start with extended storage. If you want to replace a failing drive, consolidate everything inside the console, or avoid having an external drive attached, use the internal-drive route.
Recommended Free Tools
What to prepare before touching the old drive
Identify your PS4 model
Sony’s replacement procedure is model-specific. It covers the CUH-7000 series (PS4 Pro), CUH-2015 series (PS4 Slim), and CUH-1200, CUH-1110, and CUH-1000 series. Find the CUH model number on the console label or its original documentation, then follow the instructions for that exact chassis. Do not assume that a cover, screw position, or drive-access step from another PS4 model is interchangeable.
#1 Best Overall
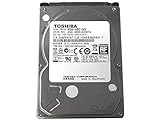
- 1TB Capacity, 9.5mm High, Rotation Speed of 5400RPM
- 8MB Buffer, SATA 3.0Gb/s Interface, 2.5inch Hard Drive
- Works for PS3 / PS4 Game Console HDD replacement / upgrade
- PS3 / PS4 Hard Drive installation & Playstation firmware download instruction included
- Backed by a 3-year warranty from Reseller
Gather the hardware
- A compatible 2.5-inch internal HDD or SSD for an internal replacement.
- A long Phillips screwdriver for the model-specific drive-access and mounting screws.
- A USB storage device for the backup and the PS4 system-software reinstallation file.
- A second USB drive, or enough free space on the same suitable drive, if you want to keep the backup separate from the installer.
For an external upgrade, use a directly connected USB HDD that meets Sony’s extended-storage requirements: SuperSpeed USB (USB 3.0) at 5 Gbps or later, capacity from 250 GB through 8 TB. Sony cautions that operation is not guaranteed with every HDD model, even when a drive appears to meet those figures.
Protect trophies before making a backup
Trophies are synchronized separately from the console backup. On the PS4, open Trophies, press OPTIONS, and choose Sync Trophies With PSN. Wait for the synchronization to complete before shutting down or removing the old drive.
Make a full PS4 backup
Use the PS4’s built-in backup tool while the original drive still works. Go to Settings > System > Back Up and Restore > Back Up, select the content you want included, and start the backup. The tool can include games and applications, saved data, screenshots and video clips, and settings.
The backup USB drive must be formatted as FAT32 or exFAT. It also needs at least twice as much free space as the backup file requires. Check the available capacity before starting; a nearly full drive can fail partway through and leave you without a usable backup.
For additional protection, copy critical saves separately to USB or upload them to PlayStation Plus cloud storage if your account has that service. A separate save copy gives you another recovery path if the full backup is interrupted or the replacement process has to be repeated.
Rank #2
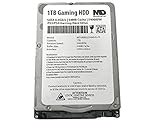
- 2.5inch Notebook HDD, 7mm Height (Slim)
- 1TB Capacity, 5400RPM, 64MB Cache, SATA 6.0Gb/s
- Works for PlayStation gaming systems (PS3 / PS4 Original, PS4 Slim, PS4 Pro)
- Massive 1TB capacity can store up to 80 × 25GB games.
- 2 Years Warranty from Reseller
Internal-drive replacement: complete procedure
1. Finish the backup and power down safely
Confirm that trophy synchronization has completed and that the backup finished without an error. Close applications, hold the PS button, choose the power option to turn the PS4 completely off, and wait until all indicator lights are off. Unplug the console and disconnect its cables before moving it to a stable, well-lit workspace.
2. Remove the original drive using the correct model instructions
Use Sony’s instructions for your CUH series to remove the drive-access cover and the drive caddy. Keep the screws organized; the caddy and its mounting screws are reused. Avoid forcing a cover or sliding a component in the wrong direction, because the access mechanism differs between the Pro, Slim, and original PS4 families.
Do these 3 things before closing this tab:
1Repair Windows errors before they cause bigger problems2Scan for outdated or missing drivers - takes under a minute3Clear out junk files and repair common Windows errors3. Transfer the mounting hardware
Take the original drive out of its metal mounting bracket and place the replacement 2.5-inch drive in the same orientation. Reinstall the bracket screws without overtightening, then slide the caddy and replacement drive back into the console. Replace the access cover and reconnect the cables only after the drive is firmly seated.
4. Prepare the official reinstallation USB
On a computer, obtain the official PS4 full system-software reinstallation file and place it on a USB storage device according to Sony’s required folder and filename structure. The USB device used for this installer must have at least 1 GB of free space. A normal update file is not the same as the full reinstallation file required after replacing the HDD.
5. Start the reinstallation process
Connect the prepared USB device to the PS4, then start the console in the system-software reinstallation process described in Sony’s model instructions. Follow the on-screen prompts. Reinstallation formats the new internal drive, so do not begin this step until you are certain the old-drive backup and any separate save copies are complete.
Rank #3
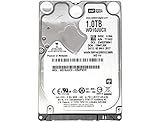
- 1TB Capacity, 9.5mm High, Rotation Speed of 5400RPM
- 16MB Buffer, SATA 6.0Gb/s Interface, 2.5inch Hard Drive
- Works for PS4 (Pro, Slim, Original) Game Console HDD replacement / upgrade (835GB available storage space on PS4, rest capacity is used for System)
- PS4 Hard Drive installation & Playstation firmware download instruction included
- Backed by a 3-year warranty from Reseller
The operating system must be reinstalled after the HDD is replaced; the console will not simply boot into the old installation on the new drive. This is the step most likely to be missed when a drive is swapped without consulting the official procedure.
6. Complete first-run setup
When installation finishes, select your language, network, time, privacy, and other setup choices. Sign in with the PlayStation Network account used on the original installation. Using the same account matters for accessing synchronized trophies, cloud saves, and content licenses.
7. Restore the backup or copy saves back
For a full restoration, open Settings > System > Back Up and Restore > Restore, select the backup, and let the console complete the process. If you made a separate saved-data copy, use the PS4 saved-data management controls to copy it from USB. PlayStation Plus cloud saves can also be downloaded after signing in with the same account that uploaded them.
A restore can take considerable time because it may include applications, captures, and settings as well as saves. Do not unplug the console or USB drive while the progress indicator is active.
8. Reinstall anything not restored
If a game or application was not included in the backup, reinstall it from your library or disc. You may also move applications from an already prepared extended-storage drive after setup. Saved data is separate from the game installation, so verify that your save appears before deleting any remaining copy or starting a new game.
Rank #4

- 1TB Capacity, 9.5mm High, Rotation Speed of 5400RPM
- 8MB Buffer, SATA 3.0Gb/s Interface, 2.5inch Hard Drive
- Works for PS3 / PS4 Game Console HDD replacement / upgrade
- PS3 / PS4 Hard Drive installation & Playstation firmware download instruction included
- Backed by a 3-year warranty from Reseller
Using an external drive as PS4 extended storage
1. Check the drive requirements
The drive must be an HDD with SuperSpeed USB at 5 Gbps or later and a capacity between 250 GB and 8 TB. Connect it directly to a PS4 USB port; Sony does not support using a USB hub for extended storage. If the drive is bus-powered, use the cable supplied with it and avoid loose or unusually long cables that can interrupt the connection.
2. Format it through the PS4
- Connect the external HDD directly to the console.
- Open Settings > Devices > USB Storage Devices.
- Select the connected drive and choose Format as Extended Storage.
- Confirm the warning. Formatting erases the drive’s existing contents.
After formatting, the PS4 manages the drive as application storage. It is not a general-purpose disk for moving saves, themes, screenshots, or video clips.
3. Set the default application location
To install new applications on the external drive, open Settings > Storage, press OPTIONS, choose Application Install Location, and select Extended Storage. Existing applications can be moved from the same storage-management area. Add-ons associated with an application follow the application’s storage location when supported by the console.
4. Disconnect it correctly
Never pull the cable while the PS4 is reading or writing. Use the PS4 menu to stop using the extended-storage device before disconnecting it. If an application lives on that drive and the drive is unplugged, the application will not start until the drive is connected again. Repeated unsafe removal can corrupt application data and force a repair or reformat.
Internal versus external: practical decision points
| Question | Internal replacement | USB extended storage |
|---|---|---|
| Must the console be opened? | Yes; the drive caddy and model-specific cover must be accessed. | No. |
| Is system-software reinstallation required? | Yes, using the full reinstallation file on USB. | No; only the extended-storage format is required. |
| Can saved data live on the added drive? | Yes, after restoration to the new system drive. | No. Saves remain on system storage or in supported USB/cloud backups. |
| Does the drive need to stay attached? | No, once installed internally. | Yes, whenever you run an application stored there. |
| What happens to existing games? | Restore them from the full backup or reinstall them. | Move them to the external drive without changing the internal hardware. |
| Capacity and interface limits | Use a compatible 2.5-inch replacement for the applicable PS4 model; the cited Sony procedure does not state a universal replacement-capacity ceiling. | 250 GB minimum, 8 TB maximum, SuperSpeed USB 5 Gbps or later. |
Choose the internal route when the console’s original drive is failing, you want a self-contained system, or you are comfortable performing a restore. Choose external storage when speed and low risk matter more than having every application inside the console.
Best Value

- FASTER THAN ANY HARD DRIVE: Sequential read/write speeds up to 500/450MB/s on SATA III 6Gb/s deliver quicker boot-up, faster app launches, and shorter game load times compared to traditional HDDs
- SLC CACHING FOR SUSTAINED SPEED: Built-in SLC write caching maintains responsive performance during large file transfers and heavy workloads without dedicated DRAM
- EASY DROP-IN UPGRADE: Standard 2.5-inch, 7mm slim form factor fits most laptops and desktop PCs - the simplest, most affordable way to revive an aging computer
- PS4 COMPATIBLE: Works as a direct replacement for the PlayStation 4, PS4 Slim, and PS4 Pro internal hard drive to noticeably reduce game loading and system boot times
- DURABLE 3D NAND DESIGN: No moving parts means shock and vibration resistance, silent operation, and lower power draw that helps extend laptop battery life
What can go wrong and how to recover
The PS4 says the USB backup cannot be used
- Verify that the USB drive is FAT32 or exFAT, not a format the PS4 cannot read.
- Check that the drive has at least twice the required free space.
- Reconnect the drive directly rather than through a hub.
- Use the same PlayStation Network account that created the copied saved data.
The console will not find the reinstallation file
- Confirm that you downloaded the full reinstallation file, not a smaller update package.
- Check the required USB folder and filename structure character for character.
- Ensure the USB device has at least 1 GB of free space and is connected directly.
- Restart the reinstallation process with the PS4 fully powered off before entering the required startup mode.
A restored game is present but its save is missing
Check that the save was selected for inclusion in the backup, then look in USB saved-data management and PlayStation Plus cloud storage. Download or copy the save while signed in to the same account that created it. Do not overwrite a newer save with an older copy until you have checked the dates and versions available.
An external application shows an error after reconnecting the drive
Reconnect the drive directly to the PS4, allow the console to recognize it, and use the storage menu to verify that it is registered as extended storage. If the drive was removed without using the stop command, the PS4 may need to repair it. Do not choose to reformat until you have accepted that formatting erases its applications.
The new internal drive appears smaller than expected
Some capacity is consumed by the PS4 system software and its reserved space, so the usable figure shown in Settings > Storage is lower than the number printed on the drive. That difference is normal and is not evidence that the installation failed.
Outdated Drivers Are Slowing You Down
One free scan finds every outdated or missing driver and matches the right update for your exact hardware.Free scan · exact hardware matchPC Slower Than It Used to Be?
A free scan shows the junk files, broken settings and background clutter dragging Windows down - then fixes them in one click.Free scan · Windows 10 & 11SSD considerations
A 2.5-inch SATA SSD can be used as the internal replacement when it is compatible with the applicable PS4 model. An SSD has no moving parts, which can be attractive for durability and noise, but the available official material does not establish a specific percentage improvement in PS4 loading times. Treat any claimed loading-time figure as dependent on the particular game, console model, software version, and test method rather than as a guaranteed result.
The replacement procedure is otherwise the same: back up first, swap the drive, reinstall the PS4 system software, and restore or reinstall content. Buying an SSD does not eliminate the need for the USB reinstallation step or change the rules for saved data.
Data-safety checklist
- Sync trophies with PSN before removing the old drive.
- Complete a full Backup and Restore backup while the original drive still works.
- Keep a separate USB or cloud copy of irreplaceable saved data.
- Use FAT32 or exFAT media and at least twice the backup-file capacity.
- Record the exact PS4 CUH model before following a drive-removal guide.
- Have the long Phillips screwdriver and the replacement-drive mounting screws ready.
- Prepare the official full reinstallation file, with at least 1 GB free on its USB device.
- Sign in with the same account used for the original saves and cloud uploads.
- For external storage, use a directly connected 250 GB–8 TB SuperSpeed USB drive.
- Stop using an extended-storage drive through the PS4 menu before unplugging it.
Why the backup matters
“It is important to back up saved data to avoid losing any game progress.” — Sony Interactive Entertainment, PlayStation Support.
A game can usually be downloaded again, but a save represents your progress and may not be recoverable if the old drive fails. The safest sequence is therefore to preserve trophies, create the complete backup, verify that your account and cloud options are available, and only then replace hardware. Once the new installation is working, check a few important saves and applications before disposing of or reusing the old drive.
The Tool Desk
Outbyte PC Repair FREERepair Windows errors before they cause bigger problemsFix Now →Outbyte Driver Updater FREEScan for outdated or missing drivers - takes under a minuteDriver Scan →Quick Recap
Product prices and availability are accurate as of the date/time indicated and are subject to change. Any price and availability information displayed on Amazon at the time of purchase will apply.

