The Tool Desk
Outbyte Driver Updater FREEScan for outdated or missing drivers - takes under a minuteDriver Scan →Outbyte PC Repair FREERepair Windows errors before they cause bigger problemsFix Now →Upgrade the pool from Control Panel > Storage Spaces, then add a Windows-recognized eligible disk and optimize drive usage to rebalance existing allocations. Before changing the pool, verify its health and make an independent backup. An upgraded pool gains optimization and safer drive-removal management, but it cannot be used by earlier Windows versions.
What upgrading a Storage Spaces pool changes
A Storage Spaces pool is a collection of physical disks managed as one storage resource. Virtual disks, called Spaces, are created on top of that pool with a resiliency layout such as Simple, mirror, or parity. Upgrading the pool is a management and compatibility change; it is not the same thing as adding capacity.
As an Amazon Associate I earn from qualifying purchases.
Microsoft recommends upgrading existing pools after you upgrade Windows. The upgraded management model enables features including Optimize drive usage and the Prepare for removal workflow. Those features help redistribute allocations and migrate data before a disk is disconnected.
Free tools Windows power users keep installed
One-click scans. No signup required.
The compatibility cost is permanent for the pool’s metadata: upgraded pools are not compatible with previous Windows versions. Do not upgrade if you must move the pool between Windows releases that predate the upgrade support.
#1 Best Overall

- IronWolf internal hard drives are the ideal solution for up to 8-bay, multi-user NAS environments craving powerhouse performance
- Store more and work faster with a NAS-optimized hard drive providing ultra-high capacity up to 16TB and cache of up to 256MB
- Purpose built for NAS enclosures, IronWolf delivers less wear and tear, little to no noise/vibration, no lags or down time, increased file-sharing performance, and much more
- Easily monitor the health of drives using the integrated IronWolf Health Management system and enjoy long-term reliability with 1M hours MTBF
- Three-year limited warranty protection plan included and three year Rescue Data Recovery Services included
Check the pool before changing anything
Storage changes modify metadata and can start long-running data movement. Confirm that the pool and every virtual disk are healthy before upgrading or adding hardware.
Record the current configuration
- Open Control Panel > Storage Spaces. You can also search for Storage Spaces and select Manage Storage Spaces.
- Record the pool name, pool health, each virtual disk’s health, resiliency type, free capacity, and the physical disks assigned to the pool.
- Check whether an upgrade action is offered for the existing pool. Do not assume that a newly installed Windows version automatically upgraded the pool metadata.
Make an independent backup
Keep a separate copy of important files before changing pool metadata, adding hardware, or preparing a disk for removal. A mirror or parity layout protects against particular disk failures; it is not a substitute for a backup that can be restored independently of the pool.
Upgrade the existing pool in the Windows 10 interface
With the pool healthy and your backup verified, use the pool’s upgrade action in Manage Storage Spaces. The exact button appears only when Windows detects a pool that can be upgraded.
- Open Manage Storage Spaces.
- Select the existing pool.
- Choose the available Upgrade action and confirm it.
- Wait for the operation to finish, then reopen the pool view and verify that the pool and its Spaces still report healthy status.
Keep the computer running during the operation. If the pool is already reporting a warning, stale metadata, incomplete status, or failed media, resolve that condition first rather than treating the upgrade as a repair.
Rank #2

- Store more, compute faster, and do it confidently with the proven reliability of BarraCuda internal hard drives
- Build a powerhouse gaming computer or desktop setup with a variety of capacities and form factors
- The go to SATA hard drive solution for nearly every PC application from music to video to photo editing to PC gaming
- Confidently rely on internal hard drive technology backed by 20 years of innovation; Max sustained transfer rate OD(MB/s): 190 MB/s
- Migrate and clone data from old drives with ease using our free Seagate DiscWizard software tool
Choose hardware that Storage Spaces can use
Storage Spaces does not accept every disk that appears in File Explorer. The disk must be exposed to Windows as an eligible physical disk. Internal SATA hard drives and SSDs are generally the clearest hardware path because Windows commonly reports them as fixed disks.
Why a new disk may be ineligible
- A USB enclosure or hub can report the disk as removable instead of fixed.
- Some enclosures hide individual disks and expose only the enclosure as one device.
- Windows may see the disk in File Explorer but not mark its physical-disk state as eligible for pooling.
- The disk may already contain a configuration or assignment that prevents it from appearing as available for a pool.
Verify the disk in Windows
- Connect the disk and allow Windows to detect it.
- Open Device Manager or Disk Management and identify the exact physical device.
- Confirm that Windows reports the device as fixed and eligible for pooling. Do not rely only on the drive letter or on the fact that files can be copied to it.
- If the disk is not eligible, check the enclosure, cable, hub, and controller path. A direct internal connection or a different enclosure may expose the disk correctly.
Do not select a disk containing data you still need. Adding a disk to a pool changes how Storage Spaces manages it, and a disk that is merely visible in Explorer is not automatically safe to repurpose.
Add the eligible disk to the pool
Graphical method
- In Manage Storage Spaces, select the target pool.
- Choose Add drives.
- Select the intended eligible physical disk. If several disks are listed, select only the one you have identified; do not add every available disk by accident.
- Enable Optimize drive usage when that option is presented.
- Confirm the operation and monitor the pool’s status until Windows reports completion or a clear warning.
Adding a disk increases free resources in the pool, but it does not guarantee that every existing virtual disk immediately gains usable space. The result depends on the Space’s provisioning, resiliency layout, disk sizes, and the amount of unallocated capacity.
Do these 3 things before closing this tab:
1Repair Windows errors before they cause bigger problems2Scan for outdated or missing drivers - takes under a minute3Clear out junk files and repair common Windows errorsPowerShell method
Run PowerShell with an account that can administer Storage Spaces. First identify the intended disk rather than blindly passing every disk that happens to be available:
Rank #3
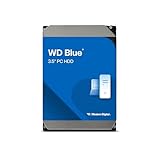
- Reliable everyday computing
- Western Digital quality and reliability
- Free Acronis True Image WD Edition cloning software
- Capacities up to 12TB
- 2-year limited warranty
$PDToAdd = Get-PhysicalDisk -CanPool $True
Add-PhysicalDisk -PhysicalDisks $PDToAdd -StoragePoolFriendlyName "YourPoolName"
The documented example uses Get-PhysicalDisk -CanPool $True to find poolable disks and Add-PhysicalDisk to add them to the named pool. On a system with multiple unused disks, replace the broad selection with the specific physical disk you intend to add. Verify the pool’s friendly name before running the command.
Rebalance data after adding a disk
Storage Spaces can add the disk without immediately moving all existing allocations onto it. If you did not select optimization during the add operation, start it explicitly. Optimization rebalances Space allocations toward disks with available capacity; it is not a quick format or a simple inventory refresh.
From Manage Storage Spaces
- Open the pool in Manage Storage Spaces.
- Choose Optimize drive usage.
- Confirm the operation and leave the computer powered on while Windows moves allocations.
From PowerShell
Optimize-StoragePool -FriendlyName "YourPoolName"Microsoft describes Optimize-StoragePool as rebalancing Spaces allocations in a pool to disks with available capacity. The operation is I/O intensive: expect active disk use, slower foreground workloads, and a duration that varies with the amount of stored data, the disks, and the resiliency layout. Avoid judging the final distribution while the job is still running.
Understand resiliency before creating or changing a Space
Adding a disk does not by itself change a Space’s resiliency type. Compare the available layouts before creating a new Space or deciding how much protection and capacity you need.
Rank #4

- 4TB Enterprise Storage Capacity – Provides ample space for business applications, databases, backup systems, and data center storage requirements.
- 12Gb/s SAS Interface – High-speed Serial Attached SCSI connectivity delivers superior data transfer performance and improved reliability compared to SATA drives.
- 7200 RPM Performance – Optimized rotational speed ensures fast data access and dependable throughput for enterprise workloads.
- 24/7 Enterprise Reliability – Designed for continuous operation with enhanced workload ratings and advanced error correction technology.
- Ideal for Servers & Data Centers – Perfect for enterprise servers, storage arrays, virtualization platforms, RAID systems, and cloud infrastructure deployments.
| Layout | Protection | Usable-capacity trade-off | Performance considerations |
|---|---|---|---|
| Simple | No protection from a single-drive failure | Highest usable capacity because data is not duplicated for resiliency | Generally good performance; a failed disk can make its data unavailable |
| Two-way mirror | Maintains two copies and tolerates a drive failure | Uses additional capacity for the second copy | Suitable when redundancy is required; exact results depend on disk count and workload |
| Three-way mirror | Maintains three copies for stronger fault tolerance | Highest capacity cost among the mirror choices | Provides stronger protection, with usable capacity and performance dependent on the pool |
| Parity or dual parity | Uses parity information to protect data; dual parity provides additional protection | Can be capacity-efficient for appropriate workloads, but parity consumes space for protection | Write behavior differs from mirrors; suitability depends heavily on workload and disk configuration |
There is no universal capacity percentage or benchmark for a Windows 10 pool. Disk count, unequal disk sizes, provisioning, resiliency type, and workload determine the actual result. Treat the table as a design comparison, not a promise of a particular throughput or capacity figure.
Independent reader supportYour contribution helps us test, update, and keep practical guides available for everyone.Replace or remove a drive safely
Never disconnect a pooled disk simply because Windows has stopped showing an obvious file copy. Storage Spaces must first move the disk’s allocations to other pool members.
Use Prepare for removal
- Open Manage Storage Spaces and go to Physical drives.
- Select the disk you intend to replace or disconnect.
- Choose Prepare for removal.
- Keep the computer powered on and prevent sleep while Storage Spaces copies data and metadata to other disks.
- Wait until the disk reports Ready to remove.
- Select Remove, then disconnect the physical disk.
Preparation can take several hours, depending on the amount of stored data. The pool must have enough free capacity, and a replacement disk of similar size may be required when the remaining disks cannot hold the migrated allocations. Do not interrupt the process merely because progress appears slow.
Recommended Free Tools
PowerShell and unhealthy disks
For command-line administration, Microsoft’s documented workflow can mark a physical disk as Retired, remove it from the pool, and repair affected virtual disks when necessary. The correct action depends on the reported health state:
Best Value

- Built for video DVR and NVR security camera systems, SkyHawk delivers video-optimized storage
- Support workloads of up to 180TB/year—that's 64 simultaneously streaming HD cameras with zero dropped frames
- Built-in RV sensors allow drives to maintain performance in multi-bay systems, offering the flexibility to scale systems when more storage is needed
- Lower power consumption reduces heat emissions and improves reliability—plus, drives can easily be monitored with SkyHawk Health Management
- Enjoy long-term peace of mind with 1M hours MTBF, an included three-year limited warranty, and three-year in-house Rescue Data Recovery Services
- Incomplete: investigate whether a disk is disconnected or whether the pool needs the missing member reconnected.
- Warning: inspect the affected disk and Space before making hardware changes.
- Stale metadata: determine whether the disk has old pool information and whether it should be reconnected, reset, or replaced.
- Failed media: treat the device as a hardware failure and plan replacement or repair according to the Space’s resiliency.
Use Repair-VirtualDisk when Storage Spaces reports that a virtual disk requires repair and the underlying hardware situation has been addressed. Do not reset a physical disk while its data or pool metadata may still be needed; resetting discards information that may be required for recovery.
Common problems and the safest response
The disk is visible but cannot be added
Check how Windows classifies the physical disk, not just whether it has a drive letter. USB enclosures and hubs are frequent causes because they can expose disks as removable or conceal individual devices. Test a direct connection or a different enclosure, then recheck eligibility in Device Manager or Disk Management.
The new disk has been added but looks unused
Run Optimize drive usage or Optimize-StoragePool and allow the I/O-intensive rebalance to complete. Existing allocations may not move automatically in every situation.
What’s actually slowing this PC down?
Pick the symptom - the matching free tool is one click away.
The pool has no room to remove a disk
Preparation needs enough free capacity on the remaining disks. If the pool cannot migrate the data, add a replacement disk of similar size first, or free capacity through a planned data move. Do not pull the disk out while it still contains allocations.
A disk was disconnected unexpectedly
Reconnect the same hardware and check the pool and physical-disk health before resetting anything. States such as Incomplete or Stale metadata can indicate that reconnection or metadata handling is required. Reset only when you have confirmed that the disk’s data and metadata can be discarded.
Quick Recap
Windows 10 upgrade checklist
- Back up important data outside the pool.
- Confirm pool and Space health, resiliency, free capacity, and assigned disks.
- Upgrade the pool in Manage Storage Spaces, understanding that previous Windows versions will not be compatible afterward.
- Install a disk that Windows exposes as a fixed, eligible physical disk.
- Add only the intended disk and enable optimization when offered.
- Run Optimize drive usage if allocations did not rebalance during the add operation.
- Use Prepare for removal and wait for Ready to remove before replacing or disconnecting a disk.
Product prices and availability are accurate as of the date/time indicated and are subject to change. Any price and availability information displayed on Amazon at the time of purchase will apply.

