Crashes, No Sound, or Screen Glitches?
Random freezes, missing sound and display glitches usually trace back to one bad driver. Find and replace yours safely.Free scan · under a minutePC Slower Than It Used to Be?
A free scan shows the junk files, broken settings and background clutter dragging Windows down - then fixes them in one click.Free scan · Windows 10 & 11Sometimes you can extend a laptop’s useful life by adding RAM, replacing a drive, or doing both—but only if that exact model has serviceable parts. The deciding details are the complete model and product number, whether memory is soldered, which slots are available, the supported capacity, and the storage interface and size. Check the manufacturer’s current manual and parts lookup before buying anything or removing a screw.
Start with the model-specific answer
A laptop upgrade is not a universal procedure. Two machines sold under the same family name can have different memory layouts, drive connectors, battery arrangements, and service classifications. One may accept a standard memory module and an M.2 solid-state drive; another may have soldered memory, a permanently integrated drive, or a part that the manufacturer reserves for trained technicians.
As an Amazon Associate I earn from qualifying purchases.
The safest decision is therefore conditional:
- Upgrade the RAM when the manual confirms removable memory, an open socket or replaceable module, a supported memory generation and form factor, and a maximum capacity that meets your goal.
- Upgrade the storage when the manual or parts listing confirms a replaceable drive, its interface, its physical dimensions, and the supported capacity.
- Do not open the chassis yet when the manual is missing, the part is marked technician-only, or the machine’s exact product number is unknown.
An upgrade can remove a specific bottleneck, but it is not automatically cheaper than a new computer and does not guarantee a particular speed improvement. The correct comparison depends on your model, local component prices, the work involved, and the problem you are trying to solve.
The Tool Desk
Outbyte PC Repair FREERepair Windows errors before they cause bigger problemsFix Now →Outbyte Driver Updater FREEFix the driver behind crashes, sound loss and screen glitchesFind Drivers →What to check before ordering parts
1. Record the complete identity of the laptop
Write down the manufacturer, full model name, machine type or product number, and region. A broad label such as “15-inch business laptop” or a family name is not enough. Look for a sticker on the underside, a label inside the battery compartment if the battery is removable, the original invoice, or the system-information screen in the operating system. Record the serial number as well; manufacturers often use it to show the exact factory configuration and compatible parts.
#1 Best Overall

- Boosts System Performance: 32GB DDR5 RAM laptop memory kit (2x16GB) that operates at 5600MHz, 5200MHz, or 4800MHz to improve multitasking and system responsiveness for smoother performance
- Accelerated gaming performance: Every millisecond gained in fast-paced gameplay counts—power through heavy workloads and benefit from versatile downclocking and higher frame rates
- Optimized DDR5 compatibility: Best for 12th Gen Intel Core and AMD Ryzen 7000 Series processors — Intel XMP 3.0 and AMD EXPO also supported on the same RAM module
- Trusted Micron Quality: Backed by 42 years of memory expertise, this DDR5 RAM is rigorously tested at both component and module levels, ensuring top performance and reliability
- ECC Type = Non-ECC, Form Factor = SODIMM, Pin Count = 262-Pin, PC Speed = PC5-44800, Voltage = 1.1V, Rank And Configuration = 1Rx8
Keep the identity information with your notes. A product number can distinguish configurations that look identical but use different memory or storage hardware.
2. Open the exact manufacturer documentation
Find the current owner’s guide, technical specifications, hardware-maintenance or service manual, and parts lookup for that identifier and region. Lenovo’s RAM support guidance, last modified August 4, 2026, recommends checking installed memory, available slots, compatible parts, and the model specifications. Search the manual for these terms:
- “maximum supported RAM” or “maximum memory”
- “memory module,” “SO-DIMM,” or the documented memory generation
- “soldered” or “onboard memory”
- “drive slot,” “storage,” “M.2,” “2.5-inch,” or “form factor”
- “customer-replaceable unit,” “optional-service CRU,” or “field-replaceable unit”
Use the parts lookup with the product name or serial number and compare its compatible or schematic listing with the manual. Do not treat a physically similar part from another configuration as proof of compatibility.
3. Decide whether the work is owner service
Manufacturers use different service categories. Lenovo’s documentation defines a customer-replaceable unit (CRU) as “a computer part that a user can upgrade or replace.” It also distinguishes self-service CRUs, optional-service CRUs that may require more skill or simple tools, and field-replaceable units (FRUs) intended for trained technicians. A Legion service page directs owners to the model’s Hardware Maintenance Manual for warnings, safety instructions, and warranty information.
Rank #2

- A-Tech 32GB RAM Kit (2 x 16GB Modules), DDR4 SO-DIMM 260-Pin, 2666MHz / 2667MHz PC4-21300 (PC4-2666V)
- Non-ECC Unbuffered, JEDEC DDR4 Standard 1.2V Operating Voltage
- Compatible with select DDR4 SODIMM capable Laptop, Notebook, Mini PC, and All-in-One (AIO) computer systems. Please verify your system's memory type, form factor, and maximum supported capacity before purchasing
- Not compatible with desktop (DIMM), DDR2, DDR3, DDR5, ECC Registered (RDIMM), ECC Load Reduced (LRDIMM), or ECC Unbuffered (ECC UDIMM) memory types
- Increases available memory capacity to enhance system responsiveness, application performance, and multitasking capabilities.
That classification matters more than a generic teardown video. If the part is an FRU, or the manual says the battery, system board, or memory procedure is technician-only, use an authorized service provider unless you are qualified to do the work and accept the risk.
How to tell whether laptop RAM is upgradeable
Replaceable modules versus soldered memory
Removable laptop memory is normally installed in a socket, often described as a SO-DIMM slot. The manual may state the number of sockets, the number occupied, and whether any memory is soldered to the motherboard. A system can have both: some capacity onboard and one socket for an upgrade. It can also have all memory soldered, in which case there is no ordinary plug-in RAM module to install.
Do not infer the answer from the laptop’s thickness, age, or appearance. The exact service manual is the authority. If the documentation does not clearly identify a socket or replacement procedure, stop and ask the manufacturer or a qualified technician rather than forcing the bottom cover open.
Capacity, generation, and configuration
Check all of these values before buying:
| Requirement | What to verify | Why it matters |
|---|---|---|
| Current memory | Installed capacity and how many sockets are occupied | Shows whether an empty socket exists or whether a module must be replaced. |
| Maximum capacity | The model’s documented total limit | A larger module may not be recognized if it exceeds the platform limit. |
| Memory generation | The exact generation specified by the manual | Different generations are not interchangeable even when the module looks similar. |
| Form factor | Laptop module type, usually identified in the specifications | Desktop-sized modules do not fit laptop sockets. |
| Socket arrangement | Number of sockets and any soldered portion | Determines whether you add capacity, replace a module, or cannot upgrade. |
| Configuration guidance | Any manufacturer notes about matched modules or supported combinations | Following the documented combinations avoids an unsupported mixed setup. |
A compatible laptop RAM upgrade kit is a sensible product category only after these values are confirmed. “Laptop RAM upgrade kit” is a useful search phrase, not a specification. Select a module or kit whose capacity, generation, form factor, and configuration exactly match the model listing.
Rank #3

- [Specs] DDR3L / DDR3 1600MHz PC3L-12800 / PC3-12800 204-Pin Unbuffered Non ECC 1.35V CL11 Dual Rank 2Rx8 based 512x8
- [Size] Module Size: 16GB KIT(2x8GB Modules) Package: 2x8GB
- [Voltage] JEDEC standard 1.35V, this is a dual voltage piece and can operate at 1.35V or 1.5V
- [Compatibility] Compatible with DDR3 Laptop / Notebook PC, Mini PC, All in one Device
- [Color] PCB Color is green
How much RAM do you need?
Use the laptop’s documented maximum and your observed workload, not a universal target. Check the operating system’s memory-use view while you perform the tasks that feel slow. If memory use is consistently near the installed capacity and the system is paging to storage, additional supported RAM may address that constraint. If memory use is low while the processor, graphics, thermal system, or storage is saturated, buying RAM will not fix the underlying issue.
How to identify a compatible laptop SSD
Confirm the interface and physical format
The manual and parts list should identify the connector and dimensions. Look for the interface, the drive length or form factor, whether a mounting screw or bracket is required, and whether the slot supports the type of drive you intend to use. A drive that fits the connector physically can still be unsupported electrically or mechanically.
A Dell Latitude 5520 teardown identifies an M.2 2280 SSD slot in that specific model. That is an example of model-level information, not a rule that every laptop accepts an M.2 2280 drive. Other laptops may use a different M.2 length, a 2.5-inch drive bay, removable storage only, or no owner-replaceable drive at all.
Check whether the existing drive is replaceable
The service manual should show the drive location and removal procedure. If the parts lookup does not list a replaceable drive, do not assume that a similarly shaped SSD will work. Consult the official documentation or a technician. Some systems integrate storage on the motherboard, and some require a manufacturer-specific bracket, cable, or thermal pad.
Rank #4

- Capacity – 32GB RAM KIT (2 x 16GB Modules) Speed up to 2666MHz Non-ECC Unbuffered 260-Pin 1.2V SODIMM.
- Specs – PCB Color (Green or Black) and Rank (1Rx8 or 2Rx8) may vary depending on production batch. Performance and quality remain consistent across all Timetec products.
- Compatibility – Designed for selected DDR4 Laptop, Notebook, Mini PCs, and All-In-One systems(AIO) that support 260-Pin SODIMM memory. NOT compatible with Desktop DIMM slots.
- Installation – Plug-and-Play Upgrade, Quick and Easy to Install, no expertise required (please refer to your system's manual for guidelines).
- Warranty – All Timetec products are high-quality and rigorously tested to meet stringent standards. Backed by Timetec Limited Lifetime Warranty and professional technical support based in the United States.
Plan the data move
Replacing the only internal drive is also a data-recovery project. Before opening the laptop, make a verified backup of personal files and confirm that you can reinstall or restore the operating system. Record encryption-recovery information and application licenses where applicable. If the new drive will be larger, decide whether you will clone the old installation or perform a clean installation; the laptop manual generally covers hardware, not your preferred migration method.
Choose the upgrade path that matches the limitation
| Observed limitation | Potential upgrade | First verification | When it will not help |
|---|---|---|---|
| Applications slow down when many are open and memory use is full | Add or replace RAM | Replaceable socket, supported generation, available capacity | Memory is soldered, already below the system’s normal use, or another component is the bottleneck. |
| Slow startup, long application loads, or very little free space | Replace the internal storage drive | Replaceable drive, interface, dimensions, mounting hardware | The drive is soldered, the slowdown comes from another subsystem, or a migration plan is missing. |
| Both memory and storage are constrained | Do both only if both procedures are supported | Separate compatibility and service checks for each part | Either part is technician-only or the platform limit makes the spend poor value. |
| General sluggishness with no measured constraint | Diagnose first | Task Manager, Activity Monitor, or the operating system’s equivalent during the slow task | An upgrade chosen by guesswork may leave the real cause unchanged. |
Price and performance should be evaluated for the particular machine and local market. The available documentation establishes compatibility and service procedures, not a universal saving over replacement or a guaranteed benchmark gain.
Prepare safely before opening the case
Follow the model-specific service guide before the general checklist below. The manufacturer’s instructions take precedence, especially for battery isolation, hidden screws, clips, and warranty conditions.
What’s actually slowing this PC down?
Pick the symptom - the matching free tool is one click away.
- Shut down completely; do not work on a sleeping or hibernating system.
- Unplug the AC adapter and every peripheral.
- Remove a removable battery only in the manner described by the owner’s manual. Do not pry out an internal battery unless the service procedure explicitly permits it.
- Work on a clean, stable surface with good lighting and a container for screws.
- Discharge static electricity by touching unpainted metal, or use an ESD wrist strap as described in Crucial’s laptop-memory guide.
- Handle memory modules by their edges. Do not touch the gold contacts or chips.
- Use only the tools named by the manual. Lenovo notes that some optional-service parts require simple tools such as a screwdriver, but the correct bit and opening method vary by model.
- Photograph cable routing and screw locations if the service guide allows owner access and you are qualified to continue.
Never substitute the general RAM instructions for the laptop’s storage procedure. Battery isolation, shielding, thermal pads, and cable connectors differ substantially between models.
Best Value
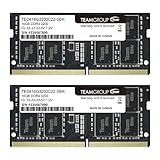
- Actual memory speed may vary depending on the system, CPU, motherboard, BIOS settings, and supported memory configuration. DDR4 3200MHz modules may operate at lower speeds such as 2933MHz or 2666MHz when supported by the host system. Please check your device specifications and compatibility before purchase.
- Adherence to JEDEC and compliance to RoHS with respect to environmental protection regulation, production and manufacturing
- All new generation product of DRAM module. Strict test and verification procedures are performed for products
- Lifetime warranty and Free technical support
- Installation video is attached in product image. ※Refer to the latest version on the official website. In case of discrepancies, the official website prevails.
Installing laptop RAM: a cautious general sequence
The following sequence describes the broad pattern for a documented, owner-serviceable memory module. Your manual’s order and warnings override it.
- Power down and isolate. Shut down, unplug power, remove a removable battery only as directed, and hold the power button only if the manual recommends that discharge step.
- Remove the access cover. Use the specified screwdriver and release clips exactly as shown. Do not lever against ports or force a panel that remains attached.
- Locate the memory socket. Confirm that the visible part matches the manual’s diagram and that you are not looking at soldered memory.
- Remove an existing module if necessary. Release the side latches evenly; the module should lift to an angle. Pull it out by the edges.
- Align the replacement. Match the notch in the module with the key in the socket. The contacts should enter at the documented angle.
- Seat the module. Press it down until both latches engage. If a latch does not close, remove the module and realign it rather than applying extra force.
- Reassemble and test. Replace the cover and battery as directed, connect power, and start the laptop. Verify the recognized capacity in firmware or the operating system.
If the laptop fails to start, powers on with warning lights, or reports less memory than expected, shut it down and repeat the seating check. Confirm that the module is the documented type and that the total capacity does not exceed the model limit. If the fault remains, reinstall the original module if possible and contact support.
Replacing a laptop storage drive
Storage replacement is more model-dependent than the generic RAM sequence. The service guide may require removing a bottom cover, battery connector, shield, bracket, cable, or thermal pad in a specific order. Follow that procedure rather than a video for a different revision.
Free tools Windows power users keep installed
One-click scans. No signup required.
- Back up and prepare recovery. Verify personal-file backups and retain operating-system recovery and encryption information.
- Confirm the replacement specification again. Match interface, physical length, capacity support, mounting screw or bracket, and any required thermal material.
- Shut down and isolate power. Follow the manual for the internal or removable battery.
- Expose the drive without disturbing unrelated parts. Disconnect only the cables identified by the service procedure.
- Remove the old drive. Take out the retaining screw or bracket, lift the drive at the specified angle, and disconnect it without bending the connector.
- Install the new drive. Insert it fully, lower it into its mount, and secure the specified hardware. Do not leave an M.2 drive unsupported.
- Restore the system. Clone the old installation or perform the planned clean installation, then apply the manufacturer’s drivers and firmware guidance.
- Verify recognition and health. Check firmware and the operating system for the expected capacity, then confirm that files and applications open normally.
If the drive is not detected, power off before reseating it. Recheck the interface and length against the exact manual, the mounting hardware, and any cable or adapter. A connector that looks correct is not proof of compatibility.
Verify the result and troubleshoot deliberately
After a RAM upgrade
- Check the total memory in the system-information page or firmware setup.
- Confirm that the operating system reports the expected usable amount.
- Run the normal workload that prompted the upgrade and observe memory use rather than assuming performance improved.
- If the system is unstable, power down, reseat the module, test one supported module at a time if the manual permits, and restore the original configuration to isolate the cause.
After a storage upgrade
- Confirm the drive appears in firmware and in the operating system’s storage manager.
- Check the capacity and partition layout before deleting the old drive’s data.
- Open several files and applications, and verify that backups and encryption remain configured.
- If the drive is absent, revisit the model’s interface, dimensions, bracket, cable, and firmware requirements before concluding that the drive is defective.
When to stop
Stop troubleshooting and seek manufacturer or professional service if a connector, battery, board, or screw mount is damaged; if the manual classifies the part as an FRU; if the laptop will not power on after a careful reassembly; or if the upgrade requires a procedure not documented for your exact product number.
When buying a new laptop is the more sensible choice
An upgrade is attractive only when it addresses a verified limitation and the machine remains suitable in other respects. Consider replacement instead when the needed component is soldered or technician-only, the model’s maximum capacity is still inadequate, the battery, display, keyboard, ports, or processor are also failing, or the combined parts and service cost approaches a suitable replacement. Those are decisions about your specific machine and market; there is no reliable universal percentage for upgrade savings or guaranteed life extension.
Keep the decision explicit:
- Evidence for upgrading: the manual confirms a replaceable part, the proposed component is listed as compatible, the service risk is acceptable, and the measured bottleneck matches the upgrade.
- Evidence for replacing: required parts are soldered or unavailable, the platform limit cannot meet your needs, several major components are failing, or the total cost and risk no longer make sense.
A printable model-specific checklist
- Record the full model name, machine type or product number, serial number, and region.
- Download the exact owner’s guide, specifications, service manual, and parts lookup.
- For RAM, record installed capacity, socket count, soldered capacity, memory generation, form factor, and maximum supported total.
- For storage, record replaceability, interface, physical length, mounting hardware, and documented capacity limits.
- Confirm whether the work is a self-service CRU, optional-service CRU, or technician FRU.
- Measure the actual bottleneck during the task that feels slow.
- Back up data and prepare operating-system recovery before replacing a drive.
- Gather only the tools and ESD precautions specified by the manual.
- Install one verified component at a time, following the model’s procedure.
- Verify recognition, stability, capacity, and data access before discarding the original part.
Bottom line
You can often postpone a laptop purchase by upgrading RAM, storage, or both, but the answer belongs to the exact model—not the product family or a generic compatibility chart. Identify the complete machine, verify the manufacturer’s documented slots, interfaces, limits, and service classification, then match the component and procedure precisely. If memory is soldered, a drive is not listed as replaceable, or the work is assigned to a technician, treat that as a boundary rather than an invitation to experiment.
Recommended Free Tools
Quick Recap
Product prices and availability are accurate as of the date/time indicated and are subject to change. Any price and availability information displayed on Amazon at the time of purchase will apply.

