Crashes, No Sound, or Screen Glitches?
Random freezes, missing sound and display glitches usually trace back to one bad driver. Find and replace yours safely.Free scan · under a minutePC Slower Than It Used to Be?
A free scan shows the junk files, broken settings and background clutter dragging Windows down - then fixes them in one click.Free scan · Windows 10 & 11You can give a modern photo a convincing 1980s-inspired snapshot feel without AI or a one-click filter. Start by correcting exposure and white balance, then make restrained adjustments to color and contrast, soften digital sharpness slightly, and add grain only if it suits the image. Keep the original so every step can be revised.
What makes a photo feel like an old snapshot?
There is no single, definitive 1980s snapshot look. Film results varied with the stock, exposure, storage, processing, printing, and later scanning; photographs from the decade did not all share the same colors or texture. Treat this as a flexible, period-inspired edit—not an exact reconstruction of a particular film stock.
As an Amazon Associate I earn from qualifying purchases.
The convincing effect usually comes from several modest choices working together: gentle contrast, subtly shifted color, a slightly faded black point, and, when appropriate, fine grain. Adobe describes film presets as mimicking the grain and appearance of retro film cameras, while its editing tutorials also use color, contrast, and softened detail. Adobe’s Lightroom film presets and its film-style editing tutorial illustrate those controls.
A non-AI editing workflow
1. Correct the photo before styling it
Make a copy or use a reversible editing workflow. First adjust exposure so important details are visible, then set white balance to keep skin and neutral objects plausible. A stylized color treatment is easier to judge once the photograph itself is balanced. Adobe likewise recommends adjusting exposure and white balance to complement the image and skin tones.
#1 Best Overall

- Classic Design: Experience the timeless appeal of this Black Canon EOS REBEL X S, a 35mm film SLR camera that combines vintage charm with robust functionality
- Manual Control: Enjoy complete creative freedom with manual focus, exposure control, and aperture modes, allowing you to capture images exactly as you envision
- Versatile Lens: Equipped with a 35-80mm zoom lens, this camera offers a range of focal lengths to suit various shooting scenarios
- Full Frame Photography: Capture stunning, high-quality images with the camera's full frame (35mm) photo sensor, perfect for professional and enthusiast photographers
- Unisex Appeal: This camera is designed to appeal to a wide range of users, making it an excellent choice for both men and women
2. Choose a color direction that fits the scene
Avoid applying the same orange cast to every image. Consider the light already present: warm highlights with cooler, lightly colored shadows can suggest an aged print, while a different photograph may work better with a subtler warm overall balance. Use color controls or a selective Color Mixer to move particular hues rather than tinting everything indiscriminately. Keep faces recognizable and natural enough that the effect reads as a photograph, not a color overlay.
Adobe’s Lightroom tutorial demonstrates warm tones and selective Color Mixer adjustments; its preset examples also include cool, light-blue shadows against warm, washed-out tones. These are possible directions, not a universal recipe.
Rank #2
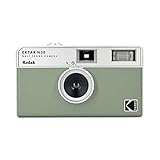
- 📷 Film-saving: You can have twice as many images per roll. For example, a film roll with 36 exposures can yield around 72 half-frame photos - doubled!
- 📷 Lightweight and Easy-to-use: The pocket-size camera is light and tiny, and hence convenient for you to bring along daily. Since its instructions are simple, it is suitable for all analog hobbyists.
- 📷 Built-in Flash: Turning on the flash by adjusting the silver ring around the lens so that you can use KODAK EKTAR H35 during days and nights, outdoor and indoor.
- 📷 Perfect for Beginners: The point-and-shoot camera is easy to use for new analogue hobbyists.
- 📷 Five colors: Off-white, black, brown, sage and sand. Neat and natural.
3. Lift the darkest tones, but keep the image readable
Use a gentle tone curve to raise the black point: in an RGB curve, move the lower-left endpoint slightly upward. This fades the deepest shadows and can suggest a print that has softened with age. Keep enough separation in the midtones for faces, clothing, and objects to remain clear; flattening the whole curve can make the photo look dull rather than film-like.
For more control, adjust individual color channels carefully after shaping the overall contrast. Adobe’s Photoshop tutorial on a Polaroid-style look demonstrates a lifted black point and channel curves. It is an editing example, not evidence that every 1980s snapshot looked like an instant photo.
Rank #3
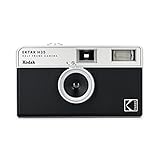
- 📷 Film-saving: You can have twice as many images per roll. For example, a film roll with 36 exposures can yield around 72 half-frame photos - doubled!
- 📷 Lightweight and Easy-to-use: The pocket-size camera is light and tiny, and hence convenient for you to bring along daily. Since its instructions are simple, it is suitable for all analog hobbyists.
- 📷 Built-in Flash: Turning on the flash by adjusting the silver ring around the lens so that you can use KODAK EKTAR H35 during days and nights, outdoor and indoor.
- 📷 Four colours: Black, brown, sage and sand. Neat and natural.
- 📷 Perfect for Beginners: The point-and-shoot camera is easy to use for new analogue hobbyists.
4. Reduce digital crispness only a little
If the image looks clinically sharp, lower Clarity or Dehaze modestly, or use a very restrained softening effect. Check edges and faces as you work. Too much blur makes a sharp source look accidentally out of focus; it is not a necessary ingredient of a vintage treatment. Adobe’s Lightroom film-style tutorial uses Clarity and Dehaze as ways to soften detail.
5. Add grain only when it helps
Grain is optional. If you add it, begin subtly and inspect the result both fitted to the screen and at 100% magnification. Grain that looks delicate at a small preview can become coarse or distracting at full size. The appropriate amount depends on the photo’s resolution, existing noise, and overall treatment; a large, uniform noise layer is not proof of authenticity.
Rank #4

- Shutter Speed: The AE-1 offers a range of shutter speeds from 1/1000 to 2 seconds, along with a Bulb mode for long exposures, allowing for creative control over your shots.
- TTL Metering: Its built-in Through-The-Lens (TTL) metering system ensures accurate exposure readings, helping you capture the perfect shot in various lighting conditions.
- Interchangeable Lenses: Compatible with Canon FD lenses, the AE-1 opens up a world of photographic possibilities, from wide-angle to telephoto.
- Auto and Manual Modes: With both automatic and manual exposure settings, photographers can easily switch between point-and-shoot convenience and hands-on control.
- Durable Design: The camera features a robust metal body and a sleek, classic aesthetic, making it not only functional but also a stylish accessory.
Adobe’s Photoshop tutorial includes subtle grain, while also noting that not all film photos have grain. Digital Photography School provides rough Lightroom slider starting points organized by ISO category, but calls them baselines and notes that source digital ISO affects the amount needed. Those settings are practical examples, not validated or universal values: Digital Photography School’s Lightroom guide.
What’s actually slowing this PC down?
Pick the symptom - the matching free tool is one click away.
6. Treat vignettes, bloom, and halation as optional
A light vignette may help direct attention, but a heavy dark ring can make the edit look like an obvious preset. Bloom or halation can add a glow around bright areas, yet strong effects quickly dominate the photograph. Use these only if they suit the reference and scene; none is required for a snapshot-inspired result. Adobe includes vignette among Lightroom preset controls, and Dehancer advertises grain, halation, and bloom adjustments.
Best Value
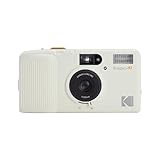
- 3-Element Glass Lens - Create photo images with sharpness and details
- 2-Zone Focus - Eff ortlessly switch between two focuses for optimal shots in any environment
- Built-in Auto Flash - Users can select auto flash function with red-eye reduction
- Multiple Exposure - Capture layered images, blending two di erent scenes on a single photo
7. Check the result against the original
Toggle the edit on and off and ask whether the subject still looks believable. If the color treatment obscures skin, the curve erases detail, or grain becomes the first thing you notice, reduce the relevant adjustment. Save a reusable preset only after trying it on several different photos. Adobe documents saving adjusted Light, Color, Grain, and Vignette settings as a Lightroom preset; still revisit exposure, white balance, and effect strength for each new image.
Independent reader supportYour contribution helps us test, update, and keep practical guides available for everyone.Which editing route should you use?
| Route | Best for | What it offers | Trade-off |
|---|---|---|---|
| Lightroom | Readers who already use Lightroom and want direct, reversible adjustments | Presets and controls for Light, Color, Grain, and Vignette; Adobe also provides film-style editing guidance. | Presets need image-specific correction and may not suit every photo unchanged. Check Adobe for current plan and feature availability. |
| Photoshop | Readers who want to shape tone and color with curves | Curves, highlight treatment, noise, and optional blur are demonstrated in Adobe’s Polaroid-style tutorial. | The tutorial targets a Polaroid-style result, not a universal 1980s look; the controls require more manual judgment than applying a preset. |
| Dehancer Photo | Readers seeking specialized film-emulation controls | Dehancer advertises 60+ film profiles, print controls, and grain, halation, and bloom. Its product page lists Photoshop, Lightroom, Capture One, and Affinity compatibility, plus subscription and lifetime-license options. | These are vendor-stated features and licensing options, which may change. It is an optional advanced tool, not a requirement; check Dehancer’s current product details. |
| In-camera film simulation | People planning future photographs rather than editing an existing one | Applies a film-like look in-camera, often to a JPEG, without post-processing; camera-brand labels differ. | It does not convert a photo you have already taken. A 2025 presentation from the Greater St. Augustine Camera Club explains the approach and brand-specific labels: Digital Film Simulations: In-Camera JPG Creation. |
For an existing photo, a native editor is enough to build the basic look. A dedicated plugin is worth considering only if you want its more specialized controls and it fits your editing workflow. The available sources do not provide an independent side-by-side image-quality or value test, so there is no evidence-based reason to rank one of these options as objectively superior.
Quick Recap
Product prices and availability are accurate as of the date/time indicated and are subject to change. Any price and availability information displayed on Amazon at the time of purchase will apply.
The Tool Desk
Outbyte PC Repair FREEClear out junk files and repair common Windows errorsFree Scan →Outbyte Driver Updater FREEScan for outdated or missing drivers - takes under a minuteDriver Scan →
