Do these 3 things before closing this tab:
1Fix the driver behind crashes, sound loss and screen glitches2Repair Windows errors before they cause bigger problems3Scan for outdated or missing drivers - takes under a minuteYou can make a useful home flashlight test with a fixed-distance lux meter, a timer and a controlled setup. The result will show how illuminance changes over time and how long the light stays above a threshold you choose. It will not, by itself, establish the flashlight’s total lumens: lumens are total luminous flux and require integrating-sphere photometry.
For a fair comparison, keep the mode, battery condition, distance, aim, surroundings and endpoint identical. Report readings as lux at a stated distance, and label whether your runtime means time to a practical brightness threshold, time to a standard-style endpoint or time until shutoff.
As an Amazon Associate I earn from qualifying purchases.
Decide what your test is meant to answer
“Brightness” and “runtime” are not single measurements. Choose the question before switching on the light, because each question needs a different result.
Relative brightness
This compares two or more lights under the same geometry. Record lux at the sensor after the same elapsed time, such as 30 seconds, and use the same mode and batteries. The result is a relative illuminance comparison, not a lumen rating.
#1 Best Overall
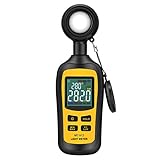
- Measures luminosity from 0 to 200,000 Lux and ambient temperature
- High accuracy of ±3% rdg ± 8 dgts (10,000 Lux)
- 4 digital color LCD screen, MIN/Max readings, data hold, auto power off, and low battery indication
- Wide range of application, use lux light meter for set design, factory, office or home use
- lightweight and compact, 2 years long period warranty
Time to usable light
Choose a minimum lux value that represents the light you need for your task. Examples might be the reading that still lets you walk safely through a room or read a map. The value is your own practical threshold; it is not automatically the runtime claimed under ANSI/PLATO FL 1.
Time to switch-off
Start the timer at activation and stop it when the flashlight turns off or its protection circuit stops producing visible light. This measures total elapsed operation, including dim periods. It can be useful for emergency planning, but it does not describe how bright the light remained.
What ANSI/PLATO FL 1-2025 means
ANSI’s catalog lists ANSI/PLATO FL 1-2025 as the current edition for portable directional lighting. Its scope includes light output, runtime, beam distance, peak beam intensity, impact resistance, and water and dust protection. The 2025 revision adds treatment for Short-Duration Elevated Brightness (SDEB), the category commonly used for turbo or boost modes.
PLATO describes the purpose of the standard this way: “The ANSI/PLATO FL 1 Standard has always been about giving manufacturers, retailers and consumers a consistent way to understand and compare portable lighting performance.” The public explanation is useful for understanding the definitions below; formal compliance testing requires the complete standard and its specified equipment.
| Mode category | Output measurement window after activation | FL 1 runtime endpoint | What the endpoint means |
|---|---|---|---|
| Ordinary mode (not SDEB) | Between 30 seconds and two minutes | Output reaches 10% of the initial output measured at 30 seconds | Runtime is tied to a brightness level, not necessarily to darkness or switch-off |
| Short-Duration Elevated Brightness (SDEB) | One to 10 seconds | Output falls to 90% of the maximum measured in that interval | The test captures the short boost period rather than a long, lower-output run |
For an ordinary mode, the standard’s starting point is the output at 30 seconds, and the run ends at 10% of that value. It does not promise that the flashlight stays near its initial peak for the entire stated runtime. A home test only reproduces this definition if its setup can measure output in the required way and apply the same endpoint.
Rank #2

- High Precision & Fast Response: This high-precision illuminance meter delivers lightning-fast readings 2 times per second, ensuring you get accurate light intensity data—perfect for creating the ideal growing environment for your plants.
- FC/LUX Conversion: FC or LUX? The Power is in Your Hands! Effortlessly toggle between FC and LUX to measure light intensity in the unit that suits your gardening needs—precision made simple.
- PEAK Data Recording: Instantly lock in and display the highest light pulse value with a single press of the PEAK button—perfect for measuring lightning, laser beams, and other brief high-intensity sources.
- Low Battery Alert: Stay powered, stay prepared! A handy + - symbol appears when the battery runs low, so you’ll always know when it’s time to swap out the 9V battery and keep your light measurements going strong.
- Versatile Usage: Ready for any setting! Whether indoors or outdoors, this meter is perfect for homes, offices, factories, or measuring sunlight intensity to create the perfect environment for your plants to thrive.
Equipment for a repeatable home test
- Flashlight and the manufacturer-recommended battery type: use a fully charged rechargeable pack or a fresh, matched set of replaceable cells. Record the battery condition and chemistry exactly as used.
- Digital lux meter: this is optional but provides a direct illuminance reading at the sensor. Choose a range that will not overload at the brightest point.
- Timer or data logger: a phone timer or spreadsheet is adequate for elapsed time. Logging does not calibrate the optical sensor; it only improves the time record.
- Stable mounts: use a tripod, clamp or blocks so the flashlight and meter cannot move during the run.
- Darkened enclosure or room: reduce daylight and changing room lights. A box with a non-reflective interior can help, provided it does not overheat the flashlight.
- Tape measure or ruler: measure the flashlight-to-sensor distance rather than estimating it.
A phone’s ambient-light sensor can provide a rough comparison when no meter is available, but phone hardware and apps are not verified here for calibrated flashlight testing. Treat those readings as relative only, and identify the phone and app if you publish them.
Build the measurement setup
Fix the geometry
Place the flashlight and sensor at a measured, repeatable distance. One metre is a practical choice and matches the fixed flashlight-to-surface spacing used in a published Lawrence Berkeley National Laboratory illuminance study. That study used a dark box and controlled positioning; it is a precedent for fixed geometry and reduced stray light, not a complete household recipe or an FL 1 lumen test.
Aim the flashlight at the same point on the sensor for every run. Mark the positions on the table or floor. Keep the sensor orientation unchanged. Do not compare a reading taken at one distance with a reading taken at another as though distance had no effect.
Control ambient light and reflections
Close curtains, turn off room lights and allow your eyes to adjust before starting. Keep the meter’s sensor shielded from windows, screens and reflective walls. If you use a box, leave enough ventilation for the light and battery; heat can cause a regulated flashlight to step down earlier.
Check the meter’s range
Turn on the meter and verify that the display responds without showing an overload indication at the intended mode. If the reading is beyond the instrument’s range, move to a lower-output mode or use a greater distance, then use that new distance for every comparison. Record the change rather than silently mixing distances.
Rank #3
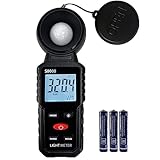
- 【Widely used】S8608 is a digital illuminometer, used for measuring visible brightness, large screen display, wide measuring range, up to 200000LUX, automatic conversion range. Can be widely used in such as schools, hospitals, factories, airports, families and other occasions of brightness measurement.
- Measurement visible brightness, measurement range is wide
- lluminance unit switch,Unit of illuminance:LUX、FC
- Measurement time: S
- MAX/ MIN,Data HOLD,Backlight function
Run the test step by step
- Write the test definition. State the flashlight model, mode, battery type and condition, distance, sensor orientation, ambient-light control and endpoint. Decide whether the endpoint is a chosen lux threshold, an FL 1-style threshold for context, or switch-off.
- Prepare the battery. Start with a fully charged rechargeable battery or a fresh matched set of replaceable batteries. Follow the flashlight and battery makers’ instructions; do not substitute an unapproved cell merely to extend the run.
- Mount both devices. Secure the flashlight and lux meter at the marked positions. Measure the distance from the emitting lens to the sensor plane and write it down.
- Zero or settle the meter. With the flashlight off, confirm that the ambient reading is stable. If the meter has a zero, hold it as directed by its manufacturer.
- Start simultaneously. Activate the selected mode and start the timer. Record an initial reading only if your meter can capture it without saturating; otherwise make the first defined reading at 30 seconds.
- Capture the starting value. For a normal-mode comparison, record the lux value at 30 seconds. If you are studying a boost mode, add readings during the first 10 seconds so the brief maximum is not missed.
- Log at regular intervals. Record lux at a fixed cadence such as every 30 seconds or every minute. Use the same cadence for every flashlight. Note visible step-downs, flicker, warnings or mode changes.
- Apply your endpoint. Stop at the first reading below your chosen usable-light threshold, at the FL 1-style threshold you have explicitly defined, or when the light switches off. Do not call one endpoint by another name.
- Record the final conditions. Note elapsed time, final lux, battery voltage if you can measure it safely, room temperature if relevant, and any thermal or low-battery indicator.
- Repeat important runs. Reposition and rerun the test at least once when the result will guide a purchase, an emergency plan or a published comparison. Placement, ambient light, battery state and thermal regulation can all change the curve.
How to measure brightness honestly
Lux is illuminance at a point
Lux describes the amount of light arriving at the meter’s location. A fixed-distance reading is useful for comparing the same beam under unchanged conditions. Report it as, for example, “1,240 lux at one metre, hotspot aimed at the sensor, after 30 seconds.” Include the mode and battery condition.
Windows Errors? Fix Them Before They Spread
Repair common Windows errors and clear accumulated junk for a smoother, more stable PC - no reinstall needed.Free scan · no reinstallOutdated Drivers Are Slowing You Down
One free scan finds every outdated or missing driver and matches the right update for your exact hardware.Free scan · exact hardware matchLumens are total luminous flux
Lumens describe the flashlight’s total visible-light output across its full angular distribution. A laboratory measurement integrates that output, typically with a spectroradiometer and integrating-sphere system plus calculation software. One lux number from a wall or sensor cannot establish total lumens because beam angle, hotspot size, spill and spectral response all affect the point reading.
Do not convert a single lux value into lumens
There is no universal conversion from a home lux reading to lumens. Two lights can produce the same lux at the sensor while distributing very different amounts of light outside the measured point. Conversely, a wide flood beam can produce lower hotspot lux while illuminating a larger area.
Ceiling-bounce comparisons
An indirect ceiling or wall bounce can reduce the influence of a sharply focused hotspot in an informal comparison. The collected standards and studies do not validate one particular do-it-yourself bounce protocol, so describe it as an informal relative test. Keep the flashlight height, angle, surface, distance and meter position identical for every run.
Turn readings into a runtime result
Use a time-series table
Do not report only the longest time until darkness. A time series shows whether the light regulates output, steps down from a boost, or dims gradually.
What’s actually slowing this PC down?
Pick the symptom - the matching free tool is one click away.
Rank #4
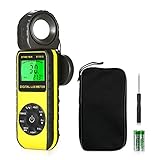
- ☀【HIGH ACCURACY】+/- 4% of readings for 10000 Lux, 1000 FC; +/- 5% of readings +/- 10 digits for 400000 Lux, 40000FC
- ☀【0.4 SECOND RESPONSE】2~3 times sampling per second, Instantly to measure out how much luminosity intensity you’re getting, No more guessing
- ☀【WIDE MEASURE RANGE】 This light meter can measure luminance at 0.01~400,000 Lumens, (0.01~40,000 Foot Candles), Which is much wider than the others. Resolution 0.01
- ☀【EASY TO USE】The light sensor can be rotated 270º, so you don’t need to turn around the light meter to measure luminosity intensity from different angles. Just rotate the sensor, and you can still read the illuminance at front
- ☀【MEMORIZE THE LIGHT READINGS】This Lux Meter can help you record 33 sets of readings,Temp Testing, The RELATIVE measuring mode will show you the difference between current / recorded data. Ideal lux meter to measure light intensity for LED grow lights,garden, plants, school, office, state, LED lights, indoor and outdoor
| Elapsed time | Lux at sensor | Event or note |
|---|---|---|
| 0:00 | Record if within meter range | Mode activated; timer started |
| 0:30 | Defined starting value for an ordinary-mode comparison | Check for an early thermal step-down |
| 1:00, 2:00 and onward | Use the same interval throughout | Record flicker, regulation changes or warnings |
| Endpoint | Reading at the chosen threshold or shutoff | Write the exact endpoint and elapsed time |
Calculate a practical threshold
Choose the minimum lux value before the run, then stop when the reading first falls below it. For example, if your defined threshold is 100 lux at one metre, report “time to below 100 lux at one metre,” not simply “runtime.” A flashlight that remains on for another hour at 5 lux has a longer shutoff time but failed the 100-lux task much earlier.
Put the FL 1 definition beside the home result
If you want a standard-oriented comparison, calculate 10% of the ordinary-mode reading taken at 30 seconds. Label the result as an approximation only if your meter, geometry and timing do not meet the standard’s complete procedure. For an SDEB mode, the relevant reference is 90% of the maximum measured one to 10 seconds after activation. These thresholds are different, so do not apply the ordinary-mode calculation to a boost mode.
Independent reader supportYour contribution helps us test, update, and keep practical guides available for everyone.Compare two or more flashlights fairly
Use a test matrix rather than a single headline number. Run each light in the mode you intend to compare, with batteries in the same starting condition and the same physical setup.
| Comparison item | What to record | Why it matters |
|---|---|---|
| Early brightness | Lux at the same distance and elapsed time | Shows initial illuminance under your chosen geometry |
| Brightness retention | Lux at fixed later times and the percentage of the starting reading | Reveals regulation, step-downs and gradual dimming |
| Usable runtime | Time to the same stated lux threshold | Compares task-oriented endurance |
| Shutoff runtime | Time until output stops | Separates total operation from useful brightness |
| Conditions | Mode, battery, distance, aim, temperature and ambient-light control | Prevents setup differences from masquerading as performance differences |
Beam shape affects perceived usefulness and reach. A focused beam can produce high center lux and illuminate a distant target, while a flood beam spreads light over a wider area. Brightness alone therefore cannot predict how far the beam will be useful; beam shape is a separate observation to record.
Quick wins for a faster PC:
Scan for outdated or missing drivers - takes under a minuteDriver Scan →Repair Windows errors before they cause bigger problemsFix Now →Fix the driver behind crashes, sound loss and screen glitchesFind Drivers →Common problems and corrections
The readings drift while nothing was moved
Check for daylight, a changing screen, reflective surfaces or the meter’s automatic range. Repeat with the room darker, cover stray light from the sensor and disable automatic display or range changes if the instrument permits.
Best Value

- UNI-T professional digital illuminance meter UT383. Effectively measures light intensity and display results in units of Lux or FC. Range: 0 to 199,900 Lux / 0 to 18,500 Fc. High accuracy of +/-(4 %+8)
- Compact & easy to use. Large 4 digital LCD screen with backlight. 0.5 s sampling time. Overload indication. Max/Min. Data hold. Low battery indicator. Auto shutdown for power saving
- Portable value pack. What you get: 1 x UT383 mini light meter, 1 x packaging box, 1 x paper manual, 1 x e Manual (free download)
- Effective & Versatile. Widely used in lightening enterprise, agriculture and animal husbandry, mining enterprise, laboratory, office, household, street lights construction, camera & studios, photography, etc
- Easy access to UNI-T 7/24 1 to 1 user support. If you encounter any problems during use, please contact us first (via e-mail) and our customer service team will deal with your problem as soon as it is received
The first reading is impossibly high or blank
The sensor may be saturated. Use a lower mode or greater distance, wait for the display to settle and record the new geometry. Never compare the saturated value with a valid reading from another light.
The flashlight steps down quickly
High-output modes often respond to heat or battery voltage. Note the time and lux at the step-down rather than treating it as a fault. Keep ventilation consistent between runs and do not place a hot light against a flammable surface.
Two runs disagree
Verify battery charge, mode selection, sensor aim and distance. A small angular shift can move a tight hotspot away from the sensor. Re-mark the positions and repeat until the setup, not guesswork, explains the difference.
The Tool Desk
Outbyte PC Repair FREEClear out junk files and repair common Windows errorsFree Scan →Outbyte Driver Updater FREEScan for outdated or missing drivers - takes under a minuteDriver Scan →A phone gives a different result from a lux meter
Phone sensors have unknown calibration, spectral response and automatic processing. Use one phone, one app and one fixed setup only for rough relative comparisons, and do not present the result as calibrated lux or lumens.
Safety and record-keeping
- Follow the flashlight and battery manufacturers’ charging, polarity and operating instructions.
- Stop a run if the battery, light or enclosure becomes unusually hot, swells, leaks or smells abnormal.
- Do not leave a high-output light running unattended in a closed box.
- Keep combustible materials away from a hot head or battery compartment.
- Store the original data, setup sketch, meter model, battery details and test date so another person can reproduce the run.
For a published result, include the exact endpoint sentence, such as: “Runtime was 47 minutes to below 100 lux at one metre, measured every 30 seconds in medium mode with a fully charged rechargeable battery.” That wording prevents readers from mistaking a user-defined threshold for a standardized lumen or FL 1 runtime claim.
What a home test can and cannot establish
- It can establish: how illuminance from one flashlight changes over time in your fixed setup; relative differences between lights tested under identical conditions; and time to a clearly stated practical threshold.
- It cannot establish by itself: total lumens, compliance with every FL 1 requirement, beam distance, peak beam intensity, impact resistance, or water and dust protection.
- It should always state: mode, battery type and starting condition, distance, aim, ambient-light controls, meter or sensor used, sampling interval, repetitions and endpoint.
A controlled lux test is therefore most valuable as a transparent comparison tool. It answers how a particular flashlight behaves in a defined setup, while laboratory integrating-sphere testing is needed for a total-lumen measurement and formal standard claims.
Quick Recap
Product prices and availability are accurate as of the date/time indicated and are subject to change. Any price and availability information displayed on Amazon at the time of purchase will apply.
Free tools Windows power users keep installed
One-click scans. No signup required.

