Quick wins for a faster PC:
Clear out junk files and repair common Windows errorsFree Scan →Fix the driver behind crashes, sound loss and screen glitchesFind Drivers →Is it a Windows setting or is your device broken? You cannot answer that reliably from one symptom. Separate the possibilities by testing from least disruptive to most independent: document the failure, run the relevant Windows troubleshooter, inspect Device Manager, compare normal startup with Safe Mode, isolate startup software with a clean boot when appropriate, and finally run the computer maker’s preboot hardware diagnostics. A failed preboot test with a recorded error code is strong evidence for a hardware fault. A passing test narrows the search but cannot rule out every intermittent or untested failure.
Why a symptom does not identify the cause
The same visible failure can come from several layers. A missing audio output may be a disabled device, a damaged or incompatible driver, a Windows configuration problem, a disconnected cable, or a failed sound component. Unexpected restarts can likewise involve hardware, a driver, or software. Microsoft summarizes that distinction this way: “An unexpected restart might be caused by a hardware device, its driver, or software.”
As an Amazon Associate I earn from qualifying purchases.
That is why replacing a part after the first error, or reinstalling Windows before collecting evidence, often wastes time and can destroy useful clues. Each check below answers a narrower question:
- Does Windows recognize and configure the device? Get Help and Device Manager address this.
- Does the symptom depend on ordinary startup software? Safe Mode and clean boot help isolate that layer.
- Does the device fail outside the normal Windows session? The manufacturer’s preboot test is the most independent check in this sequence.
None of these checks is a universal pass or fail for an entire computer. Interpret the result only within the scope of the test that produced it.
#1 Best Overall

- CEL Doctor: The ANCEL AD310 is one of the best-selling OBD II scanners on the market and is recommended by Scotty Kilmer, a YouTuber and auto mechanic. It can easily determine the cause of the check engine light coming on. After repairing the vehicle's problems, it can quickly read and clear diagnostic trouble codes of emission system, read live data & hard memory data, view freeze frame, I/M monitor readiness and collect vehicle information
- Sturdy and Compact: Equipped with a 2.5 foot cable made of very thick, flexible insulation. It is important to have a sturdy scanner as it can easily fall to the ground when working in a car. The AD310 OBD2 scanner is a well-constructed mechanic tool with a sleek design. It weighs 12 ounces and measures 8.9 x 6.9 x 1.4 inches. Thanks to its compact design and light weight, transporting the device is not a problem. The buttons are clearly labelled and the screen is large and displays results clearly
- Accurate Fast and Easy to Use: The AD310 scanner can help you or your mechanic understand if your car is in good condition, provides exceptionally accurate and fast results, reads and clears engine trouble emission codes in seconds after you fixed the problem. This device will let you know immediately and fix the problem right away without any car knowledge. No need for batteries or a charger, get power directly from the OBDII Data Link Connector in your vehicle
- OBDII Protocols and Car Compatibility: Many cheap scan tools do not really support all OBD2 protocols. AD310 scanner as it can support all OBDII protocols such as KWP2000, J1850 VPW, ISO9141, J1850 PWM and CAN. This device also has extensive vehicle compatibility with 1996 US-based, 2000 EU-based and Asian cars, light trucks, SUVs, as well as newer OBD2 and CAN vehicles both domestic and foreign. Pls confirm with our customer service whether it is compatible with your vehicle before purchasing
- Home Necessity and Worthy to Own: This is an excellent code reader to travel or home with as it weighs less and it is compact in design. You can easily slide it in your backpack as you head to the garage, or put it on the dashboard, this will be a great fit for you. The AD310 is not only portable, but also accurate and fast in performance. Moreover, it covers various car brands and is suitable for people who just need a code reader to check their car
Before troubleshooting, define the failure
Write a short description that another person could reproduce. Include the exact device, the action that triggers the problem, what you see or hear, and how often it happens. “The laptop is broken” is not useful; “the built-in microphone disappears after every restart but returns after a shutdown” is.
Record recent changes
Note what changed immediately before the first incident:
- A Windows update or rollback
- A new or updated driver
- A newly connected peripheral, dock, monitor, or storage device
- A drop, liquid exposure, overheating event, or unusual noise
- A cable, adapter, or port change
- A new security, tuning, backup, or startup application
Timing is evidence, not proof. A problem that begins after an update may still be a coincidental hardware failure, and a failure that appears gradually may still be caused by software.
The Tool Desk
Outbyte PC Repair FREERepair Windows errors before they cause bigger problemsFix Now →Outbyte Driver Updater FREEFix the driver behind crashes, sound loss and screen glitchesFind Drivers →Perform only safe physical checks
For an external device, verify that it has power and that its cable is fully seated. If the device and port are compatible, try another port once. Check for a physical switch or mute control. Do not open the equipment, remove covers, or change firmware or BIOS settings as an early diagnostic step. If storage media is making unusual mechanical noises, stop using it and protect the data before running repeated tests.
Step 1: Run the matching Windows troubleshooter
Windows’ current guided troubleshooters are accessed through the Get Help app. Open Start, search for Get Help, and describe the symptom in plain language, such as “audio output is missing” or “printer is not detected.” Choose the suggested troubleshooter that matches the device.
These tools examine selected configuration and service conditions and may offer a repair or a recommended action. Read the result and record it, especially if it names a service, setting, or driver. A successful troubleshooter means only that the checks it performs did not find, or could not correct, a problem. It is not a comprehensive hardware test.
When the troubleshooter is unavailable
Some older, organization-managed, or edition-specific troubleshooters may not appear. Do not download a random “troubleshooter” utility. Continue with Device Manager and the model-specific support instructions for the computer or device. On a work-managed computer, policy may restrict diagnostic changes; involve your IT administrator rather than bypassing those controls.
Step 2: Inspect Device Manager without guessing
Right-click Start and select Device Manager. Expand the category where the device should appear, such as Display adapters, Sound, video and game controllers, Network adapters, Universal Serial Bus controllers, or Disk drives.
What to record
- The exact device name and model shown in the list
- Any yellow warning icon or red error symbol
- The device status message and numeric error code
- Whether the device is listed as disabled, hidden, or unknown
Open the device’s Properties to read the status. Capture the code before changing anything. An error icon proves that Windows has a detection, configuration, or driver issue to investigate; it does not prove that the physical component has failed. A device missing from the expected category is also ambiguous: it may be disabled, hidden, disconnected, unsupported, or defective.
Rank #2
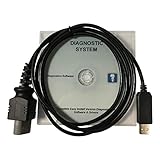
- CD-ROM with Evinrude tools, software and drivers and workshop manuals in PDF
- High Quality cable with 3 pin molded connector for long time use
- Works on all windows XP,7,8,10 operating systems 32 & 64 bit
- Step-by-step guide with pictures + technical support if needed
- This kit also includes a 6 FT USB 2.0 extension cable so you can work at a comfortable distance from the engine. Compatible with all models E-TEC, FICHT, DI, G2 1999-2020 : E-TEC: 25HP, 30HP, 40HP, 50HP, 55HP, 60HP, 65HP, 75HP, 90HP, 115HP, 130HP, 150HP, 175HP, 200HP, 225HP, 250HP, 300HP. FICHT: 75HP, 90HP, 115HP, 135HP, 150HP, 175HP, 200HP, 225HP, 250HP. DI: 100HP, 115HP, 135HP, 150HP, 175HP, 200HP, 225HP, 250HP. G2: Supports all Evinrude E-tec/Fitch models 1999-2020
Safe detection and driver actions
In Device Manager, use View → Show hidden devices when appropriate, and use Action → Scan for hardware changes to ask Windows to enumerate devices again. If the device appears, use a driver supplied through Windows Update or the official computer or device maker. Avoid unknown download sites and automatic driver-updater programs.
For a specific error, Microsoft’s Device Manager guidance may recommend updating, reinstalling, disabling, or uninstalling the device. Follow the instruction for that code and model. Before disabling or uninstalling anything, note the original state and confirm that you know how to restore it. A driver reinstall can correct software corruption; it cannot repair a failed circuit or broken connector.
Crashes, No Sound, or Screen Glitches?
Random freezes, missing sound and display glitches usually trace back to one bad driver. Find and replace yours safely.Free scan · under a minutePC Slower Than It Used to Be?
A free scan shows the junk files, broken settings and background clutter dragging Windows down - then fixes them in one click.Free scan · Windows 10 & 11Step 3: Compare ordinary startup with Safe Mode
Safe Mode loads Windows with a limited set of files, drivers, and services. It is an isolation test: does the symptom require something that normal startup loads?
Enter Safe Mode
- Open the Windows Recovery Environment. You can reach it through Settings → System → Recovery → Advanced startup → Restart now, or by using the recovery route available on your installation.
- Choose Troubleshoot → Advanced options → Startup Settings → Restart.
- After the restart, select the Safe Mode option shown on screen. Use the basic Safe Mode choice unless your test specifically needs networking.
The exact wording and route can vary by Windows release and by whether Windows can boot normally. Microsoft’s startup-settings guidance covers Windows 10 and Windows 11. Windows 10 support ended on October 14, 2025, so a Windows 10 system should be considered separately for security and support planning even when this diagnostic procedure still works.
Interpret the comparison correctly
Reproduce the same action in Safe Mode. If the problem disappears, a normal-startup service, application, or non-basic driver becomes more likely. Microsoft describes the implication this way: “If a problem doesn’t happen in safe mode, this means that default settings and basic device drivers aren’t causing the issue.” That is useful evidence, not a declaration that the hardware is healthy. Safe Mode may not load the driver or feature needed to exercise the device fully.
If the symptom still occurs in Safe Mode, a hardware problem becomes more plausible, but it is not proven. A basic driver, a reduced Safe Mode environment, or a fault that Safe Mode does not trigger can still affect the result. Record exactly what you tested and whether the symptom was identical, changed, or impossible to reproduce.
Avoid advanced startup choices such as disabling driver-signature enforcement for routine diagnosis. They change security behavior and are not needed for this comparison.
Step 4: Use a clean boot when startup software is suspect
Safe Mode changes many parts of Windows at once. A clean boot is a more targeted test for a third-party service or startup application that runs during an ordinary boot.
Set up the clean boot
- Sign in with an account that has administrator rights.
- Press Windows + R, type
msconfig, and press Enter. - On the Services tab, select Hide all Microsoft services. Do not disable Microsoft services blindly.
- Select Disable all for the remaining non-Microsoft services, then select Apply.
- Open the Startup tab and choose Open Task Manager. Disable the listed startup apps, keeping a record of each change.
- Close Task Manager, select OK in System Configuration, and restart.
Test the original symptom after the restart. Microsoft warns that some functionality may be temporarily unavailable in a clean-boot state. That is expected; the purpose is to see whether the symptom changes when third-party startup components are absent.
Rank #3

- Our diagnostic cable is the GREEN PCB board, Our diagnostic cable with Switch, so now it can support more cars easier
- Interface USB OBD2 for BMW - Ediabas - K+DCAN allows full diagnostic for BMW from 1998 to 2019 (all functions as in OMNITEC interface). Build in 2 lines K and D-Can magisterial
- In FT232RL chip, quick connect and response.Note:Because this product is a technical automotive diagnostic products, if not familiar with the diagnostic technology, please buy carefully, thank you
- Works flawlessly with N54, N55, N55E, S55, B58, and N13 for MHD Flasher with Android device. You may need a USB C adapter
- Your fantastic OBD2 diagnostic DIY tool, to same your time and money, enjoy your DIY diagnose
Restore normal startup
When testing is complete, open msconfig again, choose Normal startup on the General tab, apply the change, and restart. Re-enable startup apps and services as needed. If the problem disappeared, re-enable a small group at a time and restart between groups. This method identifies the contributor without leaving the computer in a degraded configuration.
Do these 3 things before closing this tab:
1Clear out junk files and repair common Windows errors2Fix the driver behind crashes, sound loss and screen glitches3Repair Windows errors before they cause bigger problemsA clean boot is an isolation technique, not a hardware test. A symptom that remains in clean boot has survived the removal of the selected startup software, but it does not establish that every driver or physical component is good.
Step 5: Run the manufacturer’s preboot hardware diagnostics
If the issue persists, use diagnostics that run before the normal Windows session. Find the exact computer model on the manufacturer’s official support site and look for preboot diagnostics, hardware diagnostics, or a similar built-in tool. Use instructions for the exact model; menus and tests differ by hardware.
Example: supported Dell systems
On supported Dell computers, Dell documents starting its quick diagnostics from the F12 one-time boot menu. The available advanced tests depend on the installed hardware. A test can return an error identifying a component that did not work correctly. Record the complete error code and validation code exactly as displayed.
This F12 procedure is a Dell-specific example, not a universal instruction for other manufacturers. On another brand, use that maker’s documented key, menu, and test sequence rather than guessing. Do not change BIOS settings simply to reach a test unless the manufacturer’s instructions require it.
What a preboot result means
A failed manufacturer diagnostic is strong evidence that the maker’s test detected a hardware problem. Give support the exact code, validation code, model, and test name; do not paraphrase the code as a diagnosis. Support can use those identifiers to determine whether the next action is a part replacement, repair, or additional test.
A pass means that the tested component passed that test at that time. It cannot rule out an intermittent fault, a cable or port that was not exercised, a thermal problem that appears later, or a component outside the test’s scope. Continue with model-specific troubleshooting if the symptom remains.
Use cross-device comparisons as corroboration
If safety and compatibility permit, test the external device on another known-good computer, or test a known-good equivalent on the affected computer. Keep the comparison narrow: use the same cable, adapter, and type of port when those are part of the suspected chain. A device that fails on multiple compatible computers is more suspicious than one that fails only on one Windows installation. A problem that follows the computer but not the peripheral points in the opposite direction.
Do not force a test when voltage, connector shape, operating-system support, data privacy, or physical safety is uncertain. Cross-device behavior is corroborating evidence, not a substitute for the manufacturer’s diagnostic procedure.
What’s actually slowing this PC down?
Pick the symptom - the matching free tool is one click away.
Rank #4

- ATTN : Please DO study the listing page the "Product Guides and Documents" section, the "Instructions for Use (IFU) (PDF)" guide for all manual links at the end of the PDF, to use this kit correctly and easily. 【The item PACKING】 includes the paper printout with the same Complete Instruction Folder with PDFs and APP. 【Only use the tested APP in the folder】 【BOTH 64bit for Newer Androids and 32bit Manufacturer APP】 are available, passed the Android security scan checks and Google Play pending. MUST use the Android APP to display results on the screen, NO Traditional DIGITAL Display to show the POST codes, Great Ease to save hassles of diagnostic codes lookup one by one manually.
- Easy To Use Unique USB Diagnosis with Videos and PDF Guides. 【MUST study the Guides Before Use】 New latest smartphone technology in using the USB ports ( Standard USB / micro USB / Type C ) to diagnose the computers. 【NOT just getting the electric power but RUNNING the Diagnosis Data through USB ports】. A very powerful Essential Nice Handy computer repair tool kit for quick help on diagnosing Desktop PC, Server, Laptop, All-in-one PC, Android Smartphone / Tablet, customized built miniPC and Mac machines ... etc. A great motherboard tester diagnostic kit that provides the most accuracy and effectiveness in making the computer troubleshooting and repairs much easier.
- USB Diagnosis Unique Feature - Save hassles of taking the dusty PCs or laptops apart. Follow the English PDF user guides to power on and let the Android APP to work with this new test kit to auto scan the motherboard for faulty components quickly. When testing different PCs together, make sure follow the listing User Guide(PDF) to see 【Latest Updates with PRECAUTIONs and Extra Tech Tip】 to UNPLUG the USB cable between each test and restart to clear the last cached working motherboard diagnosis data. The ONBOARD USB cable is needed to plug to the Android charger, the other dedicate USB cable connects to motherboard USB port. Connect this 2 USB cable wrongly causes the unstable connectivity.
- All-in-one Multiports support - Different complete bus connector adapter parts included. Made of quality PCB, transistors and capacitor components. Direct pinpointing the faulty motherboard components to greatly reduce the costs yet increase the effectiveness in the computer diagnostic repairs. Videos and the PDFs instructions please see the listing "Videos" section and the "Product guides and documents" section for more details.
- Tested and brought to you by 29 years IT Professionals This kit works with all machines with USB ports including New Old Desktop PC and Laptop Computers, IBM compatible, Mac machines (using USB), Android devices Smartphones and Tablet PCs. Comes with Step by Step Easy Guides, videos instructions, PDF pictorial manuals with Easy Flowcharts and Latest Updates with Precautions. Great for PC Technicians, Computer Owners, Computer Class Student Learners and PC DIY Lovers, Hardware Traders, professionals and novices . Nice Essential must have to add to our computer tool boxes.
How to weigh the evidence
| Observation | What it suggests | What it does not prove |
|---|---|---|
| The issue disappears in Safe Mode | A normal-startup configuration, service, or non-basic driver may be involved. | That the physical hardware is certainly healthy. |
| The issue disappears after a clean boot | A disabled startup app or non-Microsoft service may contribute; re-enable items methodically to identify it. | That every driver and physical component is good. |
| Device Manager shows a warning or error code | Windows has a device detection, configuration, or driver issue worth investigating. | That the device itself is physically defective. |
| The manufacturer’s preboot test returns a hardware failure code | The maker’s test detected a problem; retain the code and contact support. | That unrelated components are also faulty. |
| The preboot test passes but the symptom persists | Investigate intermittent faults, untested scenarios, connections, and model-specific software. | A guarantee against all hardware faults. |
| The device works on another compatible computer | The affected Windows installation, driver, port, or host hardware deserves closer attention. | That the original device is perfect under every workload. |
The strongest evidence is independent and repeatable: a named component failing a manufacturer test, or the same device failing across compatible hosts. The weakest evidence is a single icon, one successful repair wizard, or a symptom that happened near an update.
Audio problems: a concrete Windows example
Audio illustrates why the sequence matters. If an output device is missing, open Device Manager and check Sound, video and game controllers. If the device is absent, select View → Show hidden devices and then Action → Scan for hardware changes. Microsoft’s audio guidance also recommends obtaining the suitable driver from the computer or sound-card maker.
These steps can restore a disabled or incorrectly enumerated audio device. They do not prove that a sound chip, headphone jack, speaker, cable, or USB audio interface is physically sound. If audio disappears only after normal startup, compare Safe Mode and a clean boot. If it remains absent and the computer maker’s preboot test reports an audio-related failure, preserve that code for support.
Choose the next action from the result
If the symptom changes in Safe Mode or clean boot
Return to normal startup and identify the changed component systematically. Check recently installed drivers and applications, restore one startup service or app at a time, and test after each change. Keep the working and failing conditions written down. Do not leave all services disabled merely because the symptom disappeared during isolation.
If Device Manager reports a code
Use the code-specific Microsoft or manufacturer procedure. Prefer a driver from Windows Update or the official device maker. If reinstalling the correct driver does not change the behavior, move to the preboot test instead of repeatedly installing unrelated packages.
If the preboot test fails
Stop treating the issue as a Windows-setting problem. Back up accessible data, avoid unnecessary use if storage or overheating is involved, and contact the manufacturer or a qualified repair provider with the model and exact error and validation codes.
If every test passes but the problem continues
Describe the failure as unresolved or intermittent, not as disproven hardware. Check model-specific firmware, power, cable, port, and environmental guidance from the maker. Note when the failure occurs, how long the system has been running, and whether sleep, docking, charging, heat, or movement changes it. A passing test narrows the search; it does not close it.
When to stop troubleshooting
- Protect data first: If a drive is making unusual mechanical noises, disappearing, or reporting repeated read errors, stop repeated experiments and back up or clone it using an appropriate recovery method.
- Preserve diagnostic identifiers: Keep preboot error and validation codes exactly as displayed, along with the date and test name.
- Do not make irreversible changes casually: Record the original startup configuration before disabling services, and avoid firmware or BIOS changes unless the maker directs you.
- Use qualified help for physical hazards: Liquid damage, swelling batteries, burning smells, exposed conductors, and severe overheating require professional handling.
- Respect managed-device policy: Ask IT before changing startup services, drivers, or recovery settings on an organization-owned computer.
What to give support
A support case is faster when it includes the computer’s exact model, Windows edition and version, device name, reproduction steps, recent changes, Device Manager code, Safe Mode and clean-boot results, cross-device comparison, and any preboot error and validation codes. State which tests passed and which failed, and under what conditions. This prevents a passing Windows troubleshooter from being mistaken for a hardware certification or a single warning icon from being mistaken for a dead component.
Recommended Free Tools
Windows version and support boundaries
The Microsoft procedures described here apply to Windows 10 and Windows 11, but labels and recovery paths can change between releases. Windows 10 reached end of support on October 14, 2025. If the computer still runs Windows 10, use the manufacturer’s current model guidance and make a separate plan for supported software and security. For any version, use instructions matching the installed edition and the exact PC or peripheral model.
The practical decision rule
Start inside Windows because configuration and driver causes are common and the checks are reversible. Move outside Windows when the symptom survives those isolation steps. Treat a manufacturer failure code as actionable hardware evidence; treat a pass, a missing Device Manager entry, or a successful troubleshooter as limited evidence that guides the next test. That discipline answers the real question—Windows setting or faulty device—without claiming certainty that the available test cannot provide.
Quick Recap
Product prices and availability are accurate as of the date/time indicated and are subject to change. Any price and availability information displayed on Amazon at the time of purchase will apply.

