For the Nintendo GameCube version of Godzilla: Destroy All Monsters Melee, Dolphin emulates a GameCube Standard Controller. Set Dolphin’s Port 1 to Standard Controller, choose your keyboard or gamepad in the Device menu, and bind each GameCube input. The original action layout is A for punch, B for kick, X for a fierce attack, Y for block, Z for a projectile or beam, L for ducking or running, R for jumping, and A+B for grabbing.
This guide covers the GameCube Melee title, normally played on a PC through Dolphin. It is not a guide for the separate SNES game titled Godzilla: Destroy All Monsters, whose controls and emulator setup are different.
As an Amazon Associate I earn from qualifying purchases.
Confirm which Godzilla game you are configuring
The controls in this article belong to Godzilla: Destroy All Monsters Melee for Nintendo GameCube. In Dolphin, the game appears as a GameCube title and uses the emulated GameCube controller ports. The similarly named SNES game does not use this control scheme, so check the platform before changing any settings.
Quick wins for a faster PC:
Scan for outdated or missing drivers - takes under a minuteDriver Scan →Clear out junk files and repair common Windows errorsFree Scan →Dolphin’s controller system is input-device agnostic. It records a key, button, or axis when you select an input slot and activate it. Consequently, there is no single mandatory keyboard layout. The important part is reproducing the GameCube actions and preserving comfortable access to movement, aiming, attacks, the shoulder buttons, and the A+B grab combination.
#1 Best Overall

- With broad game support, the Logitech Gamepad F310 works with old standbys to today's biggest titles, so it's easy to set up and use with your favorite games.
- Profiler software allows the gamepad to be programmed to perform keyboard and mouse commands for games without gamepad support.* * Requires software installation.
- A familiar control layout that doesn't require a learning curve to be able to use, with all the same buttons as on an Xbox 360.
- The unique floating D-pad rests on four switches-instead of a single pivot point-making it responsive to quick changes in direction.
- The six-foot cord lets you lean back and play a comfortable distance from your PC monitor.
Controls you need to reproduce
| Game action | Original GameCube input | Suggested keyboard starting point |
|---|---|---|
| Move | Control stick or D-pad | WASD |
| Aim the head and projectile direction | C-stick | Mouse or I/J/K/L |
| Punch | A | J |
| Kick | B | K |
| Fierce attack | X | U |
| Block | Y | I |
| Projectile or breath/beam | Z tap or hold | O |
| Duck or run with the control stick | L | Left Ctrl |
| Jump or fly | R | Space |
| Grab an opponent or building | A+B together | J+K together |
The keyboard column is a practical starting point, not a required preset. Dolphin accepts any keys you prefer, so move an action if the suggested arrangement creates hand strain or makes simultaneous inputs awkward.
Prepare Dolphin and your input device
Keyboard setup requirements
- A Dolphin installation with the GameCube controller configuration available.
- A keyboard with the keys you intend to bind.
- The GameCube version of the game recognized by Dolphin.
- A short test session in which you can verify analog directions, buttons, and combinations.
Modern USB controller requirements
Xbox, PlayStation, Switch, and generic USB controllers can be mapped manually. Connect the controller before opening the configuration screen when possible, then select it from Dolphin’s Device menu.
Original GameCube controller requirements
An original pad requires a compatible USB GameCube controller adapter. Dolphin’s adapter documentation describes native support for the official Wii U/Switch adapter: enable Direct Connect in GameCube Controller Settings, restart Dolphin if it asks you to, and connect the controller. Other adapters may appear as ordinary input devices and require manual button and axis mapping instead.
Set up a keyboard in Dolphin
- Open controller settings. From Dolphin’s main window, choose Options → Controller Settings. You can also open the same screen with the Controllers button.
- Enable the first GameCube port. Under GameCube Controllers, set Port 1 to Standard Controller. If Port 1 is set to None, the game will not receive the keyboard mapping.
- Open the port configuration. Click Configure beside Port 1.
- Select the keyboard device. In the Device drop-down, choose the keyboard entry rather than a disconnected gamepad or an unrelated input device.
- Bind movement first. Select the left control-stick slots and press the keys you want for up, down, left, and right. With the suggested layout, assign W, S, A, and D to the corresponding directions. If you prefer the D-pad for digital movement, bind its directions as well, but the control stick is the more natural match for the game’s movement input.
- Bind the C-stick. Assign the four C-stick directions to mouse movement or to I/J/K/L. The C-stick controls where the monster’s head points and therefore where a projectile or beam is aimed. A keyboard-only layout can use four keys, while a mouse may feel more direct for directional aiming.
- Bind the face buttons. Assign J to A for punch, K to B for kick, U to X for the fierce attack, and I to Y for block if you are using the suggested profile.
- Bind Z, the shoulder buttons, and Start. Assign O to Z, Left Ctrl to L, Space to R, and a convenient key to Start. Leave Z as a normal button binding; the game distinguishes a quick tap from a hold.
- Plan the grab combination. A grab uses A+B together. With the example profile, pressing J and K at the same time supplies that chord. If that combination is uncomfortable, move either face button or place a separate, convenient key on a profile designed for grab practice. Dolphin allows the inputs to be changed later.
- Calibrate analog controls. Use Dolphin’s calibration controls for the left stick and C-stick. With no key pressed, each stick should return to its neutral center. If a direction remains active, redo the calibration before launching the game.
- Save a named profile. Save the completed mapping as a profile so you can restore it after switching devices or experimenting with alternate layouts. A named profile also makes it easier to keep a stable arrangement for this game while testing another one.
- Test in the game. Launch the title and check movement, head aiming, each attack, block, jump, the Z tap-versus-hold behavior, and the A+B grab. Return to the configuration screen for any key that feels late, uncomfortable, or difficult to press with another key.
Bind the sticks before the face buttons because a wrong axis or an uncalibrated neutral position can make every later test misleading. Once movement and aiming are centered, the button checks are straightforward.
Understand the actions while testing
Movement and aiming
The control stick moves the monster. The C-stick is separate: it aims the monster’s head and the direction of a projectile. A mapping can therefore appear to work for movement while still failing to aim correctly if the C-stick directions were skipped or assigned to the wrong device.
Rank #2

- Wide Compatibility: VOYEE wired 360 controller compatible with Microsoft Xbox 360 & Slim/ PC (Windows 11/10/8.1/8/7). Just plug and play, not for FPS games
- Enhanced Game Controller: Upgraded PC 360 controller with new left and right trigger buttons and more sensitive joysticks and buttons - Respond quickly to player commands without delay
- Astonishing Gaming Experience: VOYEE wired pc controller provides rumble control and according to the game automatic vibration feedback to enhanced game experience and match your personal preference
- Ergonomic Design: Grips's contours have been designed to fit your hands more comfortably to hold for a long time and 7.2ft cord allows greater
- What You Get: VOYEE wired 360/PC Controller, 45 Days Money Back, 365 Days Guarantee Against quality defect and 24 Hours Friendly Customer Support
Punch, kick, and fierce attack
A is the punch, B is the kick, and X is the fierce attack. Test each button independently rather than assuming that adjacent keyboard keys were captured correctly. Dolphin records the first pressed key or axis when you select a slot, so verify the resulting label in the configuration window.
Block
Y activates block. Put it on a key that can be held while you continue to control movement or aim. If your chosen key is already needed for a stick direction, choose another key rather than trying to share one slot.
Crashes, No Sound, or Screen Glitches?
Random freezes, missing sound and display glitches usually trace back to one bad driver. Find and replace yours safely.Free scan · under a minutePC Slower Than It Used to Be?
A free scan shows the junk files, broken settings and background clutter dragging Windows down - then fixes them in one click.Free scan · Windows 10 & 11Projectile and breath or beam
Z has two behaviors. A tap fires the projectile; holding Z produces the breath or beam. Test both durations in a match. If a quick press works but the beam never appears, confirm that the Z slot is bound to a button and that the key remains held long enough for the game to recognize the charged behavior.
Duck, run, jump, and flight
L is used with the control stick for ducking or running. R jumps, and some monsters can fly while jump is held. Test R both as a brief press and as a sustained hold with a monster that supports flight.
Grab
A+B grabs an opponent or a building. It is the one action that requires two face-button inputs at once, so test it separately after confirming that A and B work individually. On a keyboard, the best arrangement is the one that lets two fingers press both keys without moving your hand away from movement or aiming.
Rank #3

- 【Supported Operating System】The Game Controller is specifically designed for playing classic old school retro snes games on computer or laptop. Compatible with Windows 98 / ME / Vista / 2000/2003 / XP / 7 / 8 / 8.1 / 10/11, Mac OS X/ OS X 10.0 and beyond, Raspberry Pi, Raspberry PI 2 model B,Model A, Raspberry Pi 1 Model B+, Raspberry Pi 2,Raspberry Pi OS, Raspberry Pi 3 Model B+, Raspberry Pi 3, Raspberry Pi Zero.
- 【Simple USB Plug and Play】If your program or application accepts USB controller input, this classic game controller do not need install drivers or patches. 1.5 meter external cable(approx. 5 ft. Long). Notice: Please download the game emulator first before start the games, and then you must manually set the buttons and directionals within the emulator you're using, and the controller not automatically assigns buttons/directional axes. If on the Steam platform, you need to first enable Steam's "Universal Controller Configuration Support" and then restart Steam. After entering the game, you also need to manually bind key positions in the game
- 【High Sensitivity without Delay】Super sensitive buttons for precision control: 6 fire buttons, a 'Start' button and a 'Select' button, motion control cross. Play your favorite old school games with classic retro feel. Fits perfectly in the hand and also perfect for two player action.Note: Not applicable to Switch/PS games. Not Compatible with TV/ TV Box, third Mini Games Box and Tesla Model 3
- 【Supported Game Emulators】The game controller works with most emulators. Download any emulator you wish to download and use from Google and do the same with ROMS. Notice:Third party controller, not original controller. But it works phenomenal with the Raspberry Pi game emulation and so on
- 【Product Service】If you have any problem during use, send message to us and we will help you to solve the problem soon
Map an Xbox, PlayStation, Switch, or generic USB controller
- Connect the controller and open Options → Controller Settings.
- Under GameCube Controllers, set Port 1 to Standard Controller.
- Click Configure for Port 1.
- Choose the connected controller in the Device drop-down.
- Assign the left analog stick to the GameCube control stick and the right analog stick to the C-stick. If Dolphin labels the axes unexpectedly, move one stick at a time and confirm the captured direction before continuing.
- Map the controller’s face buttons to GameCube A, B, X, and Y. Follow the action table rather than relying on the printed letters on a modern pad, because the physical labels do not always match the GameCube layout.
- Map a controller button to Z, then map the left and right shoulder controls to L and R. Preserve an analog trigger if Dolphin exposes one and the game accepts it; otherwise use the button behavior captured by the device.
- Assign Start and save the configuration as a named profile.
- Launch the game and test analog travel, C-stick aiming, shoulder inputs, the Z tap and hold, and A+B together.
A controller usually matches the game’s intended input grammar more closely than a keyboard because it provides two analog sticks and shoulder controls. It also makes simultaneous A+B input easier for many players. The exact result still depends on how Dolphin detects the particular device.
Connect an original GameCube controller with an adapter
Official adapter path
- Connect the compatible USB GameCube adapter to the computer and plug the controller into the adapter.
- Open Dolphin’s GameCube Controller Settings.
- Enable Direct Connect for the adapter-supported controller path.
- If Dolphin requests a restart, restart the emulator before testing the pad.
- Set Port 1 to the adapter’s controller entry or the appropriate Standard Controller option shown by Dolphin.
- Test both sticks, the four face buttons, Z, L, R, Start, and the A+B grab.
Generic adapter path
A generic adapter may not expose a native adapter mode. If it appears in the Device list as a normal input device, select that entry and map every GameCube slot manually. The procedure is the same as for a modern USB controller: capture the left stick, C-stick, face buttons, shoulder buttons, Z, and Start, then calibrate and save a profile.
If no adapter entry appears, disconnect and reconnect it, reopen the controller configuration, and check the Device menu again. Do not change game bindings until Dolphin can see the adapter or its controller input; otherwise the slots may capture the keyboard or another device by mistake.
Test the profile methodically
A short checklist prevents a plausible-looking profile from failing during a match. Test in this order:
- Leave every key or stick untouched and confirm that the monster does not walk or aim by itself.
- Move in each of the four directions, then release the control and verify that movement stops.
- Move the C-stick or its keyboard equivalent in all four directions and watch the head direction.
- Press A, B, X, and Y one at a time for punch, kick, fierce attack, and block.
- Tap Z once, then hold it long enough to produce the breath or beam.
- Press L with movement for ducking or running.
- Press R briefly for a jump and hold it with a monster that can fly.
- Press A and B together to attempt a grab on an opponent or building.
- Open the profile again and confirm that the intended device is still selected before saving.
This order isolates errors. For example, a drifting stick must be corrected before you can tell whether a jump or attack button is misbound.
Rank #4
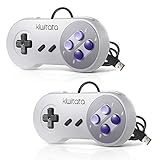
- ✅【Compatibility】Compatible with Raspberry Pi, Windows PC, Linux ,Mac. Specifically designed for playing classic old school retro snes games on computer or laptop.This is the USB controller what has a USB plug for PC, NOT compatible for Original SNES super Nintendo console
- ✅ 【Ergonomic Design】Super precise cross key and function buttons,the cross direction key adopts frosted concave design,anti-sweat and anti-slip.The shape of the controller is designed to fit the contour of your hands,easy and comfortable to hold.
- ✅ 【Advanced Game Experience】PC running operating system:Windows 98/2000/ ME/XP/Vista/Win7/8/8.1/11 or later,or Mac running OS X 10.0/Mac OS X or above.It works with most of emulators you wish to download and use,such as VirtuaNES(PC),sens9x,Zsens,sensgt,Uosnesw,RetroArch,OpenEmu(MAC),NESEmu and Jnes etc.
- ✅ 【Wired USB Connection】Standard USB 2.0 port with a 1.5 meters (5ft) cable, don't need to install any drivers, you must manually set the buttons and directionals within the emulator you're using, and the controller not automatically assigns buttons/directional axes. Notice: please download the game emulator first before start the games, you can download the emulator “VirtuaNES” on PC and “OpenEmu”on MAC.
- ✅【Satisfaction】Third party controller(USB Version), not for original snes console and not support for switch. If there is an incompatibility on MAC or Raspberry Pi , please contact the seller for a support.
Troubleshoot a controller or keyboard that does not respond
Nothing responds in the game
- Open Options → Controller Settings and check that Port 1 is Standard Controller, not None.
- Open Configure and verify that the intended keyboard, controller, or adapter is selected in Device.
- Click a slot and press the intended key or button again. A slot that captured the wrong device will not react to the control you expect.
- Confirm that the profile was saved after the bindings were changed, then relaunch the game.
Only some buttons work
Rebind the missing slots individually. Dolphin captures the input that is activated while a slot is selected, so pressing a button too early or moving the wrong stick can place an unintended control in that slot. Test A, B, X, Y, Z, L, R, and Start separately instead of assuming the entire device failed.
Movement drifts or a stick feels limited
Return to the analog calibration controls and recalibrate the affected stick. Confirm that the neutral position returns to center with no key, axis, or stick movement. Then test all four directions again. A profile that was calibrated for one device can behave incorrectly after you switch to another device, which is why separate named profiles are useful.
The C-stick aims incorrectly
Check that the right stick or keyboard aim keys were assigned to the C-stick slots, not the left control stick. Move one direction at a time while configuring so Dolphin’s captured axis is easy to identify. After saving, test head movement independently from walking.
The beam never appears
Verify that Z is bound and test both a tap and a sustained hold. A tap is the projectile action; the breath or beam requires holding Z. If the key is being used for another action through an accidental duplicate binding, remove the duplicate and save the profile again.
What’s actually slowing this PC down?
Pick the symptom - the matching free tool is one click away.
Grab is unreliable
Confirm that A and B each work on their own, then press them together. If the keyboard arrangement makes the chord difficult, move one face-button binding or choose a controller. The game expects two simultaneous inputs, so a layout that is comfortable for isolated attacks may still be poor for grabbing.
Best Value

- Wired Controller, USB cable: 1.8M.
- Compatible with Switch (version 3.0.0 or above), Windows, Raspberry Pi devices.
- Rumble vibration.
- Support turbo function.
An original controller is not detected
Check the USB connection, reopen GameCube Controller Settings, and look for the adapter in the Device menu. With the official Wii U/Switch adapter path, enable Direct Connect and restart Dolphin if requested. With a generic adapter, use its normal input-device entry and map the controls manually.
The profile changes after switching devices
Choose the correct Device entry before loading or editing a profile. Save a named profile for each keyboard, controller, or adapter you use. This preserves the mapping and prevents a profile intended for one device from being tested against another device’s axes or button names.
Keyboard or controller: which is better?
| Comparison point | Keyboard | Gamepad or GameCube pad |
|---|---|---|
| Analog movement | Digital keys provide on/off directions unless an analog-capable device is used; calibration still applies to any mapped axes. | Two sticks provide the analog movement and head aiming the GameCube layout expects. |
| Aiming | Mouse or four keyboard keys can drive the C-stick; four keys require deliberate directional presses. | The second analog stick gives a direct C-stick equivalent. |
| Simultaneous inputs | A+B grab depends on two keys being comfortable to press together. | Two face buttons are generally positioned for combinations such as grab. |
| Long-session comfort | Depends on key spacing and whether movement, aiming, and attacks force awkward hand positions. | The two-stick and shoulder-button layout follows the game’s original control grammar. |
| Portability and cost | Uses hardware already present on most PCs; no additional controller or adapter is required. | Requires a compatible USB gamepad or, for an original pad, a compatible USB adapter. Exact hardware compatibility should be checked. |
| Dolphin detection | Select the keyboard device and capture keys directly. | Select the detected controller or adapter; native Direct Connect is available for the supported official adapter path. |
Choose the keyboard when convenience or an existing desk setup matters most and you are comfortable with digital movement. Choose a GameCube-style controller when analog precision, C-stick aiming, shoulder controls, and easy A+B input are priorities.
The Tool Desk
Outbyte PC Repair FREERepair Windows errors before they cause bigger problemsFix Now →Outbyte Driver Updater FREEScan for outdated or missing drivers - takes under a minuteDriver Scan →Keep a reliable control profile
Once the controls work, avoid changing the working profile while experimenting. Save the tested arrangement under a clear name, such as a keyboard or controller profile that identifies the device. If you switch from a keyboard to a USB pad, select the new device, load or create its profile, recalibrate both sticks, and run the test checklist again.
For a keyboard, keep movement and aiming close enough that you can reach attacks without releasing directional control. For a controller, check that the physical face-button labels have been mapped to GameCube actions rather than copied by letter. The final test should always include the Z hold and the A+B grab, because those two behaviors are easiest to miss when only basic movement and attacks are tested.
Quick Recap
Product prices and availability are accurate as of the date/time indicated and are subject to change. Any price and availability information displayed on Amazon at the time of purchase will apply.

