To set up an Apple-compatible smart-home accessory, use an iPhone or iPad: open the Home app, create or select a home, tap Add Accessory, scan the accessory’s QR code or enter its setup code, then assign a room and a clear name. Keep the accessory powered on, connected to your network, and close to the phone or tablet during pairing. A Mac cannot add accessories to Home.
The exact requirements depend on whether the accessory uses Apple Home, HomeKit, or Matter, and whether it communicates over Wi‑Fi or Thread. Some Matter accessories can be added and controlled by an iPhone running iOS 18 or later without a home hub, while Thread-based Matter devices and features such as dependable remote access may require compatible hub hardware. Check the device’s instructions before buying or resetting anything.
| # | Preview | Product | Price | |
|---|---|---|---|---|
| 1 |

|
Apple - HomePod mini - Yellow | $141.78 | Buy on Amazon |
| 2 |
|
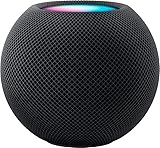
Apple - HomePod mini - Black | $144.00 | Buy on Amazon |
| 3 |

|
Apple - HomePod mini - Orange | $144.00 | Buy on Amazon |
| 4 |

|
Amazon Echo Dot (newest model) - Vibrant sounding speaker, Designed for Alexa+, Great for bedrooms,... | $79.99 | Buy on Amazon |
| 5 |

|
Apple - HomePod mini - Space Gray | $169.99 | Buy on Amazon |
As an Amazon Associate I earn from qualifying purchases.
What you need before opening the Home app
A few minutes of preparation prevents most failed pairings. Gather the accessory, its power supply, the setup code or QR label, and the iPhone or iPad you will use for installation.
Recommended Free Tools
Use an iPhone or iPad
Apple requires an iPhone or iPad to add accessories. The Home app on a Mac cannot perform the initial accessory addition. Apple states: “You need an iPhone or iPad to add accessories to the Home app. You can’t add accessories with a Mac.” See Apple’s troubleshooting guidance for that limitation and other checks.
#1 Best Overall
- Rich, 360-Degree Sound – Delivers deep bass and crisp high frequencies for immersive audio in any room.
- Siri Voice Assistant – Control music, smart home devices, and get information hands-free.
- Seamless Apple Integration – Works effortlessly with iPhone, iPad, Mac, and Apple TV for a connected experience.
- Compact & Stylish Design – Small but powerful, fits perfectly in any space.
- Privacy & Security – Designed to keep your personal information safe and secure.
Power and network the accessory
- Connect the accessory to power and complete any physical switch or battery installation.
- Connect it to the same home network you intend to use for Home, following the accessory maker’s instructions. Keep it nearby while pairing.
- If the product has a separate manufacturer app, install it only when the manual requires that app for network setup, firmware, or code generation.
- Have the QR code or setup code ready. It may be printed on the device, inside the packaging, or in the documentation.
Check compatibility and radio requirements
Look for Apple Home, HomeKit, or Matter compatibility on the exact model, not merely on the product family. Then check whether it uses Wi‑Fi, Thread, Bluetooth during setup, or a combination. The following questions are more useful than a generic “works with Apple” badge:
| Question | Why it matters | What to verify |
|---|---|---|
| Does the model support Apple Home, HomeKit, or Matter? | An accessory that lacks the required standard cannot be added through Home. | The exact model number and current firmware support in the manufacturer’s documentation. |
| Does it use Thread? | Thread-based Matter accessories may need Thread-capable hub hardware or a supported third-party border router. | The device’s Thread requirement and the compatible hub or border-router list. |
| Will you need remote access, sharing, or automations? | Those use cases can change the hub and account requirements. | Apple’s current hub requirements and the accessory maker’s notes for the model. |
| Which Wi‑Fi band does it support? | Some accessories do not work on 5 GHz networks. | Whether the product requires 2.4 GHz, 5 GHz, or a particular router mode. |
Apple’s accessory setup instructions are available in its iOS 27 Home guide. Hub and Thread conditions are described in Apple’s home-hub article.
Create your first Apple Home and rooms
Let Home create the initial home
Open the Home app on your iPhone or iPad. If no home exists, the first launch guides you through creating one. Give the home a recognizable name if you manage more than one location, then follow the prompts to define rooms. You can add or edit rooms later, so do not delay pairing because the room list is not perfect.
Plan rooms before adding many devices
Use physical locations that make voice control unambiguous: “Living Room,” “Hallway,” or “Garage” is more useful than a vague label such as “Downstairs.” A room assignment determines where an accessory appears in Home and helps Siri understand commands such as turning off the lights in a room. After setup, rooms can be organized into zones such as “Upstairs” or “Outside.”
Rank #2
- Rich, 360-Degree Sound – Delivers deep bass and crisp high frequencies for immersive audio in any room.
- Siri Voice Assistant – Control music, smart home devices, and get information hands-free.
- Seamless Apple Integration – Works effortlessly with iPhone, iPad, Mac, and Apple TV for a connected experience.
- Compact & Stylish Design – Small but powerful, fits perfectly in any space.
- Privacy & Security – Designed to keep your personal information safe and secure.
Add a compatible accessory step by step
- Open Home on an iPhone or iPad. Confirm that you are signed in as the household member who should own or administer the home.
- Start the add flow. Choose Add Accessory in Home. If the app offers a camera view, allow the requested camera access so it can read a setup code.
- Put the accessory in pairing mode. It should be powered and connected as directed by its manual. Some products enter pairing mode automatically; others require a button press.
- Scan or enter the code. Scan the QR code when prompted, or choose the manual-entry option and type the setup code exactly. Apple says an Apple Home code can be eight digits; Matter devices may use an 11- or 21-digit code. The code can be on the device, packaging, or documentation.
- Accept the accessory’s identity. Check that the name and model shown by Home match the product you are holding before continuing.
- Wait for commissioning. Keep the phone, accessory, and router within normal range and do not remove power while Home completes the connection.
- Choose a room. Select the room where the accessory physically belongs. If the correct room does not exist, create it when offered or finish setup and add the room afterward.
- Name the accessory. Use a short, unique name that describes its function and location, such as “Desk Lamp” or “Front Door Sensor.” This is the name you will say to Siri.
- Finish the prompts. Home may present accessory-specific options. Complete them, then return to the Home view and tap the new tile to test basic control.
Apple’s complete iPhone sequence, including the code locations and room assignment, is documented at Set up accessories with Home on iPhone.
Understand setup codes and Matter pairing
Where to find the code
Search the accessory body, a removable label, the quick-start sheet, and the original box. Treat the code as part of the installation record; store the documentation somewhere you can find it if you later reset the accessory. Do not guess missing digits. A failed code entry usually requires locating the correct label or regenerating a code through the manufacturer’s app.
When Matter was already paired elsewhere
A Matter accessory may already be commissioned in another smart-home app. In Home’s iPhone pairing flow, select More Options when it appears, choose the existing Matter accessory, then open the other app and generate a pairing code as instructed. Enter or scan that new code in Home. The steps can vary by manufacturer, so keep its app available until Home confirms the addition.
Free tools Windows power users keep installed
One-click scans. No signup required.
Do not confuse a product account with Home pairing
Some accessories need a manufacturer account or app to connect to Wi‑Fi, update firmware, or expose a Matter pairing code. That does not replace the Home app’s Add Accessory step. Complete the required manufacturer setup first, then use the code or hand-off path shown in Home.
Rank #3
- Rich, 360-Degree Sound – Delivers deep bass and crisp high frequencies for immersive audio in any room.
- Siri Voice Assistant – Control music, smart home devices, and get information hands-free.
- Seamless Apple Integration – Works effortlessly with iPhone, iPad, Mac, and Apple TV for a connected experience.
- Compact & Stylish Design – Small but powerful, fits perfectly in any space.
- Privacy & Security – Designed to keep your personal information safe and secure.
Matter, Thread, and the home-hub decision
Matter is a standard, not a single network type
Matter accessories can use different transports. A Wi‑Fi Matter product and a Thread Matter product should not be assumed to have identical hardware requirements. Read the exact model’s installation requirements and identify which transport it uses before purchasing a hub.
When Apple says a hub is needed
Apple’s home-hub documentation says a home hub is needed to add Matter accessories and that Thread-enabled Matter accessories need Thread-capable hub hardware or a supported third-party border router. Apple names HomePod mini and certain Apple TV 4K configurations among Thread-capable home hardware, but eligible-device wording varies by page and configuration. Check the requirements for your particular accessory and hub at Apple’s current home-hub guidance.
The iOS 18 or later qualification
Apple’s troubleshooting article adds an important qualification: an iPhone running iOS 18 or later can add and control Matter accessories without a home hub. Apple still recommends a hub for the best experience. This does not make every Matter device hub-free: a Thread accessory still needs a Thread-capable path, and the accessory’s own requirements remain decisive. Read the qualification in If you can’t add a smart home accessory to the Home app before you conclude that no hub is necessary.
PC Slower Than It Used to Be?
A free scan shows the junk files, broken settings and background clutter dragging Windows down - then fixes them in one click.Free scan · Windows 10 & 11Crashes, No Sound, or Screen Glitches?
Random freezes, missing sound and display glitches usually trace back to one bad driver. Find and replace yours safely.Free scan · under a minuteChoose hardware for the experience you need
- Basic local control: A compatible accessory and an iPhone or iPad may be enough in the cases Apple describes for iOS 18 or later Matter setup.
- Thread Matter: Plan for a compatible Thread-capable hub or supported border router unless the product documentation explicitly provides another supported arrangement.
- Remote access, sharing, or automations: Check Apple’s current home-hub requirements for your software versions and accessory category before installation.
- Mixed standards: Do not infer compatibility from another device in the same brand’s range; verify each model.
Give devices useful names, rooms, and zones
Use names Siri can distinguish
After pairing, select the accessory’s settings in Home to rename it or change its room. Avoid giving two devices identical names. Include a location or function when necessary: “Kitchen Ceiling,” “Bedroom Fan,” and “Entry Motion Sensor” are easier to understand than “Device 1.”
Rank #4
- Your favorite music and content – Play music, audiobooks, and podcasts from Amazon Music, Apple Music, Spotify and others or via Bluetooth throughout your home.
- Alexa is happy to help – Ask Alexa for weather updates and to set hands-free timers, get answers to your questions and even hear jokes. Need a few extra minutes in the morning? Just tap your Echo Dot to snooze your alarm.
- Keep your home comfortable – Control compatible smart home devices with your voice and routines triggered by built-in motion or indoor temperature sensors. Create routines to automatically turn on lights when you walk into a room, or start a fan if the inside temperature goes above your comfort zone.
- Do more with device pairing – Fill your home with music using compatible Echo devices in different rooms, or create a home theatre system with Fire TV.
- Say goodbye to drop-offs and buffering - With eero Built-in, Echo Dot doubles as a mesh wifi extender, adding up to 1,000 sq. ft. of wifi coverage to your existing eero network.
Move accessories when your layout changes
Room assignment is not permanent. When a lamp or sensor moves, edit its settings and choose the new room. Organize related rooms into zones after the room list is stable. This keeps commands based on a zone meaningful without requiring you to rename every accessory.
Test the result immediately
Tap the accessory tile and try its principal action. For a light, test on and off; for a sensor, confirm that a current reading appears; for a lock or door device, verify the status without assuming that a displayed state proves the physical mechanism moved. If the tile is in the wrong room or has an unclear name, correct it now while the device and its documentation are still nearby.
Add an Apple TV to Home
Apple TV follows a different path from ordinary accessories. On the Apple TV, open Settings, choose AirPlay and Apple Home, select Room, and choose an existing room or create one. The Apple TV then appears in the Home app. Apple says adding other accessories in Home requires an iPhone or iPad; the Apple TV room assignment is the separate setup path described in Apple’s accessory article.
Quick wins for a faster PC:
Repair Windows errors before they cause bigger problemsFix Now →Scan for outdated or missing drivers - takes under a minuteDriver Scan →Clear out junk files and repair common Windows errorsFree Scan →Fix “Add Accessory” missing or pairing failures
The Add Accessory control is not available
- Switch to an iPhone or iPad; a Mac cannot add accessories.
- Update the iPhone or iPad to the latest version available for that device.
- Turn on Bluetooth and keep the accessory nearby.
- Open the accessory manual and check whether initial Wi‑Fi, firmware, or account setup must happen in the manufacturer’s app.
- Confirm that the model actually supports Apple Home, HomeKit, or Matter.
Home reports “Unable to add to home”
Start with power. A device that is sleeping, out of battery, or not fully booted cannot complete commissioning. Move it nearer to the router, then restart any bridge or home hub involved. Retry the Add Accessory flow after the restart. If the accessory was previously installed in another home or account, follow its reset procedure and begin again; use the manual rather than holding a button for an unspecified length of time.
Best Value
- Rich, 360-Degree Sound – Delivers deep bass and crisp high frequencies for immersive audio in any room.
- Siri Voice Assistant – Control music, smart home devices, and get information hands-free.
- Seamless Apple Integration – Works effortlessly with iPhone, iPad, Mac, and Apple TV for a connected experience.
- Compact & Stylish Design – Small but powerful, fits perfectly in any space.
- Privacy & Security – Designed to keep your personal information safe and secure.
An incompatible-network alert appears
Check the router’s bands. Apple notes that some accessories are not compatible with 5 GHz, so connect the accessory through a supported 2.4 GHz network when the product requires it. Do not assume that a phone connected to 5 GHz proves the accessory can use that band. If your router combines bands under one network name, consult its documentation for a temporary 2.4 GHz setup option.
The accessory is unsupported or stops at firmware verification
Look for a firmware update in the manufacturer’s app, then retry Home pairing. Firmware support can change by model, and an update for one product does not establish support for another. If no update exists, verify the exact model number and its Apple Home or Matter status before replacing network equipment.
The code is rejected
- Rescan the label in good light and clean the camera lens.
- Use manual entry if the printed QR code is damaged.
- Distinguish similar characters such as zero and the letter O when typing.
- For a Matter accessory paired in another app, use More Options and generate a fresh pairing code in that app.
- If the code is missing, contact the manufacturer or follow its documented reset and code-recovery process.
The device pairs but is unreachable later
Confirm that the accessory still has power and remains within the network’s coverage. Recheck whether it requires 2.4 GHz or Thread infrastructure. Restart the relevant bridge or hub, then test again. If the accessory was moved, return it temporarily to the original pairing location to separate a range problem from a configuration problem.
A practical buying and installation checklist
Use this checklist before committing to a device or beginning a large installation:
- Record the exact model number and confirm Apple Home, HomeKit, or Matter support.
- Identify Wi‑Fi, Thread, and Bluetooth requirements separately.
- Confirm whether a home hub, Thread-capable hub, or supported border router is required for your intended features.
- Check the supported Wi‑Fi band, especially if your network primarily uses 5 GHz.
- Keep the setup code, manual, and any required manufacturer app available.
- Decide the final room and a unique Siri-friendly name before adding many similar devices.
- Plan for remote access, household sharing, and automations rather than assuming they work exactly like local control.
- Install firmware updates when the manufacturer requires them for Home or Matter compatibility.
Following those checks makes the actual process repeatable: prepare power and network, use an iPhone or iPad to add the accessory, complete the code-based pairing, assign a room, name the device, and test it before moving on to the next one.
Quick Recap
Product prices and availability are accurate as of the date/time indicated and are subject to change. Any price and availability information displayed on Amazon at the time of purchase will apply.

