Crashes, No Sound, or Screen Glitches?
Random freezes, missing sound and display glitches usually trace back to one bad driver. Find and replace yours safely.Free scan · under a minuteWindows Errors? Fix Them Before They Spread
Repair common Windows errors and clear accumulated junk for a smoother, more stable PC - no reinstall needed.Free scan · no reinstallAn Intel Core Ultra mini PC can make a quiet, efficient home server for containers, file services, development tools and other always-on workloads. The processor name alone does not tell you how much memory it accepts, which storage fits, how many Ethernet ports it has or whether its cooling is suitable for 24/7 use. Build the server around the exact mini-PC model, install Ubuntu Server on an NVMe drive, secure the host before deploying services, give it a stable LAN address and keep administration behind your home network or a VPN.
This guide covers the complete workflow, from checking the hardware SKU to backups and recovery. A representative Core Ultra mini-PC catalog shows designs with two M.2 Key-M slots and two 2.5-Gigabit Ethernet ports, but those are model-specific examples rather than platform-wide specifications.
As an Amazon Associate I earn from qualifying purchases.
What a Core Ultra mini PC can—and cannot—tell you
“Core Ultra” identifies Intel’s processor platform, not a single server appliance. Two systems with the same processor family may have different memory arrangements, M.2 slot counts, Ethernet controllers, fan curves, BIOS options and power adapters. Before buying or installing anything, obtain the exact model number and service manual.
Recommended Free Tools
Intel reference material demonstrates Ubuntu and Docker running on Core Ultra processors, so the architecture is suitable for a Linux container host. Compatibility still depends on the OEM’s firmware and the individual network, Wi-Fi, graphics and storage controllers in your enclosure.
#1 Best Overall

- MEET THE NEXT GEN: Consider this a cheat code; Our Samsung 990 PRO Gen4 SSD helps you reach near max performance with lightning-fast speeds; Whether you’re a hardcore gamer or a tech guru, you’ll get power efficiency built for the final boss
- REACH THE NEXT LEVEL: Gen4 steps up with faster transfer speeds and high-performance bandwidth; With a more than 55% improvement in random performance compared to 980 PRO, it’s here for heavy computing and faster loading
- THE FASTEST SSD FROM THE WORLD'S FLASH MEMORY BRAND: The speed you need for any occasion; With read and write speeds up to 7450/6900 MB/s you’ll reach near max performance of PCIe 4.0 powering through for any use
- PLAY WITHOUT LIMITS: Give yourself some space with storage capacities from 1TB to 4TB; Sync all your saves and reign supreme in gaming, video editing, data analysis and more
- IT’S A POWER MOVE: Save the power for your performance; Get power efficiency all while experiencing up to 50% improved performance per watt over the 980 PRO; It makes every move more effective with less consumption
Use the exact SKU as your source of truth
- Record the full model and board revision, not just the processor name.
- Check whether memory is socketed SO-DIMM, soldered, or a mixture of both.
- Confirm the maximum supported RAM and the number of memory slots.
- Verify every M.2 slot’s key, PCIe generation, supported length and single- or double-sided clearance.
- Identify the Ethernet controller, Wi-Fi module, USB4 or Thunderbolt ports, fan and BIOS update method.
- Check the supplied power adapter’s output and whether the warranty permits opening the chassis.
Plan the server hardware
Memory: 16 GB is a practical starting point
Choose 16 GB for a few lightweight containers such as a reverse proxy, DNS service, small dashboard or home-automation application. Move to 32 GB when you expect several services, a database with meaningful caches, build jobs, or a virtual machine. More memory can reduce swapping and makes maintenance less disruptive, but the useful ceiling is set by the mini PC’s documented maximum.
Do not order memory until you know whether the system uses replaceable modules and which capacity and speed it accepts. A soldered design may have no upgrade path. If two slots are available, matching modules can simplify compatibility, but the OEM manual takes precedence over generic SO-DIMM specifications.
Storage: select the drive and the slot together
An M.2 NVMe SSD 2280 for a mini PC server is a sensible OS, container and database drive when the exact machine accepts that key and length. Confirm all four details before purchase:
What’s actually slowing this PC down?
Pick the symptom - the matching free tool is one click away.
- Key: an NVMe drive normally uses an M-key slot; an M.2 SATA drive is not automatically interchangeable.
- Length: “2280” means 22 mm wide and 80 mm long. Some compact systems accept only shorter modules.
- Interface: check the slot’s PCIe generation and lane configuration. A faster-generation SSD may operate at a lower slot speed, but the manual should confirm support.
- Clearance and cooling: inspect whether a heatsink is supplied and whether the slot accepts single-sided or double-sided modules.
If the mini PC has a second M.2 slot, use it only after confirming its electrical interface and thermal clearance. A second drive can separate the operating system from bulk data or backups, but it is not a substitute for an external backup.
Networking: prefer wired Ethernet
Use wired Ethernet for predictable latency, throughput and recovery. The representative catalog example with dual 2.5-Gigabit ports is useful when one interface serves the LAN and the other connects an isolated network, but port count and speed vary by model.
If onboard Ethernet is inadequate, a USB-C 2.5GbE adapter is a secondary option. Identify its chipset first and verify that Ubuntu has a working driver for that chipset; USB-C connector shape alone does not guarantee 2.5GbE support. Keep the adapter’s driver and firmware in your maintenance notes.
Rank #2

- HUGE SPEED BOOST: Get random read/write speeds that are 40%/55% faster than 980 PRO; Experience up to 1400K/1550K IOPS, while sequential read/write speeds up to 7,450/6,900 MB/s reach near the max performance of PCIe 4.0*
- BREAKTHROUGH POWER EFFICIENCY: Use less power and get more performance; Enjoy up to 50% improved performance per watt over 980 PRO, plus optimal power efficiency with max PCIe 4.0 performance**
- SMART THERMAL CONTROL: Samsung's own nickel-coated controller delivers effective thermal control; With its slim size, 990 PRO is a perfect fit for desktops and laptops that meet the PCI-SIG D8 standard***
- THE CHAMPION MAKER: Up to 65% improvement in random performance enables faster loads for an ultimate gaming experience on PS5 and DirectStorage PC games****
- SAMSUNG MAGICIAN SOFTWARE: Get the most out of your SSD with Samsung Magician's advanced yet intuitive optimization tools; Monitor drive health, protect valuable data, and receive important updates for your 990 PRO
Power, heat and unattended operation
Keep every intake and exhaust vent clear, place the unit on a hard surface and use the supplied adapter. A mini PC that is quiet at idle can still throttle under sustained encryption, compilation, database or transcoding loads. Record temperatures during a representative workload rather than relying on a short benchmark.
Free tools Windows power users keep installed
One-click scans. No signup required.
A small UPS can bridge brief outages for the mini PC and network equipment. Size it for the combined load, and test an orderly shutdown or recovery procedure; a UPS that powers only the computer while the router is off will not preserve network access.
Prepare and update the mini PC
- Read the service documentation. Identify the RAM slots, M.2 screw positions, Ethernet and Wi-Fi devices, fan access and BIOS recovery process.
- Update firmware before deployment. Follow the OEM’s documented BIOS or firmware procedure, keep the machine on stable power and do not interrupt an update.
- Record the original configuration. Photograph cable positions, note the installed memory and storage, and save the firmware version. This makes warranty or recovery work easier.
- Install the hardware. Fit the NVMe module at the supported length, secure it with the correct screw and attach any approved thermal pad or shield. Install RAM only in the documented orientation.
- Enter firmware setup. Confirm that the drive and memory are detected, review the boot order, set the correct time and enable any required virtualization option before installing the operating system.
Install Ubuntu Server
Ubuntu Server is a version of the Ubuntu operating system designed and engineered as a backbone for the internet. Use the current Ubuntu Server amd64 installer appropriate for the release you have selected and write it to a USB drive from another computer.
Installation sequence
- Create the installer USB and boot the mini PC from it using the firmware’s boot menu.
- Select the NVMe drive as the installation target. If the drive contains old data, verify the target carefully before choosing an erase option.
- Set the server’s hostname, create a named administrator account and choose a strong password for initial setup.
- Configure networking during installation if the wired interface is detected. DHCP is acceptable temporarily; the permanent address plan comes later.
- Enable the OpenSSH server when offered so you can administer the machine without leaving a monitor attached.
- Complete installation, remove the USB drive and boot from the NVMe disk.
From the console or first SSH session, update the base system:
sudo apt update
sudo apt full-upgrade -y
sudo reboot
Keep the release and kernel version in your inventory. Hardware support can change with firmware and kernel updates, so knowing the last working combination speeds recovery.
Harden the Ubuntu host before running services
Create a non-root administrator
Use a named account with administrative privileges rather than logging in as root. If the installer already created one, confirm that it can use sudo and that you know the recovery password.
Rank #3

- Capacity: 512GB
- Sequential Read (CDM): up to 3000MB/s; Sequential Write (CDM): up to 2200MB/s
- Latest PCIe Gen3 controller
- 2282 M.2 PCIe Gen3 x 4, NVMe 1.3
- O/S Supported: Windows
sudo adduser serveradmin
sudo usermod -aG sudo serveradmin
Replace serveradmin with the account you actually created. Log in with that account and test sudo before removing or restricting any other administrative login.
Use SSH keys and then disable password authentication
Generate an SSH key on your trusted administration computer, copy the public key to the server and test a second session before changing SSH settings. Keep the private key protected by a passphrase.
ssh-keygen -t ed25519
ssh-copy-id serveradmin@SERVER_IP
ssh serveradmin@SERVER_IP
After key login works, edit the SSH daemon configuration and set password authentication off. Keep the existing session open while restarting SSH, then verify a new key-based session:
sudoedit /etc/ssh/sshd_config
sudo systemctl restart ssh
Do not disable every fallback account until you have confirmed that your key, account and console recovery path all work.
Allow only required firewall ports
Ubuntu’s uncomplicated firewall (UFW) can start with SSH access from the LAN and deny unsolicited inbound traffic:
sudo ufw default deny incoming
sudo ufw default allow outgoing
sudo ufw allow from 192.168.1.0/24 to any port 22 proto tcp
sudo ufw enable
sudo ufw status verbose
Change the example subnet to your actual LAN. Add a service port only when you understand which device needs it and whether the service binds to the LAN address or all interfaces. Remove temporary rules after testing.
Rank #4

- This product has been replaced by our latest generation. Please search for the SANDISK Optimus GX 7100 NVMe SSD
- HIGH-OCTANE GAMING. Experience speeds up to 7,250MB/s read and 6,900MB/s write (1-2TB models), with up to 35% faster performance than previous generation.
- PURPOSE-BUILT. Designed for serious on-the-go gamers, with a PCIe Gen4 interface and SANDISK’s next generation TLC 3D NAND.
- MORE TIME TO CLEAR THAT CHECKPOINT. Built with laptops and handheld gaming devices in mind, with up to 100% more power efficiency over the previous generation.
- DO MORE WITH DASHBOARD. Ensure your drive is optimized for prime performance with the downloadable WD_BLACK Dashboard (Windows only).
Give the server a stable IP address
Preferred method: a DHCP reservation
Reserve the mini PC’s current DHCP lease in your router. This keeps address management centralized, avoids conflicts and lets you change the address later without editing the server. Record the hostname, MAC address, reserved address and router location.
Quick wins for a faster PC:
Repair Windows errors before they cause bigger problemsFix Now →Scan for outdated or missing drivers - takes under a minuteDriver Scan →Clear out junk files and repair common Windows errorsFree Scan →- Find the wired interface MAC address with
ip link. - In the router’s LAN or DHCP section, create a reservation for that MAC address.
- Renew the lease or reboot the server.
- Verify the result with
ip addressandip route. - Connect using the hostname and reserved address from another LAN device.
When a host-side static address is necessary
Use Ubuntu’s documented network tooling for a static configuration only when your network design requires it. A typical Netplan file contains your interface name, address, gateway and DNS servers; interface names differ, so discover yours with ip link rather than copying an example blindly.
sudoedit /etc/netplan/01-server.yaml
sudo netplan try
sudo netplan apply
netplan try gives you a rollback opportunity if the change breaks connectivity. Keep local console access available when changing remote networking.
Install Docker and deploy containers safely
Use the documented Ubuntu/Core Ultra Docker installation path for your chosen Ubuntu release. Avoid mixing unrelated installation scripts or leaving an old distribution package beside a newer Docker Engine package. After installation, confirm that the daemon starts at boot and that a test container runs.
sudo systemctl enable --now docker
sudo docker run --rm hello-world
Adding your user to the docker group removes the need for sudo, but membership grants root-equivalent control over the host. Make that change only for trusted administrators:
The Tool Desk
Outbyte Driver Updater FREEScan for outdated or missing drivers - takes under a minuteDriver Scan →Outbyte PC Repair FREEClear out junk files and repair common Windows errorsFree Scan →sudo usermod -aG docker serveradmin
newgrp dockerUse Compose files with deliberate defaults
Store each application in its own directory, pin image tags instead of using an unbounded “latest” tag, keep data in named volumes or explicit bind mounts, and define a restart policy. A minimal pattern is:
Best Value
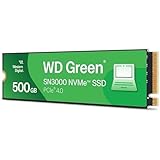
- PCIe Gen4 performance improves slow boot times and launches apps faster at speeds up to 5,000MB/s. (Based on read speed, unless otherwise stated. 1 MB/s = 1 million bytes per second. Based on internal testing; performance will vary depending on host device, usage conditions, drive capacity, and other factors.)
- Storage up to 2TB* keeps your photos, videos and other important files within reach. (1GB = 1 billion bytes and 1 TB = 1 trillion bytes. Actual user capacity may be less, depending on operating environment.)
- Slim M.2 SSD design utilizes a single-sided M.2 2280 to be compatible with thin laptops and small PCs.
- Multitask with breathtaking responsiveness, transfer files faster, and improve your workflow with NVMe and Western Digital nCache 4.0 Technologies.
- Move your data to your new drive with free downloadable Acronis True Image for Western Digital data migration software.
services:
  app:
    image: example/app:1.2.3
    restart: unless-stopped
    volumes:
      - app_data:/var/lib/app
    ports:
      - "127.0.0.1:8080:8080"
volumes:
  app_data:
The image name and port above are placeholders for your selected application; replace them with its documented values. Binding to 127.0.0.1 keeps a service local until a reverse proxy or VPN policy is ready. Never publish a database port to the entire LAN unless the application’s security model requires it.
Separate persistent data from disposable containers
- Keep Compose files, environment files and service documentation in a versioned private directory.
- Back up named volumes and bind-mounted data, not just the container definition.
- Pin image versions and record upgrade notes so a rollback is possible.
- Use explicit health checks where the application supports them.
- Review logs and disk consumption; a container can fill the root filesystem even when its application appears healthy.
Remote administration without exposing the server
Keep SSH and administrative dashboards on the LAN or reachable through a VPN. Do not publish SSH, Docker’s control socket or an admin interface directly to the internet. If remote access is required, terminate the VPN on a trusted gateway or on the server, restrict the allowed users and use key-based authentication.
For a public-facing application, expose only the intended application endpoint through a deliberately configured reverse proxy, use automatic certificate renewal, and keep management endpoints on a separate interface or access policy. A port-forward rule should be an explicit exception, not the default way to make a home server reachable.
Operate, monitor and recover the server
Watch the conditions that cause home servers to fail
- Disk health: monitor available space and SSD health indicators where the drive exposes them.
- Temperature: check idle and sustained-load temperatures, then clean vents and reassess fan placement if temperatures rise.
- Memory pressure: inspect swap activity and container limits when services become slow.
- Network stability: review link speed, packet loss and interface errors, especially with USB Ethernet adapters.
- Logs: inspect
journalctl, Docker logs and application logs after updates or unexpected restarts.
Back up what cannot be recreated
Export Compose files, environment settings, SSH configuration, firewall rules and application data. Keep at least one backup on another device and, for irreplaceable data, another physical location. A second M.2 drive inside the same mini PC protects against some file-level mistakes but not theft, power damage or enclosure failure.
Test restoration on a spare system or temporary directory. A backup is not validated until you can recover the data and restart the service from documented steps.
Plan updates and rollback
Apply Ubuntu security updates and container image updates on a schedule that fits the service. Before a major change, capture a backup, record current image tags and verify free disk space. Update one service at a time, check health and logs, and retain the previous image tag until the new version has proved stable.
Ports, expansion and upgrade limits to verify
Do not infer any of the following from the Core Ultra name:
| Area | What to verify in the exact model | Why it matters for a server |
|---|---|---|
| Memory | Socketed or soldered, slot count, maximum capacity and supported module type | Determines whether 16 GB can become 32 GB or more as services grow |
| Storage | M.2 key, 2230/2242/2280 length, PCIe generation, lane count and single-/double-sided clearance | Prevents an incompatible drive or thermal throttling |
| Ethernet | Controller, number of ports, negotiated speed and Linux driver support | Controls reliable throughput and network segmentation options |
| USB4/Thunderbolt | Actual port capability, display support, power delivery and Linux behavior | Determines whether fast external storage or networking is practical |
| Cooling | Fan access, sustained-load temperatures and noise profile | Short benchmark peaks do not represent 24/7 operation |
| Firmware | Update process, recovery method and Linux device support | Firmware quality affects stability more than a small benchmark difference |
| Warranty and service | Opening rules, replacement parts and access to the SSD or RAM | Defines the real cost and downtime of an upgrade |
How to compare two Core Ultra mini PCs for server duty
For a 24/7 home server, score systems in this order rather than choosing by short CPU benchmarks:
- Sustained cooling and noise: can it maintain workload performance without an intrusive fan curve?
- Idle and peak power: estimate the electricity and UPS requirements for continuous operation.
- RAM upgradeability: prefer a documented path to 32 GB when your service list may expand.
- M.2 capacity and thermals: check whether a second slot is useful and adequately cooled.
- Ethernet quality: favor stable wired networking and well-supported controllers.
- Firmware and Linux support: investigate update quality, suspend behavior and device detection.
- Serviceability, warranty and total cost: include adapters, storage, memory, UPS and replacement effort.
A model with a slightly slower peak result but accessible RAM, stable Ethernet and better cooling is often the safer 24/7 choice.
Quick Recap
Troubleshooting common setup failures
The NVMe drive is not detected
- Confirm that the module is the right key and length for the slot.
- Reseat the drive and verify the retaining screw is not preventing full insertion.
- Check firmware storage settings and update firmware using the OEM procedure.
- Test the drive in the other M.2 slot only if that slot’s interface is documented as compatible.
Ubuntu has no network after installation
- Use the local console and run
ip linkto see whether the interface exists. - Check the interface’s negotiated link and cable, then inspect
journalctl -kfor driver messages. - Install only drivers supported by your Ubuntu release and the controller vendor.
- If using USB Ethernet, confirm the adapter chipset and test a known-good port and cable.
SSH stopped working after a firewall or address change
- Use the console or a second active session to run
sudo ufw status verbose. - Verify that the router reservation or static address matches the address you are using.
- Check that SSH is listening with
sudo ss -tlnp | grep ':22'. - Test the key-based login before changing authentication settings again.
Containers restart repeatedly
- Read the service log with
docker compose logs --tail=200 app. - Check volume permissions, required environment variables and free disk space.
- Confirm that the image tag supports your CPU architecture and that a dependency is reachable.
- Temporarily remove the restart policy while diagnosing so the original failure is visible.
A practical first-day checklist
- Exact SKU, service manual and firmware version recorded.
- RAM and M.2 compatibility confirmed before purchase.
- Ubuntu Server installed on the intended NVMe drive.
- System fully updated and rebooted.
- Named non-root administrator created.
- SSH key login tested; password login disabled only afterward.
- UFW enabled with LAN-only SSH and only required service ports.
- DHCP reservation recorded in the router.
- Docker test container completed successfully.
- Compose files use pinned tags, persistent volumes and restart policies.
- Disk, temperature, log and backup checks documented.
- Remote administration restricted to the LAN or a VPN.
Product prices and availability are accurate as of the date/time indicated and are subject to change. Any price and availability information displayed on Amazon at the time of purchase will apply.

