For the cleanest PS5 picture, connect the console directly to the display with the included HDMI cable, select the correct HDMI input, finish the system update, and then open Settings > Screen and Video > Video Output. Leave resolution and video transfer rate on Automatic unless you have a specific problem, set HDR to On When Supported, run Adjust HDR, and enable 120 Hz or VRR only when both the display and the game support them.
What you need before connecting the console
Prepare the PlayStation 5 or PS5 Pro, its power cable, the HDMI cable supplied in the box, and a TV or monitor with a free HDMI input. A compatible display is required for features such as 4K, HDR, 120 Hz, VRR, ALLM, or 8K on PS5 Pro. The console can detect the display’s capabilities, but it cannot add a feature that the panel, HDMI port, firmware, or cable does not support.
As an Amazon Associate I earn from qualifying purchases.
- Use the supplied HDMI cable for the initial setup. For replacement cables, choose an Ultra High-Speed HDMI cable rated for 4K/120Hz.
- Identify which HDMI input on the TV or monitor supports the features you want. Some displays have only one HDMI 2.1 input, and some require an HDMI mode to be enabled in the television’s menus.
- Have the display’s remote control available so you can select the correct input and change its game, HDMI, or low-latency settings.
Connect the PS5 directly to the display
- Place the console where its ventilation openings are not blocked and connect the power cable.
- Connect one end of the HDMI cable to the HDMI OUT port on the PS5 and the other end directly to the TV or monitor. Do not route the signal through an AV receiver, soundbar, capture device, HDMI switch, or splitter during setup.
- Turn on the TV or monitor and select the exact HDMI input used by the console. A blank screen is often just an incorrect input selection.
- Turn on the PS5 with the power button or controller and follow the on-screen setup. Sign in, connect to your network if prompted, and install the system-software update when offered.
A direct connection is the best baseline because every device inserted between the console and display can impose its own bandwidth, HDCP, HDR, or refresh-rate limit. Add an intermediate device only after the console and display work correctly together.
Check what the display and console negotiated
After setup, open Settings > Screen and Video > Video Output. This page shows the detected HDMI device and the output capabilities available to the console. PlayStation’s support guidance says the PS5 detects the TV’s capabilities and automatically selects the best available resolution, so Automatic is the safest starting point.
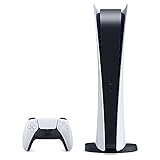
#1 Best Overall

- Model Number CFI-2000
- Includes DualSense Wireless Controller, 1TB SSD, 2 Horizontal Stand Feet, HDMI Cable, AC power cord, USB cable, printed materials, ASTRO’s PLAYROOM (Pre-installed game)
- Vertical Stand sold seperately
Resolution
Keep Resolution on Automatic while testing. If a compatible 4K display is connected and you want to select the 4K output explicitly, choose 2160p. Sony describes 4K as almost four times the definition of standard 1080p HD. Selecting 2160p does not make a 1080p panel display native 4K; the connected display still determines what it can show.
HDR status
The Video Output page also indicates whether HDR is available. If HDR is missing, first verify that the display supports HDR and that the console is connected to an HDMI input that accepts it. The TV may also require a setting such as an enhanced, high-bandwidth, or HDMI 2.1 mode before HDR and high-refresh output become available.
Set HDR without washing out SDR games
Go to Settings > Screen and Video > Video Output > HDR. You have two useful choices:
Do these 3 things before closing this tab:
1Repair Windows errors before they cause bigger problems2Scan for outdated or missing drivers - takes under a minute3Clear out junk files and repair common Windows errors| HDR option | What it does | Best use |
|---|---|---|
| On When Supported | Outputs HDR when the game or app supports it and leaves non-HDR content in SDR. | The best general-purpose setting when you want the display to respect each game’s native format. |
| Always On | Converts non-HDR games and apps to HDR output. | Use only if you prefer the display’s HDR processing for all content and accept that SDR material is being converted. |
After choosing HDR, select Adjust HDR and follow the three calibration screens. This is the console’s authoritative control for matching HDR brightness to the connected display. Re-run it after moving the console to a different TV or monitor, changing the display’s HDR mode, or performing a major display reset.
Enable 120 Hz, VRR, and ALLM deliberately
120 Hz Output
Set 120 Hz Output to Automatic or enable it when the option is available. A 120 Hz signal requires a compatible display, a compatible game, the correct HDMI input, current display firmware, and a cable with enough bandwidth. A game that does not offer a 120-fps or 120-Hz mode will not become one simply because the console setting is enabled.
If enabling 120 Hz causes a blank screen, flicker, handshake failure, or other output problem, turn it off temporarily while troubleshooting. Restore it after the direct connection and display settings are confirmed.
Variable Refresh Rate (VRR)
Turn on VRR when both the display and the game support it. VRR lets the display adjust its refresh timing to the console’s changing frame rate, which can reduce tearing and make uneven frame rates feel smoother. Results vary by TV, so a setting that works well on one display may produce flicker or other behavior on another.
Free tools Windows power users keep installed
One-click scans. No signup required.
Rank #2
- CPU: x86-64-AMD Ryzen Zen 8 Cores / 16 Threads at 3.5GHz.GPU: AMD Radeon RDNA 2-based graphics engine.
- 16GB GDDR6/256-bit Memory; 825GB SSD Storage Capacity
- Ethernet (10BASE-T, 100BASE-TX, 1000BASE-T), IEEE 802.11 a/b/g/n/ac/ax, Bluetooth 5.1
- HDR technology, 8K output, 4K TV gaming, Up to 120 fps with 120Hz output, Tempest 3D AudioTech
- What's Included: Sony PlayStation 5 Disc Version; Wireless controller; USB cable, HDMI cable, AC power cord. Nogtox PVT HDMI_cable
The Apply to Unsupported Games option can be used to stabilize frame rate in games that do not officially list VRR support. Treat it as an experiment rather than a universal improvement; Sony advises turning it off if unexpected behavior occurs.
Automatic Low Latency Mode (ALLM)
On a compatible television, ALLM can switch the display automatically into its low-latency or game mode when the console is active. If you want to disable ALLM completely, VRR must also be turned off. This relationship matters when a television keeps returning to game mode even after you change a picture preset manually.
Use Video Transfer Rate to cure flicker
Leave Video Transfer Rate on Automatic for normal use. If the image flickers, drops out, or repeatedly renegotiates at a high-resolution, high-refresh setting, open Settings > Screen and Video > Video Output > Video Transfer Rate and try -1. If the problem continues, try -2.
These lower settings limit the signal transfer rate. The resulting limits depend on the selected resolution, refresh rate, and RGB or YUV format; Sony lists those combinations in its support guidance. A lower transfer rate can restore a stable picture, but it may reduce the available color or bandwidth mode, so treat it as a compatibility fix rather than an automatic quality upgrade.
Fix overscan, black borders, and a cropped picture
If the edges of the PS5 interface or a game are cut off, or if the picture does not fill the panel correctly, go to Settings > Screen and Video > Screen > Adjust Display Area. Follow the on-screen outline until all four edges are visible.
If black borders remain after adjustment, check the TV’s aspect-ratio or picture-size control. Use a setting that displays the signal at its original size, and avoid an aggressive zoom mode. Make changes on the display only after confirming that the console’s Display Area setting is correct.
How to get 4K at 120 Hz
The PS5 supports HDMI 2.1 specifications and 4K 120Hz video output, but the complete chain must support the mode. Check each item in this order:
Rank #3

- 🚀 CPU: 3.5GHz, 8-core AMD Zen 2
- 🚀 Storage: Custom 825GB SSD
- 🚀 RAM: 16GB GDDR6
- 🚀 GPU: 10.3 teraflop RDNA 2 GPU
- Console: Confirm the PS5 is connected directly to the display and that 120 Hz Output is enabled.
- Display input: Use the TV or monitor’s HDMI 2.1-capable port. On some models, enable the port’s enhanced or high-bandwidth HDMI mode in the display menu.
- Display firmware: Install the latest firmware offered by the TV or monitor manufacturer. Firmware updates can correct HDMI handshakes and compatibility problems.
- Cable: Start with the HDMI cable included with the PS5. If replacing it, use an Ultra High-Speed HDMI cable rated for 4K/120Hz.
- Game: Select the game’s 120-fps or performance mode if it provides one. The console cannot force a title to render at 120 frames per second.
- Signal path: Temporarily remove receivers, soundbars, capture devices, switches, and splitters. Reconnect them only after direct 4K/120Hz output is stable.
When these conditions are met, return to Settings > Screen and Video > Video Output and review the detected resolution, refresh-rate capability, and HDR status. If the display reports a lower mode, test the other HDMI 2.1 input if one exists and repeat the firmware and cable checks.
PS5 Pro settings and hardware qualifications
PS5 Pro consoles in the CFI-7000 model group can expose additional controls, including Allow 8K Output and Enhance PSSR Image Quality. These options are model-specific; do not expect them on every PS5 or every PS5 Pro menu.
Allow 8K Output
8K output requires an 8K screen capable of 60 Hz and Display Stream Compression (DSC). VRR is disabled while the PS5 Pro is outputting 8K. If your display does not meet those requirements, leave 8K output disabled and use the display’s supported 4K mode instead.
Enhance PSSR Image Quality
The PS5 Pro’s Enhance PSSR Image Quality control is available only where the console and software support it. PSSR is a PS5 Pro image-reconstruction feature; the option does not turn a standard PS5 into a Pro model and does not replace a game’s own graphics modes.
Vertical stand and console fit
A vertical stand is listed as compatible with PS5 Pro, but the compatibility guide documents model-specific incompatibilities for older covers and bases. Check the model number before reusing an existing stand, cover, or base. Do not force an accessory that does not match the CFI-7000 hardware.
What’s actually slowing this PC down?
Pick the symptom - the matching free tool is one click away.
A complete troubleshooting path
No picture at all
- Confirm the TV or monitor is powered on and set to the HDMI input used by the PS5.
- Reseat both ends of the HDMI cable. Try the cable supplied with the console.
- Connect the PS5 directly to the display, bypassing every receiver, soundbar, switch, splitter, or capture device.
- Try the display’s other HDMI input, especially the one labeled for HDMI 2.1 or enhanced bandwidth.
- After a picture returns, review Video Output > Resolution and Video Transfer Rate.
4K works but 120 Hz does not
- Verify that the display actually supports 4K at 120 Hz; a 4K panel alone is not sufficient.
- Enable the display’s enhanced HDMI mode if its menu requires one.
- Use an Ultra High-Speed HDMI cable and update the display firmware.
- Test with 120 Hz Output enabled and no intermediate equipment in the signal path.
- If the screen becomes unstable, disable 120 Hz, set Video Transfer Rate to Automatic, and then try -1 or -2 one at a time.
HDR is missing or looks wrong
- Check that the connected HDMI input supports HDR and that the display’s HDR or enhanced mode is enabled.
- Confirm HDR is set to On When Supported or Always On, depending on whether you want SDR content converted.
- Run Adjust HDR again for the current display.
- If only one game looks incorrect, check that game’s HDR and picture options before changing the console-wide setting.
VRR causes flicker or odd behavior
- Confirm the TV or monitor and the game support VRR.
- Turn off Apply to Unsupported Games and test an officially supported title.
- Update the display firmware and test a direct HDMI connection.
- If the display remains unstable, disable VRR and use a fixed refresh rate.
The image is cropped or surrounded by borders
- Run Settings > Screen and Video > Screen > Adjust Display Area.
- Set the television’s picture size to its original or screen-fit mode rather than zoom.
- Check the game’s own safe-area setting if the console interface is correct but one title is not.
How to evaluate a TV or monitor for PS5 gaming
Sony does not publish one universal recommended TV model in the support material. Instead, compare the capabilities that match your games and target output:
| Feature | What to verify | Why it matters |
|---|---|---|
| Native resolution | 4K for standard PS5 output; 8K only for PS5 Pro use with the required 60 Hz and DSC support. | Determines the panel’s native detail and whether an 8K Pro mode is possible. |
| HDR | HDR support on the exact HDMI input you will use. | Allows supported games to display a wider brightness range. |
| HDMI 2.1 | At least one input with the bandwidth and features needed for 4K/120Hz. | Older or limited inputs may cap refresh rate even on a 4K panel. |
| 120 Hz | Native 120 Hz capability at the intended resolution. | Required for compatible games’ 120-Hz modes. |
| VRR format and range | VRR support that matches the display and console. | Can reduce tearing and smooth frame-rate changes. |
| ALLM behavior | Whether the display automatically enters low-latency mode and how it interacts with VRR. | Prevents a manual picture preset from being overridden unexpectedly. |
| Firmware support | A manufacturer update path and current firmware availability. | Updates can resolve HDMI, HDR, and high-refresh compatibility problems. |
| Input lag and game mode | Measured input lag and the display’s low-latency preset. | Lower processing delay makes controls feel more immediate. |
If you only need reliable 4K gaming, prioritize a good 4K display, HDR on the correct input, and a stable HDMI connection. If 4K/120Hz is important, require a genuine HDMI 2.1 input, a 120 Hz panel, suitable firmware, and an Ultra High-Speed cable. If you are considering PS5 Pro 8K output, verify 8K/60Hz and DSC explicitly rather than assuming that an “8K” label covers every requirement.
Quick Recap
Practical baseline profiles
Most players
- Resolution: Automatic
- HDR: On When Supported
- Adjust HDR: complete the calibration screens
- 120 Hz Output: enabled or Automatic when the display supports it
- VRR: on only when the display and game support it
- Apply to Unsupported Games: off unless testing shows a clear benefit
- Video Transfer Rate: Automatic
- Display Area: adjust only if edges are cropped or borders appear
Diagnosing an unstable high-bandwidth signal
- Connect the console directly to the display with the included or Ultra High-Speed HDMI cable.
- Disable 120 Hz and VRR temporarily and confirm a stable picture.
- Update the display firmware and enable its enhanced HDMI mode.
- Re-enable 120 Hz, then VRR, testing after each change.
- If flicker returns, lower Video Transfer Rate to -1 and then -2 if necessary.
PS5 Pro with an 8K display
- Confirm the console is a CFI-7000 model and that the 8K display supports 60 Hz and DSC.
- Enable Allow 8K Output only after the direct HDMI connection is stable.
- Expect VRR to be unavailable during 8K output.
- Use the PS5 Pro’s PSSR image-quality control only where the console and game expose it.
Final setup checklist
- Console connected directly to the display.
- Correct HDMI input selected on the display.
- System software and display firmware updated.
- Resolution checked in Settings > Screen and Video > Video Output.
- HDR set to the preferred mode and calibrated with Adjust HDR.
- 120 Hz and VRR enabled only when supported by the display and game.
- Video Transfer Rate left on Automatic unless flicker requires -1 or -2.
- Display Area adjusted if the picture is cropped or underscanned.
- PS5 Pro 8K and accessory compatibility verified against the CFI-7000 requirements.
Product prices and availability are accurate as of the date/time indicated and are subject to change. Any price and availability information displayed on Amazon at the time of purchase will apply.

