Quick wins for a faster PC:
Fix the driver behind crashes, sound loss and screen glitchesFind Drivers →Repair Windows errors before they cause bigger problemsFix Now →The reliable way to set up a new 4K smart TV is to work in this order: assemble and connect it safely, complete the television’s first-run wizard, join Wi‑Fi, install updates, add apps, connect external equipment, then calibrate picture and sound for your room. If an external box or console still outputs 1080p or lacks HDR, troubleshoot the entire HDMI chain rather than assuming the panel is defective.
What you need before turning the TV on
Have the television’s model manual, stand or wall-mount hardware, remote and batteries, Wi‑Fi network name and password, and the account credentials used by the TV platform. Put the TV close enough to the router for initial setup if possible. Gather the devices you expect to use: an antenna or cable feed, streaming player, game console, disc player, set-top box, soundbar or receiver.
As an Amazon Associate I earn from qualifying purchases.
- A stable power connection: use the supplied power cord and a properly rated outlet or surge protector.
- Network details: write down the exact Wi‑Fi name and password; a hidden network may require manual entry.
- HDMI leads: keep the cables that came with your sources. Buy a different cable only after checking the source, TV port and required resolution, HDR format and refresh rate.
- Account access: some platforms ask you to sign in, while others let you continue without a platform account. The screens depend on the TV maker, operating system and country.
Read the model-specific manual before drilling, attaching a stand or connecting a receiver. Menu labels, supported HDMI ports, wireless bands, audio outputs and firmware behavior differ even between televisions from the same brand.
Free tools Windows power users keep installed
One-click scans. No signup required.
1. Install the TV and connect the basics
Choose a safe position
Place the set on a level surface that can support its weight, or install the specified wall mount using the manual’s screw size, spacing and ventilation clearances. Keep vents unobstructed and leave room to reach the HDMI, network and power sockets. Remove protective film only where the manual permits; leaving film over vents or sensors can trap heat or interfere with the remote.
#1 Best Overall

- 4k Ultra HD (2160p resolution): Enjoy breathtaking HDR10 4K movies and TV shows at 4 times the resolution of Full HD, and upscale your current content to Ultra HD-level picture quality.
- High Dynamic Range: Provides a wide range of color details and sharper contrast, from the brightest whites to the deepest blacks.
- All-in-one: Get right to your good stuff. With Fire TV, you can enjoy a world of entertainment from apps like Prime Video, Netflix, Disney+, Hulu, and HBO Max. Plus, stream for free with Fire TV Channels, Pluto TV, Tubi, and more. Access over 1.8 million movies and TV episodes. Subscriptions may be required. Feature and content availability may vary.
- Smart Home: Your smart home hub. Pair Fire TV with compatible smart home devices to see live camera feeds, use AirPlay, control your lighting and thermostat, and more.
- Free Content: Stream for free. Access over 1 million free movies and TV episodes from popular ad-supported streaming apps like Fire TV Channels, Tubi, and Pluto TV. Subscriptions may be required. Feature and content availability may vary.
Attach only the connections you will use
- Attach the stand or wall bracket exactly as illustrated. Do not lift a large panel by one corner; use two people if the manual calls for it.
- Connect the power cord, but leave the TV switched off while you attach other equipment.
- Connect an antenna or cable feed if you plan to use the tuner. A channel scan is normally offered during first-run setup or later in the broadcast settings.
- Connect each external source to an HDMI input. Note the port number so you can select it later.
- For a soundbar or receiver, identify whether both devices support HDMI ARC or eARC, or whether optical audio is the appropriate alternative. Connect only after checking both manuals.
- Insert the remote batteries and switch on the TV.
2. Complete the first-run wizard
The opening screens establish language, country or region, time settings, privacy choices and network access. Follow the on-screen sequence rather than guessing a menu path: manufacturers change labels and order with firmware and model year.
Phone-assisted setup
Some Google TV models can transfer network details and account information from a phone. Google documents this as a model-dependent feature, so do not wait for a phone option that your television does not display. You can complete the same setup with the remote.
Platform accounts
Account prompts are platform-specific. A Roku TV setup, for example, asks you to sign in to an existing Roku account or create one when prompted. Other systems may request a different account, offer guest use, or defer sign-in until you open an app. Use an email address you can recover and record which account is associated with the TV.
What’s actually slowing this PC down?
Pick the symptom - the matching free tool is one click away.
3. Connect the smart TV to Wi‑Fi
- In the first-run wizard, choose the home wireless network from the list. If you are setting up later, open the TV’s Network, Connections or similarly named settings.
- Enter the password exactly, including capitalization and punctuation. A wrong character is the most common reason a network appears but will not connect.
- Wait for the TV to report both a wireless connection and internet access. Being connected to the router does not always mean the internet service is reachable.
- If the network is hidden, choose the manual or hidden-network option and enter its name and security details.
- Accept any platform terms and continue to the home screen.
If Wi‑Fi fails during setup
- Move the TV or router closer for the initial connection and remove obvious interference.
- Confirm another device can reach the internet on the same network.
- Restart the router, wait for it to finish booting, then restart the TV.
- Re-enter the password instead of relying on a remembered value.
- Try the TV’s other supported band if your router exposes separate network names.
- If the TV has an Ethernet socket, use a temporary wired connection to complete updates and account setup, then configure Wi‑Fi later.
Do not assume every TV supports every wireless security mode or frequency. The manual and the router’s compatibility settings are the authority for your model.
4. Install firmware updates before adding lots of apps
Accept the update prompt during first-run setup when the TV offers one. Roku describes updates as a way to receive the latest features, programming and fixes; other platforms use similar update systems. Keep the TV powered and connected until the process finishes, and do not unplug it during a firmware installation.
Rank #2

- Breathtaking picture: Sharp 4K brings out rich detail on our 55" flat screen TV, while the QLED screen and HDR10 create bright, accurate colors. Roku Smart Picture cleans up incoming TV signals, optimizes them, and chooses the right picture mode.
- Seamless streaming: With fast Wi-Fi and apps that launch in a snap, Roku Select Series TVs get you to your entertainment quickly. You get excellent picture quality, clear sound, automatic updates, and more. It’s simple to use. Hard to outgrow.
- TV, simplified: With setup that only takes minutes, a simple-to-navigate Home Screen, and an uncluttered remote control that does all you need—Roku makes it easier to watch the TV you love.
- A world of free entertainment: Enjoy a huge selection of free live TV, news, sports, movies, shows, and much more—all just a click away.
- More streaming, less searching: With personalized picks right on your Home Screen, quick access to the sports and entertainment you watch most, and fast and easy search in one place—the days of endless scrolling are over.
If no prompt appears, open the settings area labeled System, About, Support or Software update. The exact path varies by manufacturer. Note the installed version and the date of the last check so you can describe the state accurately if support is needed. Some updates restart the TV and reset an input selection; that is normal, but verify your network afterward.
5. Install apps and sign in selectively
- Open the TV platform’s app store or app interface from the home screen.
- Search for the service you want, open its listing and choose Install, Add or the platform’s equivalent.
- Launch the app and sign in with its own service account, often by entering a code on a phone or computer.
- Repeat only for services you actually use, then arrange the home screen so the most-used apps are easy to reach.
Roku’s “Streaming Store” and “add app” workflow is specific to Roku devices and should not be treated as a universal instruction for every smart TV. App availability depends on the television model, operating system, service licensing and country. If an app is missing, check the TV’s region, firmware and supported-model list; a phone app or web subscription does not guarantee a compatible TV app.
Built-in apps or an external player?
| Question | Built-in TV apps | External streaming player |
|---|---|---|
| Setup | Uses the TV’s own network, account and app interface. | Requires a separate power connection, HDMI input, network setup and player account. |
| App access | Limited to apps offered for that TV platform, model and region. | Depends on the player’s supported apps, region and software. |
| Picture output | Uses the TV’s internal video path. | Requires the player, HDMI port and any receiver in the chain to support the desired resolution, HDR format and refresh rate. |
| Audio routing | Uses the TV’s internal speakers or its audio outputs. | Audio may pass through the TV, an ARC/eARC connection or a receiver; check every device’s supported formats. |
Choose the path that supports the services and formats you need in your region. There is no universal app-count or quality advantage established by the setup steps alone.
6. Connect and label external devices
- Power off the TV and source when practical, then connect the source to the intended HDMI port.
- Power on the source and TV.
- Press the remote’s input or source button and select the matching HDMI number.
- Confirm the source is awake and producing a signal; some consoles and players remain in standby until their own remote is used.
- Rename the input if the TV allows it, using a clear label such as “console” or “player.”
Check the individual port specifications in the manual. One port may support a higher refresh rate, a particular HDR format or ARC/eARC while another does not. A receiver or switch inserted between the source and TV becomes part of the video chain and must support the same requirements.
7. Get 4K and HDR from an external source
A 4K panel does not guarantee 4K or HDR from every connected box, console, receiver, switch or cable. Roku’s support guidance states: “If even one device does not support HDMI 2.0 and HDCP 2.2, then the 4K movie or TV show can only be viewed in a lower resolution, such as 720p or 1080p.” In practice, troubleshoot each link rather than replacing parts at random.
Rank #3
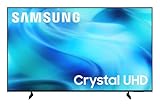
- CRYSTAL PROCESSOR: Powerful processor enhances colors and sharpens details for a vibrant 4K viewing experience. Experience every shade of color as it was meant to be seen in dazzling 4K. Plus, make your movies, TV shows, games and sports look even better with powerful 4K upscaling.
- ENDLESS FREE CONTENT: Watch 2,700+ free streaming options, including 750+ subscription-free channels on Samsung TV Plus. Enjoy news, sports, movies, kids' shows and reality TV — all without a subscription. Discover endless entertainment with new content added regularly, tailored to your mood and interests.*
- MOTION XCELERATOR: Experience clear picture and smooth motion in games and sports. Enjoy smooth motion and clear visuals with technology that estimates and adjusts frame transitions in real time. Whether gaming or watching sports, enjoy up to 4K 60Hz performance that brings every play, move and scene to life with realistic clarity and motion.
- COLOR BOOSTER: Supercharge your color. From fiery reds to sparkling blues, make every color come to life with intensity. Color Booster transforms your content into a visual masterpiece.
- 4K UPSCALING: Upgrades what you watch to crisp 4K clarity. Upgrade your favorite shows, movies and more. Experience incredible details and clarity in every frame, even from lower-quality sources, with advanced upscaling technology.
Configure the TV input
Some televisions require an enhanced or high-bandwidth HDMI mode on the specific port. Sony documents an Enhanced HDMI signal format for supported 4K picture modes; Samsung uses a setting called HDMI UHD Color on some models. These names are examples, not universal menu labels, and not every 4K TV supports HDR. Open the model manual, select the port in use and enable the mode required for the source’s resolution and HDR format.
Do these 3 things before closing this tab:
1Fix the driver behind crashes, sound loss and screen glitches2Clear out junk files and repair common Windows errors3Scan for outdated or missing drivers - takes under a minuteConfigure the source
Open the player or console’s video settings and select automatic detection first. If automatic detection fails, choose a resolution, HDR option and refresh rate that the TV and every intermediary device explicitly support. Confirm that the content itself is mastered in 4K/HDR; a 1080p title cannot become native 4K merely because the output menu offers it.
Use a methodical 4K/HDR checklist
- Read the TV manual for the exact HDMI port that supports the required resolution, HDR format and refresh rate.
- Connect the source directly to that port, temporarily bypassing a receiver, switch or capture device.
- Check the source’s output status while a known 4K/HDR title or test screen is running.
- Enable the TV’s enhanced input format if the model requires it.
- Update the TV and source firmware.
- Reconnect intermediary equipment one item at a time and verify the signal after each change.
- Only then test another cable. Match the cable rating to the actual bandwidth and distance; an Ultra High Speed HDMI cable is an optional choice for compatible equipment or a difficult, inaccessible run, not a requirement for built-in TV apps.
If the image remains 1080p, the selected input, source setting, port capability, intermediary equipment, HDCP support or content may be the limiting factor. If HDR is absent while 4K works, check the source’s HDR output, the TV’s per-input mode and whether that TV model supports the format being sent.
8. Set a comfortable starting picture
Picture modes are starting points, not a universal best setting. Open Picture or Display settings and compare the available modes while watching the content and in the lighting you normally use. A bright showroom-style mode can look harsh in a dim room; a darker mode may be easier on your eyes at night.
Adjust in a sensible order
- Select a neutral or cinema-oriented mode as a baseline if your TV offers one, then compare it with the standard mode.
- Set brightness or backlight for the room. Increase it for daylight and reduce it when the room is dark.
- Adjust contrast and black level only until bright detail and shadow detail remain visible in a familiar scene.
- Set color temperature to the appearance you find natural; warmer options often look less blue, but personal preference and room lighting matter.
- Turn motion smoothing, noise reduction and sharpness features on or off while viewing real content. Excess processing can create halos or an artificial “soap opera” look.
- Repeat the check for each input and picture mode you actually use; TVs often store settings separately.
Do not copy exact numerical values from a different model. Panel type, firmware, room light and source behavior make a value that works elsewhere unreliable. If the TV provides a reset option, record your changes first so you can return to the manufacturer defaults.
Recommended Free Tools
Rank #4
- CRYSTAL PROCESSOR: Powerful processor enhances colors and sharpens details for a vibrant 4K viewing experience. Experience every shade of color as it was meant to be seen in dazzling 4K. Plus, make your movies, TV shows, games and sports look even better with powerful 4K upscaling.
- ENDLESS FREE CONTENT: Watch 2,700+ free streaming options, including 750+ subscription-free channels on Samsung TV Plus. Enjoy news, sports, movies, kids' shows and reality TV — all without a subscription. Discover endless entertainment with new content added regularly, tailored to your mood and interests.*
- MOTION XCELERATOR: Experience clear picture and smooth motion in games and sports. Enjoy smooth motion and clear visuals with technology that estimates and adjusts frame transitions in real time. Whether gaming or watching sports, enjoy up to 4K 60Hz performance that brings every play, move and scene to life with realistic clarity and motion.
- COLOR BOOSTER: Supercharge your color. From fiery reds to sparkling blues, make every color come to life with intensity. Color Booster transforms your content into a visual masterpiece.
- 4K UPSCALING: Upgrades what you watch to crisp 4K clarity. Upgrade your favorite shows, movies and more. Experience incredible details and clarity in every frame, even from lower-quality sources, with advanced upscaling technology.
9. Set up sound and a soundbar or receiver
Using the TV speakers
Start with the TV’s normal speaker output and adjust volume, dialogue enhancement or night mode only if you need it. Listen from the main seating position at a normal program level. Sound modes can change intelligibility and bass, so compare them with speech-heavy content rather than selecting one by name alone.
Using HDMI ARC/eARC
- Identify the TV’s HDMI port labeled ARC or eARC and the matching port on the soundbar or receiver.
- Connect those ports with a suitable HDMI cable.
- In the TV’s audio settings, choose the HDMI ARC/eARC output and enable the required control option if the manual calls for it.
- Set the soundbar or receiver to its TV/ARC input.
- Play a source and confirm that volume commands operate the external audio system.
ARC and eARC support, audio formats and control behavior vary by model. If the connection is silent or unstable, verify both manuals, try the optical output if both devices support it, and check that the TV is not still set to internal speakers.
Using optical audio
Connect the TV’s optical output to the soundbar or receiver’s optical input, select optical or digital audio output in the TV settings, and choose a compatible digital format. Optical does not provide every feature available through eARC, so use the connection that matches the formats your equipment supports.
10. Verify the finished setup
- Open a built-in app and play a short video to confirm internet access.
- Switch through every labeled HDMI input and verify the correct device appears.
- Check the source’s reported resolution and HDR status with a known compatible title.
- Raise and lower volume to confirm the intended speakers respond.
- Test the remote from your seating position and replace batteries if commands are intermittent.
- Run a channel scan if you connected an antenna or cable feed.
- Review privacy, voice-control and automatic-content settings before leaving the TV unattended.
Troubleshooting by symptom
The TV cannot find or join Wi‑Fi
Confirm the network name, re-enter the password, restart the router and TV, and test another device on the same network. Move the TV closer or use Ethernet temporarily. If only this TV fails, check whether its manual lists restrictions on wireless security or bands.
An app is unavailable
Install pending TV updates, verify the region selected during setup, and search the platform’s own store rather than a phone store. The service may not publish an app for that model, platform or country. In that case, use a supported external player if the service lists one.
Best Value

- A treat for the eyes: Sharp 4K brings out rich detail on our 43" flat screen TV, while colors pop off in lifelike clarity with HDR10. Roku Smart Picture cleans up incoming TV signals, optimizes them, and chooses the right picture mode.
- Seamless streaming: With fast Wi-Fi and apps that launch in a snap, Roku Select Series TVs get you to your entertainment quickly. You get excellent picture quality, clear sound, automatic updates, and more. It’s simple to use. Hard to outgrow.
- TV, simplified: With setup that only takes minutes, a simple-to-navigate Home Screen, and an uncluttered remote control that does all you need—Roku makes it easier to watch the TV you love.
- A world of free entertainment: Enjoy a huge selection of free live TV, news, sports, movies, shows, and much more—all just a click away.
- More streaming, less searching: With personalized picks right on your Home Screen, quick access to the sports and entertainment you watch most, and fast and easy search in one place—the days of endless scrolling are over.
The screen is blank on an HDMI input
Confirm the input number, wake the source, reseat both HDMI ends and bypass a receiver or switch. Try a different supported port. If the source works directly but not through intermediary equipment, that equipment is the compatibility boundary.
The TV shows 720p or 1080p instead of 4K
Check the source output, the selected port’s specification, the TV’s enhanced-input setting, firmware and every receiver, switch or adapter in the path. One device lacking HDMI 2.0 or HDCP 2.2 can force a lower resolution. Verify with a known 4K title before judging the result.
4K works but HDR does not
Confirm that the title and source support the same HDR format, enable HDR output on the source, and activate the TV’s required enhanced or HDR option for that input. Some HDR-capable TVs do not enable HDR on an input by default.
Windows Errors? Fix Them Before They Spread
Repair common Windows errors and clear accumulated junk for a smoother, more stable PC - no reinstall needed.Free scan · no reinstallCrashes, No Sound, or Screen Glitches?
Random freezes, missing sound and display glitches usually trace back to one bad driver. Find and replace yours safely.Free scan · under a minuteThe soundbar has no audio
Check the physical port labels, select ARC/eARC or optical output in the TV, choose the corresponding input on the soundbar, and verify that the TV is not muted or set to internal speakers. Test a simple audio format before enabling advanced passthrough options.
Keep the setup dependable
Keep the model manual and a list of connected devices. After a major firmware update, recheck input labels, picture settings and audio output because an update can alter defaults. When adding a new device, document which HDMI port and cable it uses; this makes future 4K/HDR troubleshooting much faster. Review unused apps and account access periodically, and install platform updates instead of postponing them indefinitely.
Quick Recap
Product prices and availability are accurate as of the date/time indicated and are subject to change. Any price and availability information displayed on Amazon at the time of purchase will apply.

