Do these 3 things before closing this tab:
1Fix the driver behind crashes, sound loss and screen glitches2Repair Windows errors before they cause bigger problems3Scan for outdated or missing drivers - takes under a minuteUse a Ledger Nano X or Nano S Plus as the signer, keep its Secret Recovery Phrase offline, add a Solana account in Ledger Wallet, and connect the phone only through the wallet’s supported pairing flow. Your Ledger key should remain on the device: the phone can prepare transactions, but the Ledger Secure Screen is where you verify and physically approve them.
Solana Mobile devices add a second security environment through Seed Vault. That makes a phone-only wallet more isolated than an ordinary Android app, but it is a different key and recovery system from Ledger. Treat the two as separate wallets unless you deliberately transfer funds between their public addresses.
| # | Preview | Product | Price | |
|---|---|---|---|---|
| 1 |
|
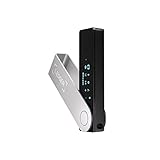
Ledger Nano X - Classic Crypto Wallet with Bluetooth | Compact, go anywhere, 1.1" display. Desktop &... | $99.00 | Buy on Amazon |
As an Amazon Associate I earn from qualifying purchases.
What a secure Ledger–Solana Mobile setup looks like
A secure arrangement has three separate parts:
- Ledger signer: A genuine Ledger Nano X or Nano S Plus holds the Solana private key in its Secure Element. The device signs only after you confirm the transaction on its own screen.
- Ledger Wallet: The mobile or desktop application displays balances, creates transactions and shows account addresses. It does not replace the hardware signer.
- Solana Mobile phone: Saga and Seeker can use Seed Vault, an isolated phone security environment for phone-side wallet seeds. Seed Vault can authorize its own transactions with a password or optional biometrics.
The key decision is whether you want the Ledger account or a Seed Vault account. A Ledger account is controlled by the Ledger Secret Recovery Phrase; a Seed Vault account is controlled by the seed created or restored in the phone wallet. Do not combine the two by importing the Ledger phrase into the phone.
Check compatibility and gather what you need
Supported Ledger models
Ledger identifies the Nano X and Nano S Plus as Solana-supported devices. Model availability and software support can change, so check the current Ledger Wallet device list when you buy or update. A model that is genuine but no longer supported by the current app should not be used for a new setup until Ledger documents compatibility.
#1 Best Overall
- Effortlessly build your crypto portfolio via the all in one Ledger Wallet app: buy, sell, send, receive, swap, stake and more across popular blockchains. 15,000+ coins & tokens in a single dashboard. Keep a close eye on the market. Compare service providers. Track performance. Get timely alerts. Build your portfolio with confidence.
- Enjoy Bluetooth connectivity, iOS access, and hours of battery use with this mobile-first, secure backup signer. Freedom you can depend on.
- Genuine Check: confirm your signer is authentic during setup with the Ledger Wallet app.
- Protect your signer: keep it in mint condition at all times with a bespoke Pod or Case to avoid scratches and everyday wear and tear.
Phone and software requirements
You need a Solana Mobile phone such as Saga or Seeker, Ledger Wallet for the phone or a computer, the Ledger device and its USB cable or supported wireless connection. Keep the phone operating system, Ledger Wallet and any Solana wallet used for Seed Vault current. The exact connection method can depend on the phone model, wallet version, operating system and region; follow the prompts shown by the current apps rather than an old pairing tutorial.
Pre-setup checklist
- Buy the Ledger through Ledger or an authorized channel. Avoid a device that arrives with a prewritten recovery phrase, a preset PIN or instructions to enter a phrase on a website.
- Use a private room for initialization. Never photograph, copy, dictate or type the Secret Recovery Phrase into a phone, computer, cloud drive, password manager or form.
- Prepare two offline backups: archival paper for immediate recording and, if desired, a metal recovery-phrase backup for protection against fire or water. A metal backup stores the words; it does not make the phrase safe to share.
- Make sure the device has enough battery and that you can read its screen clearly before approving transactions.
Inspect and initialize the Ledger
1. Inspect the package and device
Open the package yourself. Check for tampering, unexpected seals, a device that is already configured, or a recovery sheet containing words. Ledger should generate the phrase during your initialization. If a seller supplied a PIN or phrase, stop and return the device through the seller’s official process.
2. Install Ledger Wallet from Ledger
Download Ledger Wallet from Ledger’s official distribution channel for your operating system. Confirm the publisher and avoid search-ad links, unsolicited messages and browser extensions that imitate the wallet. Open the app and choose the option to set up a new Ledger device.
The Tool Desk
Outbyte Driver Updater FREEScan for outdated or missing drivers - takes under a minuteDriver Scan →Outbyte PC Repair FREEClear out junk files and repair common Windows errorsFree Scan →3. Create the device PIN
On the Ledger itself, choose a PIN that is not reused elsewhere and is not obvious from your birthday, address or phone number. Enter it on the device screen, not into a computer prompt. The PIN unlocks the device; it is not the recovery phrase and cannot restore the wallet on another device.
4. Write the Secret Recovery Phrase
The Ledger displays a 24-word Secret Recovery Phrase during initialization. Write every word, in order, on the supplied recovery sheet or another offline medium. Check spelling and numbering as you go. Ledger describes this phrase as the ultimate backup and says it must never be shared, including with Ledger.
After recording the words, complete the device’s verification exercise. This confirms that your written copy matches what the Ledger generated. Store the backup where only you can reach it, protected from moisture, fire, theft and casual discovery. Do not store a second copy in a cloud note or email account.
5. Complete Ledger’s authenticity and security checks
Let Ledger Wallet run its genuine-device and firmware checks. Install firmware only when the wallet identifies the update through its normal interface. Never follow a message that asks you to “validate” a phrase by typing it into a web page or support chat. A legitimate support representative does not need your words.
Add Solana support and create the Ledger account
1. Install or enable Solana support
Connect and unlock the Ledger, open Ledger Wallet and use its account or app-management controls to install or enable Solana support. Approve installation on the Ledger when the device asks. The Solana application is the code that lets the signer interpret and approve Solana transactions; it does not expose the private key.
2. Add a Solana account
In Ledger Wallet, choose Add account, select Solana, connect the unlocked Ledger and follow the on-screen prompts. The app derives a public Solana address from the device. You can display that address in Ledger Wallet, but the private key remains inside the Ledger Secure Element.
3. Confirm the address on the Ledger
Use the wallet’s option to verify or receive with the Ledger. Compare the address shown in Ledger Wallet with the address displayed on the Ledger screen, character by character or by using the supported address-verification view. Malware can replace an address copied from a computer clipboard; the device screen is the trusted reference.
Send a small test amount of SOL first if you are unfamiliar with the workflow. Wait for the transfer to appear in the account before moving a larger balance. A blockchain transfer cannot generally be reversed after signing.
Recommended Free Tools
Connect the Ledger to Saga or Seeker
What the Solana Mobile integration does
Ledger and Solana Mobile announced integration for Saga users, including transfers between a Solana Mobile phone and a Ledger. The supported connection can change as wallet applications and phone firmware evolve. On Saga or Seeker, start from the current wallet’s hardware-wallet or connect-device option and follow its prompts for the exact supported method.
Keep Ledger and Seed Vault accounts distinct
Seed Vault stores phone-side secrets in an environment isolated from Android and other apps. Solana Mobile says Seed Vault can store up to eight seeds, each using a 12- or 24-word phrase, and can sign without exposing the private key to ordinary apps. Those seeds are not the Ledger’s phrase. Create or restore a Seed Vault wallet only when you intentionally want a separate phone-controlled account.
Pair without revealing the Ledger phrase
- Unlock the Ledger with its PIN and open Ledger Wallet or the supported Solana wallet.
- On Saga or Seeker, choose the wallet’s hardware-wallet connection command. Confirm that the app identifies the intended Ledger model and Solana account.
- Allow only the permissions required for account discovery, address display and transaction preparation. Do not approve an unrelated wallet-import or recovery prompt.
- If the phone opens a Seed Vault authorization sheet, remember that this authorizes the phone’s Seed Vault account. A Ledger transaction must still request approval from the Ledger device.
- Complete a receive-address check and, if moving funds, send a small test transaction before transferring the full amount.
If the wallet cannot detect the Ledger, stop rather than entering the recovery phrase into a phone. Confirm that the Ledger is unlocked, Solana support is installed, Bluetooth or USB permissions are enabled as appropriate, and both applications are current. Compatibility can depend on the exact model, software version and region.
Receive SOL safely
- Open the Ledger Solana account in Ledger Wallet and select the receive function.
- Choose the account you intend to use and display the address on the Ledger’s Secure Screen.
- Compare the device address with the address shown on the phone or computer. Reject the request if even one character differs.
- Copy or share the verified public address with the sender. Sharing a public address does not reveal the private key.
- Wait for the transaction to appear and confirm the amount and network in the wallet.
Never ask a sender to use an address from an old screenshot without verifying that it is still the account you control. If you manage both a Seed Vault account and a Ledger account, label them clearly so you do not send funds to the wrong wallet.
Send SOL and approve only what you intended
Prepare the transaction on the phone
Use Ledger Wallet or the supported Solana Mobile wallet to enter the recipient, amount and network. Review the destination from an independent source when possible. A name displayed by a wallet or dApp is not a substitute for checking the actual address.
Read the Ledger Secure Screen
Ledger’s Clear Signing design shows transaction details on the device before approval. Check the recipient address, amount, network and any additional transaction data that the wallet presents. Scroll through every screen. If the details are truncated, unexpected or different from your request, reject the transaction and investigate.
Approve physically
Approve only by pressing the Ledger’s physical buttons after the Secure Screen matches your intent. The phone can prepare a transaction, but it should not be able to authorize a Ledger-controlled transfer without the device approval. Never press through a prompt simply because a dApp says the transaction will fail otherwise.
Understand Seed Vault prompts
A Seed Vault transaction is authorized separately with the phone’s Seed Vault password or optional biometrics. That approval does not prove that a Ledger transaction was signed, and a Ledger button press does not authorize a different Seed Vault account. Check which account and security surface the wallet identifies before every approval.
Ledger versus Seed Vault: which should hold the funds?
| Security or use factor | Ledger signer | Seed Vault on Solana Mobile |
|---|---|---|
| Key location | Private key and encrypted recovery material are protected by the Ledger Secure Element. | Phone wallet seed is held in Seed Vault’s isolated phone security environment. |
| Approval surface | Physical confirmation on the Ledger Secure Screen and buttons. | Seed Vault password or optional biometric authorization. |
| Convenience | Requires having the physical device available for signing. | Mobile-native approval inside the Solana Mobile experience. |
| Recovery | Restore uses the Ledger Secret Recovery Phrase through the device’s documented restore flow. | Use the wallet’s documented Seed Vault setup and restore flow for that phone-side seed. |
| Best fit | Long-term holdings and transactions where independent hardware confirmation is worth the extra step. | Phone-native activity where you accept the phone’s security and recovery model. |
| Compatibility dependency | Ledger model, Ledger Wallet version, Solana support and connection method. | Solana Mobile model, Seed Vault implementation, wallet version, operating system and region. |
Neither choice makes an address automatically safer from user error. Ledger reduces exposure of the signing key and gives you a separate screen for transaction review; Seed Vault reduces exposure to ordinary Android apps while keeping approval convenient. Choose the account that matches the value, frequency and recovery discipline you can maintain.
Protect and test the recovery phrase
Store it offline
Keep the Ledger phrase on paper or a metal backup in a secure location separate from the Ledger. A metal device can improve durability against environmental damage, but it is still a complete copy of the wallet. Anyone who sees all words can restore the wallet without your Ledger.
Do not digitize or disclose it
- Do not enter the phrase into Ledger Wallet, a browser, a support ticket or a Solana Mobile phone unless you are using the Ledger’s own documented restore process on the hardware device.
- Do not photograph or scan it. Cloud photo synchronization can create copies you cannot control.
- Do not split words across messaging apps or give some words to a “recovery agent.” No legitimate support workflow requires the phrase.
- Do not confuse a public address, transaction signature or device PIN with the recovery phrase. Only the phrase can restore the wallet.
Test recovery deliberately
Before holding a substantial balance, learn the Ledger’s documented restore process using a spare device or after transferring funds to a temporary account. Verify that the restored device derives the same Solana public address. Perform this in a private, offline-controlled setting and remove any temporary copies of the phrase afterward. Never test by typing the phrase into the phone.
Common failures and safe fixes
The package contains a recovery phrase or preset PIN
Do not initialize or fund the device. A phrase supplied by a seller is not private. Contact the authorized seller or Ledger through its official support channel and request a return or replacement.
Free tools Windows power users keep installed
One-click scans. No signup required.
Ledger Wallet shows a different address than the Ledger
Reject the transaction or receive request. Disconnect, restart the wallet and verify the account again on the Ledger screen. Check for clipboard replacement or a malicious wallet extension. If the mismatch persists, do not move funds until the wallet’s official support documentation explains the account path.
The phone asks for the Ledger phrase
Cancel immediately. The normal pairing flow should use the Ledger as a signer, not import its phrase into Android or Seed Vault. Reopen the wallet from its hardware-wallet connection option and confirm you installed it from the publisher’s official channel.
The Ledger is not detected
- Unlock the device and confirm that the Solana application is open when requested.
- Check the cable, Bluetooth state and operating-system permission required by the selected connection method.
- Close other wallet applications that may be holding the connection.
- Update Ledger Wallet, the phone firmware and Ledger firmware only through their normal official update screens.
- Verify that your exact Ledger model, Solana Mobile phone and wallet version are supported together. A generic Android pairing guide may not apply to Saga or Seeker.
A transaction fails after approval
Check the failure message, available SOL for network fees and the recipient address. Do not repeatedly approve an unfamiliar request. If a dApp asks for a new approval after the first one fails, reread every Ledger screen and confirm the account before signing again.
You lost the Ledger but still have the phrase
Obtain a genuine compatible Ledger, use its documented restore flow to enter the phrase on the hardware device, install Solana support and verify the derived address before sending funds. Never restore by typing the phrase into a phone or computer.
Quick wins for a faster PC:
Clear out junk files and repair common Windows errorsFree Scan →Scan for outdated or missing drivers - takes under a minuteDriver Scan →You lost the phrase but still have the Ledger
The unlocked device may continue signing, but the wallet is not safely recoverable if the device is lost, damaged or reset. Create a new wallet with a new phrase on a genuine device, verify its address and transfer funds while the original Ledger still works. Do not attempt to reveal the existing phrase through unofficial software.
Operational checklist for every Ledger transaction
- Confirm which account you are using: Ledger or Seed Vault.
- Open the wallet from an official, current installation.
- Check the recipient and amount in the wallet before connecting.
- Verify the full transaction details on the correct approval surface: Ledger Secure Screen for Ledger funds, Seed Vault authorization for Seed Vault funds.
- Approve only after the displayed details match your intent.
- Keep the recovery phrase offline and ignore every request to disclose it.
With this separation maintained, the Solana Mobile phone provides a convenient interface while the Ledger remains an independent signing authority. The security benefit comes from preserving that boundary: the phone may display and prepare, but the Ledger phrase never enters the phone and the Ledger device decides what gets signed.
Quick Recap
Product prices and availability are accurate as of the date/time indicated and are subject to change. Any price and availability information displayed on Amazon at the time of purchase will apply.

