Quick wins for a faster PC:
Fix the driver behind crashes, sound loss and screen glitchesFind Drivers →Clear out junk files and repair common Windows errorsFree Scan →Scan for outdated or missing drivers - takes under a minuteDriver Scan →Yes, most rusty cast-iron cookware can be saved. Remove every trace of visible rust, wash away the residue, dry the metal completely, apply an almost invisible coat of cooking oil, and bake the pan upside down at 450–500°F for about one hour. Repeat the seasoning cycle if rust removal stripped much of the old finish. Do not cook in the pan while any visible rust remains: USDA FSIS states that “Rust is not a food safe material so it should not be ingested.”
Can a rusty cast-iron pan be saved?
Usually, yes. Surface rust is a condition of the pan’s protective finish, not automatically a reason to discard the cookware. Cast iron is protected by seasoning: a layer of carbonized cooking oil that helps prevent corrosion and gives food an easier-release surface. When seasoning is worn away and the bare metal is exposed to moisture, orange or reddish rust can form.
As an Amazon Associate I earn from qualifying purchases.
Restoration is appropriate when the metal is still structurally sound. The essential boundary is simple: remove all visible rust before the pan returns to cooking. A pan with heavy rust can still be recoverable, but it will require more abrasion and a complete reseasoning cycle. Deep or severe pitting is different. The available manufacturer guidance supports removing rust and reseasoning, but it does not establish a repair method for deep structural pits. If the cooking surface has pronounced craters, flaking metal, or questionable integrity, have it inspected before use rather than assuming seasoning will repair it.
The Tool Desk
Outbyte Driver Updater FREEScan for outdated or missing drivers - takes under a minuteDriver Scan →Outbyte PC Repair FREEClear out junk files and repair common Windows errorsFree Scan →Light rust, heavy rust, and pitting
| Condition | What it looks like | Likely approach | Use before restoration? |
|---|---|---|---|
| Light surface rust | A thin orange film or a few localized spots | Targeted scouring with steel wool, a metal scouring pad, or a purpose-built cast-iron rust eraser; then wash, dry, oil, and bake | No. Remove all visible rust first. |
| Heavy or widespread rust | Large areas of orange scale or broad patches of bare metal | Remove all loose rust and plan on a full reseasoning cycle because substantial seasoning may be gone | No. The entire affected surface must be clean of visible rust. |
| Deep pitting | Permanent craters or rough depressions in the iron after loose rust is removed | Rust removal and reseasoning are supported; a method for repairing deep structural pitting is not established here | Not until the pan’s condition has been assessed. |
Safety rules before you start
- Work with the pan cool and dry. A cool surface is easier to inspect and scour without adding a burn hazard.
- Do not cook in the cookware while any visible rust remains. USDA FSIS advises removing all rust from a cast-iron skillet or knife before use.
- Expect some seasoning to come off during abrasion. Lodge’s restoration guidance says this is acceptable because the surface will be seasoned again.
- Use ventilation when heating the oiled pan. Keep the oven area clear of anything that could be damaged by heat.
What you need
- Steel wool or a metal scouring pad. Lodge also identifies its purpose-built Rust Eraser as an option.
- Warm water and dish soap for removing loosened rust and residue.
- A clean towel or lint-free cloth.
- Cooking oil for the restoration coat. Lodge also sells a seasoning spray, but the process depends on a very thin oil film rather than a thick layer.
- An oven capable of maintaining 450–500°F.
- Heat-resistant equipment for handling the hot pan after baking.
Choose the most practical abrasive for the condition. A rust eraser is designed specifically for this task; steel wool and a metal scouring pad are the readily available substitutes named in Lodge’s guidance. The objective is not to polish the iron to a mirror finish. It is to remove rust and loose residue without leaving visible corrosion behind.
#1 Best Overall

- Cast Iron Rust Remover: The Lodge Rust Eraser is a compact, abrasive rust eraser that restores cookware and other cast iron pieces with precision rust removal
- Cookware Rust Eraser Block: This rust remover block restores heirloom pans, Dutch ovens, knives, tools, and grill grates
- Abrasive Cleaning Block: Ideal as a cast iron restoration block and rust treatment tool, this metal cleaning eraser scrubs down to bare iron so you can re-season for long-term use
- Not for Hot Cookware: Please note that the Rust Eraser is not for use on hot cast iron cookware
- About Lodge Cast Iron: Lodge creates durable cookware accessories designed to support everyday cooking, serving, and care for your cast iron favorites
Step-by-step: remove the rust and reseason the pan
1. Inspect the cool, dry pan
Place the cookware on a stable work surface and look at the entire piece, including the cooking surface, rim, sides, underside, handle, and any pour spouts. Rust often hides around the rim or on the bottom where moisture has collected. Identify whether the problem is localized or widespread, and check the metal after brushing away loose flakes. If what remains is a deep, cratered surface rather than a shallow discoloration, stop and assess the pitting before proceeding to cooking.
2. Scour every rusty area
Use steel wool, a metal scouring pad, or a cast-iron rust eraser on the affected areas. Work until the orange or reddish material has been removed from the surface. For light rust, concentrate on the spots rather than unnecessarily abrading unaffected areas. For widespread rust, work methodically over the whole cooking surface and the exterior areas that show corrosion.
Some of the original seasoning may disappear during this step. That is not a failure: a compromised coating is less useful than a clean surface that can be rebuilt. Continue until no visible rust remains. If a patch still looks orange after wiping away the dust, scour that area again rather than moving on.
3. Wash away rust particles and residue
Wash the pan with warm, soapy water. This removes loosened rust, abrasive dust, and oily residue from the scouring process. Rinse thoroughly so no grit remains in corners, around the rim, or on the underside.
Soap at this stage is part of the restoration process. The important distinction is between a brief wash to clean a stripped or rusty pan and leaving cookware submerged for an extended period. Soaking can damage the seasoning and promote rust.
4. Dry the iron completely
Immediately dry the pan with a towel or lint-free cloth. Then use low stovetop heat for a few minutes to evaporate moisture that may remain in pores, around the handle, or along the rim. This step matters because even a small amount of trapped water can start the rust cycle again before the oil is applied.
Rank #2

- Rust removal, Brushed Metal Finish, Deburring.
- Our rust-removing erasers are made of rubber and silicon carbide, and do not contain harmful chemicals or toxins. Suitable for both dry and wet use, with moderate roughness, it is the ideal choice for secondary polishing.
- It precisely removes surface rust and dull oxidation without damaging the base material, and works versatility for knives, tool accessories, and other metal items.
- Attention! Not suitable for coated cookware and tools. Removes rust down to the bare iron, requiring re-seasoning of your cookware.
- 3.54"L x 0.98"W x 0.55"H
Do not set the wet pan aside to air-dry. Air drying and moisture-prone storage are specifically identified by Lodge as causes of seasoning loss or rust.
Do these 3 things before closing this tab:
1Fix the driver behind crashes, sound loss and screen glitches2Repair Windows errors before they cause bigger problems3Scan for outdated or missing drivers - takes under a minute5. Apply an extremely thin coat of oil
Wipe cooking oil over the entire surface, inside and out. Include the cooking surface, sides, rim, underside, and handle. The correct amount is a thin film: it should cover the metal but should not drip, pool, or run.
After applying oil, wipe the pan again with a clean cloth as though you were trying to remove the oil. That final pass leaves the nearly invisible coating needed for baking. A heavy coat can remain sticky or uneven instead of forming a hard, protective layer.
6. Bake upside down
Place the oiled pan upside down in an oven set to 450–500°F. Bake for approximately one hour, following the temperature range and time specified in Lodge’s restoration guidance. Positioning the pan upside down helps prevent excess oil from collecting on the cooking surface; if your oven rack or pan arrangement requires it, protect the rack below from any residue.
When the hour is complete, turn off the oven and allow the pan to cool before handling it. The cookware will remain hot well after the heating cycle ends, so use appropriate heat protection when moving it.
Recommended Free Tools
7. Inspect and repeat when necessary
Once cool, inspect the finish in good light. The surface should be free of visible rust and should have an even, dry-looking coat rather than wet or sticky patches. If the rust removal stripped substantial seasoning, repeat the thin-oil and 450–500°F, approximately one-hour bake cycle. Repeating is also reasonable when the first coat looks uneven or the pan still releases residue during a dry wipe.
Do not interpret a dark or uneven color immediately after restoration as proof that the pan is ruined. Seasoning is rebuilt over cycles, and the practical requirement is a clean, rust-free surface with a bonded protective coating.
Which rust-removal method should you choose?
| Option | Best fit | Abrasion and control | What happens next |
|---|---|---|---|
| Cast-iron rust eraser | Localized rust or a small number of stubborn spots | Purpose-built tool named in Lodge guidance; lets you focus on affected areas | Wash, dry completely, apply a thin oil film, and bake at 450–500°F for about one hour |
| Steel wool | Light to moderate rust and readily available supplies | Direct hand control; can remove some surrounding seasoning | Wash away particles and plan to reseason any area where the coating was removed |
| Metal scouring pad | Wider areas of surface rust | Useful when more coverage is needed; use deliberate pressure so you do not miss remaining rust | For widespread bare metal, complete a full reseasoning cycle |
Severity, not brand preference, should determine the method. Use the least aggressive option that removes every visible rust spot. If the tool leaves rust behind, it was not sufficient; if it strips a broad area of seasoning, that is manageable because the coating can be rebuilt.
Rank #3

- Non-Toxic and Safe Composition: This rust eraser is made of rubber and silicon carbide, and does not contain harmful chemicals or toxins. Helps maintain your cast iron cookware, knives and bladed tools by removing rust promptly to prevent it from spreading and causing further damage to the cast iron cookware
- Gentle on the Surface: These erasers are abrasive enough to remove rust and grime but gentle enough not to damage the seasoned surface of the cast iron. They won't scratch or strip away the seasoning, helping preserve the natural seasoning that enhances non-stick properties by removing only the rust and leaving the seasoning intact
- Versatile Usage: Cast iron rust erasers can be used on various cast iron items, including skillets, griddles, dutch ovens, knives and more. These versatile tools can be used on different sizes and shapes of cookware, bringing old tools and knives back to life by returning that mirror shine
- Long-Lasting and Cost-Effective: A single rust eraser can last a long time, providing multiple uses before needing replacement. Using this rust eraser is a straightforward process that typically involves scrubbing the affected areas of the cast iron with the eraser, applying gentle pressure, and wiping away the rust residue
- Effective Rust Removal: Cast iron rust erasers are designed to effectively remove rust and stubborn stains from the surface of cast iron cookware, helping restore the cookware to its original condition
How to tell whether the pan is ready to cook on
Before the first meal, check the pan in several ways:
- Visual check: no orange, red, or flaky rust remains anywhere that food or hands will contact.
- Surface check: a clean cloth should not pick up loose rust dust after washing, drying, and cooling.
- Coating check: the oil film should be thin and set, not wet, gummy, or pooled.
- Structure check: the iron should not show severe, unexplained pitting or damage that raises a question about safe use.
A pan can be dark, brownish, or uneven in color and still be usable if it is clean, structurally sound, free of visible rust, and properly seasoned. Color alone is not the safety test; remaining corrosion is.
What if rust removal exposed bare metal?
Bare gray iron is not automatically a problem. Rust removal can take away part or all of the old seasoning, especially when corrosion is widespread. The restoration sequence is designed for that situation: clean the iron, dry it completely, apply a very thin coat of oil over the whole piece, and bake upside down at 450–500°F for about one hour.
When much of the old finish has been removed, treat the first bake as the beginning of a new seasoning cycle rather than expecting one pass to create a mature nonstick surface. Repeat the cycle as needed, allowing the pan to cool between applications and wiping away excess oil each time.
Deep pitting: when restoration is not a simple seasoning job
Scouring removes loose rust and surface corrosion. It does not, by itself, fill deep cavities that corrosion has already cut into the iron. The cited manufacturer instructions explain how to remove rust and reseason, but they do not establish a repair procedure for severe structural pitting.
After cleaning, examine the cooking surface under strong light. Shallow texture may simply be the original cast surface or minor corrosion. Pronounced craters, sharp edges, flaking material, or a pan whose integrity is uncertain should be treated as an inspection issue. Do not use seasoning as a substitute for determining whether damaged cookware remains suitable for food preparation.
Rank #4

- Efficient Rust Removal: The IMPRESA Cast Iron Rust Remover Erasers effectively restore the original shine of your cookware. This versatile tool excels as a cast iron rust eraser and ensures lasting durability for your cast iron items
- Comprehensive Restoration Kit: Specifically designed for cast iron restoration, this rust eraser effortlessly tackles stubborn rust stains. Use it on flat top griddles and other metal surfaces for a thorough and effective clean
- Versatile Metal Cleaner: Not limited to cast iron, this rust remover for griddles and cookware is highly effective on grill grates and other metal items. Its unique rounded edges reach tight spots, delivering a comprehensive clean
- User-Friendly Cleaning: Easily remove rust from cast iron cookware with this user-friendly rust eraser. Simply scrub, rinse, and dry to maintain your cast iron's pristine condition and extend its lifespan significantly
- Durable Value Pack: This bulk set includes two robust rust erasers, ensuring you always have a reliable tool on hand. Maintain your cast iron cookware and metal items rust-free for years, providing long-lasting value
Prevent rust after restoration
Dry immediately after every wash
Once the pan is washed, towel-dry it and use low stovetop heat for a few minutes if any moisture may remain. The goal is to avoid leaving water in the pores, along the rim, or around hardware.
Do not soak or air-dry the cookware
Lodge warns that soaking and air drying can remove seasoning or lead to rust. A brief wash followed by immediate drying is safer for the finish than leaving the pan in a sink or on a draining rack.
Keep a very thin oil film
After drying, wipe a minimal amount of cooking oil over the interior and exterior. The film should not be visibly wet or runny. This light protective layer helps keep moisture away from bare spots between uses.
Free tools Windows power users keep installed
One-click scans. No signup required.
Keep the pan out of the dishwasher
Dishwasher use can remove seasoning and contribute to rust. Hand-wash instead, then dry and oil the cookware promptly.
Store it where moisture cannot collect
Store the pan in a dry location rather than a damp cabinet, under a wet lid, or where condensation can sit on the iron. If pans are nested, ensure the surfaces are dry before stacking them so trapped moisture does not undo the restoration.
Troubleshooting common restoration problems
The pan still shows orange spots after scrubbing
Dry the pan, inspect it under strong light, and scour the remaining spots again. Wash away the new residue and repeat the drying step. Do not move to seasoning while visible rust remains, because the oil-and-oven cycle is not a replacement for rust removal.
Best Value
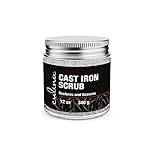
- RESTORES & SEASONS | Our Cast Iron Scrub is designed to restore & remove stubborn rust spots. Helps to remove burnt & stuck on food spots that develop over time. Made with high quality coconut oil to help season & enhanced with essential oils to eliminate odors.
- 100% NATURAL & FOOD SAFE | Made with a solvent-less, refined coconut oil base that has had it’s long-chain fatty acids removed. The result is an oil that is 100% natural & will not go rancid.
- WILL NOT SCRATCH CAST IRON | This cast iron scrub will NOT scratch the surface of your cast iron cookware, keeping it in good condition for many years to come.
- MADE IN USA | All of our Culina culinary products are Kosher manufactured solely in the United States using the only the highest quality ingredients.
- 100% Culina SATISFACTION GUARANTEE if not completely satisfied with your purchase.
The finish is sticky after baking
A sticky surface usually indicates that too much oil was left on the iron. On the next cycle, wipe the pan more aggressively after oiling so only a thin film remains, then bake again within the 450–500°F range for approximately one hour.
What’s actually slowing this PC down?
Pick the symptom - the matching free tool is one click away.
Rust returns soon after restoration
Look for retained moisture and storage problems first. Confirm that the pan was heated briefly to evaporate water after washing, that it was not left soaking or air-drying, and that a very thin oil film was applied before storage. Dishwasher use and damp storage can also strip seasoning or encourage corrosion.
The pan has lost most of its dark coating
That does not mean the cookware is beyond saving. Extensive rust commonly removes seasoning. Repeat the complete clean, dry, oil, and bake sequence until the surface has a stable protective layer, and keep the pan dry and lightly oiled between uses.
The cooking surface has deep pits
Do not assume additional oil or heat will repair structural cavities. The supported process covers rust removal and reseasoning, not a validated method for rebuilding deeply pitted iron. Have severe pitting assessed before returning the pan to food preparation.
Why seasoning protects cast iron
Seasoning is carbonized cooking oil bonded to the iron. It provides two practical benefits: it forms a protective barrier against moisture and rust, and it creates an easier-release cooking surface. Rust is more likely when that layer has been removed, damaged, or left unprotected by water.
Outdated Drivers Are Slowing You Down
One free scan finds every outdated or missing driver and matches the right update for your exact hardware.Free scan · exact hardware matchPC Slower Than It Used to Be?
A free scan shows the junk files, broken settings and background clutter dragging Windows down - then fixes them in one click.Free scan · Windows 10 & 11Restoration therefore has two separate objectives. Abrasion and washing remove the unsafe corrosion. The oil-and-heat cycle rebuilds the protective coating. Skipping either objective leaves the job incomplete: a clean but unseasoned pan is vulnerable to renewed rust, while seasoning over visible rust does not meet the food-safety requirement to remove corrosion first.
Quick Recap
Quick restoration checklist
- Start with a cool, dry pan and inspect every surface.
- Scour all rusty areas with steel wool, a metal scouring pad, or a cast-iron rust eraser.
- Continue until no visible rust remains.
- Wash with warm, soapy water and rinse away all particles.
- Towel-dry, then use low stovetop heat for a few minutes to remove hidden moisture.
- Wipe a very thin coat of cooking oil over the entire pan, inside and out; remove any excess so it does not drip or run.
- Bake upside down at 450–500°F for about one hour.
- Cool completely and inspect the finish.
- Repeat the seasoning cycle if substantial seasoning was removed or the coating is uneven.
- After future washes, dry immediately, avoid soaking and dishwashers, and maintain a minimal oil film.
Product prices and availability are accurate as of the date/time indicated and are subject to change. Any price and availability information displayed on Amazon at the time of purchase will apply.

